International L122 B Binder Rat Build

Rat Rods Rule

Help Support Rat Rods Rule:

This site may earn a commission from merchant affiliate links, including eBay, Amazon, and others.
I don't exactly know. I was just taking a shot in the dark. I think I have a gm power steering box out back so I'll check and get back to you in a midget.

What year is your box?
On my reading, I'm seeing the older boxs used the flare fittings and the newer (70's and up?) have the o-ring fittings. Now I got to check and see what year I got this box from. I want to say 78.
Maybe I'm missing the midget. Would the midget hold it tight? :D:D:p
 
Okay, I think I fingered it out for ya. The box you're using uses a 11/16x18 inverted flare(not AN) for the supply and 5/8x18 inverted flare for the return ports. Now, looking through my speedway(which doesn't have every adapter available) they offer plenty of pipe to AN adapters but no inverted flare to AN adapters. I'm guessing what you have right now is a standard pipe to AN on your supply side which will go together but will spray like a SOB under pressure from the pipe threads and on your return side you've got a pipe to compression adapter. But please don't quote me on that cause I've been wrong a few times.
 
Okay, I think I fingered it out for ya. The box you're using uses a 11/16x18 inverted flare(not AN) for the supply and 5/8x18 inverted flare for the return ports. Now, looking through my speedway(which doesn't have every adapter available) they offer plenty of pipe to AN adapters but no inverted flare to AN adapters. I'm guessing what you have right now is a standard pipe to AN on your supply side which will go together but will spray like a SOB under pressure from the pipe threads and on your return side you've got a pipe to compression adapter. But please don't quote me on that cause I've been wrong a few times.

See that's what I thought too!
Here's the fitting in question.
http://www.summitracing.com/parts/EAR-949096ERL
Earl's Performance AN to Inverted Flare Adapter Fittings 949096ERL
"Fitting, Adapter, -6 AN to 5/8-18 in. Male Inverted Flare, 90 Dergree, Swivel, Aluminum, Blue, Each"

The other one which is tight, but I am now questioning is
http://www.summitracing.com/parts/EAR-991950ERL
Earl's Performance AN to Inverted Flare Adapter Fittings 991950ERL
"Fitting, Straight, 1/2 Tube Inverted Flare with 11/16-18 Male to -6 AN Male, Aluminum, Blue, Each"
 
I don't actually know the year of the box as I found it at the dump but it's from a mid sized gm due to part #5691676. So, yeah, I don't know what ya got going on right now. Maybe they sent you one correct fitting and one incorrect fitting. If it were me, I'd call up summit and see if they know what's up.
 
From my experience power steering fittings are always a pain. Gotta Show http://gottashow.com/ will know the answer and have a solution if you can't find it anywhere else.

Pain? Yeah, starting to notice that :D
I appreciate the link. I think I'll snag the model number of the box and go from there.
I appreciate everyone's help! Glad I stopped now rather then getting all excited in the middle of the night on a Saturday and tried to fill and bleed the steering [S
 
A little progress.
I built the battery box and got it hung. I decided to put it under the bed to keep as much room available in the cab as possible.
Side bracket template


Scratching out on 3/16" plate.


I wanted both sides to be exactly the same, so I welded the two pieces together so I can work them both at the same time.


Cut out and some grinding done.


Gluing it all together.


This photo you can see three holes on the back wall of the box. I had intended on cutting heads off some bolts and welding them in these holes, then grinding smooth so the battery doesn't rub against them.


Here h can see an additional 4 bolts in the top side. I don't think I'll add the 3 in the side of the box as these 4 feel substantial. We'll see though. I'm able to stand on the box with the battery in place and it's pretty solid. Only thing I could think of is the 3 through the side will help keep the box from bouncing up over rough roads. And country living has its fair share of rough roads!
Thoughts?


Welded some wind nuts to some all thread, welded long nuts to the sides of the box and secured it all with 1.5x1.5" angle iron. Seems solid.
And of course, batter cables attached :D
 
I was going to hang the battery from the drivers side, but when I got looking at it, that's the side the fuel filler neck is located. And I wasn't comfortable with the battery being inches away from fuel. I like big bangs most of the time, but in this case, I'll avoid it.

Only problem is I put the battery where I was hoping to stub the exhaust out. Oh well. I'll find somewhere else for the exhaust to exit.


I'm at a point now that I needed to pull the bed and cab to finish all everything up under the truck.
Need to run hard fuel/return lines, rear brake line, air lines for everything, driveshaft. Blah blah blah.


Went to my drive shaft guy today to get pricing on a shaft.
He reccomended I upgrade the u-joints from 1350's to 1350's due to the torque of the engine. I advised I hope to eventually upgrade to compound turbos and more fuel, so I want enough shaft to accommodate the extra power.


I believe this rear end is a 12 bolt GM.
Any pointers on replacing the yoke?
I understand there is a crush sleeve and it needs to be tightened to the proper bearing preload. Only problem is I think to be able to measure preload properly, I have to gut the rear end so I'm spinning just the pinion gear.

I've heard guys who have marked the exact location of the pinion nut, removing, pulling and reinstalling new yoke, then tightening back to that exact same location.
Anyone have headache against this method?
 
Quote-jmlcolorado-"I've heard guys who have marked the exact location of the pinion nut, removing, pulling and reinstalling new yoke, then tightening back to that exact same location.
Anyone have headache against this method?"
__________________


I believe I've seen that process discribed in one of my manuals around here...
 
Got some exhaust done tonight.


Ever have one of those moments where you almost bought a tool, then decided not to cause......when are you going to use it?

Yeah, verticle metal band saw for me. Woulda made those few cuts much easier.


I was going to go outside the frame immediately off the turbo elbow, but noticed I had room between the frame. Figured I might as well utilize that dead space from the frame zee.
I think I like it.
 
New pinion with 1350 series u-joints installed (hopefully it's right), Driveshaft is ordered, last of the air ride showed up, hard fuel line here.

I'm running out of stuff I can buy. I'll need to actually do more work on this thing soon :D

I needed to rebuild the trans crossmember so I stopped by the scrap yard and found a nice piece of steel that will work perfectly. I'll get that installed tonight and lock in pinion angle.
I'd like to start running brake and fuel lines once that's installed. I e been waiting to run those so I could make pass throughs on the trans crossmember so they can go across the inside of the frame rails.
Also, bending aluminum tubing. Boo! I got some spring benders and a different bender today to see how those work with the aluminum line.
The one I had, the aluminum didn't like very much.
 
Also, I stumbled across this video
http://youtu.be/M8sWBqgP1PI

Sooooooo. I have the documents filled out and will be sending the money and documents today. We'll see what happens. This would be a monumental hurdle that has been holding me back for a dang long time. I feel like if I have plates for the truck, maybe I wouldn't have procrastinated as long as I have on it.
Lesson learned. Don't touch the vehicle until you are registered.

New arrivals:
Remaining air ride components. Level sensors, wiring, computer.


Fancy controller


New 1350 u-joint yolk


3/8" fuel line


Braided fuel hose, AN fitting for fuel line, misc grommet supply, some 1/2" NPT weld in bungs for the air tank. I need to do some adjusting on location of the ports as I can install any fitting on it because the ports lay on the ground when aired out. 1st world problems.


Full manual kit for the 47re


Got a phone call this morning from the guy building the shifter. He said he's wrapping it up and should be in snail mail today [cl[cl
 
Made some progress today.
When I took the cab off, I realized I never changed out the transmission crossmember. And output shaft angle was WAY off. So time to build a new crossmember.
Sectioning to gain proper driveshaft angles.


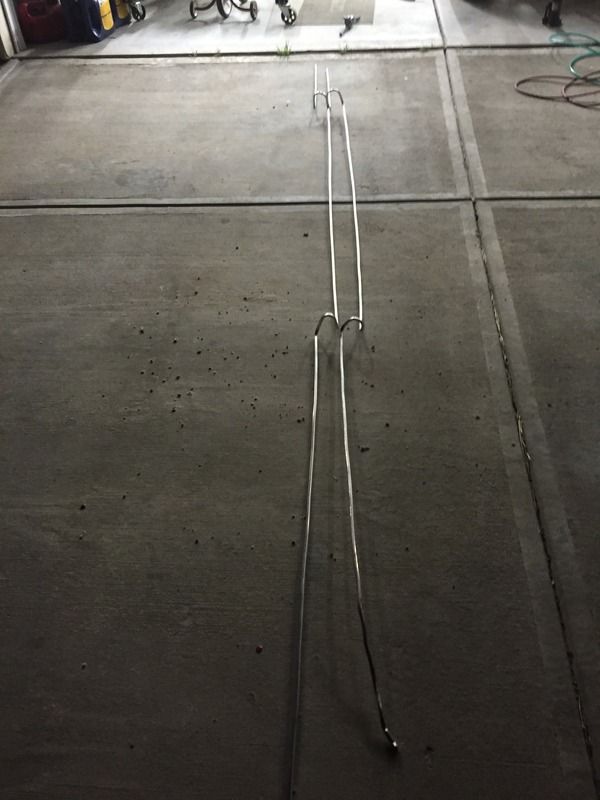
Bending up the fuel supply and return lines.
This SUCKED. These are now installed too.


Mounted the air suspension valve manifold and computer.


Started rough routing wires.


For such a simple vehicle, wiring is sure abundant. Good thing this isn't a newer truck. I can't imagine all the wires in the new cars these days.


With the air suspension wiring, I have a handful of wires that need to end up in the cab. I REALLY didn't want to just stub them throu with a grommet in case I needed to remove the cab later. I almost ordered a separate bulkhead so I could accommodate all the extra wires outside of the painless wiring kit. Then I got to reading the painless wiring instruction and it has 20 extra terminals for extra wiring [cl[cl
Gotta give it to the painless wiring folks, well done.
 
I'm guessing the aluminum tube you were bending was the fuel lines?
I have always used steel 3/8 brake line - bought a roll several years ago and just used it up. Bends and flares pretty easily. The aluminum stuff is off my radar.

Easy to see why the pros use the braided flexible line - way cheaper than the labor to install the rigid stuff.

That new yoke is incredible - don't think I have ever seen a machined yoke before.
 
I hope the title works out for you. I went through not having a title or vin on my car and I know the feeling. Here in California the don't make it easy to do it the right way so you pretty much have to cheat the system
 

Latest posts

Back
Top