
You are using an out of date browser. It may not display this or other websites correctly.
You should upgrade or use an alternative browser.
You should upgrade or use an alternative browser.
28 Fast Four build
- Thread starter DozerII
- Start date
Help Support Rat Rods Rule:
This site may earn a commission from merchant affiliate
links, including eBay, Amazon, and others.


DozerII
Well-known member
I agree totally MM. The hub caps might be almost impossible on a regular bead roller. Might be possible to do them with a negative pattern like I did the Dodge Stars on the running boards.
Torchie
Well-known member
I agree totally MM. The hub caps might be almost impossible on a regular bead roller. Might be possible to do them with a negative pattern like I did the Dodge Stars on the running boards.
That was my though as well Dozer.
Carve it into some good hard rock maple or oak and start going at it with a hammer and rounded off punch or a variety of shaped hardwood pieces.
[P [P [P
Torchie
Skip
Well-known member
I was thinking something like this, but using an air hammer to do the pounding. Don't know if that is really doable, but that is what popped into my little pea brain.That was my though as well Dozer.
Carve it into some good hard rock maple or oak and start going at it with a hammer and rounded off punch or a variety of shaped hardwood pieces.
[P [P [P
Torchie

MercuryMac
Builder Junky!
All good food for thought, guys. I still have a good bit of time to think on this conundrum.
DozerII
Well-known member
Louvers
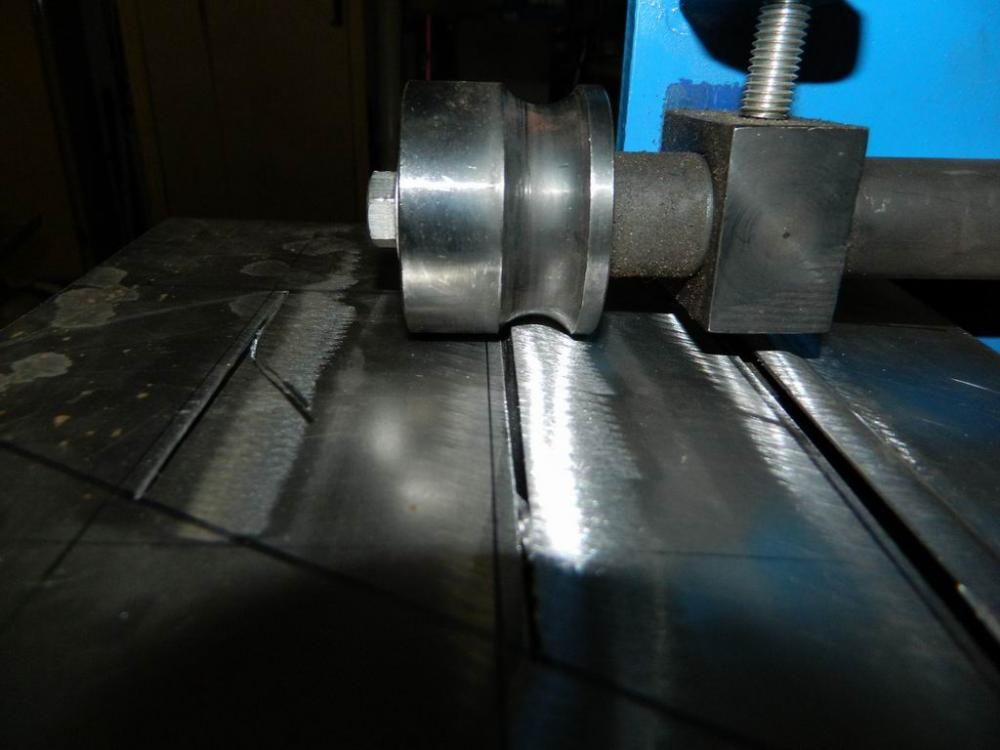
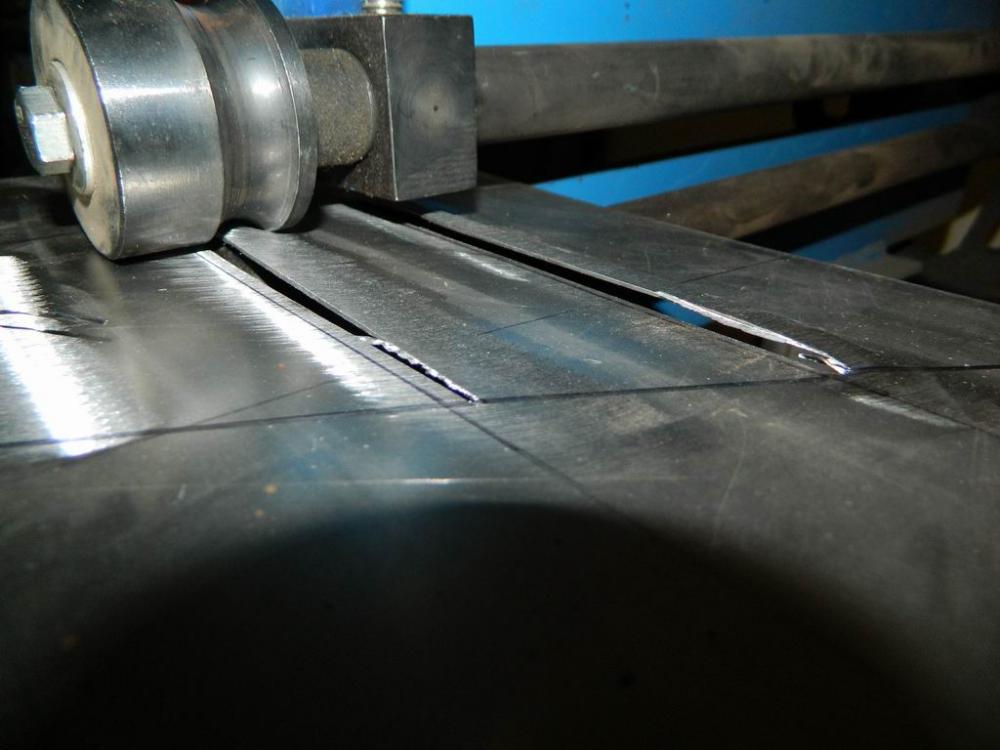
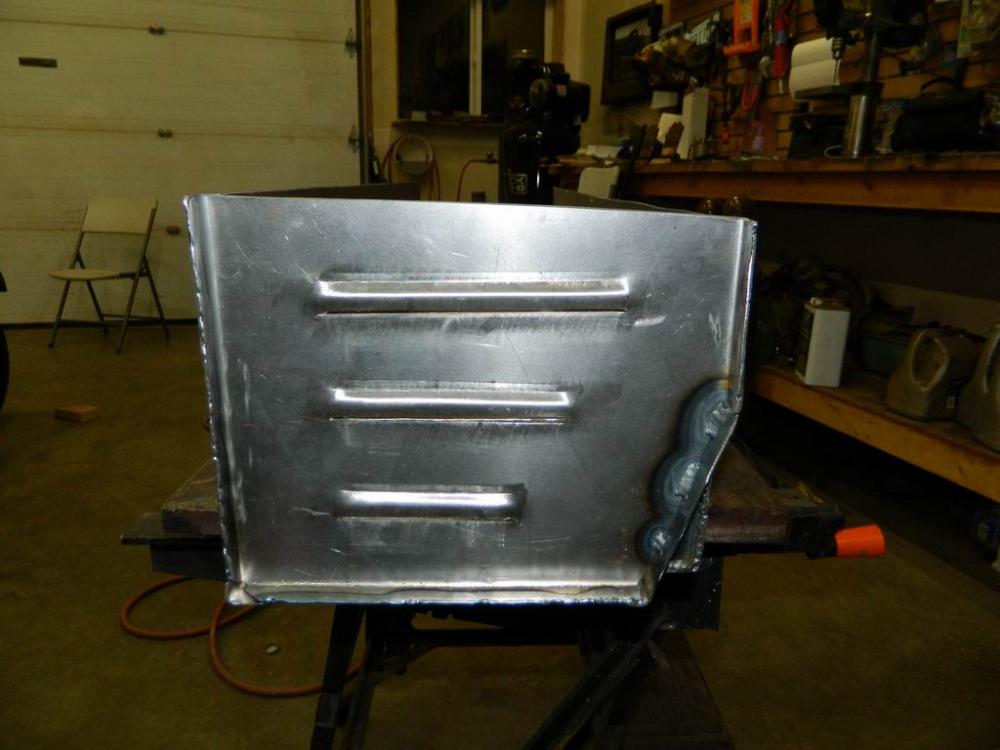
I'm sure someone has thought of this before me, but I haven't seen a thread on it. The box that I am building behind the Cnotch is going to house my battery, compressor and air tank. It has to be vented to the outside for obvious reasons. The ends of the box will be indirectly open to below the frame so I thought putting some down facing louvers in the end panels would be the best approach, but how to do them.[S There are some expensive options and I thought about cutting some out of an old hood and welding them in. Then I stared looking at the bead roller and came up with this method that worked out way better than I expected.
Lay out the lines for your louver, this will be the cut line for an .045 zip cut disc. On my 1/2"bead dies I needed to add a guide line 1/8 inch left of the cut line to follow as I'm rolling. Extend your end of cut lines well past the end of your cut and guide lines so they are easy to see as you come to the end of each louver.
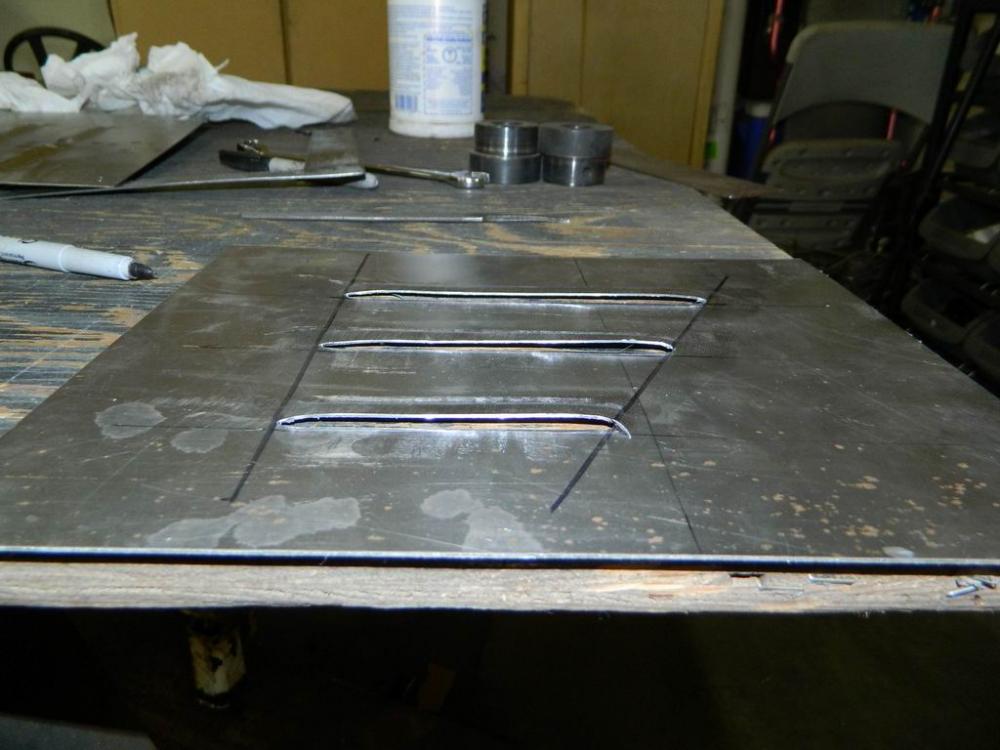
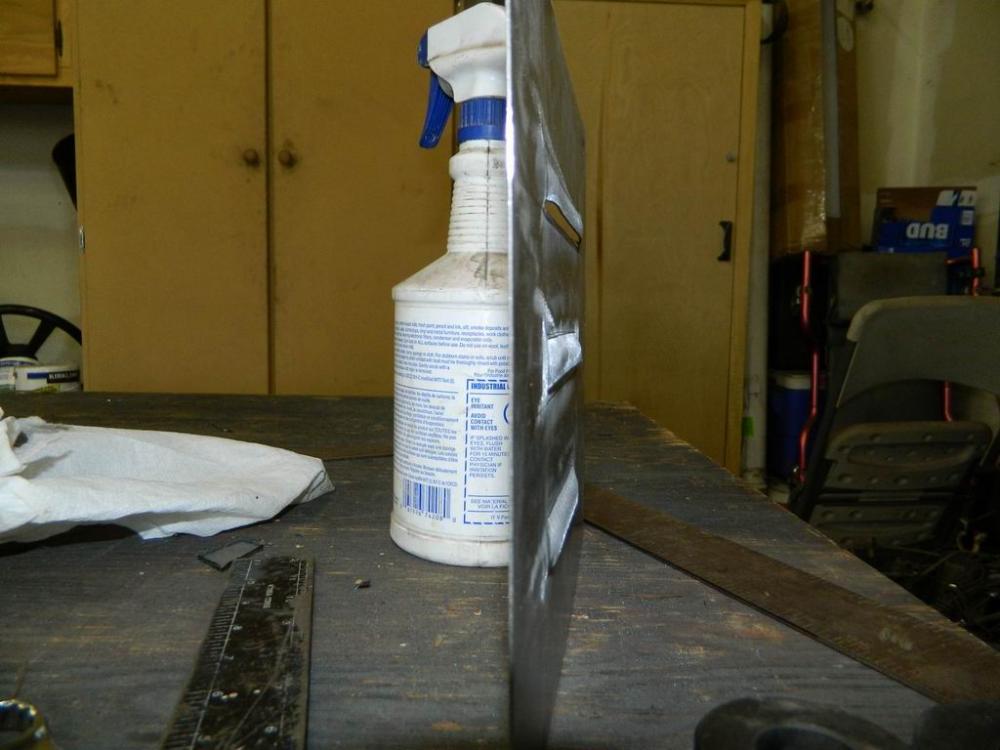
Because of the cuts in the sheet there is virtually no panel distortion. I think this would have all kinds of possibilities, I haven't tried it yet but I'm pretty sure you could even make curved louvers.

I'm sure someone has thought of this before me, but I haven't seen a thread on it. The box that I am building behind the Cnotch is going to house my battery, compressor and air tank. It has to be vented to the outside for obvious reasons. The ends of the box will be indirectly open to below the frame so I thought putting some down facing louvers in the end panels would be the best approach, but how to do them.[S There are some expensive options and I thought about cutting some out of an old hood and welding them in. Then I stared looking at the bead roller and came up with this method that worked out way better than I expected.
Lay out the lines for your louver, this will be the cut line for an .045 zip cut disc. On my 1/2"bead dies I needed to add a guide line 1/8 inch left of the cut line to follow as I'm rolling. Extend your end of cut lines well past the end of your cut and guide lines so they are easy to see as you come to the end of each louver.
Because of the cuts in the sheet there is virtually no panel distortion. I think this would have all kinds of possibilities, I haven't tried it yet but I'm pretty sure you could even make curved louvers.
Attachments


Torchie
Well-known member
[cl [cl [cl [cl [cl
[cl [cl [cl [cl
Now I really have to get a bead roller.
[P
Torchie
[cl [cl [cl [cl
Now I really have to get a bead roller.
[P
Torchie
kenny c
Well-known member
Looks sweat.[cl[cl What size roller did you use on the top and did you use the corresponding roller on the bottom or something else?
Skip
Well-known member
Louvers. Good. Skip like. [cl
DozerII
Well-known member
Thanks Torchie just buy a cheap one then the fixes for them are easy.[cl [cl [cl [cl [cl
[cl [cl [cl [cl
Now I really have to get a bead roller.
[P
Torchie
Looks sweat.[cl[cl What size roller did you use on the top and did you use the corresponding roller on the bottom or something else?
Thanks KC, I used the half inch top and bottom dies
Louvers. Good. Skip like. [cl
Thanks Skip
BillM
Well-known member
Genius Dozer! I need to get one now! Thanks for sharing that idea.
Torchie
Well-known member
I have looked at the HF ones Dozer but at this point my funds are better spent else where...
So for now I will live vicariously through your posts. As well as others...[ddd
[P [P [P
Torchie
So for now I will live vicariously through your posts. As well as others...[ddd
[P [P [P
Torchie
Dr Crankenstein
Rocket Surgeon
You're smarter than you look. (Told ya I'd get even. )
.
).
- Joined
- Nov 5, 2015
- Messages
- 3,221
nice. [cl Usually when I make straight louvres I clamp up the piece inbetween angle iron or bar and work my way through with a sharp woodchisel, then clamp both edges (open & closed side and top & bottom also) of the louvre to desired depth and work it down with a shaped punch or round bar. Works well with a little practice and no bead roller needed.
Here`s a picture of my louvre dies for the bead roller, if anyone wants to copy the shape. These just crank down through the sheet so you dont have to make a cut first. And yes, you can make curved louvres with these. Using a bead roller you will need to dress the ends of the louvres to make them looks nice.
Here`s a picture of my louvre dies for the bead roller, if anyone wants to copy the shape. These just crank down through the sheet so you dont have to make a cut first. And yes, you can make curved louvres with these. Using a bead roller you will need to dress the ends of the louvres to make them looks nice.
Attachments

DozerII
Well-known member
Genius Dozer! I need to get one now! Thanks for sharing that idea.
Thanks Bill, sharing is what it's all about on this site
I have looked at the HF ones Dozer but at this point my funds are better spent else where...
So for now I will live vicariously through your posts. As well as others...[ddd
[P [P [P
Torchie
I hear ya Torchie
You're smarter than you look. (Told ya I'd get even.
.
Thanks Doc [S I think
nice. [cl Usually when I make straight louvres I clamp up the piece inbetween angle iron or bar and work my way through with a sharp woodchisel, then clamp both edges (open & closed side and top & bottom also) of the louvre to desired depth and work it down with a shaped punch or round bar. Works well with a little practice and no bead roller needed.
Here`s a picture of my louvre dies for the bead roller, if anyone wants to copy the shape. These just crank down through the sheet so you dont have to make a cut first. And yes, you can make curved louvres with these. Using a bead roller you will need to dress the ends of the louvres to make them looks nice.
I knew someone must have done it before me, those dies look pretty cool, I have no way to make them and the local machinist would charge me what I have already spent on the car
I don't need many louvers so was looking for a real inexpensive way to do them.DozerII
Well-known member
That's a cool idea, I'm working on putting a garage door motor on mine with a pedal. That will make life so much easier.
Thanks VHT, I have been watching the local classifieds for a garage door motor as well.
DozerII
Well-known member
I bought mine on ebay, brand new craftsman for $25.
I will have to check them out, thanks.
DozerII
Well-known member
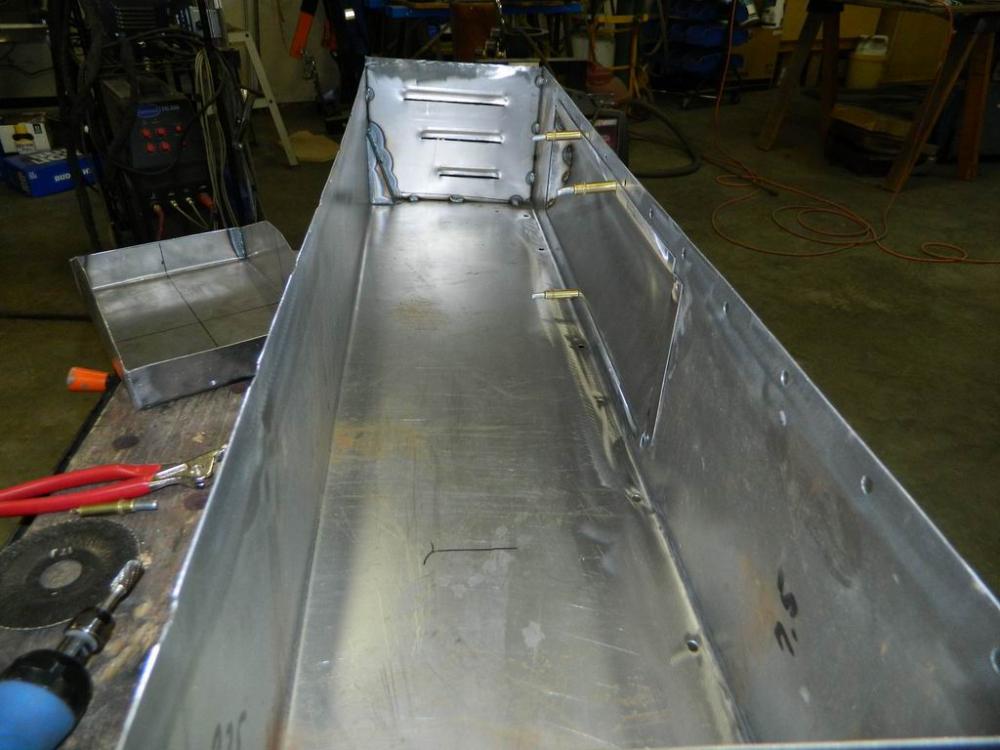
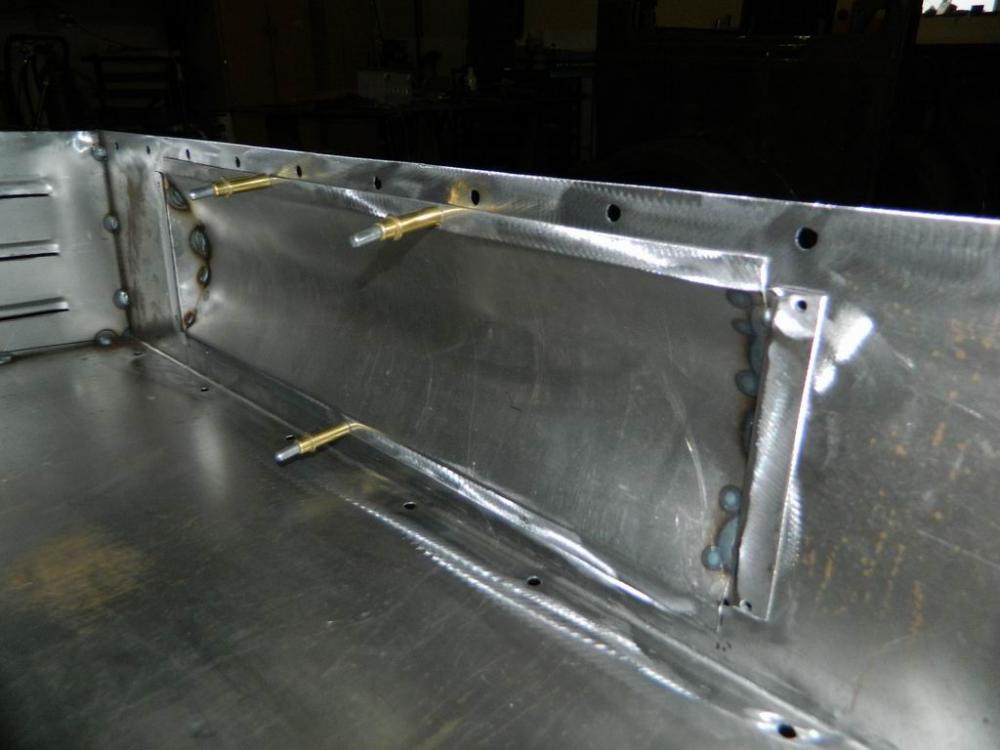
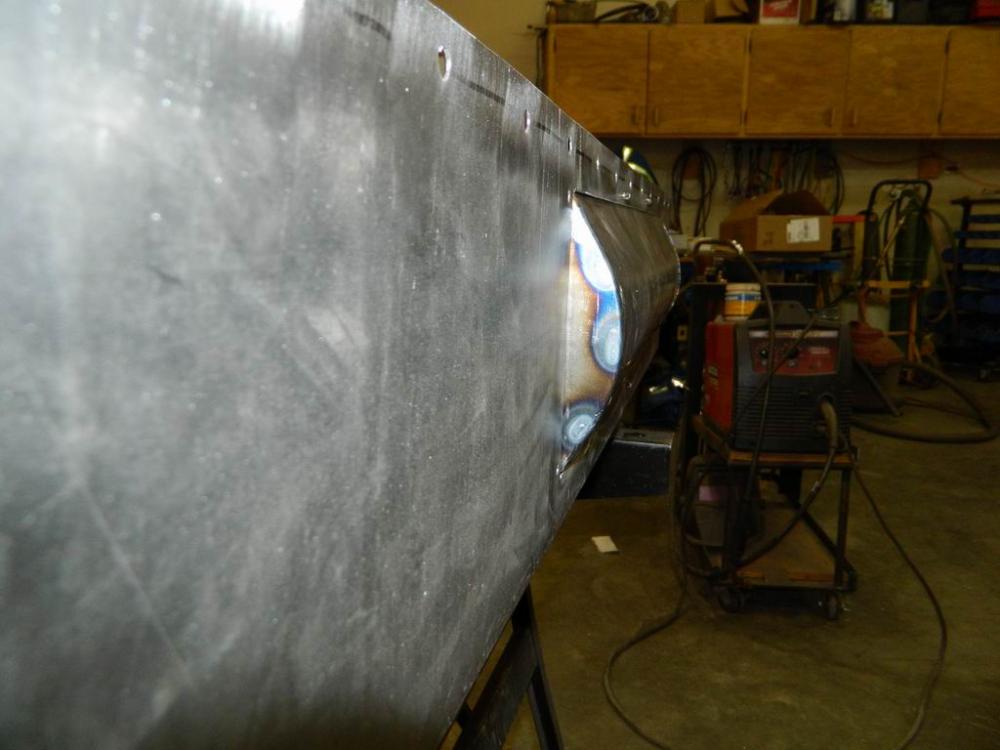
All my time for what seems like forever has been spent on the compartment behind the axle for the compressor, air tank and battery, it ended up being a real complicated affair. I had to build a little bump out on the back side to make room for the air tank and compressor to sit side by side.

Attachments


Similar threads
- Replies
- 0
- Views
- 2K
- Replies
- 2
- Views
- 3K