My Model A RPU project

Rat Rods Rule

Help Support Rat Rods Rule:

This site may earn a commission from merchant affiliate links, including eBay, Amazon, and others.

King Herald

Well-known member
Joined
Nov 10, 2010
Messages
533
Location
England
The latest project, a 'glass body we took from England to the Philippines with us:

426a24f6.jpg


The body was soon rent asunder for shipping:

ee09a4fc.jpg


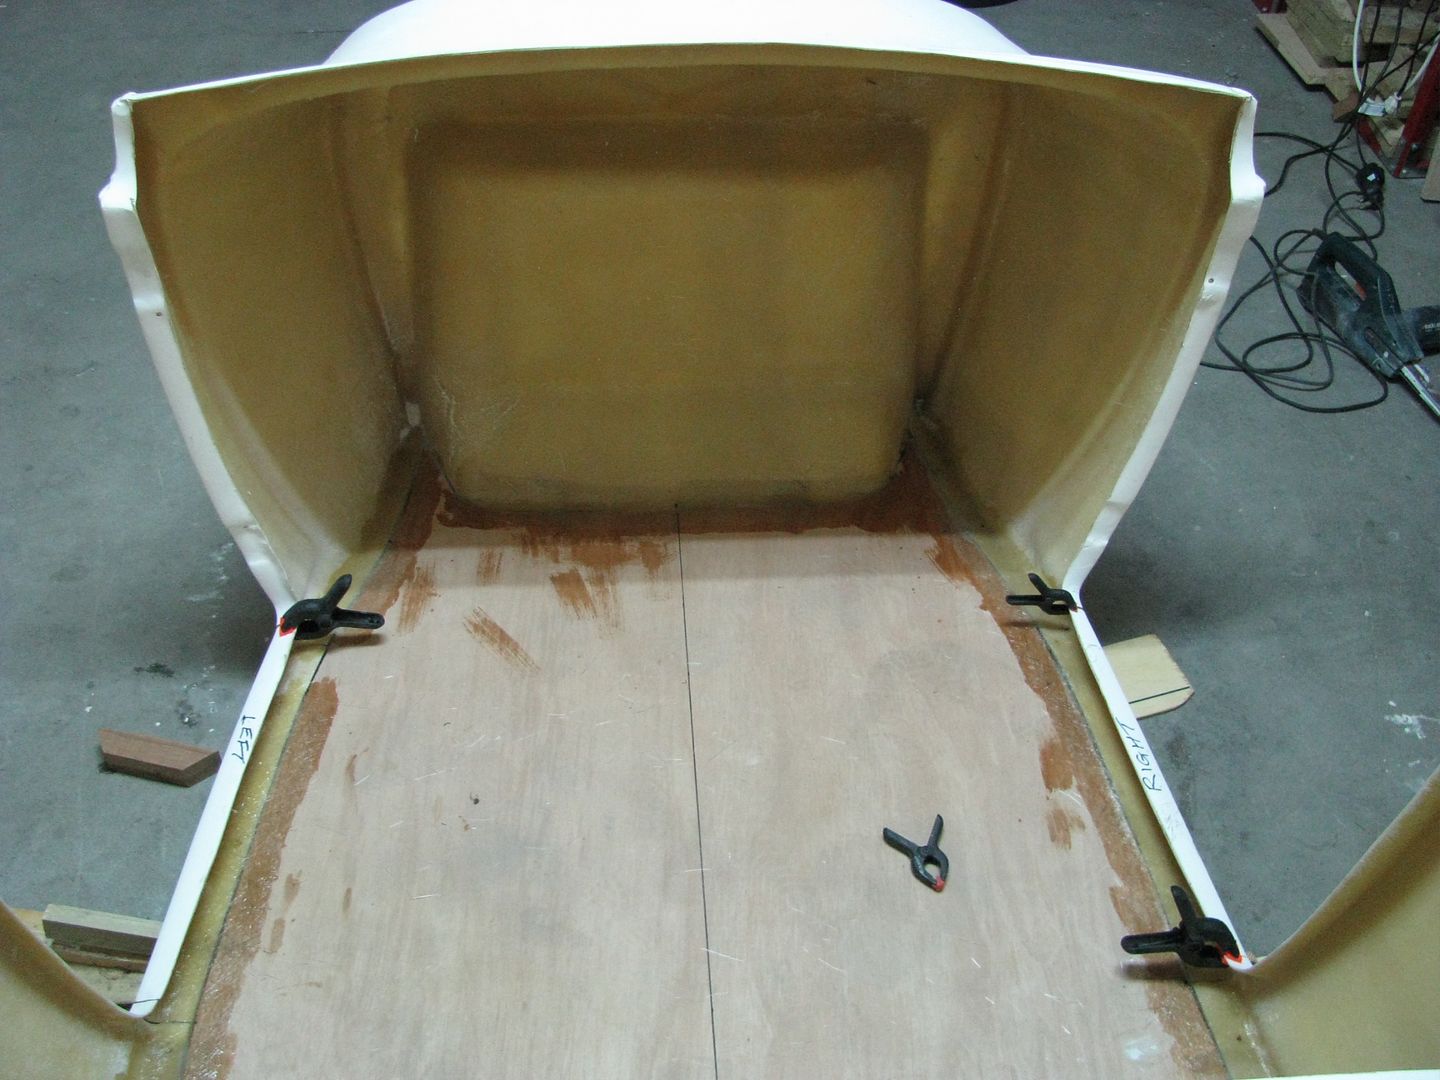
After we arrived in the PI and I finally found a place to work, I glassed a plywood floor into the body, and re-attached the rear half to the front.

305d96ff.jpg


91a7b0bd.jpg


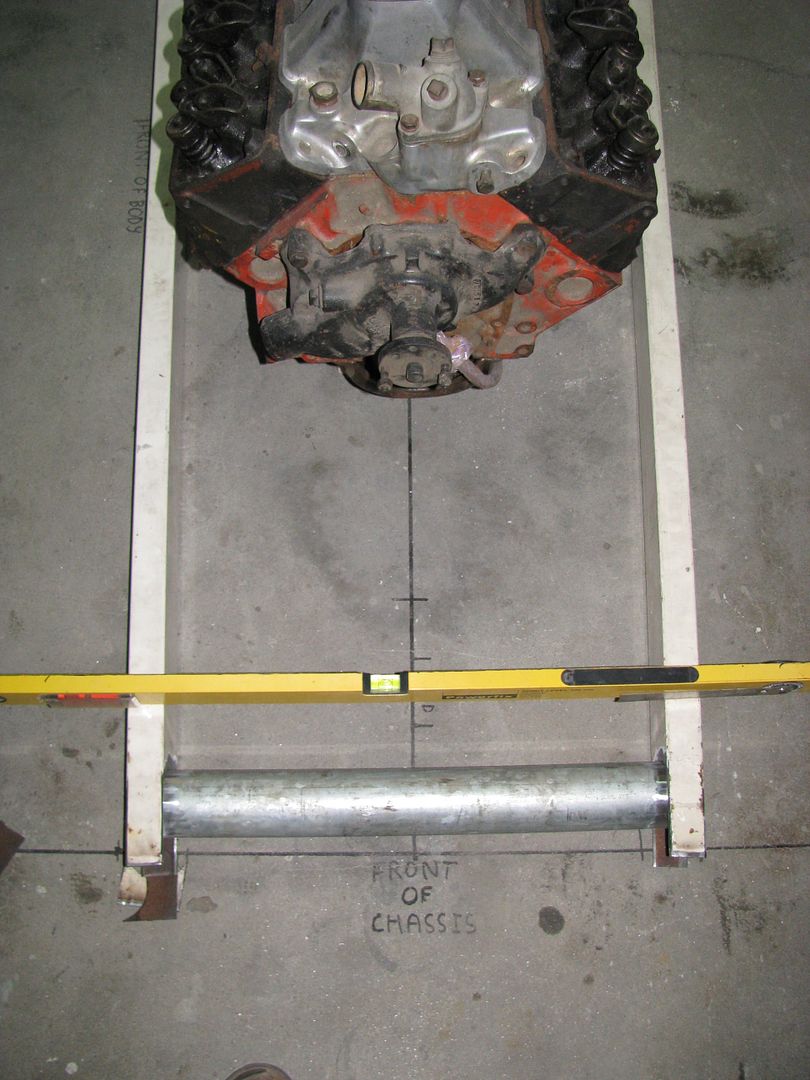
My old racing buddy from years ago has loaned me a mock up 350/350 combo, and a tunnel ram. Lodged 'em together to see what they look like and to work out where to cut for clearance. I won't actually be using it, as he wants $1000 for it and it is not really practical for a road car.

ad934180.jpg


f2f9f2d1.jpg


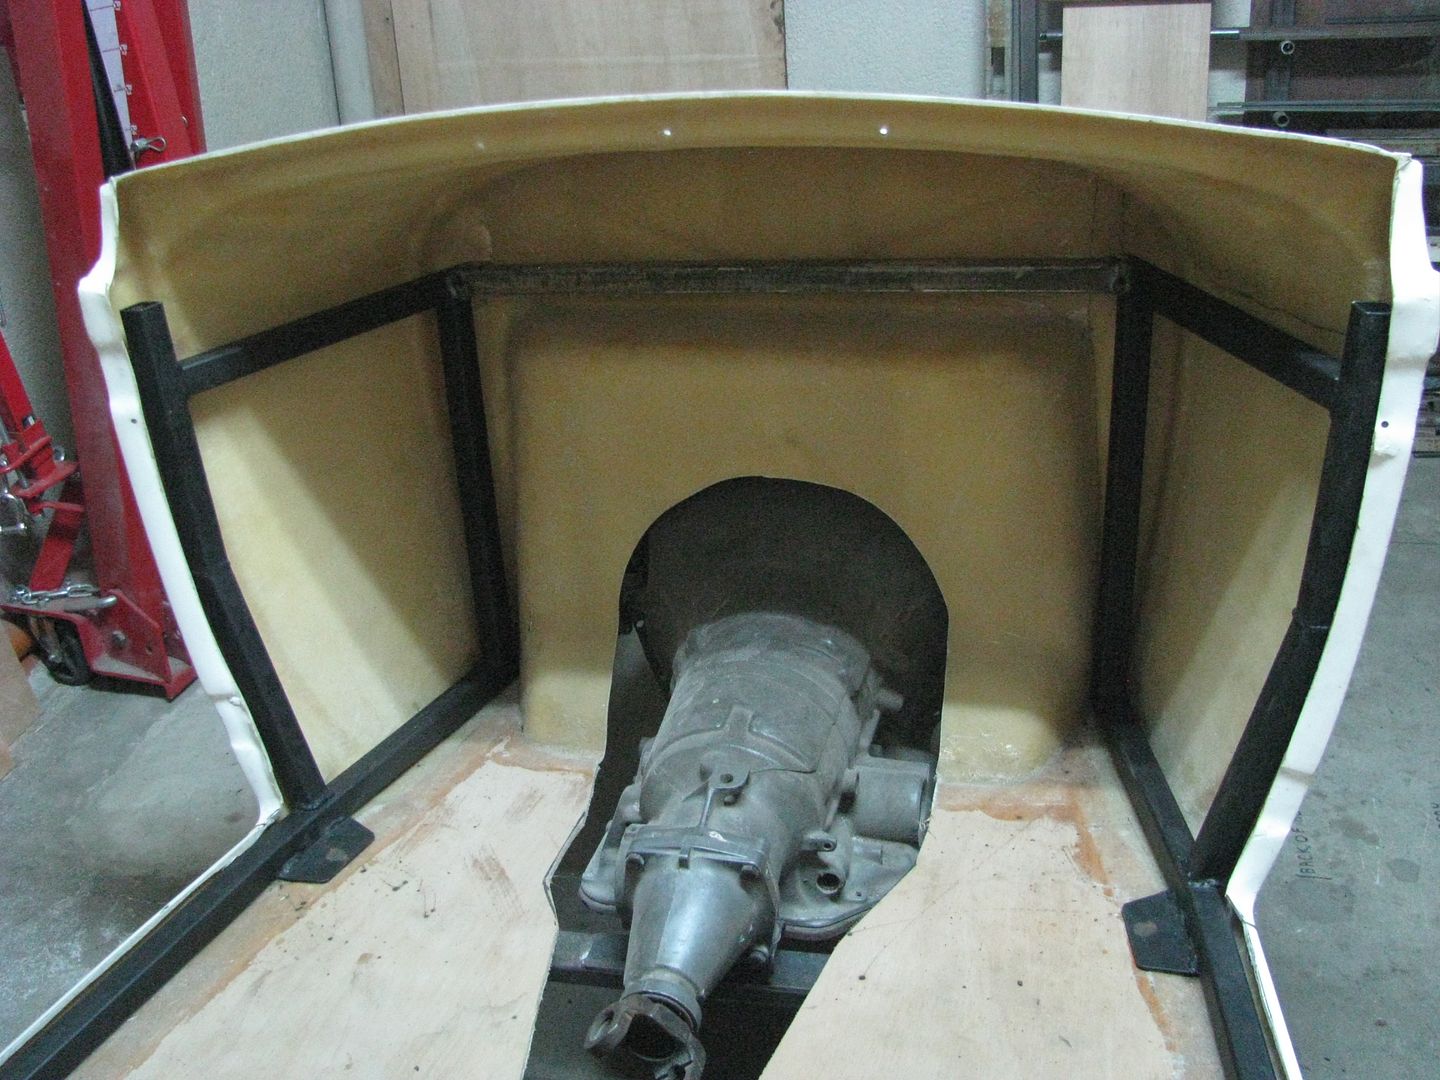
I cut out the floor to clear the motor. No room for size 13 boots in there, I fear. The tranny tunnel will need to be pretty close fitting to leave as much foot room as possible.

ef6740ee.jpg
 
I've scored an unlimited supply of 40 x 80 x 3 box section from a local scrap man, basically brand new steel, but painted white for some abandoned project.

a529fb56.jpg


The rails were sliced at the rear to tweak 'em in a couple of inches. I never thought this out properly and put too fat a cut in, with the chopsaw. :( 
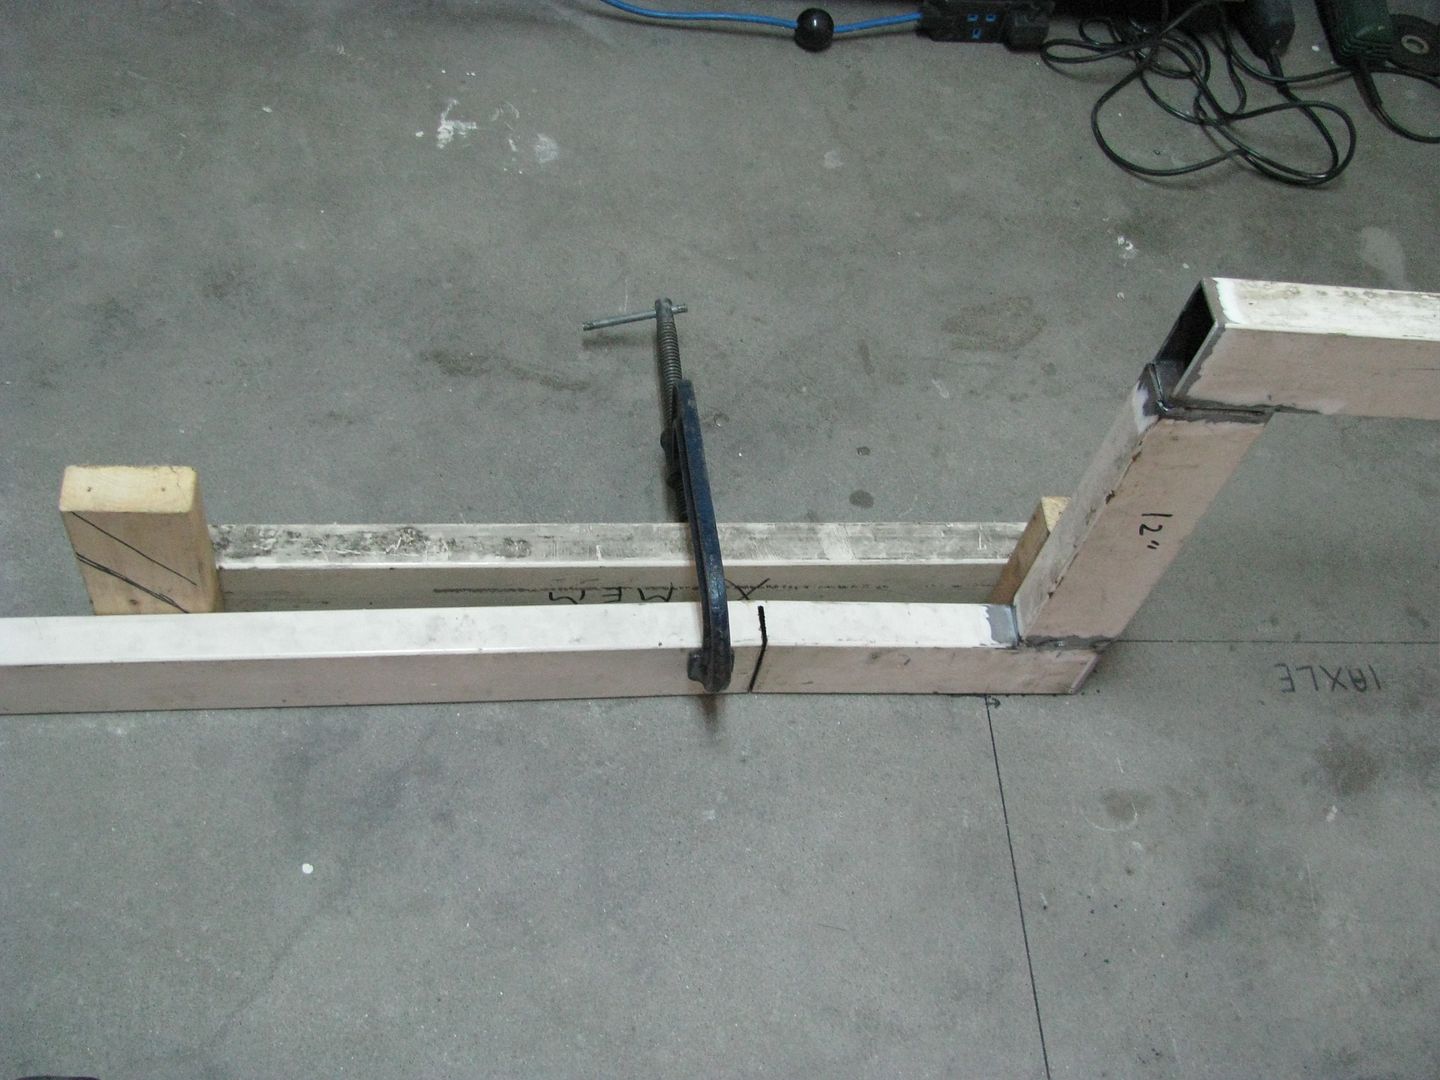
Here is my 'bender and tweaker' apparatus, to ease each one into line:

0158dd40.jpg


I took my jigsaw to the front ends, to have a go at that tubular thing so many people do. Seems to have worked so far, just got to do a little hammering and welding some time:

679512f6.jpg


ad2dfdeb.jpg


6d8dac39.jpg


I'm going for a bit of a cartoony look, so the motor will sit rather high in the chassis, and I decided to make everything sit above chassis rail height. Thus I marked the shape out on the billiard table flat garage floor in pen. The roads here are abysmal in places, with huge speed bumps of random size and shape, thus I'm opting for a minimum 6" under the lowest point of the car.

My buddy forced a pair of huge Mickey Thompson 14" wife tyres on me too, but I already have wheels and tyres, so the will be put to one side for a rainy day.

8a26b0d8.jpg


I've scored a 9" rear axle too, just the right width, but it needs new bearings. 3:0 ratio as well, so it should be okay behind a TH350 in a light car like this.

769223d9.jpg


Triangulated four bar in position, with temporary gash square tube links:

c9d9829a.jpg
 
A bit of diagonal stiffness added:

bc2633a3.jpg


My attempt at 'frilling it up' :D

a8626373.jpg


I've discovered the 'paint' on the box section is powder-coat, so that is going to be fun to remove. :(

46c377bd.jpg


816755c7.jpg


d9fda3ea.jpg


95de3c11.jpg


bf335e10.jpg


Just 30 feet away is wild jungle full of creepy crawlies and snakes and stuff.

e9d7e37f.jpg
 
I'm thinking about putting my 6v/71 blower on it, or probably just a Performer manifold and an Edelbrock 600 carb for now. I do fancy a blower, and it'd be fun making all the drive and stuff up.

Blowersetup1.jpg
 
Lookin good ,looks like a build to follow . First time in PI ? Almost got to Subic Bay in the late 50's but went to Saipan instead Good luck with your build
 
More progress:

40ae8108.jpg


fd77e395.jpg


Mounting the Corvair steering box, requires an angled oddball bracket, cut from 3/8 steel:

1c3a67db.jpg


b55998c9.jpg


Looks like it'll work:

cf76ffc9.jpg
 
Tacked in place, Pitman arm end lines up exactly with the hairpin end: good geometry. Clearances look a little tight between the various links, but at ride height it is all good. A little heating and tweaking of the steering arm may be required, but not much.

26f04e2d.jpg


I rose/heim jointed the cut off Model A hairpins, inserts and joints from Summitracing:

51df76c4.jpg


Cleared away all the rubbish, blocks of wood, trolley jack etc:

4f7a67c8.jpg


7cdec179.jpg


58ce8800.jpg


I just wish I had some hubs so I could get it rolling. :D
 
Lookin good ,looks like a build to follow . First time in PI ? Almost got to Subic Bay in the late 50's but went to Saipan instead Good luck with your build

I lived there from '93 to '02, got married etc, but we then had an 8 year stretch in England, and only moved back to the PI in May. That English weather is just a killer. :mad:

If you had got to Subic you'd have been a changed man, I tell ya, that place does things to you. :D
 
you could put your gas pedal sideways on to of the hump, depending on how low your seat is. Sat in a severely chopped and sectioned A truck set up like that. At 6'2 it wasn't too bad.
 
you could put your gas pedal sideways on to of the hump, depending on how low your seat is. Sat in a severely chopped and sectioned A truck set up like that. At 6'2 it wasn't too bad.

Tranny tunnel height will decide on how low the seat goes I guess. Looks to be 6" off the floor max. I'm not very tall, so should be okay.
 
I like it. With that body not channeled you should have a ton off leg and foot room. My old 23 and my current 27 are deeply channeled and I still had room for my feet and legs.

Only thing I think you should reconsider is that solid motor plate. You really won't like it much on the street without some rubber bushings where it mounts to the frame, and it is hard on things too. Those are ok on a drag car that only goes 1/4 mile at a time, but not on the street. Just a thought.

Don

I hear what you're saying, but the roads and traffic are so chaotic that it won't exactly be a daily driver.

I ran an engine plate once before, and the V8 is pretty smooth, so there was no real vibration. The tranny mount is stock rubber, to allow a little chassis movement with breaking things.
 
I've made up a steel tube sub frame to go inside the glass body, to stiffen it up, give a little collision protection, allow seat belt mounts etc. It was welded solid in three sections, outside the car, then installed and fully welded together in place. Some more crosspieces were added where the dash will eventually go, to tie the front together.

f72f9469.jpg


Back half went in first.

479e1c42.jpg


0ee109e3.jpg


b7056871.jpg


c1d62360.jpg


I'll glass it in place, and if I can find some of that squirt-in expanding foam I'll use it to bond and goo it all solid inside the glass.

The square 'cut out' at the rear is for the prop shaft tunnel to go.
 
I'm kinda stumped as I have no hubs to fit the model A spindles. Anybody have any ideas if some sort of import hubs and brakes can be made to fit easily? I can get metric parts, here, and some Camaro, Mustang type stuff.
 
I made a transmission tunnel from thin plywood then shaped it and glassed it over. Eventually the whole floor will be 'glassed over a couple of layers, and underneath. And the inner frame will be glassed in too.

60ddb9a5.jpg


ec9e6e20.jpg


6bc6e7df.jpg


64fdd685.jpg


Cobbled together my four bar out of some seamless pressure tubing bought locally. 4mm wall thickness, nice and strong.

d5e0eef0.jpg


5/8" Rose joints and threaded inserts from speedwaymotors.com

8da5a171.jpg


Chrome is not too pricey over here, so I may think about getting all this sort of stuff shinied up, maybe even thee whole rear axle casing.

Some oddball shocker/light brackets, going for the 50's show car look.

29715e30.jpg


a4caf68f.jpg
 

Latest posts

Back
Top