1940 Plymouth Truck

Rat Rods Rule

Help Support Rat Rods Rule:

This site may earn a commission from merchant affiliate links, including eBay, Amazon, and others.

bob w

Still crazy after all these years!
Joined
Jan 2, 2008
Messages
13,199
Location
Stillwater, MN
PlymouthTruck013.jpg

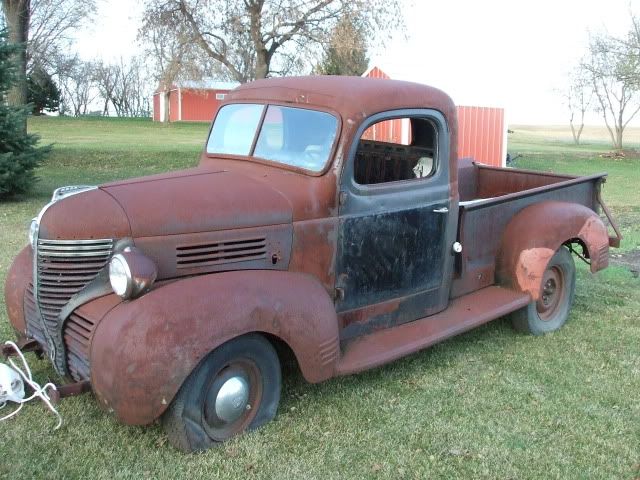
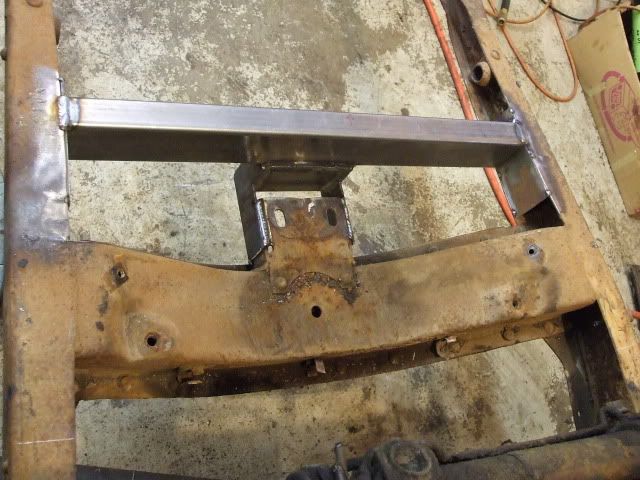
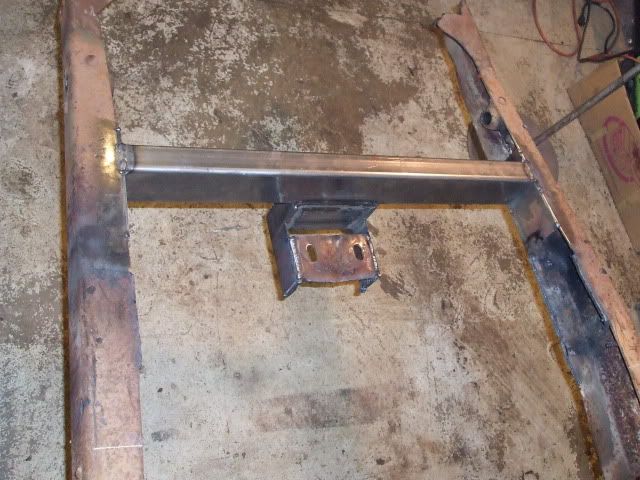
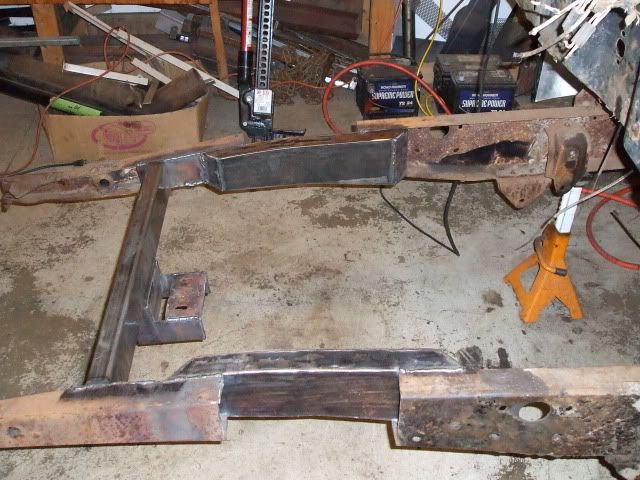
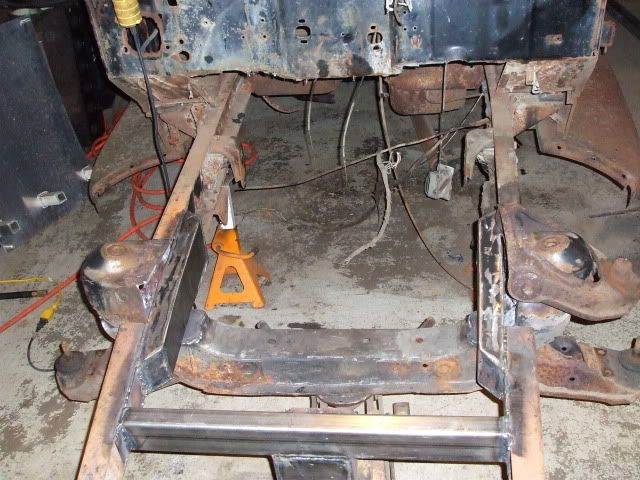
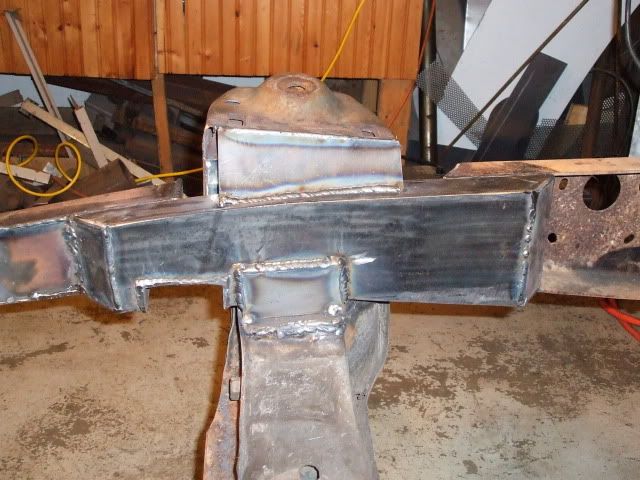
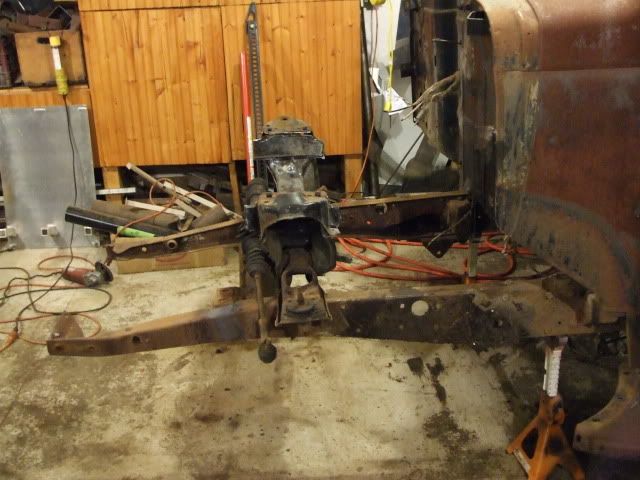
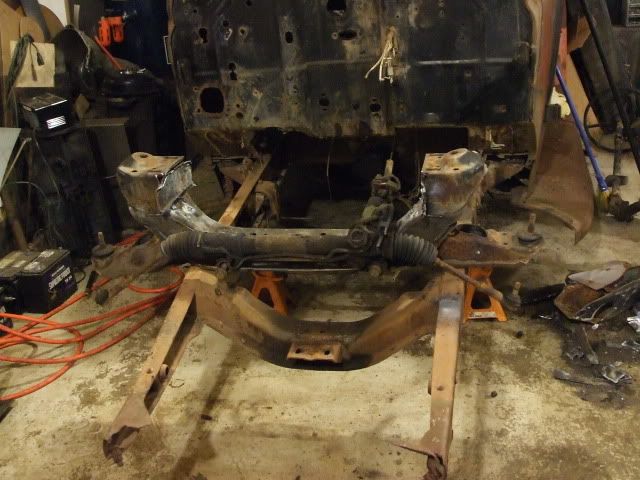
I posted pics of this truck when I was looking at it. Well, I bought it and my friend Barry & I trailered it home a week or so ago. The deal was it was going to sit until I got the Crosley put back together. However, a small crack in the 400 block (steam hole to head bolt hole) has slowed the assembly of that engine. I have found that if a stud is used in that bolt hole usually there is no problem. I'm waiting for a stud. With time on my hands I took the Plymouth apart from the firewall forward. The engine still had antifreeze in it, so it might be ok for a restorer.
 
Disassembly004.jpg

Here it is stripped of its front axle and springs. I'll be putting a Mustang II front on it during the next week. The plan is for this to be a daily driver. That means it will need lots of insulation and a good heater and defroster. At my age it needs to be comfortable so tilt, cruise and an adjustable seat and good stereo are a must.
 
Disassembly005.jpg

The frame is quite a bit wider than the cradle of the stock MII crossmember. The truck frame will be pinched through the crossmember area. There's a monster crossmember with the core support mount that needs to go to make room for the rack & pinion steering (power). It's off to the steel yard tomorrow for materials to make this happen. This is my favorite part of a build even though I'm old and getting weak and arthritic in my hands. If I would have been born a hundred years earlier I would have been a blacksmith.:)
The discolored spot on the driver's side frame rail is from heating it in order to straighten the rail. Forced it into the correct position with a high lift jack between the frame horns.
 
Last edited:
I am sure you know this already but I am going to offer this information anyway. Fatman Suspension will furnish you a front cross member in any width you need. While this may add some small amount of money to your build it may be useful before you "PINCH" your existing frame to accomodate a odd size cross member, Odd that is to your build.

Food for thought.

I really like this truck will be interested in seeing it come along.

Roland
 
had not realized you already got started on your truck.....

i really like the approach, though....a DRIVER!!![cl [cl

will be anxiously awaiting updates....[P

HRP
 
Disassembly002.jpg

Thanks for the interest and suggestions. Trip, I've used Chassis Engineering products in the past and know they make really good stuff. Hombre. I installed a narrowed Fatman MII in my Anglia. Had to pinch the frame for that installation because the car is so narrow. Because I'm working on 3 projects at once, I need to really watch the costs. That's why I'm using the stock crossmember. Pinching the frame is enjoyable work for me.
There is one local junkyard that has some worthwhile cars and parts remaining. When I spotted the two Mustang II's in the yard I told Al to save the front suspensions if he scrapped the cars. He took my advice and a year later I needed one.
The pic shows the crossmember that is in the way. I do need to retain the core support mount in its stock location.
 
CoreSupport002.jpg

There's small boxing plates on the frame. I made a crossmember with a dropped section that attaches to the core support mount. This assembly was then welded in place.
 
Disassembly006.jpg

All that was left to do was trim away the old crossmember leaving the core support pad welded to the new crossmember. This method resulted in the core support pad remaining in the exact correct location.
The crossmember is not nearly as beefy as the original. However, the MustangII crosmember will be in the same neighborhood so ample strength and rigidity will be retained.
 
I like that technique, simple and makes a lot of sense don't know if I would have thought of it though..
 
FrontSuspension001.jpg

Made some box sections that matched the frame. Welded them in place and cut the original frame away in an area big enough for the MII crossmember and A arms.
 
FrontSuspension002.jpg

I achieved the "pinch" needed to fit the stock MII crossmember. Fear not, there will be more boxing and bracing. Also, all the rust was ground off before welding.[cl
 
FrontSuspension004.jpg

Here's the crossmember in its approximate location. I have to get the angle right for the correct anti-dive on the A arms. And I have to double, triple and quadruple check ride height Before welding it in place. The crossmember should really stiffen up the frame.
I picked up a 700r4 off of Craig's List for fifty bucks last night. "Worked good when removed". Got it from a hot rodder ('36 Ford roadster & 3 window coupe, GTO clone, several Falcons and a Comet Cyclone) so I'm hoping for the best.
 
this may seem like a dumb question,but is the front :confused:mount for a radiator support bracket or is it 4 a 283 front engine mount or a six cyl mount
 
FrontSuspension002-1.jpg

Got everything pretty well put together. The little rectangular notch is clearance for the power rack & pinion steering. Looks like the bottom front of the running board will be 7" above the ground.
midnite kid, that crossmember & mounting pad is for the core support.
 

Latest posts

Back
Top