1933 Pontiac

Rat Rods Rule

Help Support Rat Rods Rule:

This site may earn a commission from merchant affiliate links, including eBay, Amazon, and others.
Cool Old Iron.
Glad to hear your guy is making progress on the engine.
The nailheads really are a beast when it comes to torque. As we talked about earlier just lots of little quirks about them. First engine used to break the 10 second quarter mile I believe. One of Tommy Ivo's nailhead powered drag cars. Plus they are just plain cool looking especialy if they are all tricked out.:D
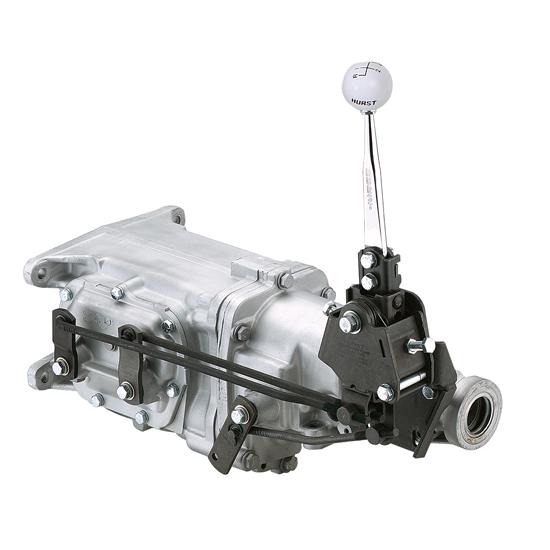
What are you using for a trans? That seems to be the biggest deterent to them as they are not compatible to anything other Factory stock with out the use of an adapter.
Oh and here is a pic of what I found in my nailhead when I pulled the intake.:eek:
Torchie.
 

Attachments

  • IMG_0950.JPG
    IMG_0950.JPG
    110.9 KB · Views: 65
I hate to have been it.
The engine and tranny are out of a 66 Gran Sport I have. The car was a 4 speed so I have everything.
I took the Saginaw tranny off and I'm using a Borg Warner super T10 that I have out of a 77 Trans Am.
The shifter is a Hurst Super Comp straight stick.

It looks like this setup
4407535_L.jpg
 
Not a lot to report.
Finished filling in around the door latches in between other duties.
Started on the dash.
Pulled the steering wheel and column off the wall and cleaned it up. It's a wheel and tilt column out of a floor shift Pontiac.
I'll get these going in between duties tomorrow afternoon and I'll post pics.
 
Well, I went to the tire shop at noon today and they put new tires on the front of my 40. I'll be cruisin the streets during the NSRA Mid America show in Springfield Mo this week end :D
I installed the dash in the 33 this afternoon plus, mocked up the steering column and wheel.

attachment.php


I will go to the show in the morning and snoop thru all the parts the vender's have and see what treasures I can find [ddd
 

Attachments

  • 147.jpg
    147.jpg
    90.9 KB · Views: 250
Got on the phone with Russ Martin this morning and ordered a 280 duration performance cam, matching valve springs and new lifters for the nailhead.
Since the originals look like new, I was just gonna use them to save some money :) but :confused:, some thump and a little more power doesn't hurt either [ddd

Oh yea, a new True double roller timing chain and new fuel pump.

Sounds like that is going to be a real sweet engine Old Iron. Are you going to go with any dress up items for the outside of the engine.[ddd
Torchie.
 

Attachments

  • images.jpg
    images.jpg
    13.1 KB · Views: 40
  • images-1.jpg
    images-1.jpg
    14.2 KB · Views: 41
  • images-2.jpg
    images-2.jpg
    14.5 KB · Views: 40
As of right now I'm gonna use the original 4 bbl intake and carb.
I want to eventually get the aluminum valley pan, aluminum valve covers and buy one of Russes 4X2 log manifolds that uses Rochester 2 bbl carbs instead of expensive Strombergs.

attachment.php
 

Attachments

  • martin.JPG
    martin.JPG
    43.7 KB · Views: 191
As of right now I'm gonna use the original 4 bbl intake and carb.
I want to eventually get the aluminum valley pan, aluminum valve covers and buy one of Russes 4X2 log manifolds that uses Rochester 2 bbl carbs instead of expensive Strombergs.

attachment.php

Nice manifold. I don't think that I've seen one of those.
My 364 came with the 4 barrel carb and intakeas well. I sold the intake to a restorer for $50 more than I paid for the whole engine so if I ever get around to rebuilding it I will keep Russ's in mind.
 
I finished the steering today.
Same look as the pics I posted a few back just, made brackets and a band to hold it to the dash.
I'll do some brake work tomorrow.
 
Awaiting more pictures! :D
You're right that wasn't fair :eek:
Here's the way I mounted the column.

The left bracket support goes up to the bolt the clutch mst cylinder is mounted with.
attachment.php


The right bracket support is right behind the brake booster bracket and is bolted with two bolts, top and bottom, through that mount.
You can also see that I use a 4" hole saw to cut the relief for the column to fit up into the dash. This will not interfere with any of the original gauges.
attachment.php


The strap that goes over is welded to each of these and bolted to the column.
The strap that goes around the column is welded to the dash
attachment.php


This band goes around the column and the ends are bolted together to clamp the column tight. You can see I need to put one more bolt in to keep the ends straight.
attachment.php


It looks off center but, I was off center when taking this pic,I centered the column with the gauges like the original.
Oh and the column is out of a Pontiac :rolleyes:
attachment.php


This is the out side view
attachment.php
 

Attachments

  • 152.jpg
    152.jpg
    78.8 KB · Views: 29
  • 154.jpg
    154.jpg
    75.2 KB · Views: 161
  • 153.jpg
    153.jpg
    86 KB · Views: 159
  • 151.jpg
    151.jpg
    69.9 KB · Views: 159
  • 150.jpg
    150.jpg
    86.3 KB · Views: 158
  • 149.jpg
    149.jpg
    90.8 KB · Views: 160
  • 148.jpg
    148.jpg
    76.6 KB · Views: 162
Here's the taillights I'm using. 39 Chevy

attachment.php

attachment.php


I had these wheelie bars laying around and slid them under the back.[ddd
attachment.php
 

Attachments

  • 156.jpg
    156.jpg
    99.6 KB · Views: 159
  • 157.jpg
    157.jpg
    86.7 KB · Views: 155
  • 158.jpg
    158.jpg
    100.7 KB · Views: 165
I installed a rear disc brake kit on the 33 today.
It's a Jeg's 965-ZDCRD019" Ford Disc Conversion kit w/e brake.
This kit was $356.00 free shipping, Less than Speedways kit :cool:
This is how the kit went on.
Spacer plate takes up space left by removing drum brake backing plates
attachment.php


Caliper mount adapter
attachment.php


Caliper bracket bolts and spacers. These need to be left loose because you can' get one of the bolts in with out a hammer.
attachment.php


Caliper bracket mounted and tightened
attachment.php


Put the rotor on and use three lug nuts turned around backwards.
attachment.php


Here's the caliper w/e-brake
attachment.php


This retainer is to keep the brake pad against the rotor so it doesn't rattle.
This one came out and I had to put it back in.
attachment.php

attachment.php


The inside brake pad is a PITA and I came up with this solution to keep it in long enough to mount the Caliper. (Bad design here)
It's a big rubber banding holding the pad in position until the caliper bolts were installed.
attachment.php


This was the only thing I found wrong with the kit.
 

Attachments

  • 163.jpg
    163.jpg
    88.7 KB · Views: 147
  • 171.jpg
    171.jpg
    80.3 KB · Views: 142
  • 170.jpg
    170.jpg
    72.7 KB · Views: 140
  • 169.jpg
    169.jpg
    73.7 KB · Views: 143
  • 168.jpg
    168.jpg
    72.7 KB · Views: 146
  • 167.jpg
    167.jpg
    78 KB · Views: 26
  • 165.jpg
    165.jpg
    87.2 KB · Views: 24
  • 164.jpg
    164.jpg
    72 KB · Views: 24
  • 162.jpg
    162.jpg
    84.9 KB · Views: 24
Everything came with this kit :eek:

Hoses and hose brackets
attachment.php


I plumbed my brake system while I was at it
attachment.php


Under the dash booster and mst cylinder
attachment.php


I used a brake light low pressure switch instead of the mechanical one.
These have 1/8" pipe thread and will not screw into the master cylinder.
I chucked it up in the lath, turned the shank to take the taper out and used a 3/8" die to match the threads of the mst cyl.
Cut a male flare in the end so it will seal tight to the female inverted flare at the bottom of the mst cyl.
attachment.php


This is where the rear rubber line mounts to the rearend. I welded a 5/16" grade 8 bolt to the housing to mount the tee,rann3/16" line to each rubber brake hose on the calipers.
attachment.php


I access the mst cyl reservoir through the cowl vent.
I'll put a screen in the vent opening to make it functional. It'll be easily removed.
attachment.php


Then can shut the vent too.
attachment.php
 

Attachments

  • 174.jpg
    174.jpg
    74.7 KB · Views: 147
  • 175.jpg
    175.jpg
    87.9 KB · Views: 29
  • 177.jpg
    177.jpg
    84.4 KB · Views: 144
  • 178.jpg
    178.jpg
    110.5 KB · Views: 26
  • 179.jpg
    179.jpg
    90.5 KB · Views: 145
  • 180.jpg
    180.jpg
    73.1 KB · Views: 146
  • 181.jpg
    181.jpg
    87.5 KB · Views: 147
  • 182.jpg
    182.jpg
    97.1 KB · Views: 143
  • 173.jpg
    173.jpg
    87.3 KB · Views: 141

Latest posts

Back
Top