First Project continued... 37Ford/46International

Rat Rods Rule

Help Support Rat Rods Rule:

This site may earn a commission from merchant affiliate links, including eBay, Amazon, and others.

kelseydum

Well-known member
Joined
Jul 9, 2007
Messages
860
Location
Little Rock, AR
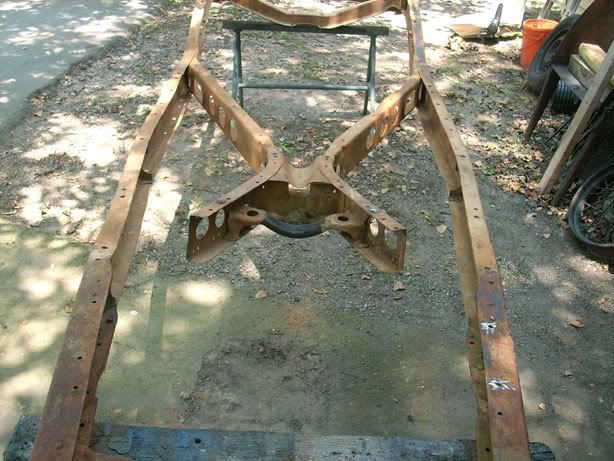
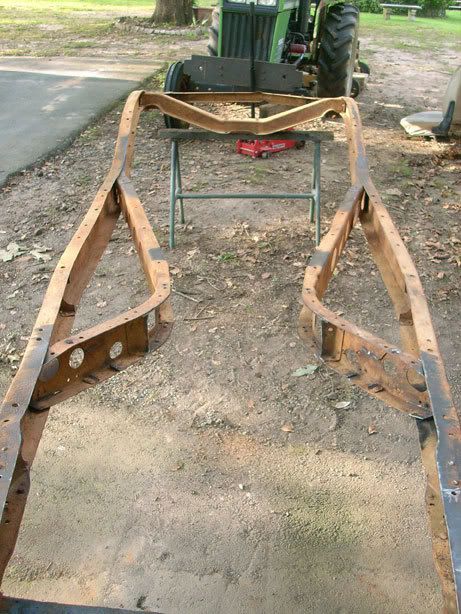
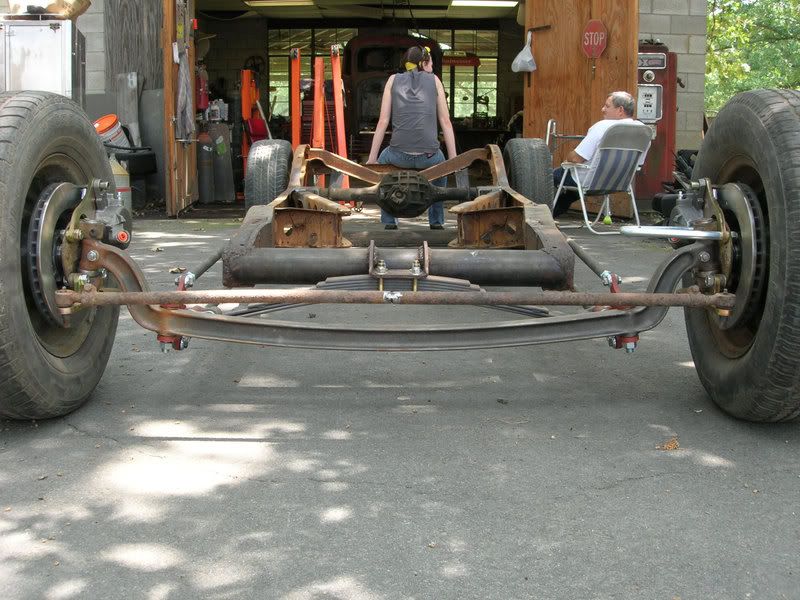
Well, I'm still not sure if I' going to use the 37 cab, but we are using the 37 Frame and spindles. I got a free 46 International cab that is in good shape and I may use this with the 37 frame with the 37 Ford bed. This is my first project and my mentor had his knee replaced so he can't physically help me right now and I am running in and out of his house asking questions. Anyways here is what I worked on last night. I'm using some trialing arms off of an S-10 for my rear end.

rearmount1.jpg


rearmount3.jpg


rearmount4.jpg


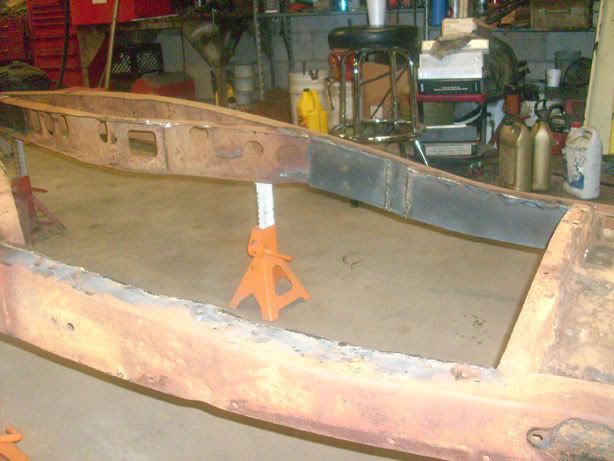
The strip of metal going across is just laid there to help line up the bolts.
rearmount5.jpg
 
Some more pics...

Here it is with the 37 Ford cab.
firewall_cut.jpg


Here is a crappy pic of the 46 International cab on the 37 frame.
46Cab_channeled1.jpg


I have more pics... just not uploaded yet.
 
Good progress kelseydum and the IH cab looks good on the 37 chassis. Here's a tip though, if I were you, I would grind ALL of the rust off of the chassis anywhere that you will be welding. That rust will contaminate the weld and cause it to be weak. It will also hinder penetration.
 
I agree with Gastrick, the cleaner the area to be welded the better your weld will be. We not only grind it clean, but then wipe it with brake cleaner to remove any contaminants, then shine it up with a scotchbrite pad. Both surfaces need to be spotless. I see people posting pictures all the time where they have welded rusty or semi rusty areas, and I shudder each time.

Also, I don't know if you are planning to gusset that radius rod mount more or not, but it needs more than just the single plate you currently show in the pictures. Needs tied into the more of the frame so it won't break loose. I would consider running a crossmember across the two mounts like that temporary piece of steel you show in the one picture. Otherwise, looking good. :)

Don
 
Thanks guys, I'm no welder and only tacked tehse so a pro can do the full welds. I guess I can clean it up better so he doesn't have to, but thanks for the knowledge and I will clean them better from here on out.

Donsrods, The bolts on the brackets are not the bolts we will be using. We will get some longer bolts that will bolt to the frame. I did think about possibly running some sort of crossmember there though as well.

Thanks again.
KD
 
Boxed the frame from front up till about mid point. Cut out front crossmember and pushed out a round member to the very front.

frontBoxed.jpg


37Front_suspension.jpg


I have more pics... just not uploaded right now.
 
Here are a few more pics. I got the front suspension complete... except we have to set the caster... but it's sitting on the ground in the front. We still need to go get a few more bolts for the right fit. I have found out that when Speedway sells you a "complete kit" that they don't include nuts and bolts. Anyway, here are some pics.

46IH_Nochop1.jpg


TruckProgress_Fsuspension.jpg


Fsus_Close.jpg
 
A few more...

Got the grill set in there just to see what it's going to look like... still not exactly sure how we will mount this.

grill_front.jpg


grill_sider.jpg


Some ideas for a grill shell...

grillShell_idea1.jpg


grilleShell_ideas2.jpg
 
Made a transmission mount and bolted her down...My mentor and teacher on my first project here calls my welds "gorilla welds"... Strong as hell, but ugly as sh*t. I think he's proud that I'm learning so quickly. Before I started this project I barely knew how to change my oil, now I'm using plasma cutters and welding and have built a working and safe chassis.

tranny_mount1.jpg


Hope to next get my steering box mounted and figure out this grill shell and how I'm going to mount my radiator.

KD:cool:
 
51deluxe,

I will probably be bagging the rear and I'm going to get some 18"s for the rear and put what's on the rear now on the front (they are 15"s).
 

Latest posts

Back
Top