progress on my 36 Chevy Truck

Rat Rods Rule

Help Support Rat Rods Rule:

This site may earn a commission from merchant affiliate links, including eBay, Amazon, and others.
Today Ronnie and I went to Dayton Ohio to see Junkyard Jeff and Doug. It was a great trip. thanks to Jeff I have a lot of parts I couldn't seem to find for the truck. I brought back all the rest of the stuff I need for my doors I can now get my side glass cut and I will be able to roll up my windows from the inside. also I got all the stuff to open the door from the inside. here is some of it.
Picture641.jpg

I brought back a dash that is pretty nice.
Picture642.jpg
 
I finished all of my frame work for the floor today. it may be a little bit of an over kill but I wanted to make sure it was solid. next will come the sheet metal for the floor.
Picture1086.jpg

also got the braces than ran up the back of the cab finished.
Picture1090.jpg
 
I worked on my floors a little last night and today. I can't stand to hear a floor pop when I get in something. so the 36 had to have bead rolls ran in the floor. my cheap bead roller was junk but with a half a day waisted firming it up and making a stand for it, it works better than I ever thought it would. still need to take it apart and paint it though.
Picture1095.jpg

Picture1092.jpg

I still have a little bit to do but it's getting there.
Picture1094.jpg

Picture1097.jpg

later the floor will get covered by sound and heat padding and then carpet
 
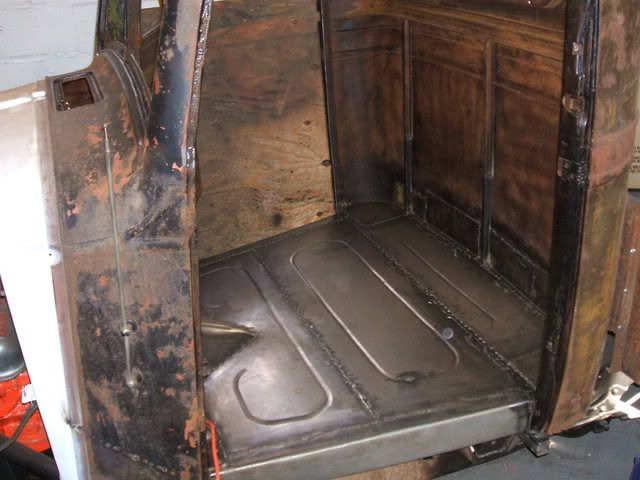
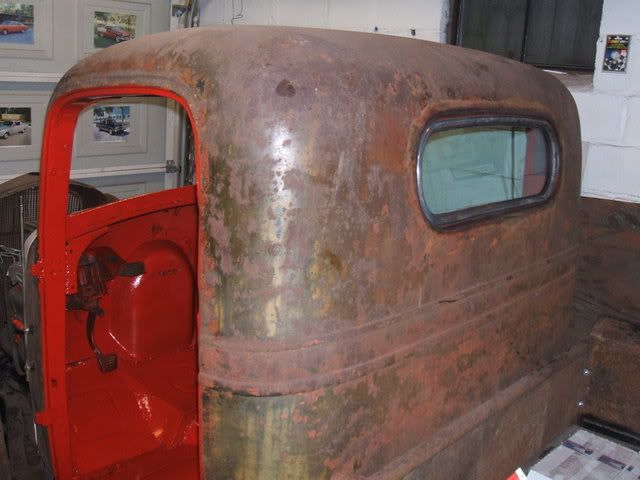
I took the doors, dash and windshield back out of the truck. one of the nastiest things I've done so far was puting on a good mask and face shield, get in the cab and take a good twisted wire wheel on a grinder to all the rust. my garage looked like a big red smoke bomb.
Picture1106.jpg

I took off as much rust as I could get off I then started cleaning everything up. it was a mess.
time for the rust converter. it was sprayed on and left to dry for 24 hours.
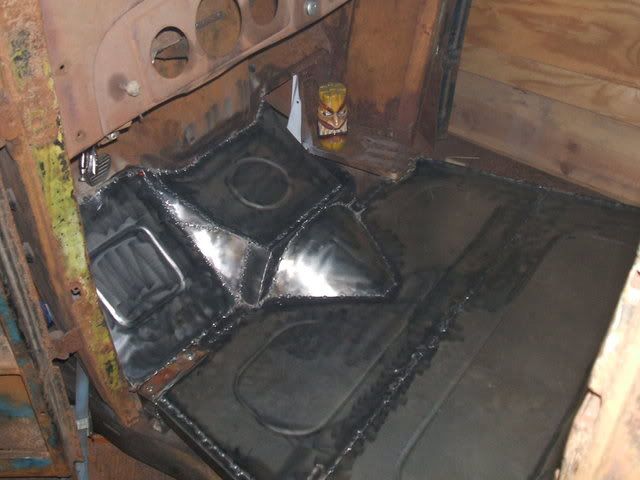
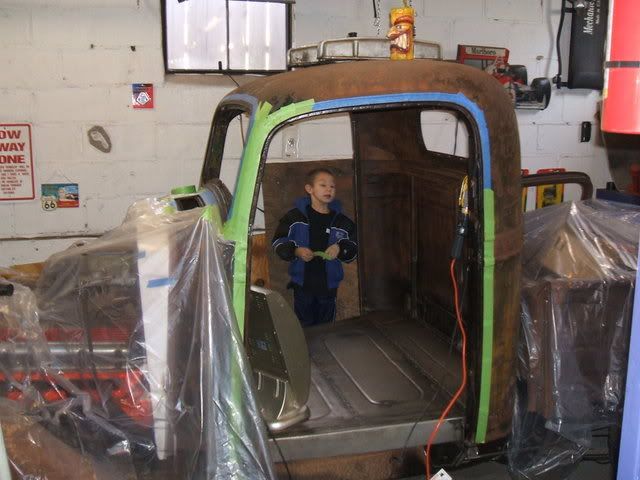
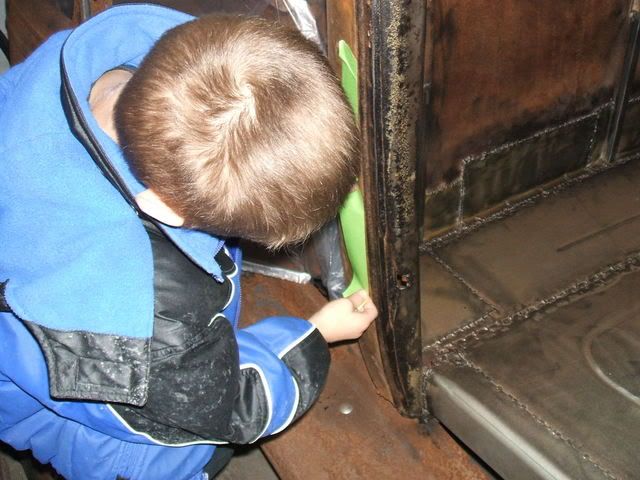
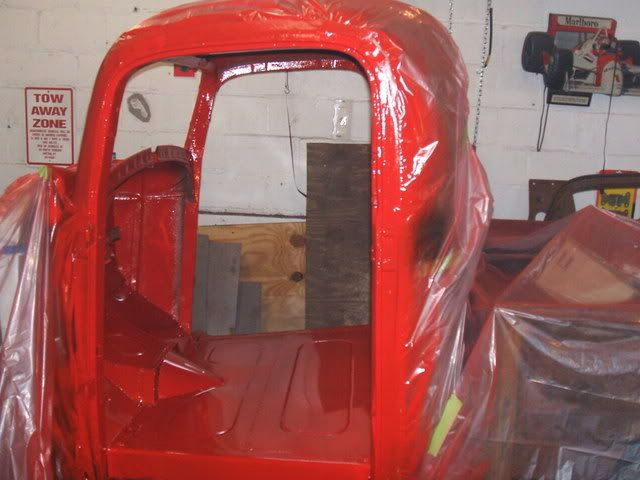
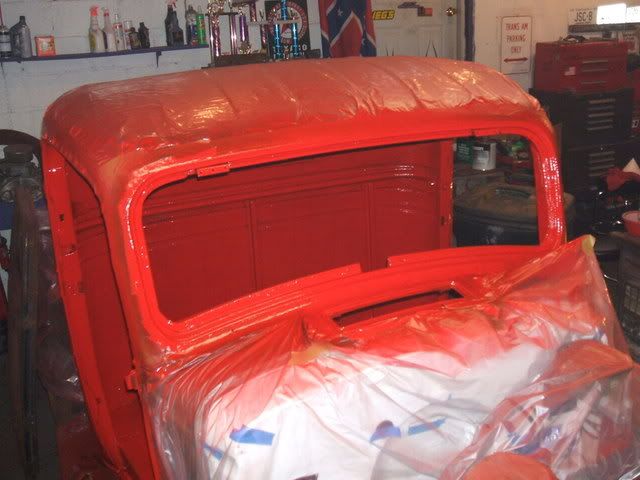
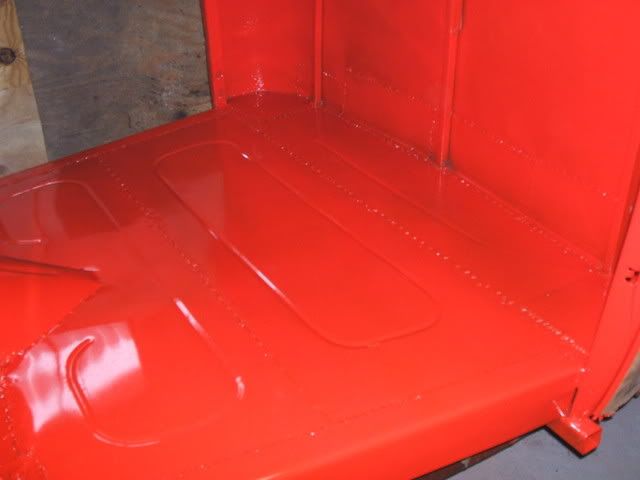
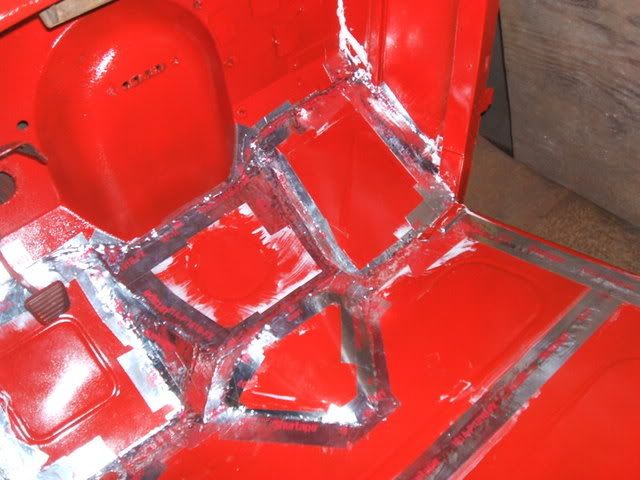
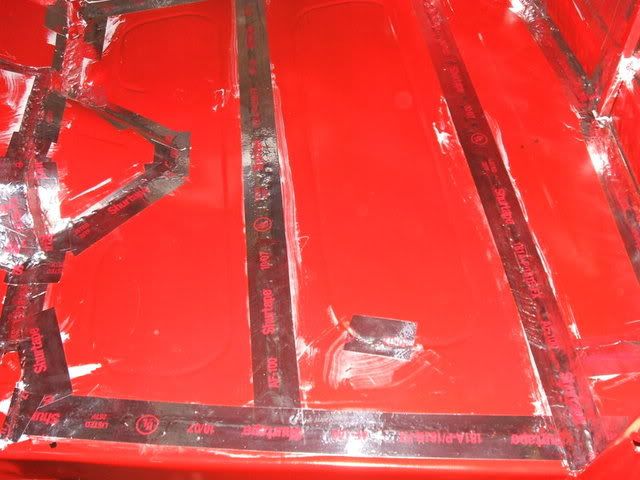
then time for the primer. the truck was taped up. my youngest son came out to help me with it. this is not a staged picture. that is my 6 year old helping tape up the truck. like I said before he has laid claim to this one and wants to help every time I work on it. when I welded the floor in he had to come and inspect my work every night before he went to sleep. it wasn't a passing glance either. I would think to myself while watching him grin? what does he keep looking at in there. it's not that big of a floor. I guess he was just taking it all in.
Picture1115.jpg

Picture1111.jpg

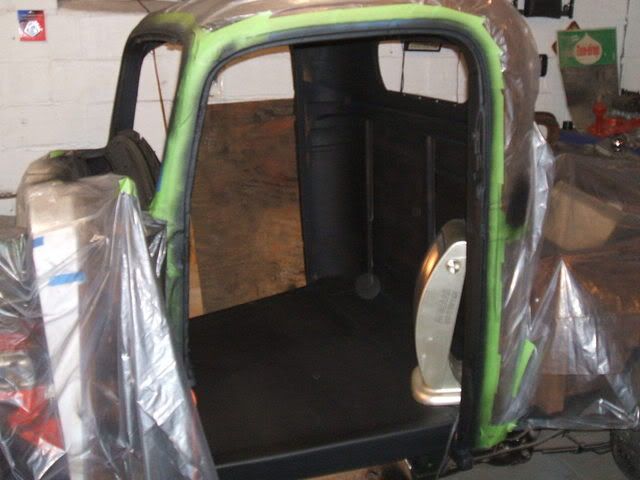
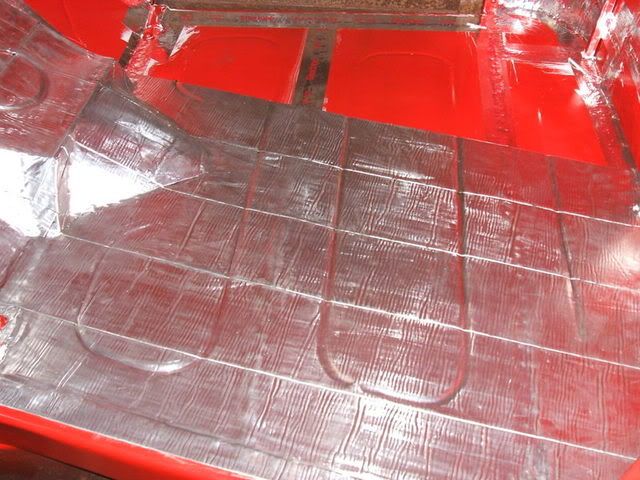
taping this thing up was fun. the cowl vent and the front and back windows had to be cut out so they would get a healthy coat of primer too. my red primer had went bad so I had to use my black. not a very good picture but the inside of the cab as well as the windows, jams, and cowl vent has been primed.
Picture1117.jpg

it was so cold today I left the fans off and the doors shut. I also turn off the heater because there was so much mist and fumes in the garage I thought I may have a flash fire. I kicked the heater back on and even stuck an electric heater in the cab after I clean my primer gun.
 
I also wanted to note how proud I am in the advancement of tape! I know that may sound funny to some but when I first started painting cars, 20 years ago there would have been no way tape would stick to flaking rust. sometime you couldn't get it to stick to a piece of chrome. the stuff 3M is making now works great and comes off easy without glue being left behind. this truck is rusty and dirty and I never had any lifting at all!
 
With the weather dipping close to zero at night for a week I could not make it into the garage. Even with the heater it was too cold to shoot paint. Today it wasn't bad so I loaded the gun and went at it. The outside of the truck will stay rusty for now. But the inside I want very clean and nice. Also the paint will help prevent rust if for some reason I take on water in a rain storm.
Picture1122.jpg

Any red paint that shows on the outside of the body will be taken off so the outside looks untouched. I painted around the windows so the rubber seals would have a good tight grip and to prevent rust in case I get trapped water. Like earlier any paint that shows from the outside will be taken off.
Picture1124.jpg

It is almost a shame to cover up all the paint but other than the door jams and dash everything will be covered by carpet or upholstery.
Picture1130.jpg
 
I found up under the cowl where it was factory yellow. then someone painted it green then black. I guess the red just adds to the color chart.
I went back out tonight and put the back window in. I guess this is the first time in a long time it's had rear glass. I would not want to put another one in. It was a pain. The new rubber seal had to be drilled to get the bolts to go through it from the inside of the cab and through to the outside chrome. I had to reach inside without touching the tacky paint and mark the holes to be drilled. take everything back out and apart, drill the 14 holes in the rubber seal. Stick the seal on the glass and stick it back in the hole without the tape holding it together. Anyone ever try to be on the inside of the cab turning the bolts and be on the outside holding your window from falling out. it's loads of fun!!! :D
Picture1132.jpg
 
hear is my build right now .i am very interested in some pics of how you are doing your rack on the s-10 frame?It would help the looks on mine a lot!
Picture035.jpg
 
wow. the chop on that thing is wicked! I like the stance too. I'm hoping to start on the steering in the next few weeks so I will post everything on here as I go. with that big block in mine I'm going to have to use a few joints to get around the header. it should be fun :eek: I've never done it before..:D
 
I really like the floor and red interior.........I mean REALLY. :) I hope mine comes out half as nice when I do it. Of course, you have that good helper there, and that makes all the difference in the world. :):cool:

BTW, you mentioned u joints in the steering. The general rule is, if you use only two you usually don't need a support on the center part of the input shaft, but if you use 3 u joints you need one. A simple way to make one is to use a spherical rod end with the proper sized hole in the pivoting end and slide it over the shaft and make a bracket to afix it firmly to the frame somewhere. You want to take out any monkey motion from the shaft whipping around as you turn the wheel. Just mentioned that as you said you had never done it.

Don
 
Great build thread rebstew. I just read through all of it. The truck is looking really nice. It's good to see the helper involved.

Here's how I got around the headers on my brother's big block 55 Chevy.
 
Great looking build! I did the red interior on mine and am getting lots of compliments on it. Sorry, but I just have to steal that tail light bracket idea from you. That's just too cool not to use.
 
Build is coming along nicely.As for the steering shaft.It is real easy.Just get some 3/4 DD shaft and some joints that have DD on one end and what ever your steer column is and that hyme joint.The joints that I have used are the Flaming River ones.They can be bought thru JEGS.Just lay it all out,Cut the shaft to fit and presto.Instant sterring shaft.
 
thanks guys for the input on the steering. I ask for some info on a couple different forums and never got a reply. I didn't ask here and had multi posts to try to help me. I think I'm going to like it here.:D
as for the taillight brackets, by all means help yourself. I'm looking for a big rod now that has about a 2 3/4" big end. I want to bolt the small end to the bottom of the bed frame all the way to the back and use the big end for my exhaust to run through. pipe hanger of sorts. from the back of the truck you will be able to see it with just about 4" of the tail pipe hanging out. I thought that may look pretty neat. not sure where to find a rod with that big of a hole. I thought about trying to see if one out of a semi may work. hard to find stuff like that around here though.
 
Hey Rebstew,
that is a cool lookin' build you got goin. I really like the red interior too. I was thinking grey or white with red seats for mine but you may have me rethinking that. Im really glad to see your son interested at an early age . Most kids today think hot rodding is seeing how much you can spend on a stereo. My son is 15 an is learning to weld and fabricate,we are having a blast together. Good luck with your truck
 
Yea.. I get a kick out of my youngest. He even has his own tools and mini stand up tool box. I gave him all my off brand tools and now he gets mad at me if I use them. lol I have to put them back in his box the way he left them or he knows. I'm hoping that the hot rod stuff will stick with him. It's rough on kids out there now a days.
A few days ago I used seam sealer around every welded panel. I came close to fully welding all the pieces in but I figured if it was good enough for GM all these years it will work for this. I let it dry for a day and then went over the seam sealer with Shurtape's hold tight. This is the same stuff you use for duct work. The reason for using it is that I wasn't sure of the bonding agent on the insulation I'm using. I wasn't sure it would stick well to the seam sealer. I know this Shurtape will stick to anything and it won't come off. The aluminum surface of the tape will also give the insulation a nice smooth surface to stick to.

Picture1138.jpg

Picture1141.jpg

Today I started putting my fake Dynamat down. This is the stuff that they have been talking about on HAMB and a few other forums. I paid less than $15.00 for a 6in. X 24ft. roll. The stuff is called Peel & Seal. It it very, very close to Dynamat other than the price. It has a 40 mil rubberized aspalt sticky back, two layers of high stregth polymer film over a reflective aluminum surface.
Picture1143.jpg

like I said above. I was worried a little about how good it would stick. I pre cut what I needed then I used a heat gun on the backing. Let me tell you!! When you stick it on you can't get it off. Even if it just bearley touches it. Make sure you have it all lined up before you touch anything with the backing. After I got it down I used an unopen pop can to smooth it out. As you can see from the bead rolls in the floor it takes the shape of where up put it. Cool thing is this stuff is used for flashing and as a roof patch. Any small holes you may have this will seal them and not let the water in. They do sell a better version of the Dynamat they already had. It is the sound and heat Dynamat. It is almost twice as thick as the original. No problem. For the price difference I will put a second layer over this one. Even with the floor half done I can tell a difference in how it sounded when I close the truck door.
 
Last edited:
Lowes in the roofing area. I walked by the stuff and never seen it. I ask a counter guy and he lead me to it. gray and blue stripes over white. Says in small letters PEEL & SEAL. give it a try. it's a lot cheaper than the brand name.
It even has the enegy star on the label. It say "meets the ENERGY STAR guidelines for energy efficiency"
someone said they sold it at Home Depot too but I couldn't find it at the one near my house.
 
Last edited:

Latest posts

Back
Top