Area 46

Rat Rods Rule

Help Support Rat Rods Rule:

This site may earn a commission from merchant affiliate links, including eBay, Amazon, and others.
I guess I neglected to mention that quite a bit of the framing lumber came from a garage that 62chevyII tore down in order to build his Garage-Mahal. LOL! I was unemployed for a while so I had a ton of time to pull nails.

I think the better story was while pulling all that lumber home on a trailer with my 74 Chevy short bed with the Vortec headed 350. While stopped at a light on a busy 4 lane I noticed that everybody behind me had got in the left hand lane as to pass my loaded down pick up and trailer. The truck had a NV 5 speed and 4.11 gears. Not a soul was able to pass me. Just exactly who is in who's way now you bunch of mini van and SUV driving losers!
 
After evicting the rat who made the oil pan on this motor his home, I tore it down and bolted it to my 5 speed for a engine / transmission mount mock up.


I think this is approximately where it will end up. It should sport an approximate 35" drive shaft.


The transmission is out of a 98 S-10 Extreme that was wrecked. The price was right so i bought it. I used a slightly earlier version of this transmission in another truck with a small block and liked it very much.

Thanks for looking!
 
I have been looking forward to this photo.


I picked these headers up last year from the swap meet for 50 bucks. They are new and designed for a NCRA late model They are stepped tube headers. I think I can make them work. Although they might get a little close to the cab.The heads in the picture are just for mock-up.


I got the mounts all sorted out and just need to do a little welding.

I also picked up a set of .040 Silvolite flat top pistons for the block and a set of Vortec heads that came from a industrial engine that ran on Propane.
 
Today was a pretty good day in general. With the help of this skid and my truck I was able to drag the 1940 cab in front of my garage.


Once there I decided to use my ZTR lawn mower to drag the whole thing into my shop. Using the cherry picker and a 2x8 under the roof I jacked the cab up high enough to get the chassis under it. I did all this by my self as I am helper challenged unless you count Penny my Miniature pincer who supervises.


Afterwards I used the cherry picker to put the whole mess back up on my saw horse with castors I fabricated.


One good thing I learned is that my headers will clear with about 1/2" to spare from the cab.


This week I also got the drive shaft cut down which can be seen in this photo.


The shifter location looks pretty good which pleases me and it looks like the steering column will work out as I planned with the end of it about the same location as the radius rods.


Today was a beautiful day here in Kansas so took a drive in the 53 up to Augusta where I bought this truck and ran down the guy I got it from who gave me the keys he found......sweet and I got to drive my 53 to boot!


Thanks for looking!
 
Very nice work [cl
Being helper challenged myself, we find ways to get things done and still have a back that works. :D

^^^^^Indeed^^^^
Project is looking good. It's always nice when things go together as planned.[cl
Getting warmer here in Michigan as well.
Torchie
 
I thought I would show a few pictures of what I've been up to. In order to get the cab to set on the chassis I had to cut the drive shaft tunnel so that I could get the cab mounts sorted out.


I'll have to form some sheet metal and weld it in place. I have access a slip roll and might use it for this although I probably can do without. The transmission tunnel will be a different story though.


Since the back of the cab needed to come up about a inch, I welded a piece of 1"x 2" square tubing to the top of the frame after drilling and tapping it for bolts. Then on top of that I added a piece of 1" rubber to absorb vibration.


Here is the front mount. I just tapped a hole 1/2"-20 into the frame and put a bolt thru it. You can see the 1" rubber I used to isolate it.


Next up I built this table for the bead roller to make it easier to roll straight lines.


I was going to try and re-use the original heal plate but decided to just build a new one as it would be less work. With my wife's help I rolled 3/8 beads in this 16 gauge sheet metal after cutting it using the old plate as a pattern.

I still have more work to do on this but I am hoping to get at the steering column shortly.
Thanks for looking!
 
I got the steering shaft hooked up to the rack. I still need to finish up some but it steers at this point.


You can see the front brake hose also in this photo.


I added this brace to the frame to hold the column in place. I have a rubber bushing to add at the firewall yet.


Here is a shot of the master cylinders that I cleaned up and went thru.


The brake pedals. I still need to find or make a clevis for the clutch pedal.


Today I picked up a Camaro disc brake rear end. I robbed the brakes from it and will sell the housing.

I hope to have brakes working or at least all ready to bleed in a couple weeks.
Thanks for looking.
 
I have been lazy about updating but I have a couple things to report on. I decided to install rear disc brakes but had to give up on the idea when too many issues arouse. These disc brakes were from an older pre- 92 Camaro ones that are 10" and I would of needed to turn the axle flanges down in order for them to fit the rotors. That was pretty much the last straw plus the fact that I would of needed to purchase expensive calipers for it. The newer 11" brake are much better suited for this axle. Which by the way is a non clip rear axle. I noticed this after taking it apart to put the 3.42 gear in it.


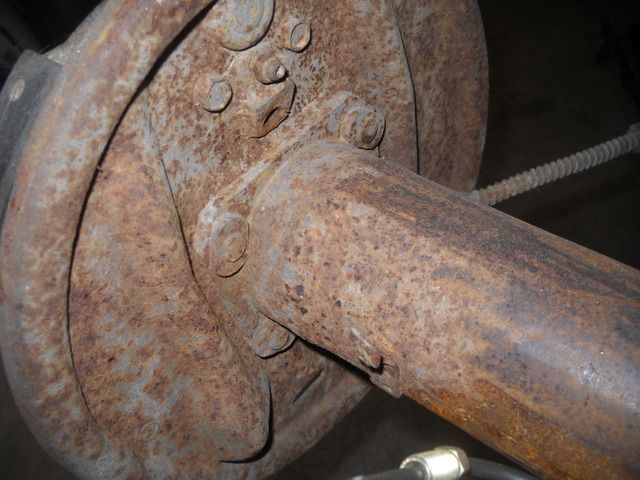
The t-nuts that hold the backing plate on are a give away as to what type of rear end it is. It's funny that I never noticed this before. these are more desirable than a C-clip type which use regular bolts to hold the backing plates on.


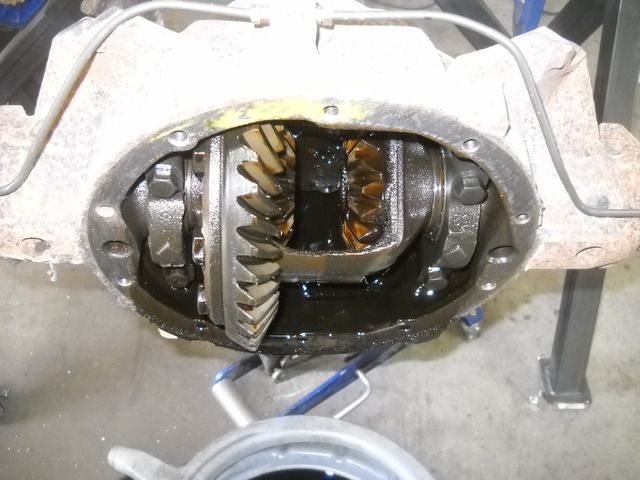
Changing the gear was pretty easy on this one. I just reused the pinion shim from the 2.73 gear that it had. I set the back lash at .010. Factory gears from the same series carrier are usually pretty easy.


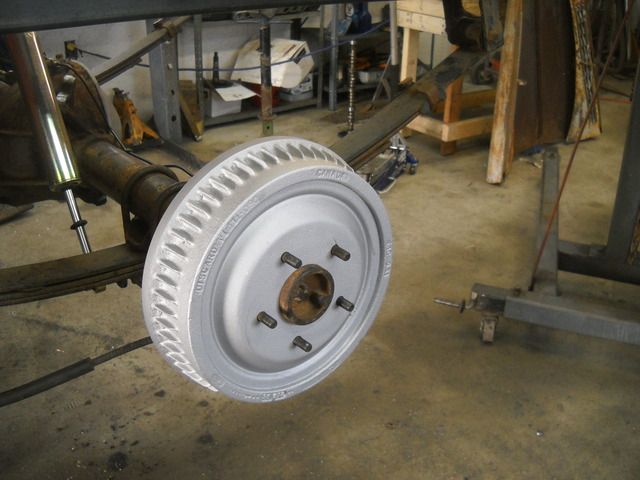
I had these 11" drum brakes left over from my 53. All new with about 500 miles on them. They'll work just fine.


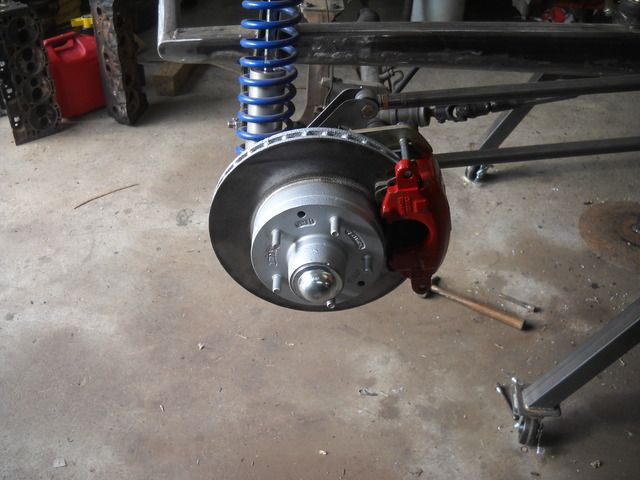
I spent my money and bought new calipers for the front which I painted with red caliper paint. 21 bucks each was better than trying to clean up rusty ones.


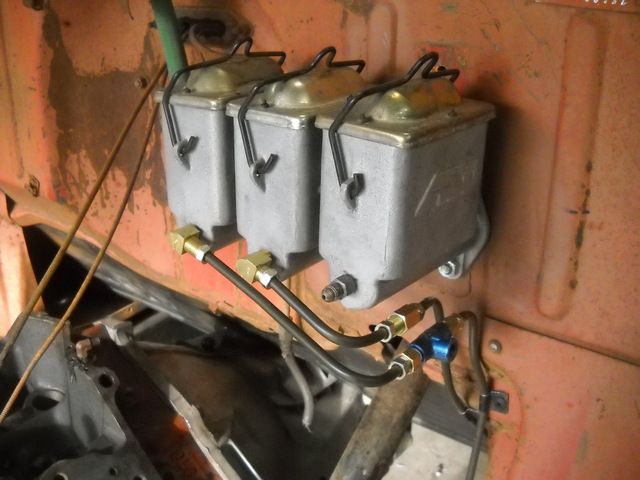
I got all the brake lines ran. All I need now is a brake light switch.


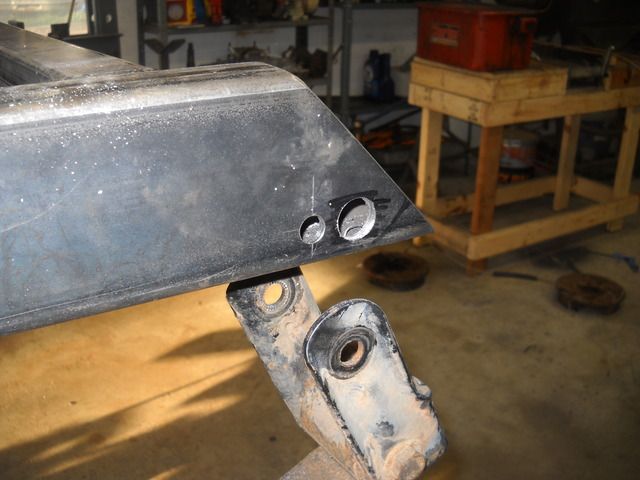
I had to move my rear shackles back 1" so the strap on the back of them would clear the end of the frame.


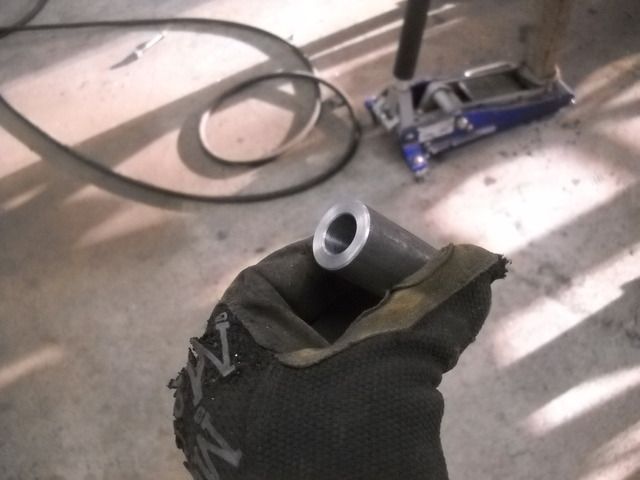
My good buddy Randy turned these bushings for me. I just hole sawed though the frame and welded them in place.


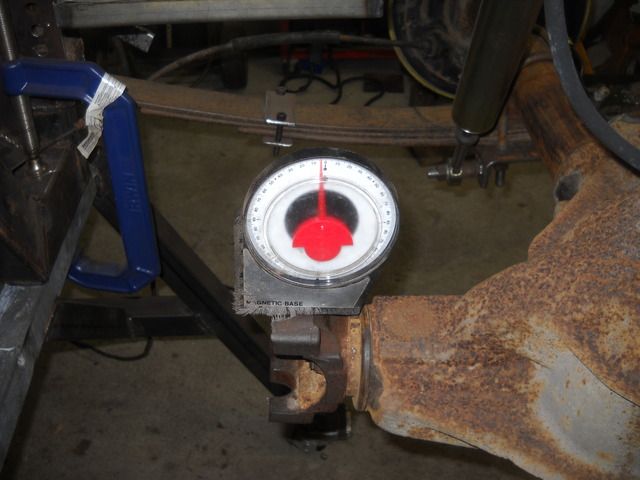
After putting some weight on the rear axle I set the pinion at 3 degrees negative from the transmission and welded the spring pads in place to the axle.


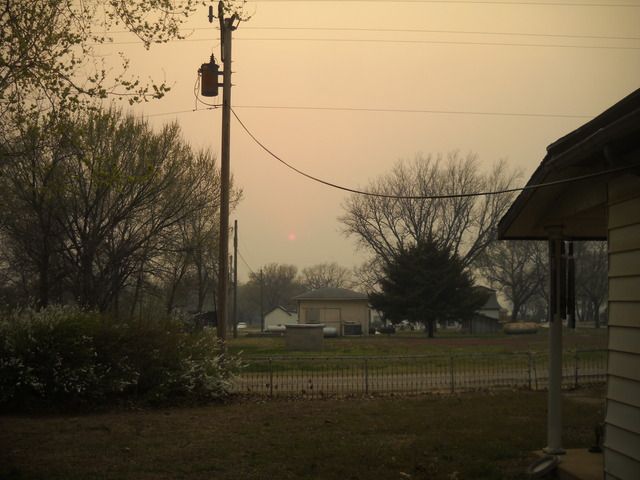
I you look really hard you can see the sun though all the smoke from a huge out of control grass fire about 100 miles west of here. Several cattle got prematurely barbecued in this one which when last I heard had burned up 620 square miles in south central Kansas.

Took the block to the machine shop yesterday for a bore job.

thanks for looking!
 
Last edited:
You may be lazy about posting but I have been lazy about working on mine.:eek: :D
All kidding aside. You are making great progress.[cl
The fire pics remind me of the grass fire we had behind my property last year.
Nobody lost any cattle though.
Keep at it.
[P [P [P
Torchie
 
Just a suggestion: I'd go with a mid 60's Chevelle mechanical brake light switch mounted off of the brake pedal instead of the pressure in line style. I first used a pressure style one but it never worked right, you had to really mash the pedal for the brake lights to come on, a light touch of the brakes wouldn't do it. I set up the manual switch so as soon as the pedal arm moves 1/4", you have brake lights.

I hope that's not copper lines.....

Just my two cents......:D

Never had any problems with the line pressure switches I reckon it's feasible though..........Copper lines ......that's funny!
 

Latest posts

Back
Top