Poor mans air conditioning

Rat Rods Rule

Help Support Rat Rods Rule:

This site may earn a commission from merchant affiliate links, including eBay, Amazon, and others.

donsrods

Well-known member
Joined
May 11, 2007
Messages
10,476
Location
fort myers florida
I stole this off of another thread where my Son Dan posted it, thought someone else might be able to use it.

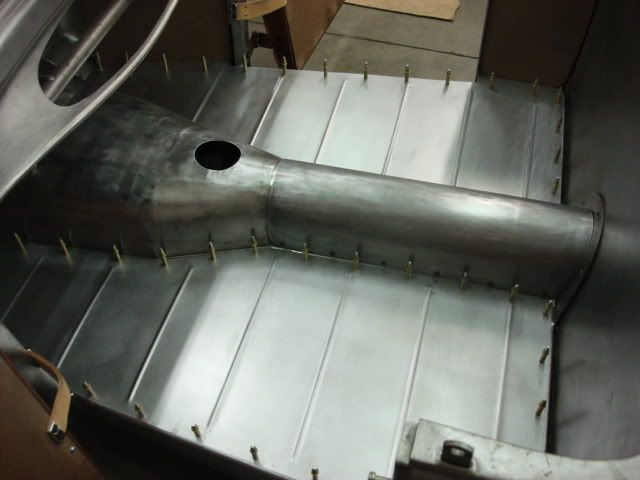
When Dan mounted the underdash master cylinder in his RPU he realized he had no way to easily fill or check the brake fluid as it was tucked up pretty far in there. He considered adding a Model A gas cap but that only gave him a very small hole to work through. So he picked up a 32 Ford cowl vent assembly from Brookville this year at Turkey Run, and he spent the last couple of nights getting it installed into his Model A cowl.

It took a lot of measuring and trimming to make sure the gap was tight but it looks like he got it done last night after I left the shop. I'm pretty impressed. It looks like it grew there and will not only give him the access he needs but also give him some additional air flow on hot days. These pictures should explain the process pretty well.

Don

First he marked the area where he was going to have to cut out the Model A cowl, then he put four round holes in the corners so he would end up with rounded corners. He has found that square corners pull when welded where the round ones don't.

cowlvent.jpg


After trimming the new Brookville assembly to size (It came as a really large assembly and he only needed the center part) he carefully fitted it into the cowl and clamped it down for welding. The tight gap makes for a neater weld.
cowlvent2.jpg


After welding and grinding smooth this is what the vent frame looked like.

cowlvent3.jpg


Here is the vent lid in the closed position.

cowlvent4.jpg


And in the open position.

cowlvent5.jpg
 
Thanks. The guys at Brookville said the curvature was the same as the Model A, and I guess they were right. Here is the reason he had to add the vent. You can see how tight it is under there to service the master cylinder.

Don

cowlvent6.jpg
 
WOW! that is some imprssive metal work-i envy guys like ya'll who can make stuff look so good......:D


but i have to say i saw one thing wrong with that lil RPU body............

.........it's in the wrong shop :D[dr (love to have one like it --it looks awesome)
 
Thanks guys. I got to see it in person today when I went to the shop. He really did a nice job on it. He also got a new shot of enthusiasm as this project was fun for a change instead of some of the more boring tasks of building a car. He has 10 days vacation left that he needs to take by the end of the year or lose it, so he is planning on getting the floor installed for the last time and welding up some seams in the body. Maybe even get a coat of primer on it.:D:D

Don
 
Don if you don't watch out He's gonna overtake you on metalworking skills. Thats some great work. I'm just kidding if he did I'm sure that would only make you prouder.
 
Hehe, he overtook me a looooooooooooong time ago. :eek: He's the go to guy in the shop for fab work. My Son Don and I understand mechanical work and engine work a little better, so we help him with building his engines, etc. But in pure hot rod building ability he has it over us 100 to 1.

Sometimes he wanders over to my part of the shop and sits down to watch me do something. After a while he says something like "ya know, if you did it like this it might work a little better." The part that is funny is that he is always right, and he can spot a neater way to do something than I ever could.

I'm shadetree, what can I say. :D:D

Don
 
Don,
That is way cool, thanks for sharing. Do you have any pictures or a link to this build that show how Dan built the lip around the upper part of the back of the cab. I would love to see how he did that too?

ISore
 
Thanks. Well, on this body he didn't build it, Brookville Roadsters did.:) We simply assembled the body. We bought it totally disassembled and put it together..........not the easy job we thought it would be, but we got it done.

Here is how it arrived.

dansbrookvillepieceslaidout.jpg


So we built a platform with perfectly scribed lines on it so we could build it square. We did it just like a jig saw puzzle, one piece at a time.

dansnewbodystartingtoassemble001.jpg


Looks easy at this point...........IT ISN'T!!

dansnewbodymorecowlwork022.jpg


dansnewbodystartingtoassemble011-1.jpg
 
You can only post so many pictures per post, so I'll start a second one.

The cowl drove us nuts. Nothing fit like it should and so much depends on it being dimensionally perfect. We even used an original Model A gas tank for a while because the smooth cowl he bought wouldn't line up at first.

dansnewbodymorecowlwork010.jpg


Finally we got it to look like a body and everything fit, doors opened and closed as they should.

dansnewbodymorecowlwork038.jpg


Then we cut it up! :eek: We had to, the Brookville body comes unchanneled, so we cut the whole subframe out and started to build a new subframe that was 4 inches higher.

dans30bodychanneling001.jpg


dans30bodychanneling004.jpg


continued................
 
We continued to build the new channeled subframe.........built a jig to keep it square while we were doing it.

dans30bodychanneling011.jpg


dans30bodyfinalweldingofbackpane-4.jpg


Then we had to build the new floor and tunnel.

dans30subframemoredone005.jpg


dans30tunnel002.jpg


dans30subframemoredone012-1.jpg
 
Shaping the transmission tunnel was tricky because of the weird shape, so we formed a skeleton out of round rod and filled it in with pieces of sheet metal, kinda like a patchwork quilt.

dans30tunnelmorework001.jpg


dans30tunnelmorework002-1.jpg


And when it is all done it fills in pretty well.

dansdashsupport007.jpg


dansdashsupport002.jpg


This is the floor we made for it.......

dansfloordone007.jpg
 
Oh, I forgot the best part. We originally built his frame for this body........

Dans29mockup-1.jpg


But when he decided to use a Brookville body it was 6 inches shorter, so this frame was now too long.

dansnewframeoutofjig.jpg


So out came the sawzall and we cut the frame in half and shortened it to fit. Gets a little scary at this point.
dans30shorteningframe003.jpg


dans30shorteningframe006.jpg


Had to keep turning it over to weld it up all the way around....

dans30shorteningframe008.jpg


And that is why this car has taken 5 years to get to this point. (I've hidden the sawzall)

Don
 
How do you keep things so clean

Great work,I love builds like this but I have a question because I am unable to leave bare metal down here in Louisiana. how do you keep the area so clean and how do you keep the metal from rusting. I am going to duild a geradge in my back yard and want to be able to leave the bare metal wile I'm working on my rods.
 
With our 100% humidity here in So Fla our stuff rusts too. We keep after it though and use Picklex 100 and a scotchbrite pad to get whatever rust starts forming. We also keep our grubby fingers off of the metal and wear gloves when we move a body or something. Piclex is not cheap, about $ 100 a gallon, but we have had the same gallon for 2 years or more. It goes far. We spray it on and use the scotchbrite pad, then wipe it quickly with a clean cloth. It dries very fast so you need to get it while wet. It puts a protective coat on the body that will last for months.

Don
 

Latest posts

Back
Top