36 Ford Bobber Build

Rat Rods Rule

Help Support Rat Rods Rule:

This site may earn a commission from merchant affiliate links, including eBay, Amazon, and others.
It certainly is a lot of work and this particular cab has added complexities to it. I'm also only working an hour a night so it's taking longer than it would if I had bigger blocks of time to work with. The other thing that slows me down is that I'm teaching myself all of this stuff as I go so figuring thing out takes more time now than it will next time. Hopefully I won't repeat some of the really time consuming mistakes that I made this time on the next one as well:rolleyes:
 
I got the door tops fully welded on and have been plugging away at welding up the top and back of the cab. On the doors, I still need to blend the outside flanges front and back and grind the welds out but the rest is done.

I'm posting lots of pics of these bits since, when I've looked for chops info, it seems like most people skip posting pics of stuff like this ans go straight from cutting the top to having it clamped up then it's magically done. I hope that some of these pics help others that are trying to figure it out as they go weather it's learning from my screwups or just seeing what I did to get it put together.

Here are a few pics of the relief cuts I did to blend the fronts of the door tops. I didn't take a pic of it fully welded but I'll take one once I get it ground out.

chop%2B97.JPG


chop%2B98.JPG


chop%2B99.JPG


chop%2B100.JPG
 
It just looks better and better all the time !!![cl
I just love that style of cab.....But seriously, you've got it nailed down !!
I just love that upswept lower cab look...
I'm rooting for ya!
Keep on keep on !!
[P
 
Thanks! I'm really liking the look myself.

I got the roof and the back of the cab all welded up tonight. I have a bit more to do on the A pillars and a little bit on the inside of the rear window opening. Then I have a whole lot of grinding to do.
 
Looking good.:D [cl :cool:
Nice documentation as well. You are right about many chops not showing all that is involved.
Good luck with the grinding. I use it as a time of meditation....:)
Torchie
 
Looking good.:D [cl :cool:
Nice documentation as well. You are right about many chops not showing all that is involved.
Good luck with the grinding. I use it as a time of meditation....:)
Torchie
Yep I have to agree on not enough pics on most chops.
I think you're do a great job [cl :cool: [P
 
At least by the time you get to the no fun grinding the finish line is in sight. I found the flappy sand paper grinding discs worked best for me.
 
Thanks everyone! Ya, getting to the grinding stage is a big milestone for sure! There's still a batch of things to do but the end is in sight. I'm definitely looking forward to work on the frame and drive train stuff! At the same time, I'm excited to chop my Willys once I get this truck "done" :D

The rubber seal was basically all gone on the windshield when I got the cab. Does anyone know where that seal seats? Does it mount on the windshield frame or in the opening in the cab? I'm just wondering because there was a boat load of lead in the opening and I really don't want to have to fill it all back in. I do want the windshield to seal when closed though.
 
I'll get a picture for you soon Willy. The rubber seal goes on the outside of windshield frame, not the inside of the cab.
There are little pipes welded into the bottom corners of the windshield frame in the cab, pointing down behind the dash; those are for draining the leaking water that the rubber seal doesn't keep out. Plumb them to somewhere out side of the cab and you will be a lot happier, or do like I did [nothing] and get sadder and wiser.
I am enjoying your chop pictures, keep up the good work.
 
WillyD, I took some pictures for you.
The first picture is the seal on the windshield frame. It's tucked in right behind the fascia on the frame. If I remember right there is a little groove around the frame to jam that seal into.
The next picture is taken looking down on the bottom of the windshield opening, between the cowl and the dash. The windshield is cranked open. You'll see a light green circle around the hole I was talking about earlier. Enough water gets by the seal to run down through this little pipe and dribble all down your cardboard kick panel, making you wiser. There is a hole in the middle of the firewall, directly behind the fuel pump on a flathead. This hole is to drain the excess water from the cowl vent seal leaking. Maybe you're supposed to drain those two windshield corner drain pipes out through there too. [Homework].

I'd like to see some grinding pictures.
 

Attachments

  • IMG_1664.jpg
    IMG_1664.jpg
    108.7 KB · Views: 33
  • IMG_1667.jpg
    IMG_1667.jpg
    57.3 KB · Views: 33
MercuryMac, thanks a bunch for the pics! There is a groove around the windshield frame to jam the seal into. Looks like that seal seats on the outer "groove" I guess of the opening. The inner flange on my cab is pretty wavy and the factory welds along the top are horrendous! Seams like that doesn't matter so that's good. On one side, the factory joint is probably a half an inch offset on that flange too. Amazing they got the things together at all[S.

I did know about those drains but it's good to be reminded that they need to be plumbed!

Are your door gaps as they came from the factory? If so can you take a couple of pics showing them? Mine are not great but I'm not all that interested in spending more time on them. I forgot to take pics of the gaps before I started though so it would be interesting to see what the factory gaps looked like just to know.

I hope I can start grinding soon so I can post pics :)
 
Willy, it sounds like my windshield opening was in better shape than yours, but my doors were NOT. I have pretty nice door gaps but it took me all winter just doing both doors, without chopping them. I had found a pair of doors a way down in British Columbia from a wrecked '35 panel truck. When I say 'wrecked' I'm not painting a full picture. The truck had been a roll over and the rest of the carcass had been hauled to the dump, in the forties or fifties, but the doors had been leaned up against a tree and forgotten. Nobody in their right mind would have taken them home, but I got a pretty good deal so I took them. I had to straighten up the window frame on the drivers door about 2 1/2" before I could test fit the door the first time.
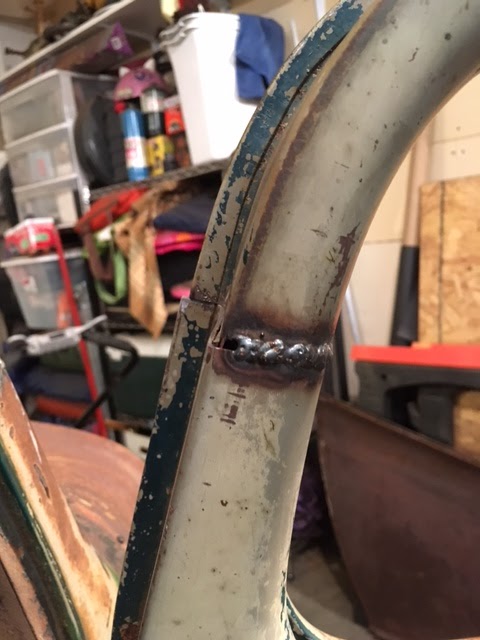
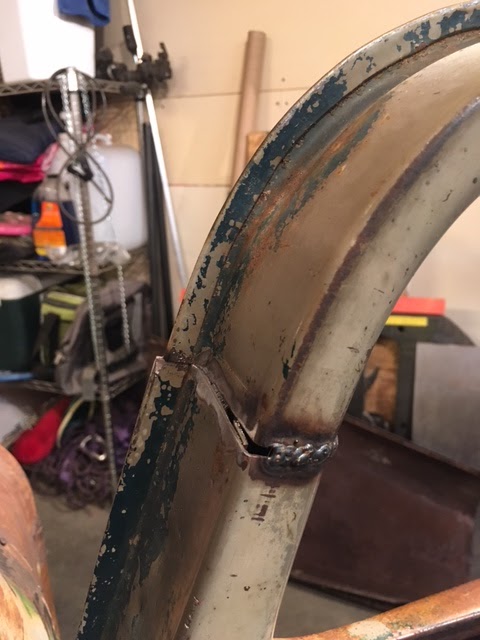
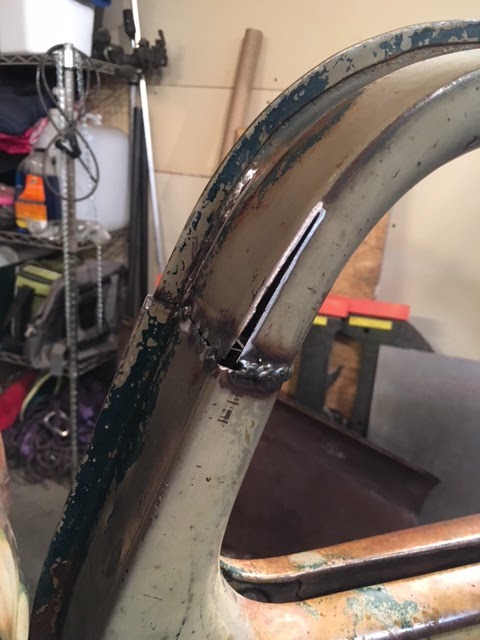
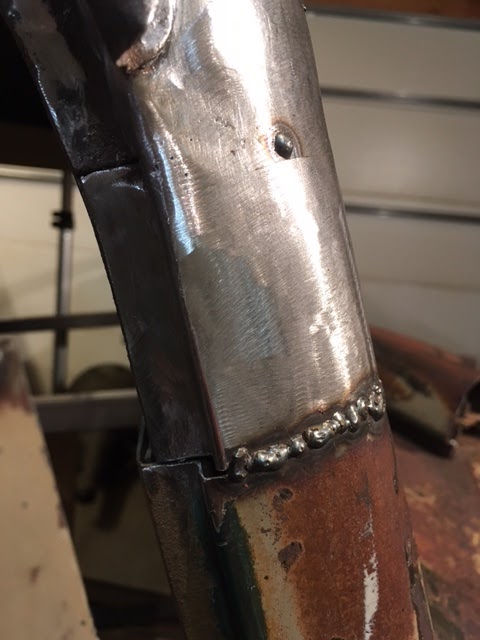
You could weld some 'gas welding rod' along the gap where it's too wide and then grind it down smooth, or hose clamp a stick or smooth rod onto the side of your wire feed stinger and use that as a guide so you can just weld a bead right along the edge of the door.
Good luck.
 
Thanks for the tips. A lot of my windshield opening issues were hidden but massive amounts of lead so, if you didn't pull the lead out, you may just not know that it's really like that down deep:D I was already planning to go get some 1/8 rod tonight to build up the door edges:) I have to do it anyway as the edges of the flanges don't line up after the chop. I'm not too worried about getting the gaps really nice as this isn't going to be a waxer by any stretch of the imagination but I would like them to look at least OK. One step at a time I guess!
 
I started on blending the A pillars last night. They're going to fight me a bit of coarse. I need to start shaping the upper edge of the door before I go much further though so that I can tell what exactly in need to do to get the gap around the end of the drip rail to look right. That's going to be the hardest part by far so we'll see what I end up needing to do to get it sorted out. Suggestions and tips are very welcome!

chop%2B101.JPG


chop%2B102.JPG


chop%2B106.JPG


You can really see the funky gap right at the end of the drip rail in this last pic. It looks a lot worse because I haven't formed the edge of the door yet though, so getting that done will be critical to sorting out what else I need to do.

chop%2B107.JPG
 

Latest posts

Back
Top