
You are using an out of date browser. It may not display this or other websites correctly.
You should upgrade or use an alternative browser.
You should upgrade or use an alternative browser.
36 Ford Bobber Build
- Thread starter willyD
- Start date
Help Support Rat Rods Rule:
This site may earn a commission from merchant affiliate
links, including eBay, Amazon, and others.
MercuryMac
Builder Junky!
WillyD, here's a philosophical observation. When I did mine I started out thinking I'd leave everything pretty rough, well, once I got a lot of hours into each mini project and it was coming nicely but a little rough yet, I said to myself 'I'll just put a couple more hours into this and smooth it out, people will be judging this one day'. --------I couldn't help myself, I had to smooth it out a little more. I'm glad I did it that way.
You might be the same way.
You might be the same way.
MercuryMac
Builder Junky!


MercuryMac
Builder Junky!

peabody
Well-known member
Here are some door gap shots, but they are not factory, as I said before. I am fairly proud of them.
You should be proud... they look perfect. [cl
Those gaps are impressive MM! You should indeed be proud of them! Man, I'm glad they aren't factory or I would be in trouble! Not that i have to be even as good as factory since it will be a patina rod with no filler and no fresh paint. The dents are worked out as much as I can but the panels are far from smooth and that's fine with me for this one.
MercuryMac
Builder Junky!
What I'm about to advise is not for delicate ears, so be ready to turn away, WillyD. I have used Camouflage dark brown paint mixed with red oxide primer to fake people out. After welding something up and grinding it down smooth it stands out a way too much on an otherwise old rusty metal surface, so Ultra-Flat Camouflage rattle cans may help you cover that newness with fake oldness. I've never tried the camo greens but they might be just the ticket for you.
Keep on tinkering.
Keep on tinkering.
The camo rattle cans are a great tip! I hadn't thought of them as good flat colors but they certainly are. I was kinda planning on using Smallfoot's technique of Scrubfree and then OSPHO on the ground out ares to force rust it then convert it. I'll have to play around with both and see what I like better. If I could find a rattle can with that old Ford off white and then some green over it I could try to fauxtina the ground out areas but the problem there is that the top of the roof is just rusty, no paint left so that wouldn't work there.
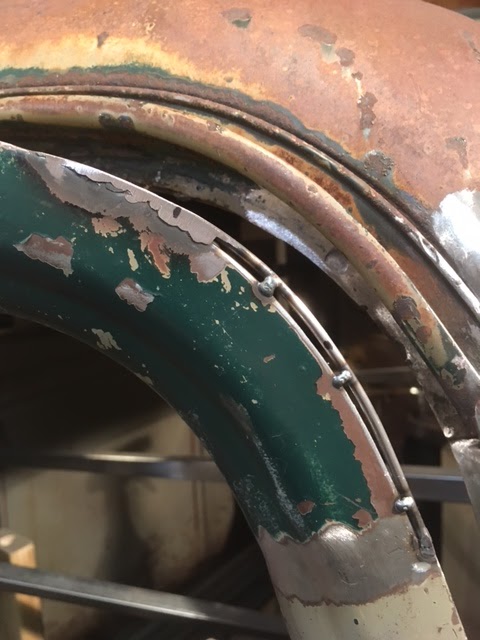
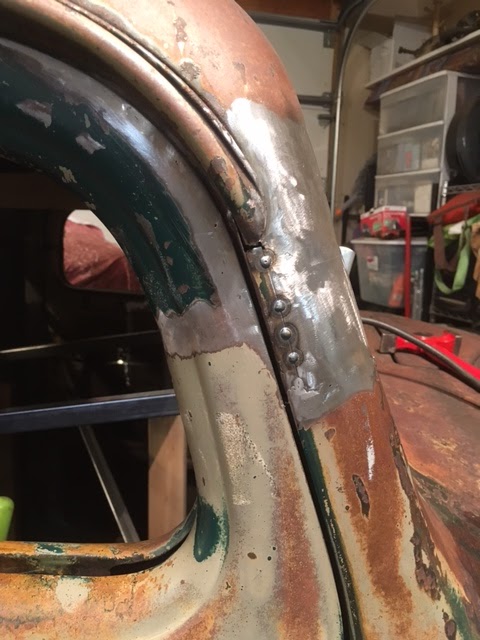
I started grinding out the doors so that I can blend the flange edges. I got the back edge of one door blended as well since that is the easiest of the edges to do. The grinding marks in the pics make some areas look dented that actually aren't so it looks straighter in real life.
Here's a tip that I figured out while grinding: Don't make relief cuts right on corners if possible. Make them back just far enough that you only have to grid on the flat rather than having to reshape the corner as that is quite difficult and easy to screw up.
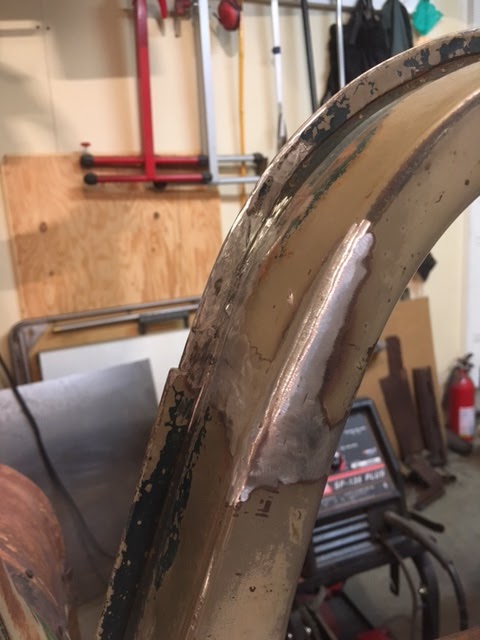
Here's a tip that I figured out while grinding: Don't make relief cuts right on corners if possible. Make them back just far enough that you only have to grid on the flat rather than having to reshape the corner as that is quite difficult and easy to screw up.
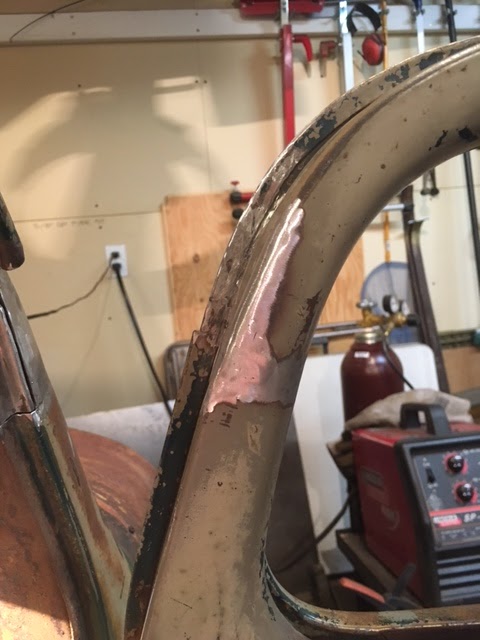
I got the front edge of the passenger side door blended. I used 1/8" mild steel rod to form the edge then welded in it solid and ground it down. I figured out only a little late that using a file for the finishing passes on the edge and for rounding the edge off is much easier than using the grinder with sanding pads as you can keep things much straighter with the file and you have a lot better control with it. Live and learn! The next one will go more smoothly!
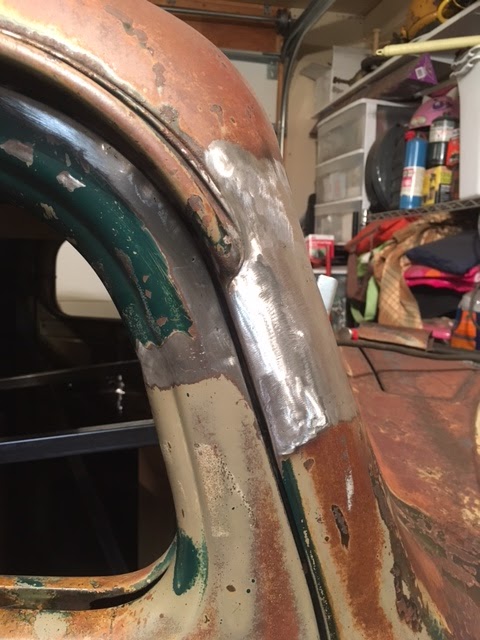
Now I just have to blend the little area near the end of the drip rail on the A pillar and finish up the rest of that pillar.
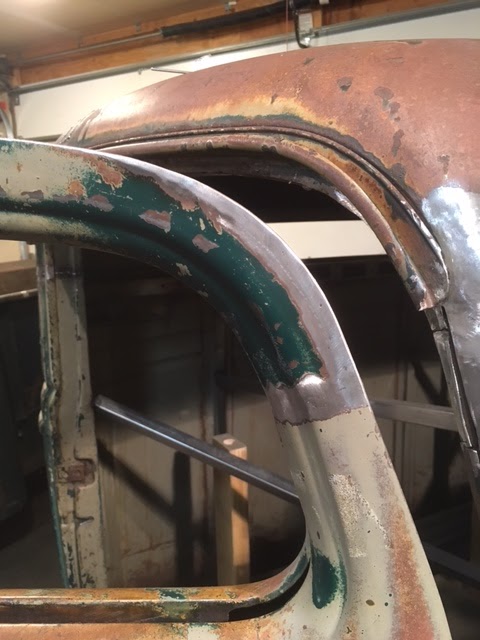
Now I just have to blend the little area near the end of the drip rail on the A pillar and finish up the rest of that pillar.
MercuryMac
Builder Junky!
Now you've gone and wrecked it Willy, You're going to have tell all the admirers that you chopped this cab and they'll probably argue with you that that looks 'factory'.  [
[
[sc5080
Well-known member
Great job on blending in the door edges. Looks fantastic.
smallfoot
He's rockin' the "Nuttin Special"!
Very nice work willyD!!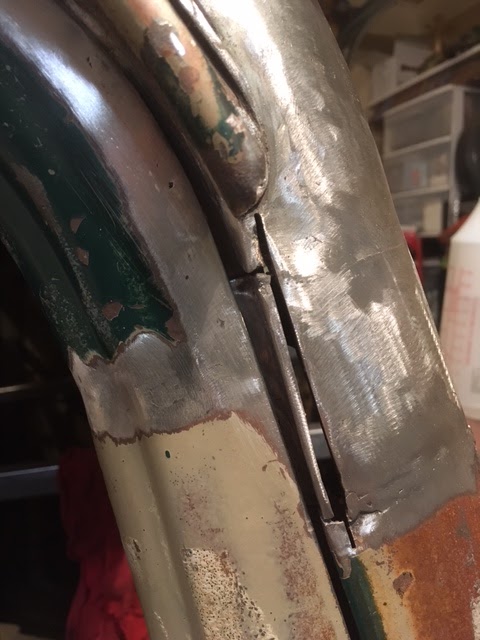
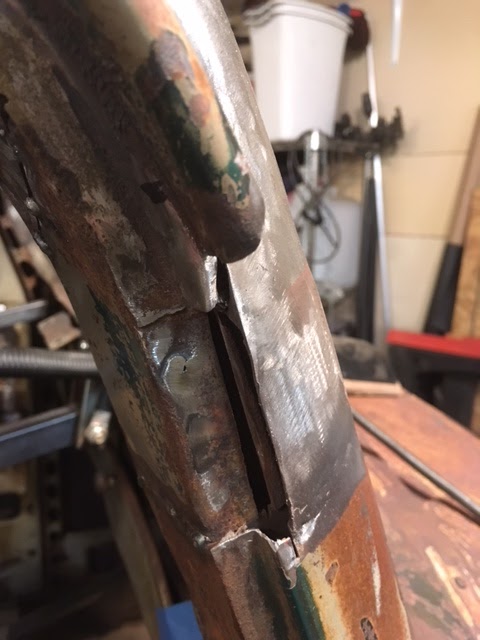
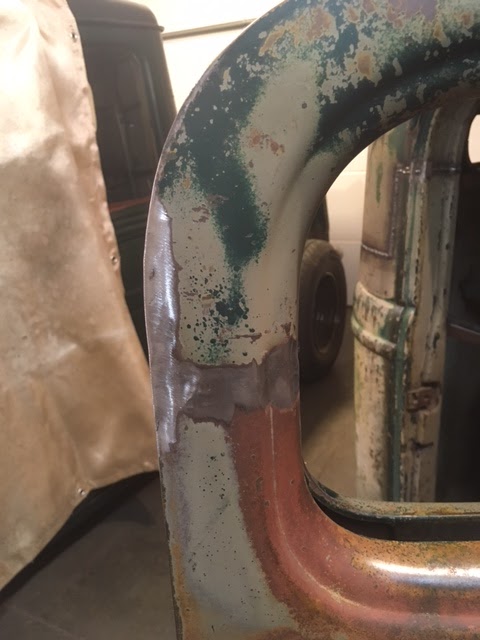
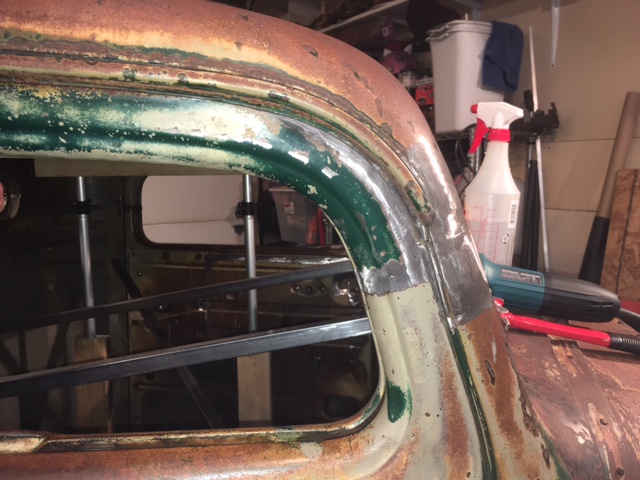
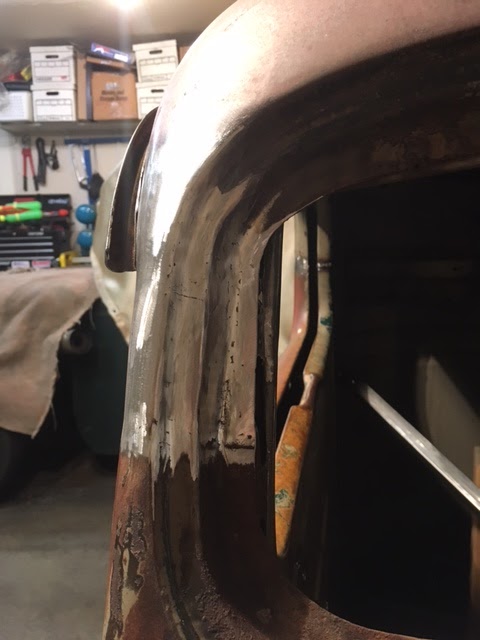
I worked on that little area around the end of the drip rail last night and I think I'm pretty happy with the way it's looking. Gotta weld it up, grind it out, and move on
The gaps in the pics look a little different than they do in real life. I think that's because of the grinder marks and the way the shadows show up...
peabody
Well-known member
[P. [P. [P
Anxiously waiting for the next installment of pictures for this build.
[cl[cl[dr
Anxiously waiting for the next installment of pictures for this build.
[cl[cl[dr
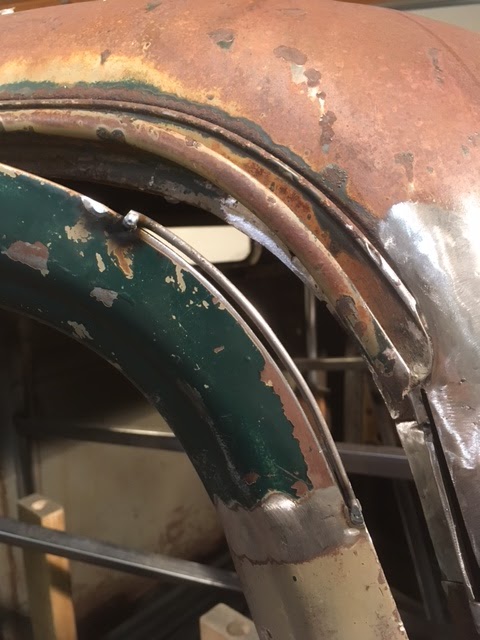
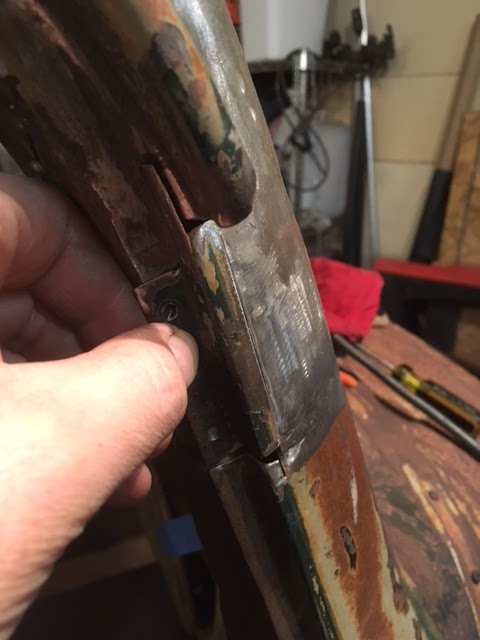
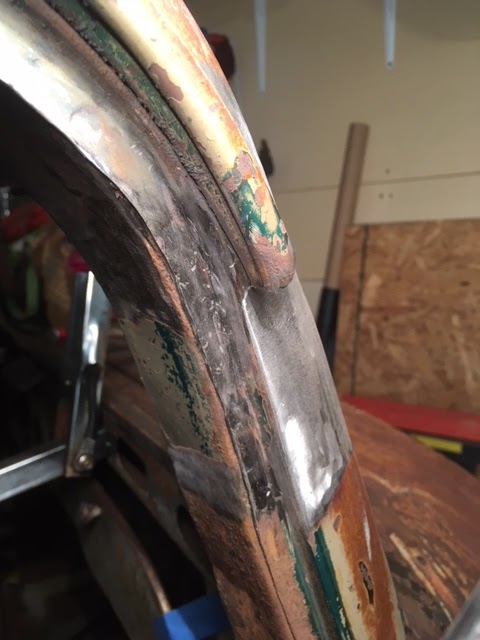
I finished up the passenger side A-pillar. Man, it's tricky grinding in those heavily contoured corners of the window and door openings! I think I'm mostly happy with the way it came out. I have to remind myself now and then that most guys will skim with a little filler (or a lot, as there was literally about a quarter inch of lead in this area from the factory) after grinding and then paint it. So getting stuff as smooth as I can without any filler is doing pretty good and likely better than most do with just the bare metal.
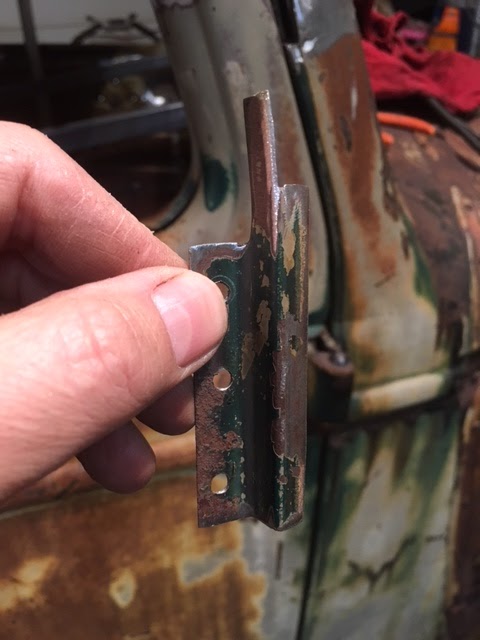
The first pic in the window opening shows a rust hole that had to be repaired and the terrible factory alignment of the inner flange (and my less than perfect cut )
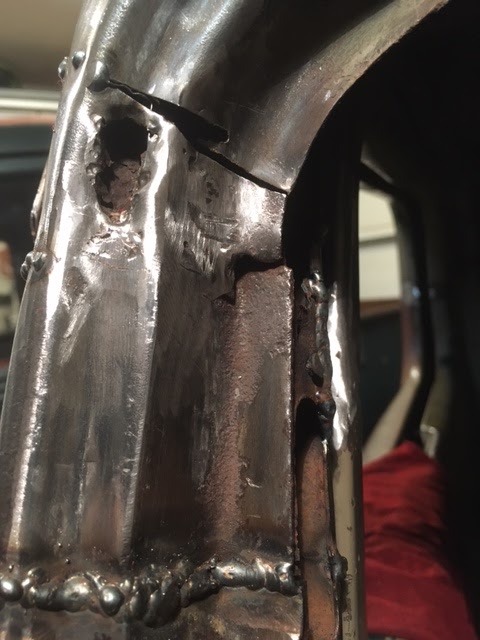
The first pic in the window opening shows a rust hole that had to be repaired and the terrible factory alignment of the inner flange (and my less than perfect cut
)
kenny c
Well-known member
You're making me jealous. Nice work.
MercuryMac
Builder Junky!
Whoaooooo! Willy.