
You are using an out of date browser. It may not display this or other websites correctly.
You should upgrade or use an alternative browser.
You should upgrade or use an alternative browser.
'65 Rover Half Cab
- Thread starter bob w
- Start date
Help Support Rat Rods Rule:
This site may earn a commission from merchant affiliate
links, including eBay, Amazon, and others.
Z.Z.Rat
Well-known member
I tell you that I'm envious that you can remember where / how all of that goes back together! WOW New frame sounds like the ticket.
bob w
Still crazy after all these years!

Well, the dragster is stored behind the garage for the winter. So I swung by the steel supply and got $270.00 worth of material to build the Rover frame.
4 pcs- 12' long 2" by 4" 11 ga. rectangular tubing
2 pcs- 7' long 2" by 6" 11 ga. rectangular tubing
2 pcs- 10' long 1/8" by 2" flat stock
bob w
Still crazy after all these years!

It would be nice if a Genii would appear and turn that stack of steel into a frame that resembles the original pictured here. Front left is the Mustang II crossmember that will be used.
sawzall
Well-known member
Just curious, Any progress on the rover frame?
bob w
Still crazy after all these years!

Hey sawzall, no action on the Rover frame yet. I've been concentrating on putting the Reo together.
Here's a little diversion. My friends Terry & Lee (Tator here on RRR) are finishing this chopped Model A coupe. It will be for sale soon.
bob w
Still crazy after all these years!

Trying to find the best front to back position for the front wheel. Put the cowl and front fender (after roughly straightening a huge dent) back on the original frame. There is a 4" tall rocker panel that runs under the rear of the fender, so it's not as up in the air as it appears in the pic. The bottom of the body will be about 7" above the ground. This wheel position is about 1 1/2" forward of the original location.
Dirtyrat
Got Fins?
It's really laying frame now =)
Snake Farm
Ol school snake charmer!
I think moving the wheel forward works well with the lower stance. 
[P[P[P
[P[P[P
bob w
Still crazy after all these years!
Mustang II Crossmember
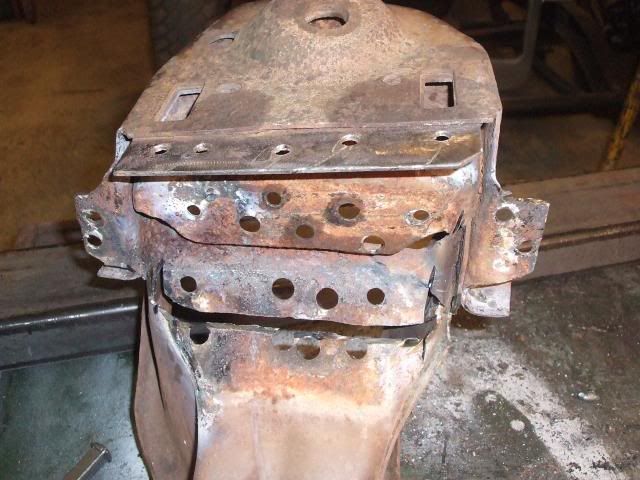
I spent about 4 hours removing the layers of unit body sheet metal by drilling out all the large spot welds. Lots of labor in a $20.00 crossmember. Then I made a horizontal cut and bent the rear metal in so the 2" by 4" frame stub will fit.
Yeah, DR, that's the middle of the frame laying on the floor. I can only bring the body down to about 7" because the frame under the middle of the body is 1 1/2" lower than the body. That gives me 5 1/2" of ground clearance with the rocker panels 7" off the ground.
bob w
Still crazy after all these years!
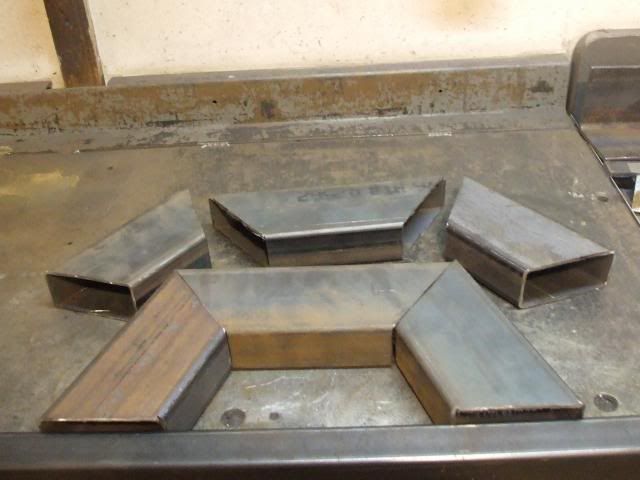
Front Frame Stubs
The front frame stubs fit as shown. The ends with the 45 degree cut will lay on top of the 2" by 6" frame effectively creating a 4" "Z".
The pieces will be sand blasted before welding. And a lot of measuring and bracing will assure it will be square is every direction.
This is the part of a build I really enjoy.
(This update starts on the end of Page 5)
Last edited:
bob w
Still crazy after all these years!
Slow News Day
I had Thanksgiving Day duties with 15 family members coming over to eat to excess. But I did sneak out to the garage and cut the pieces needed to go up, over and down around the rear axle. I used a 4 1/2" angle grinder with a thin cut off wheel.

I had Thanksgiving Day duties with 15 family members coming over to eat to excess. But I did sneak out to the garage and cut the pieces needed to go up, over and down around the rear axle. I used a 4 1/2" angle grinder with a thin cut off wheel.
bob w
Still crazy after all these years!

More cutting and fitting today. The MII crossmember slides back about 20" on the front frame members. The notch for rear axle clearance will be welded to the frame rail first then the center part will be cut away and capped.
Tomorrow, crossmembers.
bob w
Still crazy after all these years!

Front frame rails are narrower than the rest of the frame to match the MII crossmember. The rest of the frame is the width of the original Rover frame.
falconvan
Well-known member
Nice, Bob! You're whipping that baby out quick!
Dirtyrat
Got Fins?
Nice, Bob! You're whipping that baby out quick!
Agreed! looks like a production line there! [cl
icebox
Well-known member
I don't see how you can get all of that work done and still have a spotless shop. Frame is looking good.
bob w
Still crazy after all these years!

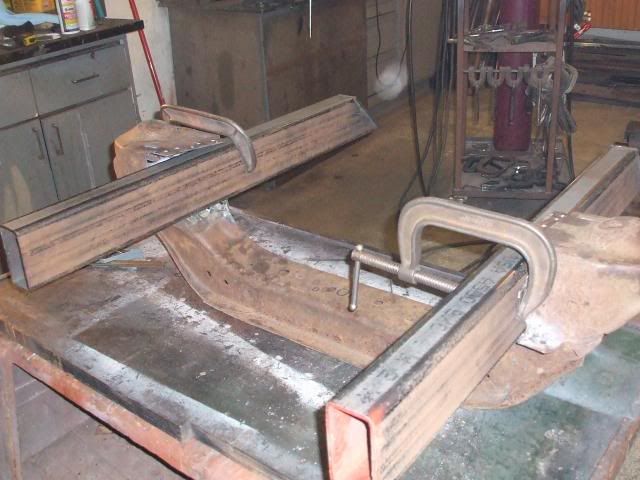
I don't have a frame table but I do have a couple wooden saw horses and some extra lengths of 2" by 4" rectangular tubing. I squared everything up and tacked some temporary crossmembers in.
bob w
Still crazy after all these years!

The front stub needs to be welded to the rest of the frame. I'll run a centerline string to position it correctly.
I had to renarrow the temporary crossmembers in the front stub twice to get it to slide into the MII crossmember.
Next will be the outriggers that pick up the body mounts.
The garage is far from neat. See all the crap on the bench. I did all the cutting with a few 4-1/2" abrasive discs and lots of grinding with a flap disc. Must have swept that crap off the floor 10 times. The little woman gets really perturbed if I track it in the house.