[cl[cl[cl

You are using an out of date browser. It may not display this or other websites correctly.
You should upgrade or use an alternative browser.
You should upgrade or use an alternative browser.
'34 Dodge Brothers, double build.
- Thread starter MercuryMac
- Start date
Help Support Rat Rods Rule:
This site may earn a commission from merchant affiliate
links, including eBay, Amazon, and others.
MercuryMac
Builder Junky!
Thank you Guys, for the vote of confidence. E-man, I think you've gone overboard imagineering a 'patina building guru' where there's just a cheap poorboy trying to 'somewhat' fool people.
Anyhow, I have finished the righthand fender, test fit it, and changed the running board to accept this second fender.
Anyhow, I have finished the righthand fender, test fit it, and changed the running board to accept this second fender.
MercuryMac
Builder Junky!
I took the box off [pic one], and flopped it on the shop floor, [pic two]. The floor was wowed down 4 1/4" in places, and the front was convexed 2 1/4". The front straightened out quite nicely. [pic three] is the box up-side-down and partly beat down [before I remembered to take a picture]. After I beat it down a lot, I turned the box over and started hammering the top side to smooth things out a bit. Now the floor is caved down a wee bit and the front of the floor broke away from it's moorings so I had to winch it back up with a 'ready-rod', and then weld it up, [pic four]. Since then, I have welded up some cracks and remade two new mounting holes.
Attachments


DozerII
Well-known member
Well it only took you four hours too beat out what it took the farmer forty years to beat in.  [P[P
[P[P
[P[POld Iron
Well-known member
Well it only took you four hours too beat out what it took the farmer forty years to beat in.
No kidding
Bamamav
Well-known member
Factory steel bed? Dodge was way ahead of the rest, weren’t they? I didn’t think anybody had a steel bed until the 50’s wide beds came out, learn sumpthing new every day.
Keep on beating on it Mac
Old Iron
Well-known member
[P[P[P
bob w
Still crazy after all these years!
Looks like you have been wielding the gas axe. Were you using it to make the dents and pokes more manageable?
MercuryMac
Builder Junky!
Bob, I'm more familiar with the acetylene welding and some of the cracks were wide and needed filling in. I did use the MIG underneath though quite a bit. On top I just used the gas so the weld bead is softer and I can grind it off somewhat with a flapper wheel.
Anyhow, today I got all of the top welded up and I'm working on straightening out one side which has bad 'loader rash'.
I filled up a pair of authentic Dodge Brothers shock absorbers and mounted them. That's when I discovered that I had mounted my lower shock brackets on back-to-front.
Anyhow, today I got all of the top welded up and I'm working on straightening out one side which has bad 'loader rash'.
I filled up a pair of authentic Dodge Brothers shock absorbers and mounted them. That's when I discovered that I had mounted my lower shock brackets on back-to-front.
Attachments

MercuryMac
Builder Junky!

DozerII
Well-known member
Amongst the social commitments we had today, I got in a wee bit of shop time. The picture will show that I straightened out the box side that was wowwed down badly at the back, [loader rash]. Then I painted it with my miracle 'patina' paint.
Making great progress MM. [P[P
MercuryMac
Builder Junky!
I have been trying to get a fuel sending unit and matching gauge that work together. The partsmen that I've encountered lately didn't see my concern so I've made a few trips to town. Now I've got a gauge that I can make work with the sender, so I measured the sender, cut the arms, and installed it.
The tank has been cleaned out and now installed.
The tank has been cleaned out and now installed.
Attachments


DozerII
Well-known member
The new generation of partsmen, just have no idea how to think out of the box.[S
MercuryMac
Builder Junky!
To compound my frustration, Dozer, there was nothing written on the reams of paper that comes with the parts to tell you what ohms of resistance either one had or needed.
Anyhow, I got some more details built in now. There is an electric fuel pump plumbed up, and the filler tube is made and installed.
Anyhow, I got some more details built in now. There is an electric fuel pump plumbed up, and the filler tube is made and installed.
Attachments


Old Iron
Well-known member
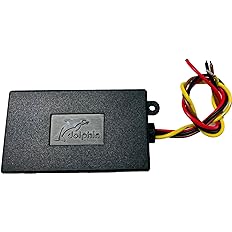
MM they make a module that will adapt any sender to any gauge. Dolphin for one and they're around $40To compound my frustration, Dozer, there was nothing written on the reams of paper that comes with the parts to tell you what ohms of resistance either one had or needed.
Anyhow, I got some more details built in now. There is an electric fuel pump plumbed up, and the filler tube is made and installed.
https://www.amazon.com/Dolphin-Gaug...13&mcid=946d8d01d7f839738402242f16af5795&th=1
I've quit trying to find senders to match gauges anymore and just get one of these. This works even if ya don't know the ohm's of either gauge or sender.
Old Iron
Well-known member
MercuryMac
Builder Junky!
Thank you OI, that is GOOD information.
Today was 'tailgate' day. I straightened it somewhat, mounted the Dodge Brothers logo on the back of it, and made chains with hooks on them to hold the tailgate closed or open, flat. All these changes were then camouflaged to look like I never touched them.
You'll see in the second picture that I drew out where I wanted my logo, bored a bunch of holes, clamped the logo on the back of the tailgate in the same position, and welded the holes full.
Attachments


earthman
Fascinated by rolling objects!
We have thumbs up now