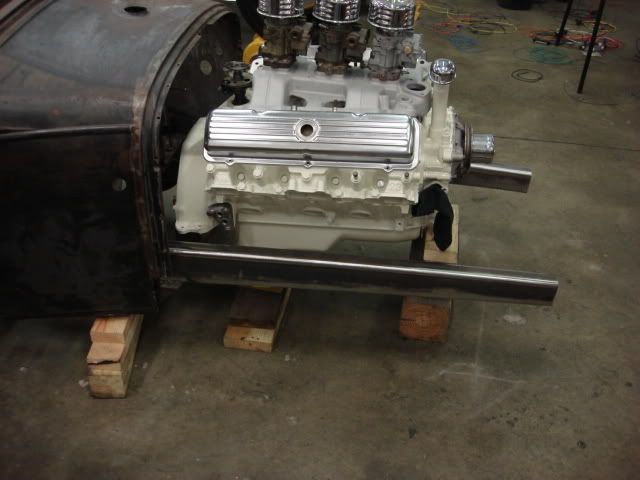
Roadster pickup from leftovers.

Rat Rods Rule

Help Support Rat Rods Rule:

This site may earn a commission from merchant affiliate links, including eBay, Amazon, and others.

donsrods

Well-known member
Joined
May 11, 2007
Messages
10,476
Location
fort myers florida
It's going to take me a while to post all the pictures, so please bear with me, guys. :)

First of all, I really can take very little credit for a lot of this car. My Son Dan built most of it, but he tends to change his mind a lot, cut stuff up, and start over. He's kind of a perfectionist and if he sees something he doesn't like he gets out the sawzall and a lot of work gets scrapped. That is how I ended up with a lot of the parts for my current project, a 1929 Ford Murray roadster pickup.

About 5 years ago, maybe 6, Dan started building a Fordor sedan. He built a custom airbagged chassis for it, chopped it 6 inches, and channeled it another 6. It was coming along pretty well, and here is how it looked:
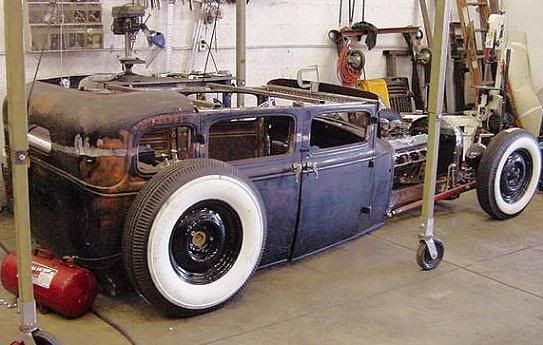
dansfordorsideview-2.jpg


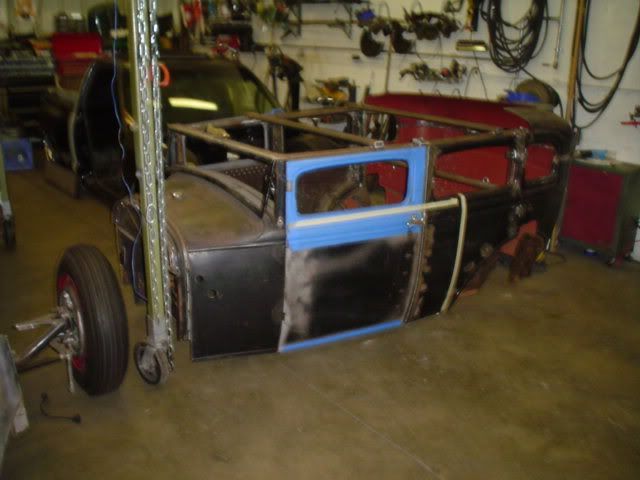
But then he found a nicer Tudor body that came out of Missouri and bought it, which made him decide he didn't need TWO sedans, so he decided to turn the Fordor body into a roadster pickup. One day I came to the shop and he had taped up lines on the Fordor body and he started cutting away everything that didn't look like a roadster.:eek:
dansfordorstartingtocutup.jpg


(My photobucket is running very slow today, so this might take a while and a few posts, sorry)


What he did was cut off everything behind the front doors and make a new inner structure from box tubing. It took a lot of bending and forming, but here is what that stucture looks like:
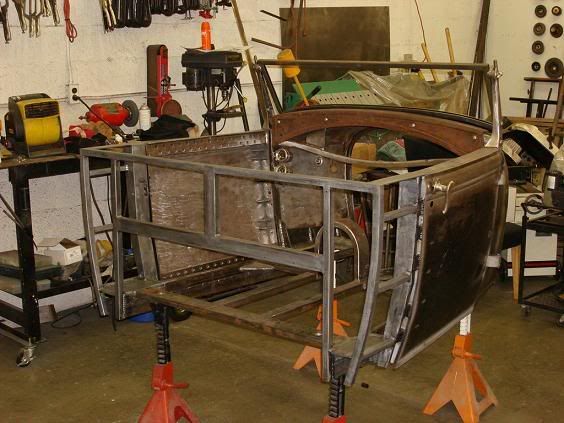
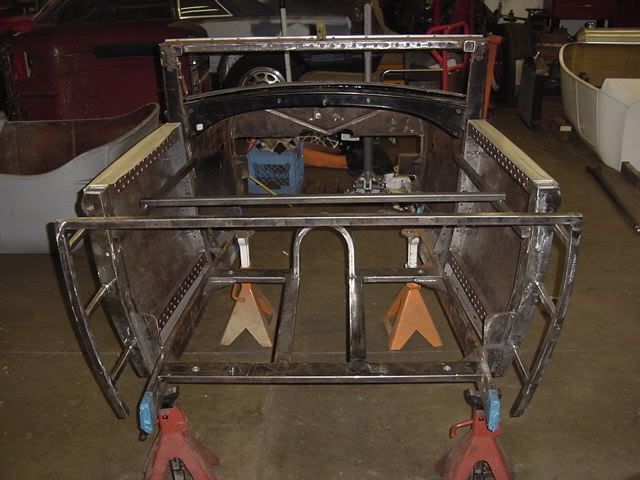
dansfordorstartingtocutup4.jpg


dansfordorstartingtocutup3.jpg


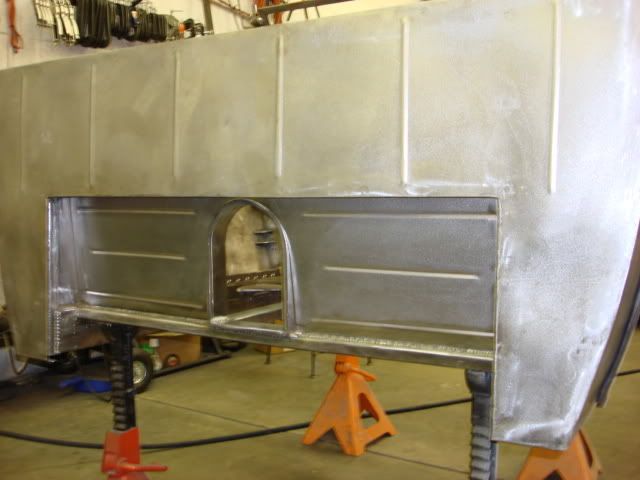
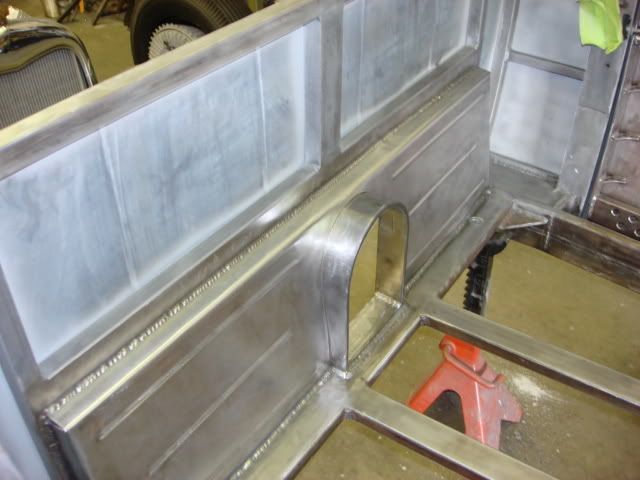
Once that was done he made skins out of sheet metal to form the back part of the body.
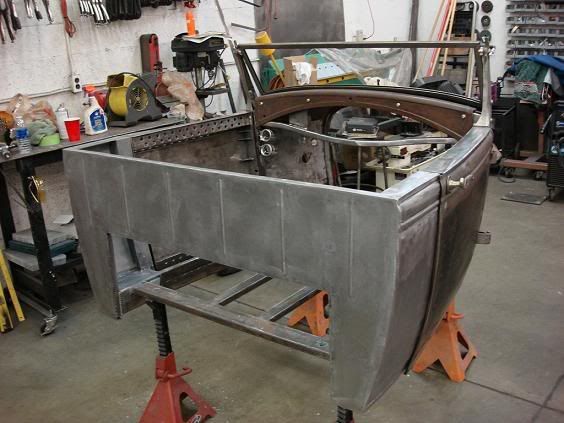
dansfordorstartingtocutup7.jpg


dansfordorstartingtocutup6.jpg


dansfordorstartingtocutup5.jpg
 
Last edited:
While he was at it he didn't like the old windshield, since it was basically a cut off Tudor windshield, so he cut that off and grafted on real 29 roadster windshield posts and 32 Ford windshield frame. The car was coming along pretty well, and he built a bed for it and a tonneau cover that we sent off to Orlando to have 224 louvers punched in. Once it was all assembled it was starting to look like a car finally:

dansbedlowered.jpg


Dan was actually looking happy with the way it was coming out.

dansittinghisRP.jpg


At that point we were starting to talk about paint and that the car would actually be done in time for Turkey Run in Daytona on Thanksgiving. He had about 2 years in the car at this point. Then one day while we were at the shop I saw Dan sitting in a chair, staring at his car. I never like it when Dan stares because it means something is going to change. When I asked him what was up he said "I'm going to make a few changes to my car." I said "WHAT KIND OF CHANGES?" and he said " The kind that will make me miss having it done for Turkey Run !":eek:

So, what he did was pull the body off of the frame, strip the car down, and then he cut the frame up into a bunch of small pieces. He said he just didn't like the way the car looked. He jokes that the frame became the worlds most expensive engine stand. :D

Long story short, we built a totally new frame and he started completely in a different direction. This one was more traditional, no more air suspension, and the only things he kept from the old car was the Olds engine, transmission, and the rpu body he had built. This is the frame he ended up building and is the one he is currently using:

dansnewframeoutofjig3.jpg


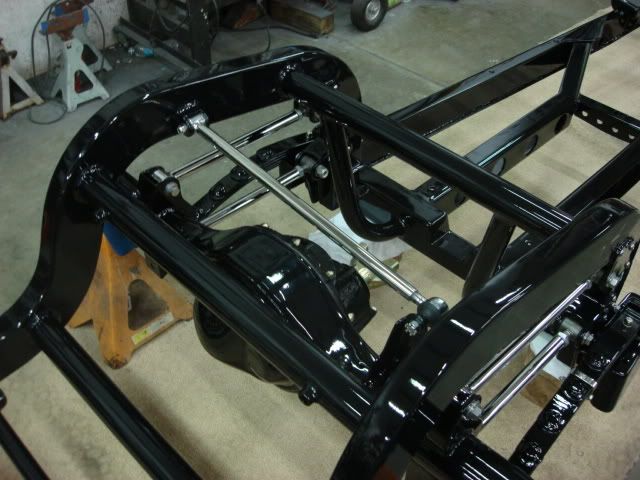
And how it looked once powder coated:

dansframestartingtoassemble004.jpg


It came out really nice, much better than the first frame, but that became a problem. Now the frame and running gear were too nice to use the old rpu homebuilt body. So Dan decided to order a new Brookville body and bed, and no longer needed the first body. That is where I came in. I wasn't going to see something he put so much work into go unused, and I really liked the body, so I pushed it over to my side of the shop. (I THINK I asked his permission first.:D)

It has been sitting there for the past few years while we wrapped up his rpu and then I redid my old 27 and got it back on the road, but I always couldn't wait to get started on building a simple rpu from the parts I stole, er, borrowed, from Dan. Last fall I started on it, but then we decided to put the push on getting Dan's car done in time for Billetproof, so I put mine on the back burner.

That brings us up to today. We did make Billetproof in his car, and now it is my turn to finish building the hot rod I want to make from his old body. I also scored his louvered tonneau cover and a bunch of other parts he didn't want. I also had a stash of parts left over from various projects, like a 406 CI Olds engine, TH350 transmission, and stuff like that. That is why I call this one "Project Leftovers".

When I recover from all this typing and picture posting, and get back from dropping off some of Dan's engine parts at the machine shop, I'll continue this thread and bring you all up to date.

Thanks for looking,

Don
 
Last edited:
If your son has any other cars he starts and then wants to scrap or redo, I'd be more than happy to have them! Great work!:D
 
DoubleJ, you'd have to get in line. I'm ready at all times to pounce on stuff he doesn't want any more. :D The other night he and I were sitting having a cold one at the end of the night and I started mentioning all the parts I don't need to buy for this build because I have them already. Then I realized MOST OF THEM CAME FROM HIS PROJECTS! :D I figure I'm just getting even with him for all those times he stole my Playboy magazines when he was young.:p

rainman............I think he got it from him Mom. She is just "perfect", which is why she left me, I guess. :D (Well, that, and the hidden stash of car part receipts):eek:

Anyway, once I got back on building the rpu I knew what look I wanted. This one will be a little rough around the edges, I want it to look like it has been around for a long time. I will probably age the paint a little and leave the body not so perfect. It will look like an old drag altered with a Moon tank up front, skinnies up front and Firestone 8 inch slicks out back. Might even run hubcaps.......I have a set of 56 Olds caps (not the spinners) that I might use. As for color, I haven't had a red car in years, so it might be satin red, not shiny.

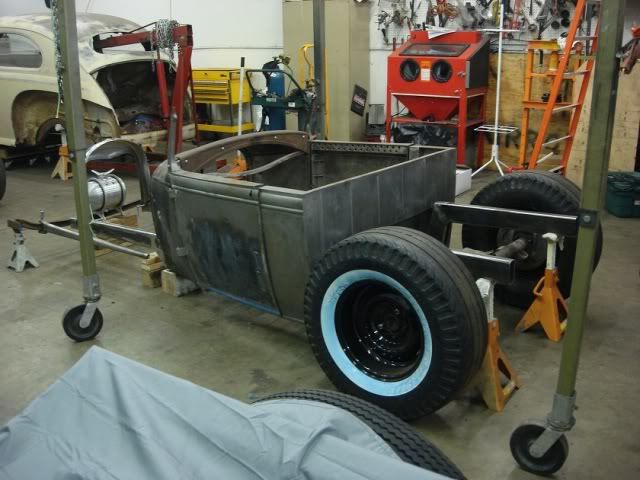
Here is the first mockup I did to get an idea of what it would look like.

myrpumockupnewframe015.jpg


and the rear view. It will have a very short bed, only big enough to hold the radiator (yep, going to have the radiator in back and an empty Model A shell up front), a gas tank, and battery.

myrpumockupnewframe018.jpg


I was going to use a 4 inch dropped SuperBell up front but it looked too new, so I found a NOS 1934 Ford undropped axle on Ebay and am going to run that suicided with Speedway wishbones.
 
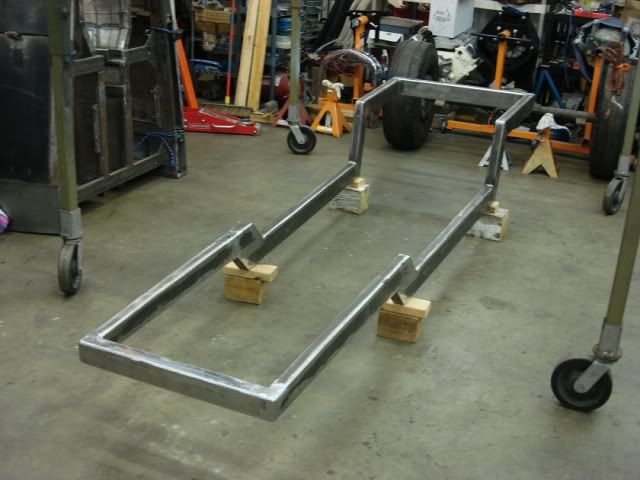
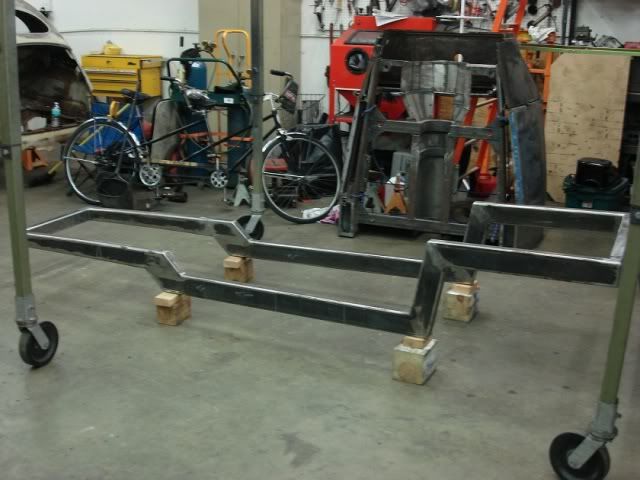
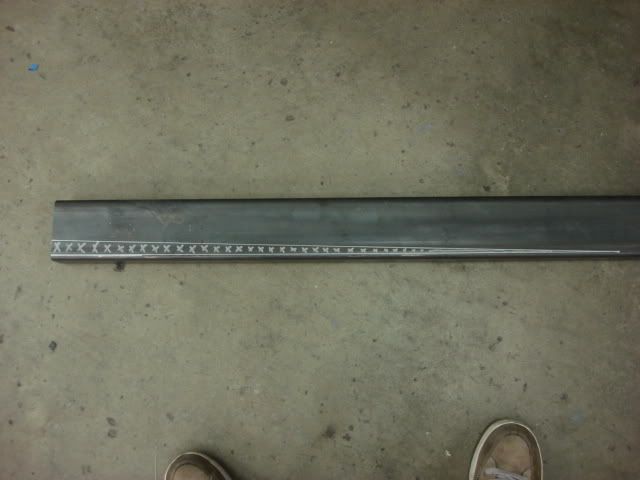
As you can see in the previous pictures, we made up a set of side rails out of 2 x 4 x 3/16 wall box tubing. It has a 4 inch kickup in front and a 16 inch kickup in the back. I cut a pie shaped piece out of the front part so it tapers down from 4 inches to 3 inches in the front. Makes it look a little less boxy and also allows me to use a 2 x 3 inch piece of box tubing for the front crossmember.

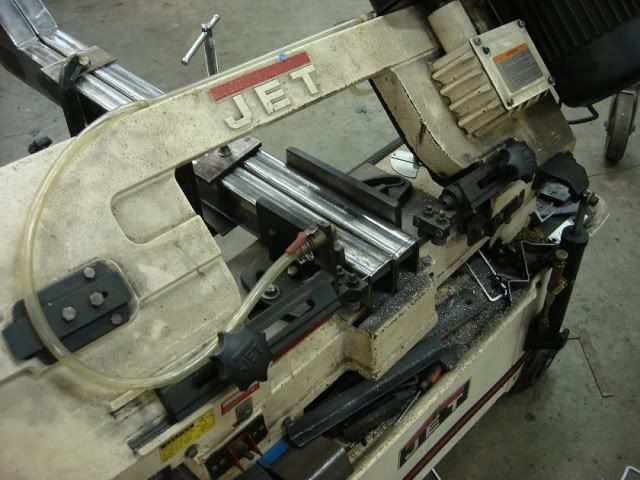
Once the rails were welded up they had pulled a little from all the welding, so we did some tweaking until each side was exactly the same as the other side, then we put it in the bandsaw to make both sides exactly the same length overall.

myrpumoreframework003.jpg


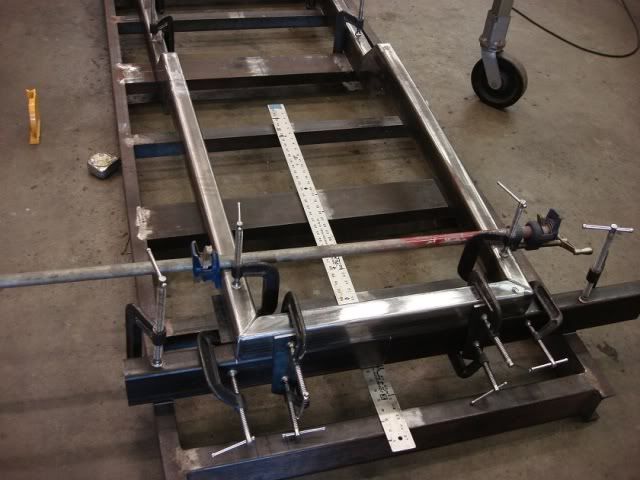
Then we clamped both rails into our jig and cut front and rear crossmembers to fit.

myrpuframecrossmembersin001-1.jpg


Once everything was secure and straight, we welded in both crossmembers.

myrpuframecrossmembersin003-1.jpg


It is now officiallly a frame.:D

myrpuframecrossmembersin004-1.jpg


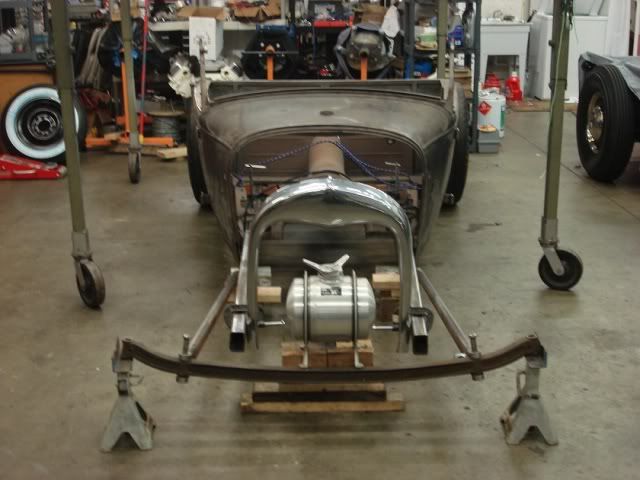
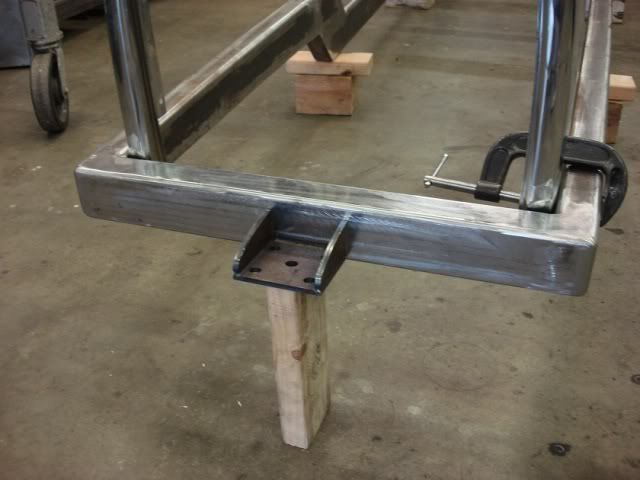
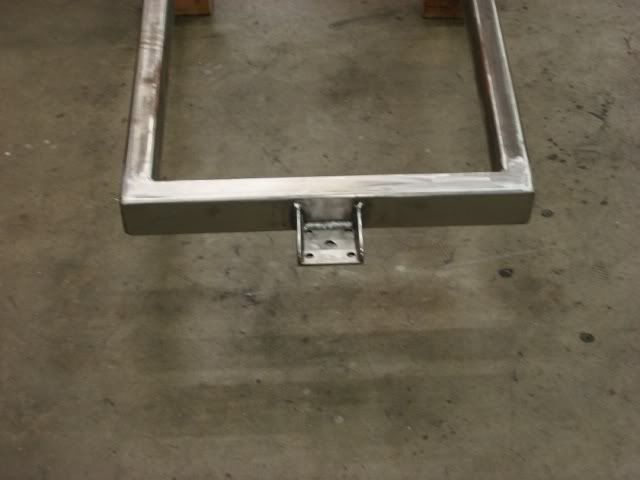
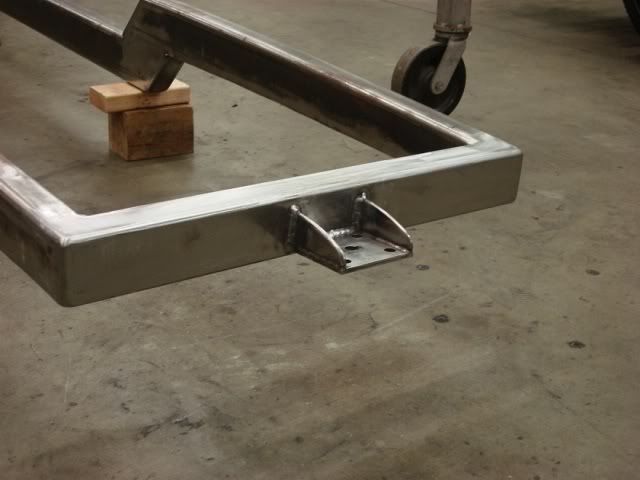
I still need to make some additional crossmembers, but first I need to hang the front end to see how it sits. To do that I needed a front spring perch and rather than make up one from flat stock I had a Total Performance perch in the shop that I cut up to work. I went by the shop after I dropped off Dan's engine parts at the machine shop today, and chucked the perch in the bandsaw and cut off what I didn't need. (It was made for a round tube crossmember, but we are just going to weld the end of it to the square crossmember)

010.jpg


So that is where the car sits right now. I'll get Dan to weld the front perch on for me one night this week, then I can start bolting on the front suspension and see what I need to do there . .

Thanks for looking.


Don
 
Last edited:
Thanks guys. Yep, 42Chevy, having a Son who welds better than I can sure does come in handy. I used to have to pay some pro to do it, now I get it done for the cost of lunch. :D

Don
 
That body is amazing! Love the plans you have Don. Another wonderful build thread to follow and enjoy.
402471-1.gif
 
DoubleJ, donsrods/myrpumockupnewframe015.jpg[/IMG]


and the rear view. It will have a very short bed, only big enough to hold the radiator (yep, going to have the radiator in back and an empty Model A shell up front), a gas tank, and battery.

myrpumockupnewframe018.jpg


.

Radiator in the back , empty grill shell up front , man your killin me . This is gonna be "the one". Might even top the " other one '
 

Attachments

  • Dons low T bucket.jpg
    Dons low T bucket.jpg
    70.6 KB
Bob is just the best ! :D Thank you Sir. :)

Also, thank you Paul, Tim, and Rat IHC for the nice words. Actually, this one is going to have some rough edges, by design. What I am trying to do is kind of replicate the very first hot rod I built, back in 1969. It was a 32 Ford pickup that was chopped when I got the body, and when I sat in it the roof was so low my head touched it. One day I was sitting in it and the spot welds broke and the top popped up, so I took it off and made it a rpu.

I had very little equipment back then, and hardly any money, so I used a 1939 Ford frame that I modified, and my older neighbor, who worked in the local steel mill, took it to work with him and they welded it all up for me. He told me they had to sneak it in, so they put it in a field and had a buddy pick it up and put it on a railroad car and move it inside the mill. When it was done they reversed the process, and hid it back in the field until the end of his shift. He brought it to me all machine welded and done. :D Who knew US Steel was in the hot rod business. :D

I found a completely built and totally chromed 371 Olds engine that came out of a California show car. It had a Cad/LaSalle stick transmission behind it, and was one wicked engine. How I got it (for $ 175.00 :eek:) was that a local bodyshop owner traded a 64 Vette for the 32 Ford that the engine was in, and he was converting over to a 427 Chevy in the Deuce. Nobody wanted Olds engines in 1969, except for some of us who liked old timey hot rods, so I got the steal of the century. Wish I had that engine and transmission today.

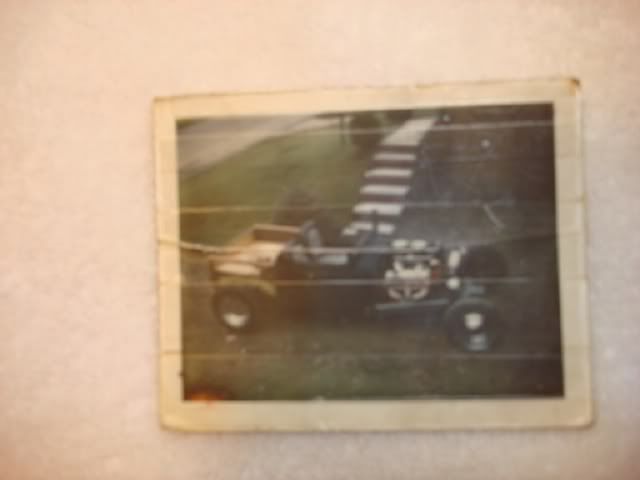
Here is a picture of that old rpu from 1969. It is a lousy polaroid but is all I have left from that car.

myoldpickup-1.jpg


That is what I am trying to recreate somewhat with this car. This one will have some of the elements of that one, but will be better built because I have learned a couple of things since 1969 and have better tools to build it with.

Yesterday, the last thing I posted was that I had cut out the front perch and was waiting for my Son Dan to weld it on for me. Tonight when he got home from work he offered to go to the shop with me, and we got that done. He spent some time beveling the edges to get good weld penetration, and also to clean up the corners to look better. Then we got it welded on.

Tomorrow I am going to start going through my stash to see what all I have for the front end, and what I need to buy yet. With this perch now in place I can take the next step and start bolting on the spring, axles, and wishbones to see where everything goes and fits.

Here are a couple of pictures from tonight:

myrpufrontperchweldedon002.jpg


myrpufrontperchweldedon003.jpg


Don
 
Mind, Jim? No way, thanks for the interest in asking. :)

The main frame rails are 2 x 4 x 3/16 wall tubing. I cut a pie shaped piece 36 inches long x 1 inch out of the front rails and tapered them down from 4 inches in back to 3 inches up front. I just felt that running 4 inch all the way would look too boxy up front, so I made that alteration. Now, the front crossmember is also 2 x 3 x 3/16 to conform to the size the front edges of the tapered rails ended up at.

Hope that is clear.

Don


Here, Jim, I found a couple of pictures that might show it better. The first on is where I marked off the 1 inch x 36 inch pie shaped area to be cut out.

taperingframerail002.jpg


And this picture shows the taper from 4 to 3 inches after welding up the pie shaped cut out. It just makes it look a little more graceful than having 4 inches all the way up IMO.

moreworkonrpuframe008.jpg
 
Last edited:
those welds on the original tub are mint, migged or tigged?

They are migged. He has a tig also, but has never taken the time to learn to use it yet. He just feels so comfortable with the mig that he uses it for everything. I wish he would start playing with the tig, I have a few projects in mind that would look great tigged. :D

boost_addict, do the rest of the family keep you busy with projects?

Don
 

Latest posts

Back
Top