This is my first chop so here goes nothing. Done a lot of reading on it and video watching.Front the front it looks like the tape is different but I just cut in the other side of the tape on the left side.5" inches total off the top!

You are using an out of date browser. It may not display this or other websites correctly.
You should upgrade or use an alternative browser.
You should upgrade or use an alternative browser.
'51 F1 Roof Chop 1st timer!!
- Thread starter Hunter1
- Start date
Help Support Rat Rods Rule:
This site may earn a commission from merchant affiliate
links, including eBay, Amazon, and others.


J
justsomeguy
Guest
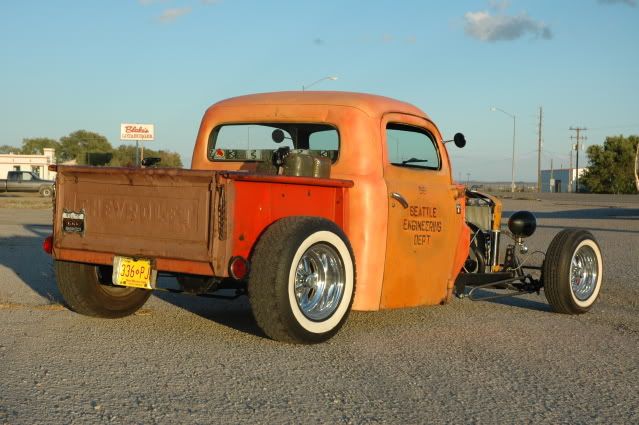
That back window looks a LOT wider than my 48's does.
skull
''SARCASM: just one of his many talents.''
behind
WOW,when driving, one can see what's behind ya, won't be a blind spot in that cab [cl
l like it.
Later
WOW,when driving, one can see what's behind ya, won't be a blind spot in that cab [cl
l like it.
Later
dmw56
Busted and Rusted on Route 66
That back window looks a LOT wider than my 48's does.
That's because it is. 51-52 had the bigger window.
skull
''SARCASM: just one of his many talents.''
cab
little off topic but,,,
dmw56, how did a cab with seattle on the door end up in new mexico [S
Later
little off topic but,,,
dmw56, how did a cab with seattle on the door end up in new mexico [S
Later
dmw56
Busted and Rusted on Route 66
little off topic but,,,
dmw56, how did a cab with seattle on the door end up in new mexico [S
Later
I bought the cab in 2008 in Colorado. Lots of things happen in 57 years.
J
justsomeguy
Guest
Good point. I did not realize the winders changed with the cab years on those. I actually like that cab better...
Well started at 9am today and took a hour lunch break. This is what I got done. In one of the pictures, the right rear looks distorted. I went back and cut it again to fix it. It worked, but I didn't get a picture of it after I was done.Any advice in lining the front roof section back up with the rear?
Attachments


HOT40ROD
Well-known member


dmw56
Busted and Rusted on Route 66
Mine was only a 4" chop so it wasn't out of alignment as much. I just made a relief cut in the top corner of the winshield and moved the post out. You might have to cut a V in the bottom corner also and move the bottom of the post in to meet the top.
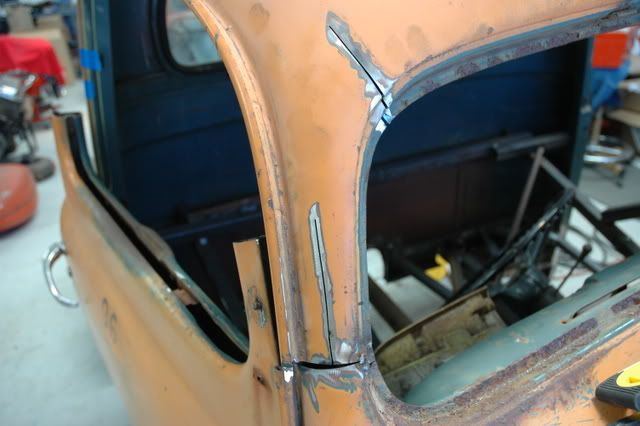
Got a little more done this afternoon. The drives side roof is not lining up as good as the left side. I think with a relief cut it will be perfect.I will get better pictures.
Attachments


dmw56
Busted and Rusted on Route 66
Looks good. Use the pieces you cut out of the A-pilar to fill in the roof above the doors. The will needto be modifid a littl but the gutter part is the same.
That's what I'm planning on doing. I read you whole build before I started mine. I made sure to save them after seeing how you used yours. This sheet metal sure is for sure a art form! Also got my tires in yesterday. I need to get a picture of them. Front and Rear 670-15 (28.5 Tall,4.5 wide,WW 3 1/4) Firestones. Super pumped about them. I trying to find a used set of rims for them. Steelies 15x5inch 4.5 bolt patern 5 lug. Any ideas where to get them cheaper than buying them brand new from summit. Might would run 6 inch wide rims. Just trying to keep a slim profile look.
Attachments

Old Iron
Well-known member
Looks like you didn't start in the middle of the roof and work to the sides to me
Jim
Jim
I started on the passenger side of the truck with a 2 inch wide strip. I got to cut another small strip (2inches wide) to finish it on the driver side. I will get some better pictures today of the chop. Think I should have started in the middle? My brother in law and I were thinking start to one side that way there was only one piece to weld in. The metal wasnt long enough to make it all the way across. I will let yall know how it works out.[P
Pictures
Attachments
-
 IMG_0210.JPG28.6 KB · Views: 17
 -
 IMG_0216.JPG76.5 KB · Views: 21
 -
 IMG_0215.JPG117 KB · Views: 17
 -
 IMG_0214.JPG105.4 KB · Views: 18
 -
 IMG_0213.JPG67.4 KB · Views: 21
 -
 IMG_0212.JPG64.4 KB · Views: 19
 -
 IMG_0209.JPG72.7 KB · Views: 20
 -
 IMG_0208.JPG77.4 KB · Views: 20
 -
 IMG_0207.JPG101.5 KB · Views: 19
 -
 IMG_0206.JPG42.3 KB · Views: 23


Well worked a little this morning on the truck. I got the drip rails on and the rest of the roof filled in. Now just need to do all the tacks so I can grind the roof smooth. The passenger side "A" post is giving me issues right now. I think I cut to much out of the post so I will need to fill in about a 1/4inch.[S Learning for sure. I think I can use some of the old post I cut out to make up for that 1/4 inch. Once the post is set then comes tack after tack!! pretty happy with it so far


Similar threads
- Replies
- 13
- Views
- 3K
- Replies
- 0
- Views
- 2K