Another New guy with ?

Rat Rods Rule

Help Support Rat Rods Rule:

This site may earn a commission from merchant affiliate links, including eBay, Amazon, and others.
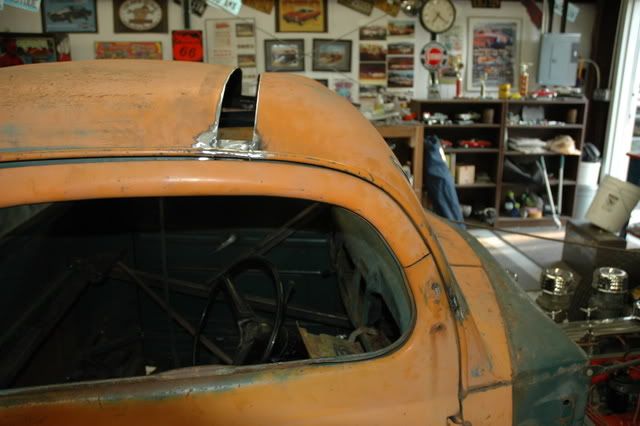
Oh! Also, I made a bunch of pieces of my roof. I quartered it and then removed my rear window in one piece and also my cab-clearance-lights-panel-section in one piece. That's six seperate original sections and a LOT of smaller filler strips. Yes, this was/is a LOT of work, but I have made absolutely NO relief cuts. Everything lines up and I should be able to have functional roll-up side windows.
 
Remember, there is more than one way to skin a cat! This is just what worked for me when I chopped my Chevy so I did it again when I chopped my GMC. You may want to get comfortable, I have a tendency to be long winded. [P

First off, I cut the rear of the cab first. That way, the roof is loose after making the first a-post cut, allowing you to test fit the roof even before you make the lower a-post cut.

Now to the posts. The idea is to find the two areas that have or are closest to having the same circumference after the cuts have been made. In other words, after the initial two cuts have been made and your section removed, you want the roof and a-post to line back up as closely as possible so as to save you a lot of work. If you look at the a-posts from the front, just by eyeing it you can usually see the points that look to be the same circumference. To be sure, you can use a flexible seamstress tape to measure the circumference of both areas. Using a combination square, mark the upper cut line all of the way around the post making sure the line is square to the post assuring that the cut won't be crooked. Next, if you are doing a 5" chop for instance, measure down three or so inches from the upper cut line and mark your cut line all of the way around the post, again making sure the line is square to the post. By doing this, you leave enough post to trim away little by little while test fitting your roof until you are happy with the fit. It's way easier to take metal off than it is to put it back on! Stare at the posts for a while, mark them up as much as needed and take your time. Measure, measure and measure! [;)
 
Great posts guys, thank you! It really helped me see what I need to do now to make it work. I will get started on bracing it up and measuring the cuts out. I will post some pics of the measured out cab before I make some cuts [;)

Last night I finally got started, I worked on the rust on the drivers side door. I finally broke into the metal ;). The guy at the metal shop sold me 16g metal instead of 18g :confused: . So, I have to wait to get more metal before I can get going on working on the patch. It feels good to finally see sparks fly.
 

Attachments

  • IMG_2965.jpg
    IMG_2965.jpg
    63.4 KB · Views: 18
  • IMG_2966.jpg
    IMG_2966.jpg
    52.5 KB · Views: 14
  • IMG_2967.jpg
    IMG_2967.jpg
    52.4 KB · Views: 16
  • IMG_2964.jpg
    IMG_2964.jpg
    41 KB · Views: 19
You can use the 16ga for some areas if you do it right. You would need to use a magnet to hold the filler piece in place with the front of the two pieces flush. It will stick out a bit on the backside, but who cares?

I would recommend buying more than you think you will need. The cost of it is (or at least *should*) insignifigant compared to running out on a Saturday morning and being at a stand still all weekend...

Did you get your welder yet?
 
Looks like a good project. To bad you're not closer.

Man you have no idea how I wished i lived closer to you. I really could learn a lot from you. I come to ABQ, I hope we can meet up someday.

You can use the 16ga for some areas if you do it right. You would need to use a magnet to hold the filler piece in place with the front of the two pieces flush. It will stick out a bit on the backside, but who cares?

I would recommend buying more than you think you will need. The cost of it is (or at least *should*) insignifigant compared to running out on a Saturday morning and being at a stand still all weekend...

Did you get your welder yet?

Good points thank you. I never thought about the magnet. I can see how that would help out. Thank you for the great tips. YOu are right about needing everything on sunday, thats how my luck is [ddd

I have not gotten a 230V welder yet. All the ones I was looking at someone bought. :confused: Day late and a dollar short... I do have my eye on a friends Lincoln 180 HD. He is debating to sell it or not. I have plenty to do with the cab and sheet metal until I work on the frame. I do have a lincoln 140HD for the sheet metal work.


I made some more progress tonight. I reinforced the cab in preparation for the chop. I left the floor pan in for added support. The pan is really solid and I will do my best to use it in this build. Tomorrow I will set up some lines on the cab.

Thank so much to everyone so far. I really appreciate all of the feedback and ideas. This board is a great resource!!
 

Attachments

  • IMG_2968.jpg
    IMG_2968.jpg
    65.6 KB · Views: 13
  • IMG_2969.jpg
    IMG_2969.jpg
    114 KB · Views: 15
  • IMG_2972.jpg
    IMG_2972.jpg
    121.3 KB · Views: 14
Now you got it!! That's braced up! Get the abrasive wheels out and give 'er heck!
 
I got alot done this weekend! I was able to chop the top and get a lot of it in place. I tacked the back on and got the rear window chopped and installed.

The chop is 5" out of cab and 3.5 out of window.

I have the front mocked up and will start to tack it in place as well.

I have a question about the front A-posts. Do you do one side then stretch the other? I can line the drivers side up perfect but the passengers side is off of course. I was thinking of tacking the drivers side then stretching the passengers. What do you guys do?

Also How do I know at what angle to put the cab. I was thinking of using the doors as my stop gauge. Let me know your thoughts


I have had a great time and it really is starting to come along. Its amazing how fast it goes once you get rolling. I have a lot more welding to do. I do enjoy it though. [;)

Here are some pics of my weekend.
 

Attachments

  • IMG_2977.jpg
    IMG_2977.jpg
    112.7 KB · Views: 11
  • IMG_2982.jpg
    IMG_2982.jpg
    102.3 KB · Views: 10
  • IMG_2981.jpg
    IMG_2981.jpg
    120 KB · Views: 11
  • IMG_2980.jpg
    IMG_2980.jpg
    115.6 KB · Views: 11
  • IMG_2979.jpg
    IMG_2979.jpg
    117.6 KB · Views: 11
  • IMG_2978.jpg
    IMG_2978.jpg
    118 KB · Views: 11
  • IMG_2976.jpg
    IMG_2976.jpg
    77.2 KB · Views: 10
  • IMG_2975.jpg
    IMG_2975.jpg
    119.6 KB · Views: 12
  • IMG_2974.jpg
    IMG_2974.jpg
    108.1 KB · Views: 12
  • IMG_2973.jpg
    IMG_2973.jpg
    80.3 KB · Views: 12
some more pictures of this weekend
 

Attachments

  • IMG_2984.jpg
    IMG_2984.jpg
    102.5 KB · Views: 13
  • IMG_2993.jpg
    IMG_2993.jpg
    122 KB · Views: 15
  • IMG_2992.jpg
    IMG_2992.jpg
    108.6 KB · Views: 13
  • IMG_2991.jpg
    IMG_2991.jpg
    76.4 KB · Views: 11
  • IMG_2990.jpg
    IMG_2990.jpg
    70.8 KB · Views: 11
  • IMG_2989.jpg
    IMG_2989.jpg
    81.4 KB · Views: 11
  • IMG_2987.jpg
    IMG_2987.jpg
    81.6 KB · Views: 12
  • IMG_2986.jpg
    IMG_2986.jpg
    76.2 KB · Views: 12
  • IMG_2985.jpg
    IMG_2985.jpg
    75.3 KB · Views: 12
  • IMG_2983.jpg
    IMG_2983.jpg
    121.2 KB · Views: 13
more of this weekend
 

Attachments

  • IMG_2995.jpg
    IMG_2995.jpg
    99.6 KB · Views: 21
  • IMG_2996.jpg
    IMG_2996.jpg
    77.6 KB · Views: 20
  • IMG_2998.jpg
    IMG_2998.jpg
    72.2 KB · Views: 21
  • IMG_3000.jpg
    IMG_3000.jpg
    83 KB · Views: 21
  • IMG_3001.jpg
    IMG_3001.jpg
    84.7 KB · Views: 21
  • IMG_3002.jpg
    IMG_3002.jpg
    83.7 KB · Views: 20
  • IMG_3005.jpg
    IMG_3005.jpg
    142.4 KB · Views: 21
  • IMG_3006.jpg
    IMG_3006.jpg
    87.9 KB · Views: 20
  • IMG_3007.jpg
    IMG_3007.jpg
    87.5 KB · Views: 20
I was waiting to see these pics. I'm glad you jumped and got right down into it.

I had the same issues with the A-pillars when I did my chop. I wound up making more pieces of the roof because I didn't want to lean the A-pillars. Where you have it split lengthwise, I would cut that front section into two pieces, line up the A-pillars and tack then add a filler between the two small pieces and anothe filler between the big rear piece and the front two. Look at my build thread to see what I did.

I don't know if that was the right or wrong thing to do, but I didn't make a single relief cut through my entire chop.

Thank you for the reply. Yeah I just needed to get to chopping. Its hard to make that first cut. Once I got rolling it went great[;)

Do you have any pictures of your process. I think I know what you are talking about. I really would like to be able to use the windows as well.

What did you use to line your front section up? Did you use the doors as your angle guide?

Thanks again for the help!
 
Looks good. Now use the gutter piece you cut out of the A pillar on the roof. You will need to modify it a little to fit.

Thats a hell of an Idea, I was wondering what I was going to use.I didnt even think about that. Thanks man!! [cl
 
Keep in mind, I was trying to keep the center section in tact for the cab clearance lights, so I have additional pieces.

As far as what I used to line it up... Not much other than my eyeball...

2011-10-09_15-42-19_839.jpg


2011-10-09_15-42-26_988.jpg


2011-10-09_15-42-44_120.jpg


2011-10-09_15-43-35_823.jpg


2011-10-09_17-17-10_499.jpg
 
Thank you for the pictures. I will do some of my bracing the same for sure. Not sure if I want to go that big with my cuts [;)

If I didnt do the cuts like yours, how do people do the A pillars? Do they line one up and stretch the other or stretch both to help decrease amount of stretch on each pillar? Any insight is appreciated.
 
My gut says you need to lean both posts. It would look lopsided otherwise. Keep the same on both sides.
 
When I did my chop I split the front roof section in 1/2 and lined up the A pillars and then welded in a small filler strip
 

Attachments

  • 42 chev 11.jpg
    42 chev 11.jpg
    121.4 KB · Views: 12

Latest posts

Back
Top