
You are using an out of date browser. It may not display this or other websites correctly.
You should upgrade or use an alternative browser.
You should upgrade or use an alternative browser.
frame narrowing??
- Thread starter ripgut775
- Start date
Help Support Rat Rods Rule:
This site may earn a commission from merchant affiliate
links, including eBay, Amazon, and others.

King Herald
Well-known member
This appears to be a major structural over-site when you were designing the whole plot.
Can you run them under the chassis, like the original cars were, or is it too low at ride height?
I can see no way to narrow that whole front frame without some major engineering going down.
ETA: Just checked out your build thread, and seeing as you need to do a kick-up at the front and rear, you might do as well to run new chassis rails. You still have to fab complete front suspension mounts, engine mounts etc, so doing it on the new fresh steel chassis rails would be easier than narrowing and zeeing the current chassis.
King Herald
Well-known member
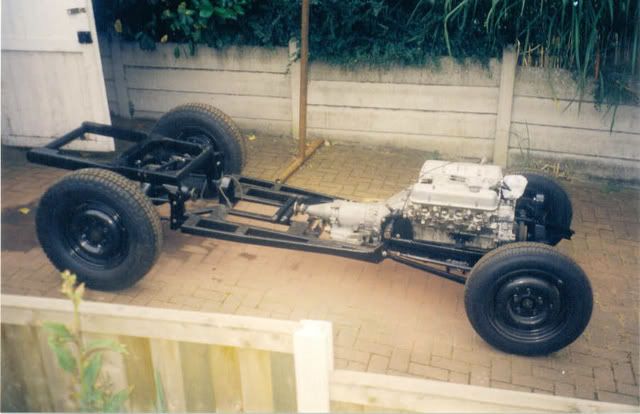
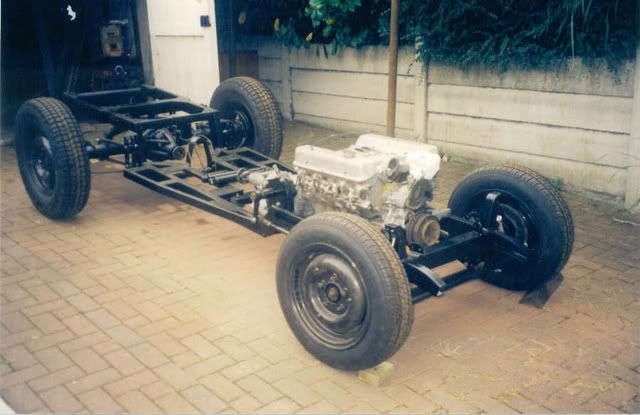
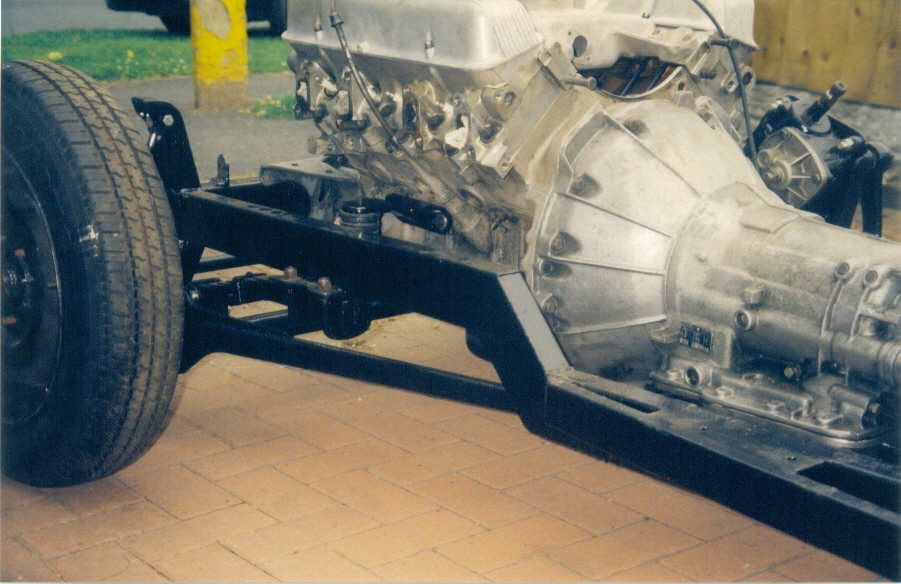
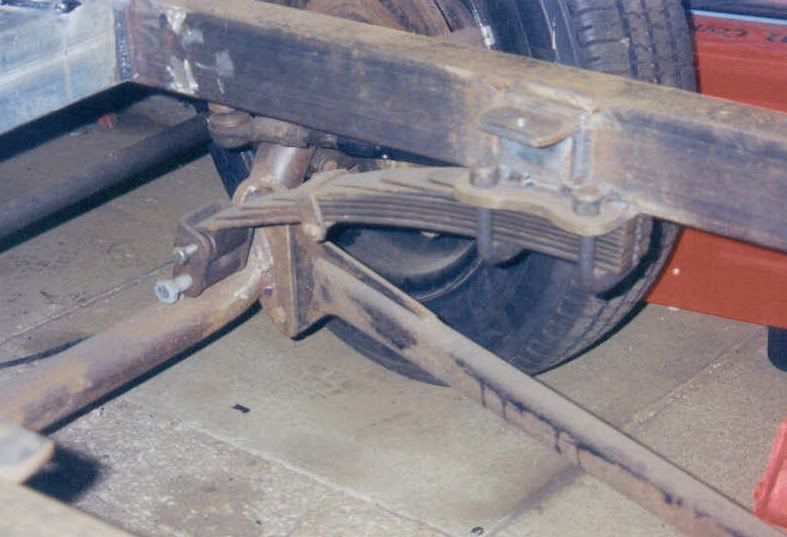
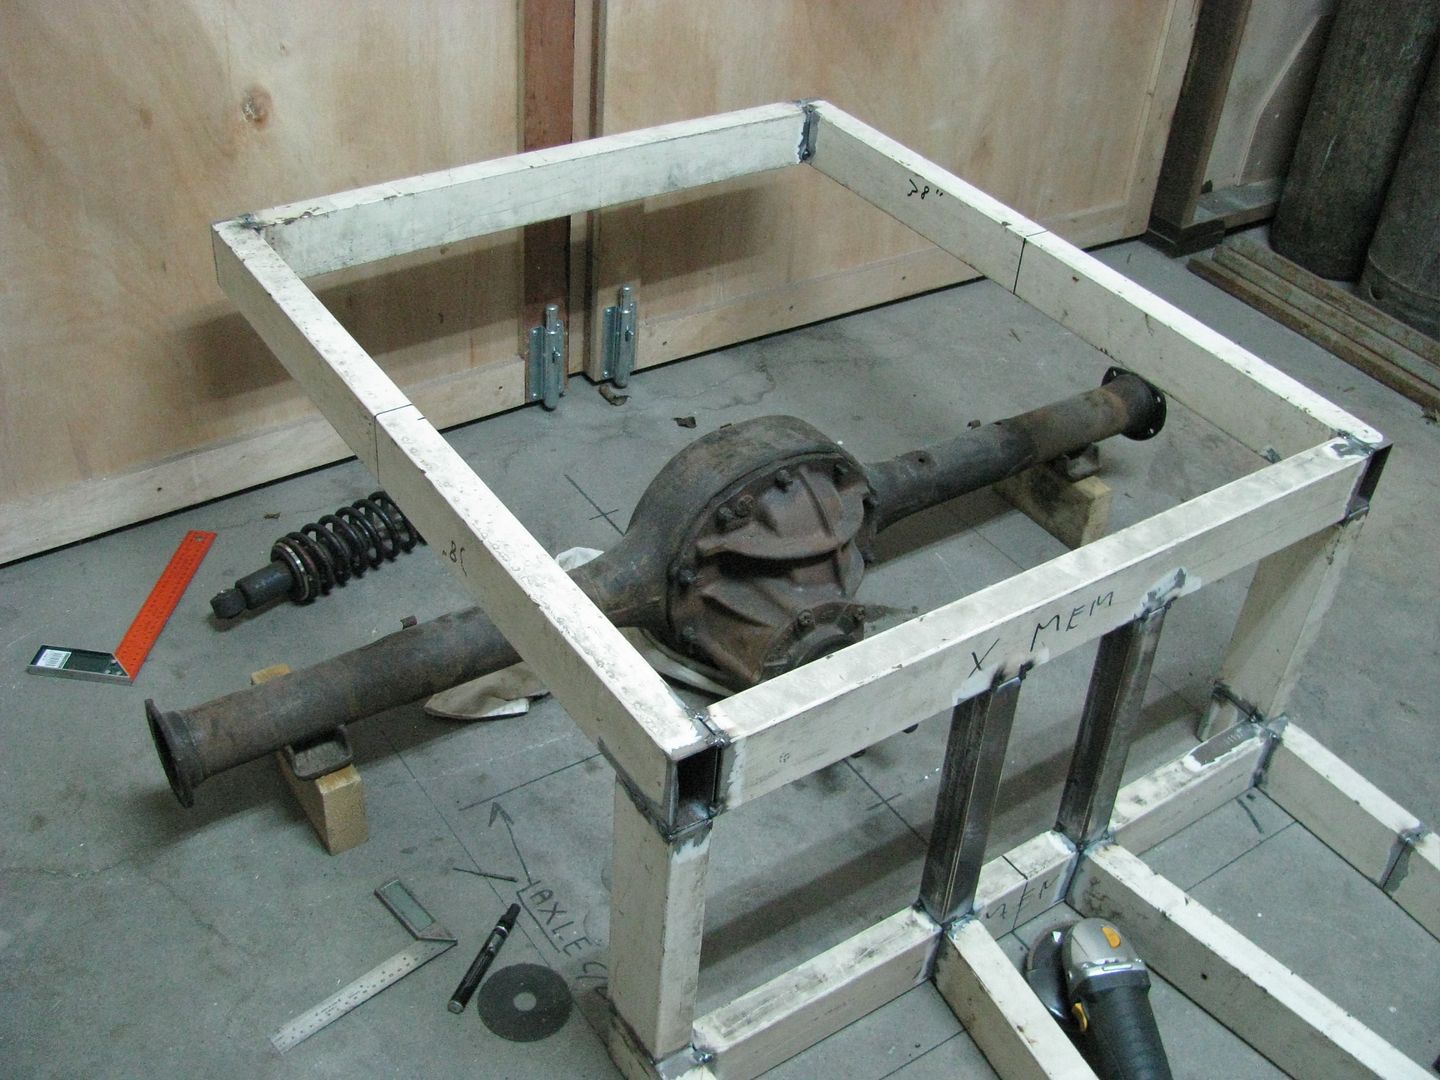
Here's the chassis I built for my Morris some years ago, simple kicked up 2 x 4 frame, with quarter elliptics at the front.
This appears to be a major structural over-site when you were designing the whole plot.
Can you run them under the chassis, like the original cars were, or is it too low at ride height?
I can see no way to narrow that whole front frame without some major engineering going down.
ETA: Just checked out your build thread, and seeing as you need to do a kick-up at the front and rear, you might do as well to run new chassis rails. You still have to fab complete front suspension mounts, engine mounts etc, so doing it on the new fresh steel chassis rails would be easier than narrowing and zeeing the current chassis.
see thats what i bben wanting to do this whole time but my dad keeps thinking it will be easier to use the og frame.
would i need any crazy tools to do iit and a frame jig or a bench? i have neither lol. because i know if its not done correct it can track down the road [S
thanks bro

You can make a make shift bench/jig by using 2 good grade sheets of plywood,and some 2x's Stack the 2 sheets on top of each other,screw them together and then you have a flat/square surface to work off of.Now once you have a good flat and square point to start with then just lay out your frame how you want it,use the 2x's as saddles to hold your steal where you want it by screwing it down on either side of your tubing,then tack it up.Once tacked measure from the front right to the rear left ends of the. frame,and then LF,RR and make sure your square then weld a little more and keep measuring like this until your all welded up.This should get you a good,square and true frame to build from.Maybe I am just rambling or maybe this will be of some help.
Last edited:
You can make a make shift bench/jig by using 2 good grade sheets of plywood,and some 2x's Stack the 2 sheets on top of each other,screw them together and then you have a flat/square surface to work off of.Now once you have a good flat and square point to start with then just lay out your frame how you want it,use the 2x's as saddles to hold your steal where you want it by screwing it down on either side of your tubing,then tack it up.Once tacked measure from the front right to the rear left ends of the. frame,and then LF,RR and make sure your square then weld a little more and keep measuring like this until your all welded up.This should get you a good,square and true frame to build from.Maybe I am just rambling or maybe this will be of some help.
WOW, now thats a really good/ cheap idea. thanks alot bro yea that helped out alot it gave me more cofidance in building my frame. did you have any pics of how you made yours? thanks
King Herald
Well-known member
My miniature shop is lucky to have a dead flat dead horizontal concrete floor in it, even though it is but 8' x 13'.
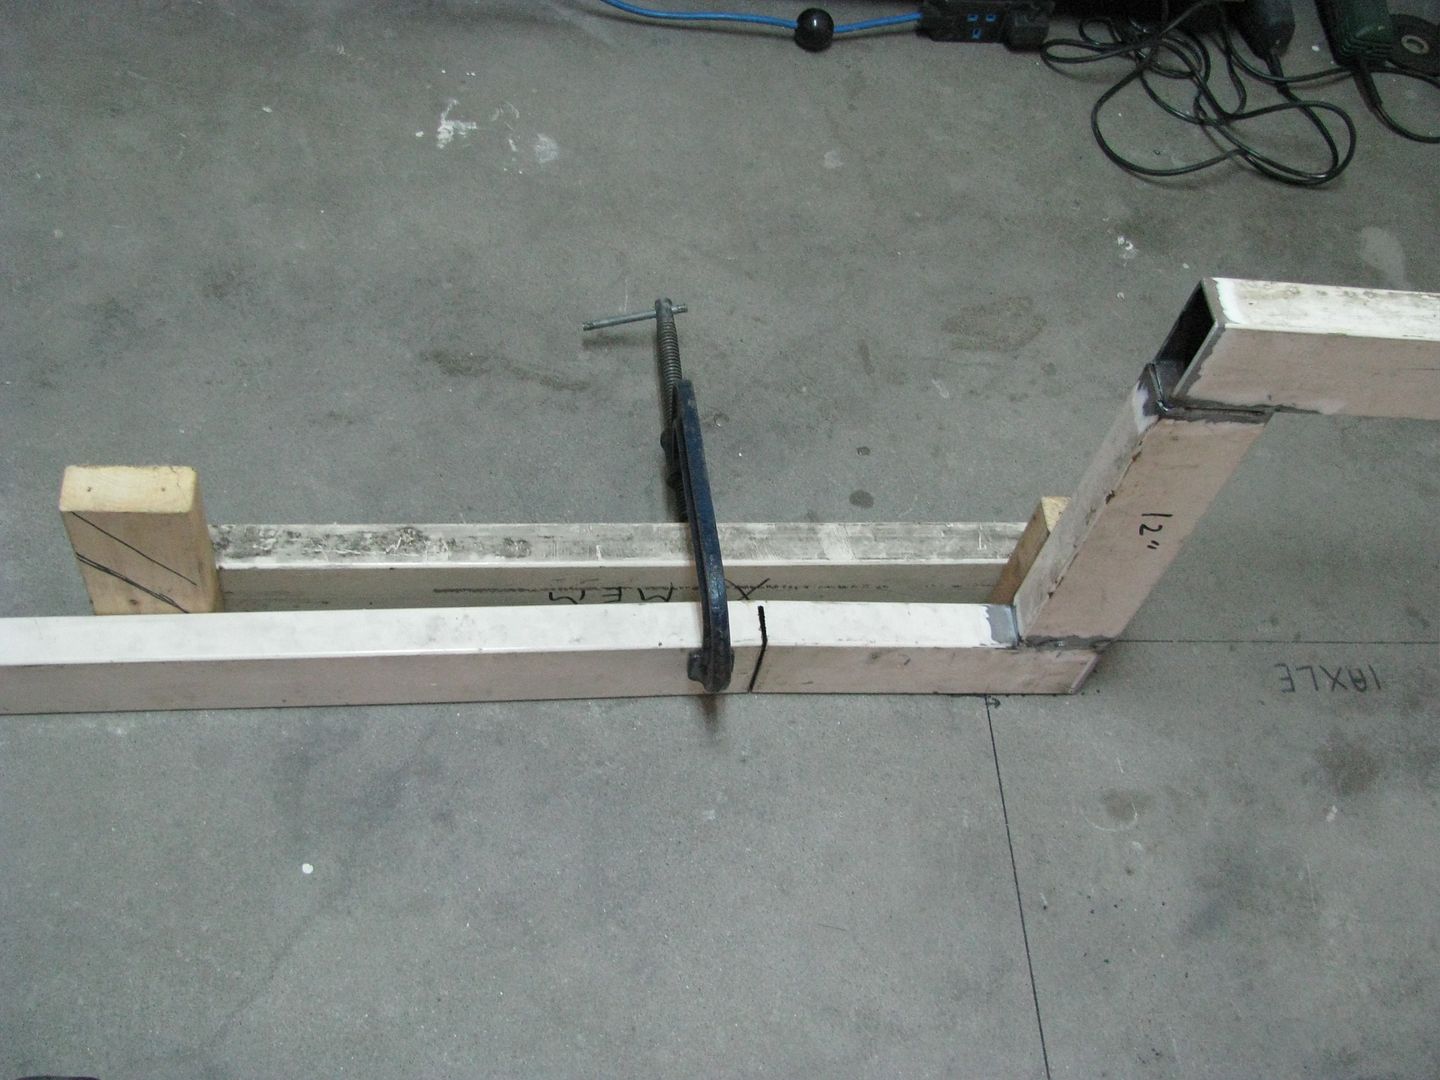
So, it was easy to draw a centreline and mark things out directly onto the floor, and build the chassis directly on that.
The plywood sheet idea is good, but you'd still need to make sure it was dead flat when you screwed it together.
You can see the lines here, as I laid the steel out and mocked things up.
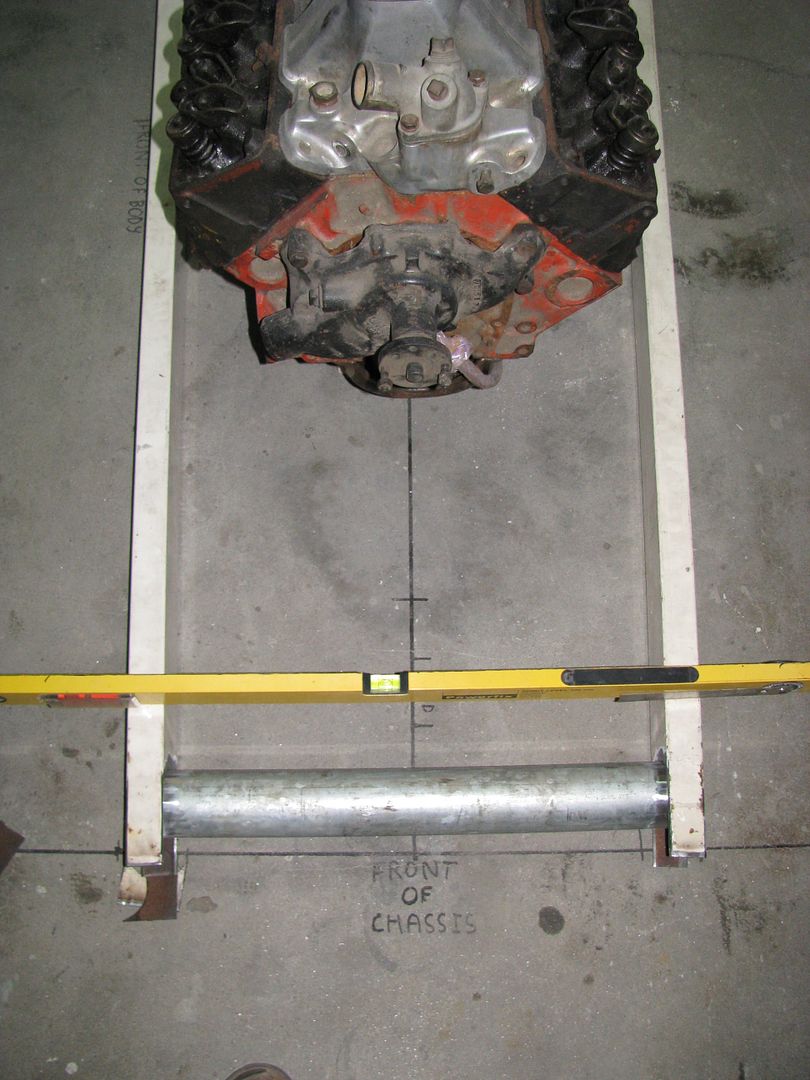
I used the floor as my lowest road level, and nothing is to hang below it. The roads where I live are garbage in some places, and I want loads of clearance.
A spirit level and tape rule are your friends here.
So, it was easy to draw a centreline and mark things out directly onto the floor, and build the chassis directly on that.
The plywood sheet idea is good, but you'd still need to make sure it was dead flat when you screwed it together.
You can see the lines here, as I laid the steel out and mocked things up.
I used the floor as my lowest road level, and nothing is to hang below it. The roads where I live are garbage in some places, and I want loads of clearance.
A spirit level and tape rule are your friends here.
HOT40ROD
Well-known member
Couple of questions.
Do you want to use the frame you have now?
What is the frame out of? Is it a ladder type frame or a center X member frames? Pictures would help
If it a ladder type it would be easy to narrow.
Do you want to use the frame you have now?
What is the frame out of? Is it a ladder type frame or a center X member frames? Pictures would help
If it a ladder type it would be easy to narrow.
Couple of questions.
Do you want to use the frame you have now?
What is the frame out of? Is it a ladder type frame or a center X member frames? Pictures would help
If it a ladder type it would be easy to narrow.
im guessing its a ladder type frame no "x" in it and its the orignal frame out of a 46 ford pickup. im trying to use the og frame tho. heres some pics
well this is the only crapy picd of the frame i got ill take another pic in a lil bit.
Attachments

RPM
The Rat Master!
I can't see much of the frame from the pictures you posted. How about remove the front cross member completely. Then go back to the fire wall and pie cut the frame and pull each side in so the front of the frame is about 26" wide and then put in a round front cross member. Won't cost much other than a piece of round tube. You will have a narrow frame and dad will have the old frame and maybe it will all work out. You could even use rectangle tube if you wanted even less expensive.
I can't see much of the frame from the pictures you posted. How about remove the front cross member completely. Then go back to the fire wall and pie cut the frame and pull each side in so the front of the frame is about 26" wide and then put in a round front cross member. Won't cost much other than a piece of round tube. You will have a narrow frame and dad will have the old frame and maybe it will all work out. You could even use rectangle tube if you wanted even less expensive.
yep thats exactally what my dad was talking about doing. so thats what were going to be doing thanks for the help ron!
ill be tetting with you soon about them parts i was asking about.whats up guys back at work now had to pay some bills lol. but now im tryin to figure out if i should narrow my front end before i Z it or after i do my Z?[S
thanks for and advice on that ill have a good pic of my frame today
thanks for and advice on that
ill have a good pic of my frame todaypics of frame
i got the front crossmember peice out today where would be a good place to do the pie cuts to narrow my front. do i want to do it before i Z it or after i Z it and should it be done before the Z or in front of the Z
i got the front crossmember peice out today where would be a good place to do the pie cuts to narrow my front. do i want to do it before i Z it or after i Z it and should it be done before the Z or in front of the Z
Attachments


King Herald
Well-known member
If it were me I'd do some experiments and see if you can incorporate the Zee to both raise and narrow the chassis at the same time.
Maybe get some cardboard and fold it to the same shape/section as a chassis rail, then faff about trimming and cutting until you work out where to put a single neat cut that moves it both in and up. it should be too hard, then you can use the card as a template to mark the chassis for cutting.
Maybe get some cardboard and fold it to the same shape/section as a chassis rail, then faff about trimming and cutting until you work out where to put a single neat cut that moves it both in and up. it should be too hard, then you can use the card as a template to mark the chassis for cutting.
If it were me I'd do some experiments and see if you can incorporate the Zee to both raise and narrow the chassis at the same time.
Maybe get some cardboard and fold it to the same shape/section as a chassis rail, then faff about trimming and cutting until you work out where to put a single neat cut that moves it both in and up. it should be too hard, then you can use the card as a template to mark the chassis for cutting.
thats a really good idea bro ill be checking that out asap
thanksKing Herald
Well-known member
thats a really good idea bro ill be checking that out asap
Apart from my typo, I should have said shouldn't be too hard.
Similar threads
- Replies
- 16
- Views
- 2K