Pope Rpu

Rat Rods Rule

Help Support Rat Rods Rule:

This site may earn a commission from merchant affiliate links, including eBay, Amazon, and others.

cornfield customs

Well-known member
Joined
Mar 16, 2008
Messages
1,027
Location
Loveland OH
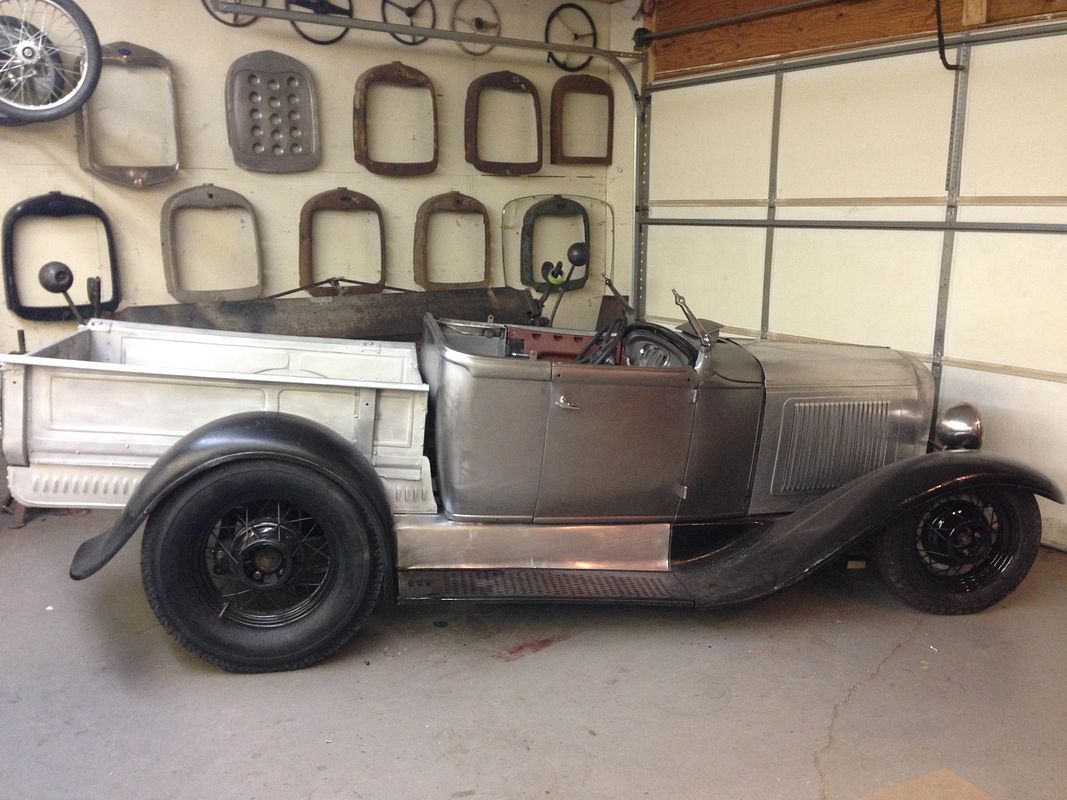
here is a dedicated build thread to the 30-31 roadster pick up i am building for a good friend of mine since high school. should be done for spring.

here is the frame in the jig on the table


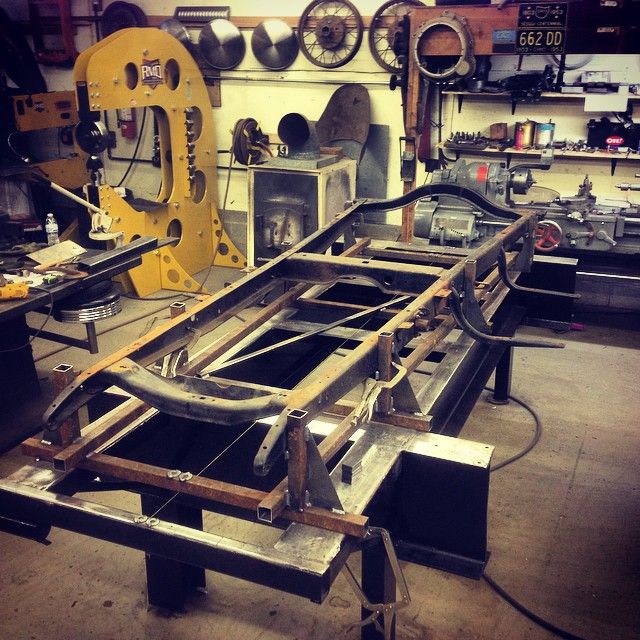
start of boxing the rails, we are using our set of boxing plates, one of our flat x members


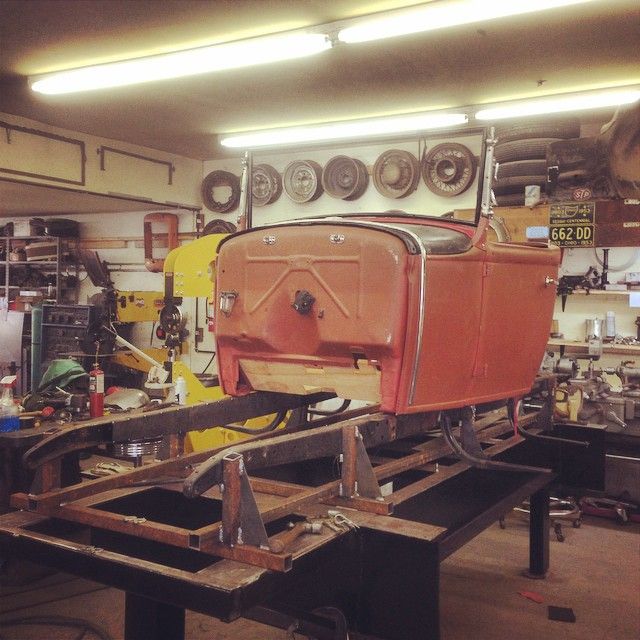
mocking up to get a good idea of the look.

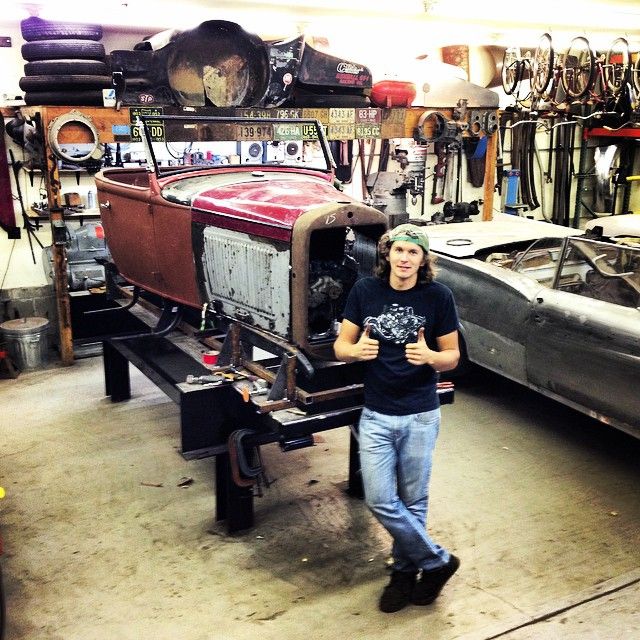
the owner looking pretty pumped with 3 days worth of work in the evenings

 
he wanted to add a 32 cowl vent to his cowl top. so i went to work on it
trimmed out the vent from brookeville


made a card board pattern of the shape of the panel, and a negative cut out of the vent to make sure i get it where i want it

scribed the cut line

all tig welded up

after some filing, hammering and dollying. and a trip through the planisher it is getting pretty close

and installed on the car

then moved on to putting on extended cab corners
stock corners

stockers removed

old rear pan taken out and extended rear pan installed


a little more progress on the RPU. reversed the fire wall and re shaped the bottom of it. wanted to make it look like it was made this way. not perfect but turned out pretty good
here is where i flipped the fire wall, making patches and patterns to smooth out the bottom of it

all patched and smoothed out

here is the back side with a new flange to make mounting the floor easier and a more factory look

and clamped in the car. just need to spot weld to the sides, weld along the bottom, and drill holes for mounting screws at the top
 
started off by making a new floor pan for under the seat bottom. 18 gauge steel, pre stretched the areas the bead rolling would be done to keep it flat.

then made a cover panel for over the tail shaft of the trans. made from on piece ,no welding was done. still pretty rough, needs a lot of finish work but ran out of time for the day on this one


started making the floor pans and trans tunnel
floor pans cleco'ed in place

want to make the trans tunnel as small as possible since room is tight in this one. so i made some blisters in the tunnel for clearance. also had to make a blister to fit around where shifter comes out. so here are the basic steps i took to make the big weld on blister
blister laid out, the black line is the hightlight or edge line of the blister

using thumb nail shrinking dies in the recip. hammer. i shrink up to the black line

all the shrinking done

after a trip through the planisher

and all welded on. you can see all the other blisters formed in the tunnel, stills needs to be hammered and dollied and metal finished out, but that will wait until i get all the other panels made and fit up

 
starting forming the front part of the trans tunnel


and made some new upper cowl braces. looks much better


tig welding up the sides of the body


after a little grinding and some dykem for guide, and a pass with the file


hammered and dollied for a while. then hit it with the high speed sander with 80 grit


started with the DA on the top half, still need to work on the bottom some more. it is a tough spot to get to since i have to hammer left handed

 
we stretched the rear of the chassis to help support the bed. ten mocked up a model T bed to get the idea of the stance on the truck. starting to look pretty good

then i got a crazy idea to do an all aluminum bed that is a close version of a factory be. here is the pass. side roughed in


aluminum bed almost all roughed in. not to decide if i should make a new aluminum tail gate, or run the nice original one....... to many decisions


the bed is done minus the actual floor, made the aluminum tailgate with custom script. made extended aprons from aluminum and worked on the last couple filler pieces on the bed. started to make some good head way on this one. just need to get the correct wheels and tires on it for the total look

 
made an adapter to run a stock model A steering wheel with a quick release hub

bent up and dimpled some bed supports/ risers. got them clamped in


and started making the aluminum version of the 30-31 commercial truck grill shell

 
rolled the Pope RPU out side for a good distance look. still waiting on the front wire wheels to come back from cleaning, so we used some steelies to roll it around


started on the 4 piece aluminum hood, all hand made in the shop, hand rolled hinges


still needs some fine tuning and trimming

the correct front wheels back from the cleaner. painted and tires on

extended the stock running board to meet back up with the fender. added a few louvers to dress up the flat part

got the upper stantions chopped , welded and smoothed out

and got the inside of the bed truck bed lined
[/QUOTE]
 
a small update, over the past week a few little things have been buttoned up. got the inside of the cab painted black

he didnt want to fill the spare tire well, so i made an aluminum louvered panel that is hinged. we are going to mount a small jack and tire iron in the well. and the cover looks neat

started getting the hood trimmed and fit properly. still needs more fine tuning.

and made him a custom 1930 aluminum license plate to go with all the other aluminum on the truck
You won't get a new job makin' license plates for makin' this one, will ya??? :D
 
Looks killer, but how driveable is it at this height? Looks like it is almost rubbing while static.

photo42_zps31daa66f.jpg
 
Looks killer, but how driveable is it at this height? Looks like it is almost rubbing while static.

photo42_zps31daa66f.jpg


on the rear there is about 3 inches of clearance before the tires rub, on the front maybe 1.5 -2 inches. right now we have a foam engine block in it and only the main leaf and a spacer block. so there is still some adjustment in the height. but he wants the tires to rub the fenders slightly on big bumps to leave burn marks in the paint. so the front wont go up much higher than it is now
 

Latest posts

Back
Top