Roadster pickup from leftovers.

Rat Rods Rule

Help Support Rat Rods Rule:

This site may earn a commission from merchant affiliate links, including eBay, Amazon, and others.
Thanks, Paul. Well, just for you here are some pictures . :D

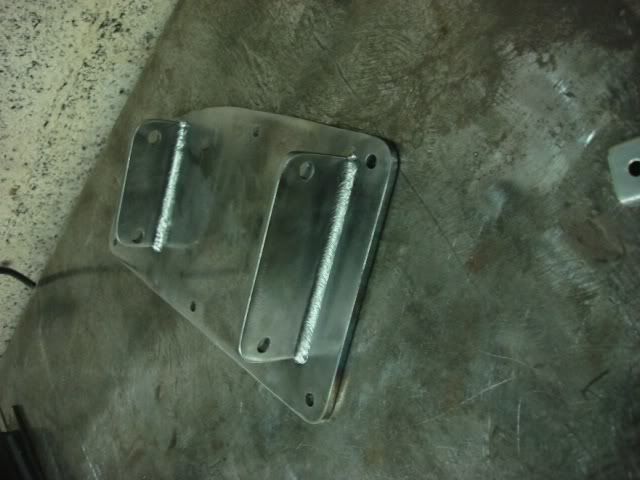
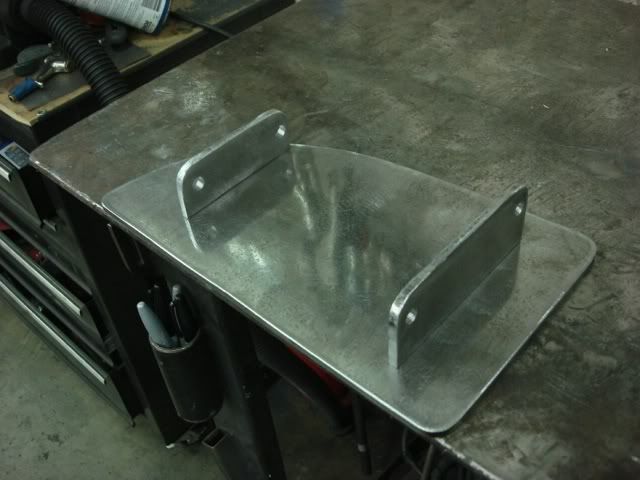
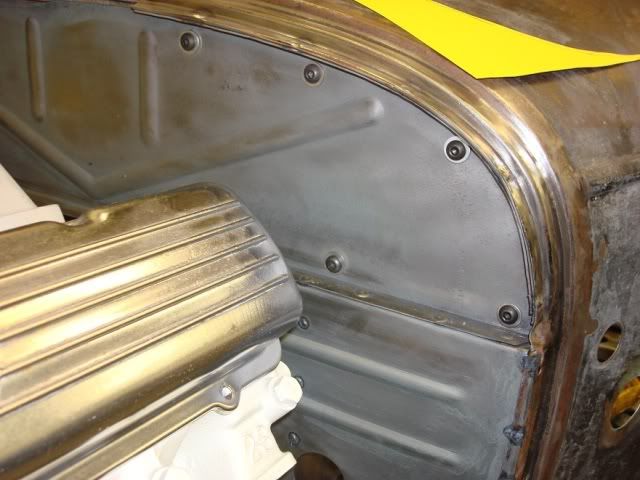
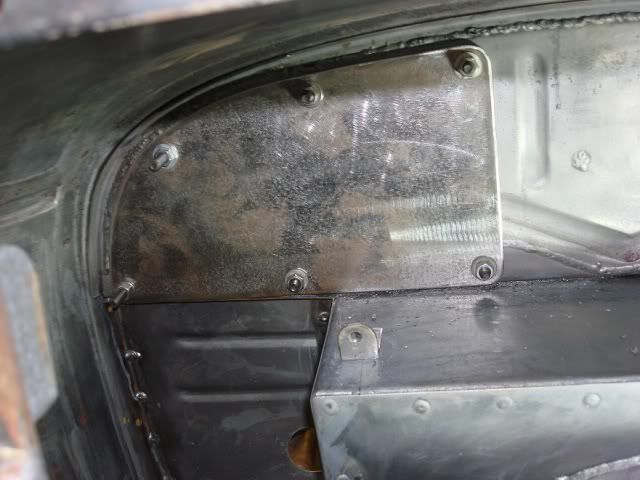
This is the 1/4 inch thick plate I cut to the shape of the top of the cowl. Those two tabs are just laying on it for now but will be welded on, probably tonight.

myrpumakingpedalmount003.jpg


myrpumakingpedalmount001.jpg


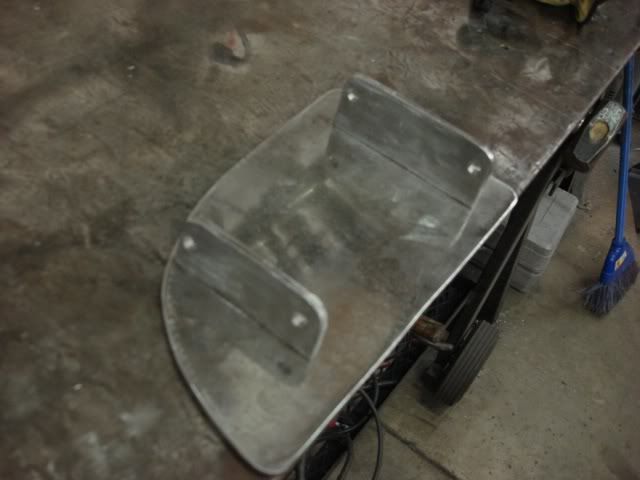
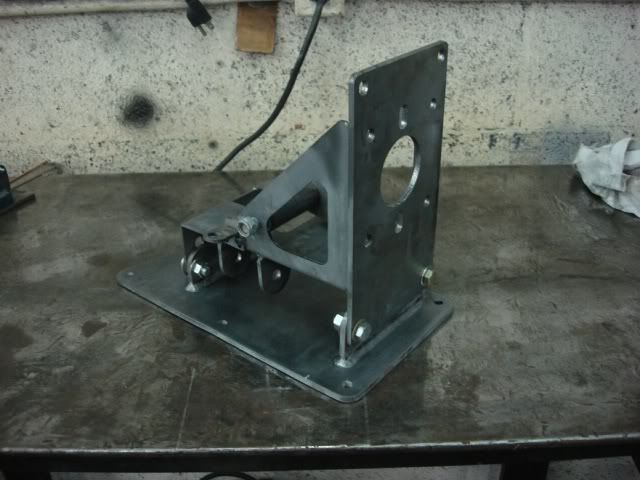
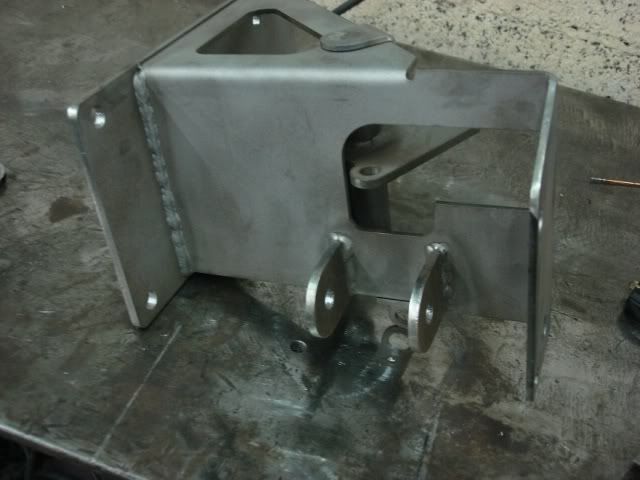
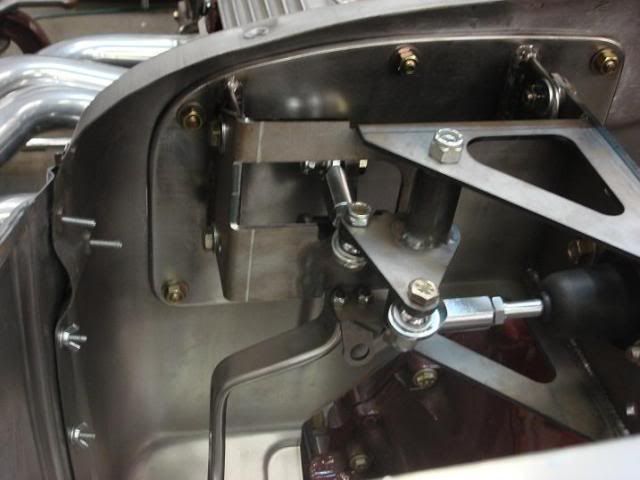
Here is the Kugel bracket bolted to the two tabs, showing how it will look when welded and installed.

myrpumakingpedalmount004.jpg


myrpumakingpedalmount008.jpg


myrpumakingpedalmount007.jpg


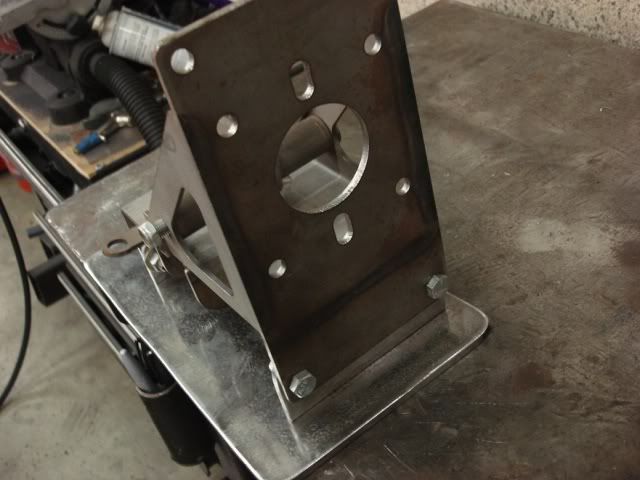
This morning I ran over to the shop and drilled 5 holes around the perimeter of that plate and drilled holes in the firewall to match. Then I ran some temporary bolts through both to see how the plate fit.

myrpumorepedalwork001.jpg


myrpumorepedalwork004.jpg


Once the Kugel mount is bolted up under the dash I will make one more support bracket to tie the back part of the Kugel mount to the 1 x 1 square brace that runs under my dashboard. There is a lot of strain on the mount when you stomp on the brake pedal so I want to make it as strong as possible.

Hope this helps.


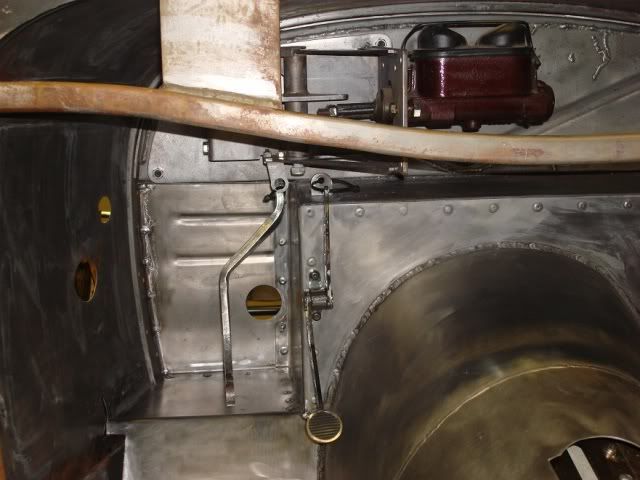
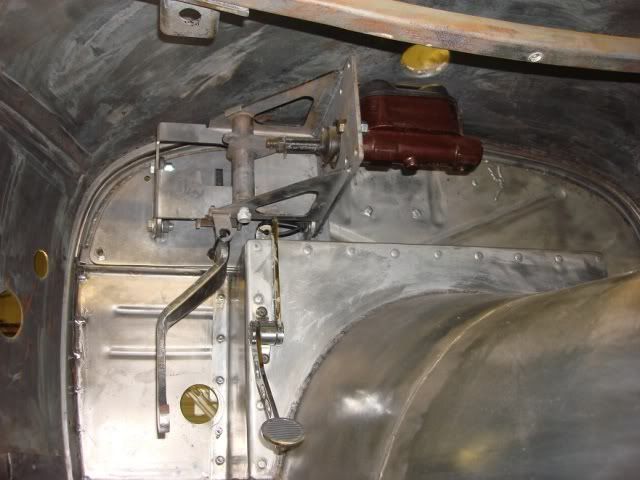
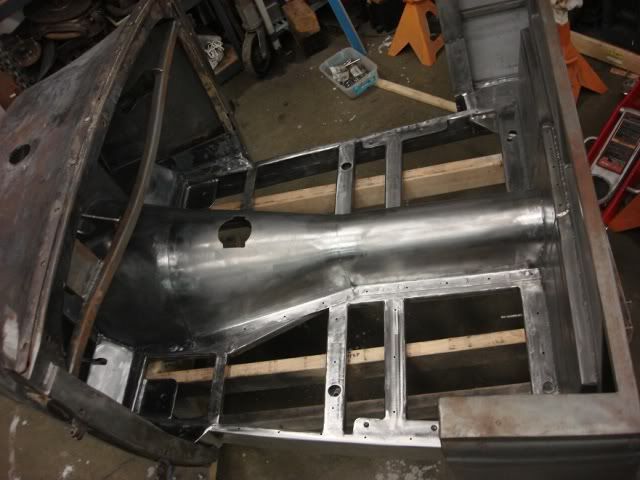
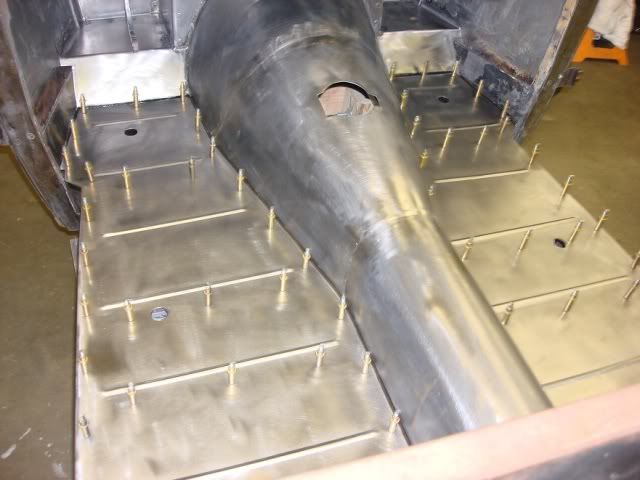
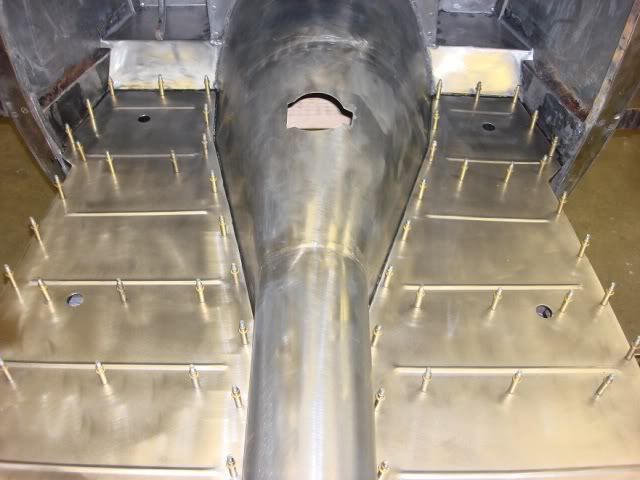
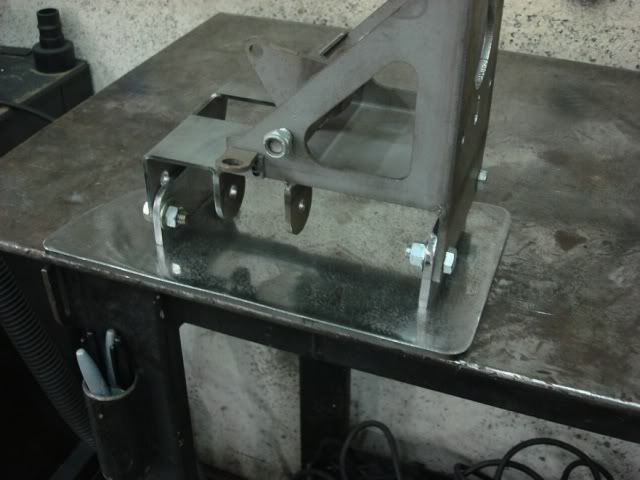
I found a couple of more pictures that might help. This was taken when my Son was building his Kugel mounts under the dash of his rpu.

dans30mastercylinder006-1.jpg


This picture shows in really good detail how he did his. This is why I decided to steal his idea, it just makes such a clean installation.

dans30mastercylinder007-1.jpg


Don
 
Last edited:
Tonight when Dan got off work he and I went to the shop to do a little more work on the master cylinder/ pedal mount. I had the plate and the two tabs ready for him to weld up for me so he dragged out the tig and got that wrapped up.

myrpubrakepedalmounted004.jpg


Then we bolted the Kugel mounting assembly to it .

myrpubrakepedalmounted006.jpg


The next thing we had to do was reshape the brake pedal that comes with the kit because it was bent to the right and we needed it to kick to the left to clear the steering column and also to put the pedal where it would be comfortable for my right or left foot. We heated it cherry red with the torch and bent it in the vice. After a few tweaks we had it pretty close to where it needs to be, so we installed the whole assembly under the dash for a trial fit.

myrpubrakepedalmounted008.jpg


myrpubrakepedalmounted013.jpg


Just a little more bending on the gas pedal and it should be good to go. Tomorrow I am going to make up a V shaped bracket out of 3/16 steel to go between the back of the Kugel bracket and the 1 x 1 dash support.

Getting this pedal assembly in was a pretty good step and it is nice to know everything fits ok. It was also nice to see that the lid for the MC ended up directly under the gas fill cap which will make filling the MC pretty easy.

Don
 
Don to access that MC you need to do some work huh? Looks like it's tucked away real good.
 
Well, it's not as accessible as if it were like a regular car on the engine side of the firewall, but not too bad. I can either reach up under the dash to undo the clip and remove the lid, or, I am thinking about making the dash removable with quick disconnect fasteners. Then I can add fluid through the gas filler cap using a small funnel.

Mine is actually easier to get at than my Son's in his rpu because he has a lot of stuff in the way that I won't have, and even his is ok to service. You don't have to get at them very often as brake fluid rarely does down unless you have a leak.

They sell a remote reservour for these underdash units but the problem is it has to be mounted higher than the MC, and it something like a model a that is almost impossible. Just one of those little idiosyncracies of a hot rod. :D

Don
 
Thanks, Guys, I appreciate it. :)

I went to the shop tonight but it was so hot and humid I didn't want to get too serious working on my project. I was also sweating so much I didn't want to get the inside rusty all over again, so I just worked on the little brace I needed to make to tie the Kugel bracket to the underdash support.

I cut a piece of 1/4 inch plate into a triangular shape and drilled some holes in it to bolt it to the Kugel bracket and one on the backside to go to a tab we will weld to the underdash brace. I could have used 3/16 but didn't have a big enough piece of it, but it doesn't show once the dash is in place, so 1/4 will be fine.

So that I can pass wires through it I holesawed a 2 3/8 hole in the brace, and got it mounted for a trial fit. I'll get Dan to weld the tab on for me and that part will be finished.

Next step will be to get all the subframe cleaned one more time and then glue the floors down with the panel adhesive. I have decided to just go ahead an epoxy prime the whole interior once the floors are glued and rivited down. I am tired of continually cleaning surface rust off the bare steel, so the primer should put an end to that nonsense.

Here is a picture of the brace I made tonight........nothing spectacular, but any progress is good progress.

myrpumcbracemade004.jpg


Don
 
Last edited:
Thanks, Guys. Haha, Sarge, those nuts and bolts are just temps. I use nylock nuts everywhere, but for mockup I just use regular ones so they spin on and off easier. As many times as I will be taking this one apart I should put wing nuts on everything. :D

We are however going to weld a couple of the nuts that hold the plate to the firewall on because they are tough to reach and we can just spin the button head bolts on from the outside of the firewall if they are welded in place.

Don
 
Thanks DR. Hope you had a nice vacation. :)

Today I got some more done on the car, but nothing that is picture worthy. I flipped the body over and spent some time with a grinder, smoothing some of the welds and underbody areas. Then I drilled the 6 holes where my body to frame bolts go slightly oversized so I have some wiggle room when I finally bolt the body down.

Tomorrow I am going to finally lay down the 3M panel adhesive and get the floors mounted for the final time. Once that is done I can start the bodywork and get the interior and undersides epoxy primed. It will be nice to see the body in one color for a change, even if it is gray primer. :D

Don
 
Tonight when Dan got off work he and I went to the shop to do a little more work on the master cylinder/ pedal mount. I had the plate and the two tabs ready for him to weld up for me so he dragged out the tig and got that wrapped up.
Don

Finally got him going on the TIG, huh?

Clean is an understatement. Very nice work!
 
Thanks, DR C. Yeah, he actually is using his TIG for some stuff now! [cl He cut up a bunch of steel scraps and kept practicing and practicing. At first he wasn't happy with the welds (If Dan makes a bad weld it ruins his whole day:rolleyes:) but finally he started to say they were not too bad.

I kept after him to TIG some stuff on my project, figuring it would give him more practice, and finally he did that bracket for me. It reallly is a much nicer process than MIG, cleaner, less cleanup, and no beveling of the pieces first. I bet once he gets really comfortable with it that he ends up using the MIG less and less.

Don
 
I bet once he gets really comfortable with it that he ends up using the MIG less and less.

Don

people keep telling me that too. If I am really in the mood to fight with an inanimate object I will pick up the TIG torch. If it just needs to be quick and strong then I grab the MIG. Guess I just need more practice. It is on my list of things to do...
 
That is what has happened to Dan, 455, he became so used to using the MIG that he just felt comfortable with it. From what I hear, TIG takes a whole new set of skills and coordination. The welds it makes sure are a lot smaller and prettier though.

Don
 
My floor is finally in and glued down !!!!!!:D[cl Dan and I worked on it all day yesterday and he spent quite a few hours cleaning up everything with a grinder so the metal was spic and span. We will not be able to reach some of it once the floor is down so it had to be cleaned now. Here is the subframe after cleanup.

myrpufloorinstalled010.jpg


Then we put down a heavy coat of 3M panel adhesive on the subframe (one double tube per side) and then put the floor panels down and installed Clecos to hold them in place until the panel adhesive sets up. Next I will remove the Clecos and put steel rivits in their place. These pictures are the floor the way we ended up last night.

myrpufloorinstalled013.jpg


myrpufloorinstalled012.jpg


Don
 

Latest posts

Back
Top