Fiat, Second Time Around

Rat Rods Rule

Help Support Rat Rods Rule:

This site may earn a commission from merchant affiliate links, including eBay, Amazon, and others.
FiatRockers010.jpg

Things got turned upside down today. Intentionally. See the indentation cut along the rocker area. A 1" square tube will be bonded in this area for body mounts.
 
FiatRockers006.jpg

The square tubes have tabs welded to them in order to bolt the body to the frame. I've ordered some 3M 5200 Adhesive & Sealer to bond the square tubes to the body. There will be tabs welded to the square tubing that will run up the inside of the body about 3" and glassed in to make a permanent bond.
I plan to use the 3M product to "glue" the square tubing I'll use to frame the door openings, to the body. Maybe Don or some other expert will offer advice on the 3M product in this application. The product is primarily used for bonding items on boats.

In answer to a question: there are no rubber isolators in the radiator mounting. Have done it this way on several rods with no ill effects.
 
Last edited:
FiatWood007.jpg

Got the wood door thresholds and the steel body to frame mounts in place. Now working on the front door jambs. The doorframes will be just an inch thick because of the lack of interior room and the closeness of the roll cage.
The body is 1 1/2" out of square. Here is far more crown both vertically and horizontally on one side than the other. These are problems I'm not able to fix. The body was made for drag racing, where it wouldn't be much of an issue.
I keep forgetting to measure the radiator for the member that asked. I'll include it in the next post.
 
I believe that would be me Don. It's not a big deal I just thought others might be interested since it looked like something many might consider. We'll give you a pass, just keep hammering away we understand!

[cl
 
FiatDoorframes004.jpg

Finally, I laid out and cut out one door, except across the bottom. It started leaning out at the top so I need to glass more bracing in in that area before cutting to door out completely.
 
FiatDoorframes007.jpg

All the wood framing was "glued" in using Duraglass, a fiberglass impregnated filler. In this picture I have started bonding the wood to the body using two layers of mat and one layer of fiberglass cloth. Picked up two gallons of epoxy intended for marine use off of Craigslist for little money. It cures slowly which is good for me.
 
So is the permanent door frame going to be wood?

I have no experience with glass or resin or any of the bonding agents you are using so I'm interested to see how this all works....

[P
 
So is the permanent door frame going to be wood?
[P

Once it is all glassed in it will be very strong. Think of a boat keel or cross braces. many of the street rod glass bodies are built the same way though some have steel instead of wood. [P
 
FiatDoor001.jpg

I made the "cut of no return" and now have a door opening. Lots more fiberglass work to do around the entire door opening. I'm using epoxy resin which is typically used for boats. It cures slowly and is stronger than polyester resin. Polyester is used for automotive work and is plenty strong. I got a deal on the epoxy. That's why I'm using it.
 
FiatDoor002.jpg

The trick now is to get the door into the hole flush and square, hinged and latched. I have some Model A roadster hinges coming from Mac's Antique Auto Parts. Best price I could find. There will be a passenger door. You can see the framing through the big, scary hole I cut.:eek:

If this doesn't work there could be a big plume of black smoke coming from my back yard. I doubt fiberglass burns very clean.:rolleyes:
 
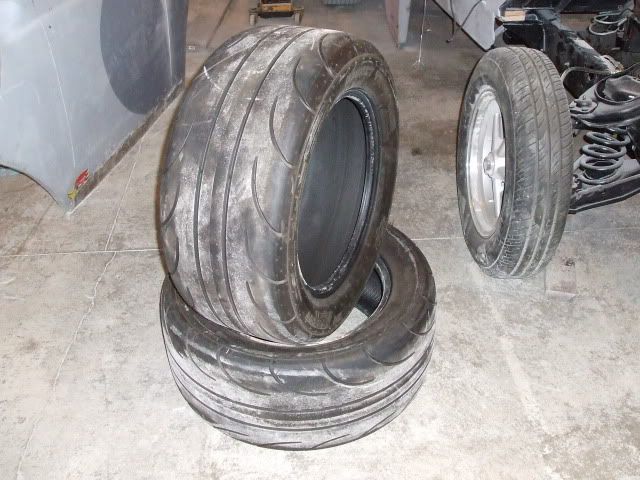
FiatSlicksMatty012.jpg

I showed these on another thread but they are for the Fiat. A hundred bucks, Craigslist. Mickey Thompson Drag radials with 50 miles on them. Got 'em last night.
 
One Hung Door

No, One Hung Door is not my favorite Chinese restaurant, nor is it the leader of Taiwan.
Finally I got the driver's door and opening fully glassed and trimmed. Today, and it took almost all day, I got the hinges installed and shimmed so the door is pretty well centered in the opening. This was my biggest worry of the whole project.

Next, it's on to the door latch and backing around the top of the door.

FiatDoorHinge004.jpg
 
FiatDoorHinge002.jpg

Got a pretty good fit on the leading edge.
Many times while working on the body I wish I would have dropped an old truck cab on the chassis. Too late now.

I can't even think about putting the passenger door in.:(
 

Latest posts

Back
Top