progress on my 36 Chevy Truck

Rat Rods Rule

Help Support Rat Rods Rule:

This site may earn a commission from merchant affiliate links, including eBay, Amazon, and others.
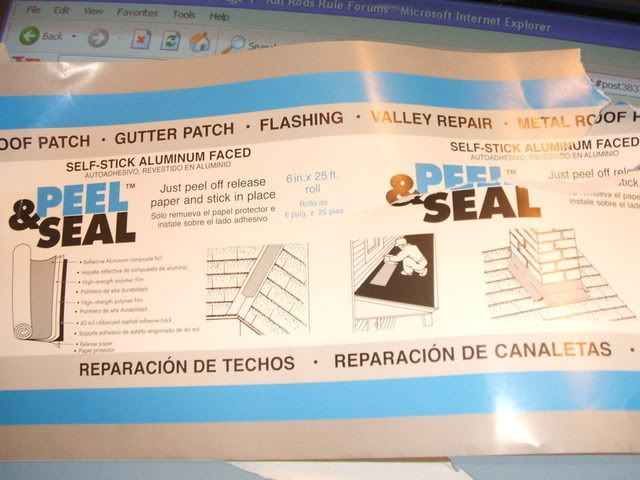
this may help ya..
Picture-1.jpg
 
Well I really feel dumb

I actually sell this stuff(different brand) and i never thought of using it.

Thanks for the cool tip Rebstew!
 
The Peel And Seal is a really good idea and a excellent alternative for Dynomat.Just make sure that all seams and any voids are filled before applying it.If moisture should get into an area and be trapped it will rust and eventually rot through.
I will be using it in the 35 and the 29.
The Peal and Seal should get posted in the Tech section for future refrence.

I figured that it may have been talk about at length on this forum. I will whip up a tech post and stick it in Tech Thread when I get a chance.
 
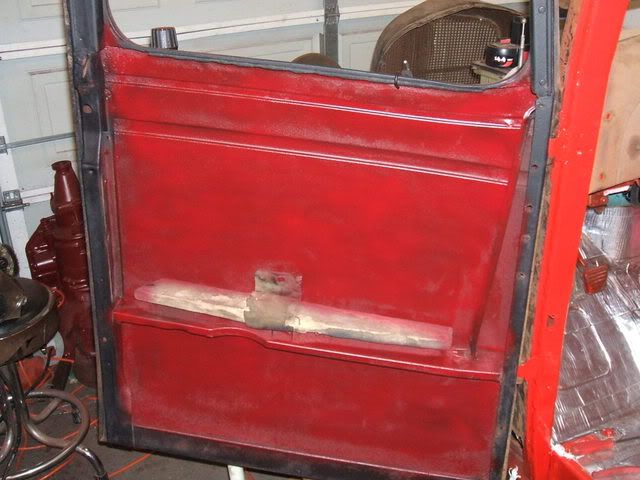
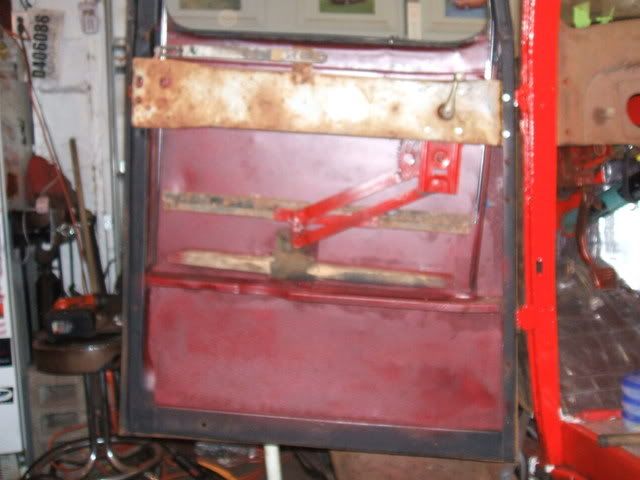
last 2 days I've put a new cowl vent seal in. I put the vent all together and it's in and work great. I did a little cleaning on the windshield frame that I got from Jeff. filled a few holes in it, ripped out the old broke up seal and replace it with a new rubber seal. Then put the windshield back in the truck. It is hooked up to the hinges. I'm still looking for the piece on the bottom that holds it tight to the body. I worked on the driver side door a bit. I was going to clean it all up and paint it on the inside but I'm going to put a new door skin on it later this summer so I figured there was no reason to waist my time painting it. I did spray on some spray bomb paint just to keep the rust away where I ground the surface rust off. I put new window felt in for the window to slide in and hooked up all the stuff to make the window go up and down. I also made a template for the door glass. I will be dropping it off in a few day to have the door glass cut.
Picture1191.jpg

Picture1192.jpg
 
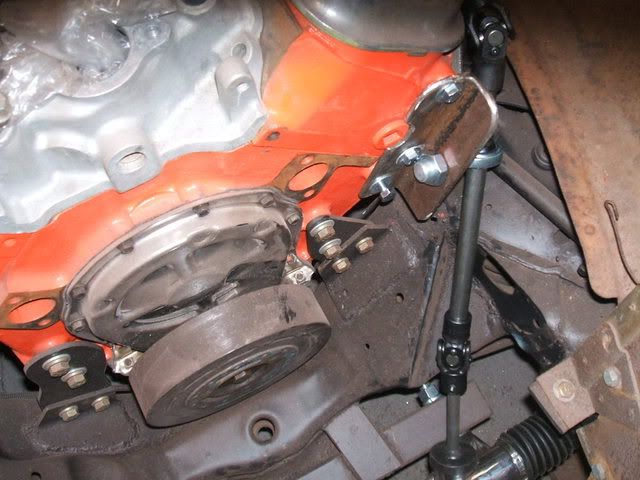
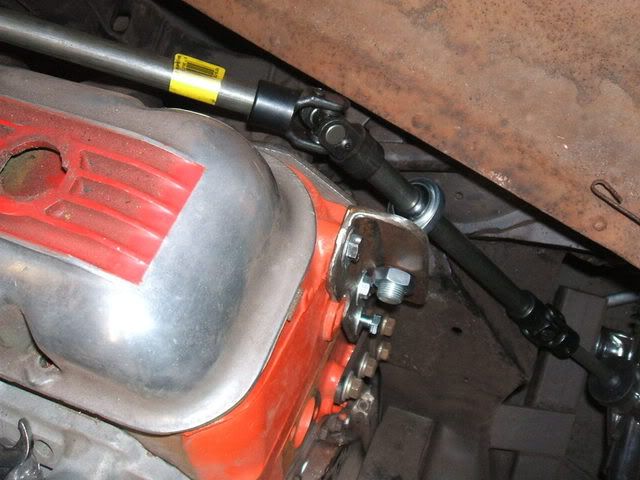
A lot of people have email me to ask about the steering on this swap. I even had a guy come down from Pennsylvania to take pics of the frame where the rack went on. first off let me tell you that you can do a much better job fabbing the rack mount. I didn't care how it looked as long as it was strong. if this would have been a real nice body I would have taken more time but for now this is what it is. in this pic you can see how the frame was notched for the steering. a piece of square tubing was welded on top of the lip that hangs out in the front of the frame. Then 1/4" thick strips were welded on both sides. two hole were drilled for the rack to bolt onto.
Picture1214.jpg

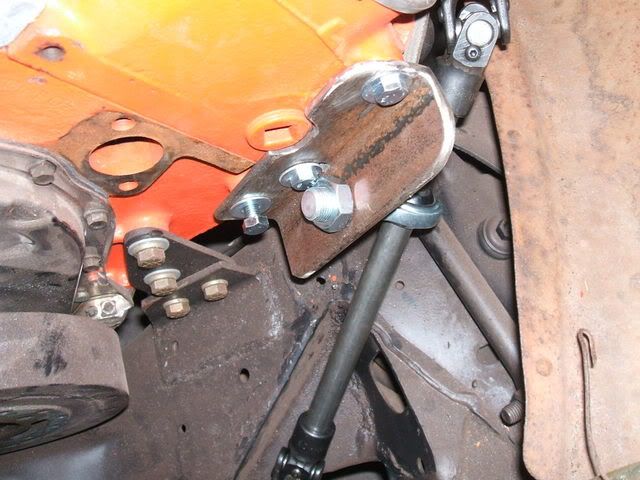
now came the hard part. with a small bock I wouldn't have had any trouble at all but with the width of the BBC I had to get creative.this is all just mocked up. nothing is welded prepped or paint yet. I made a mount for the heim joint that hooks to the head. I would NOT suggest you do this. you should have the heim joint mounted to the frame. if you break a motor mount you will loose your steeing. PLUS most guys rubber mount the engine. this would also cause steering issues. so don't use my rack swap as a guide PLEASE! mount the heim to the frame and you will be fine. the reason I mounted mine this way is that I have 1/4" thick solid motor mount. also the last bolt you see hanging out will have a steel brace ran down to the frame. bolts are mock up too. grade 8's will be installed. my engine is not going to move or break unless something crazy happens like slamming a wall. if that's the case the steering is the last of my worries. another huge reason that I did mine this way is it is more basic, clean and simple. if I made a brace for the heim joint to the frame I would have had to run the steering under the header, use another joint and go through the firewall on the bottom of it and add another joint to go up. I don't like this idea because it is more stress on the joints and I don't want the steering coming up through the floor like an early T bucket with the steering wheel laying flat instead of up and down. the other way was to mount it on the frame and have the shaft come up past the header and out of the engine compartment, having to notch a little bit of the fender. then use the two more joint to get it back to where the steering wheel needs to be on the inside. alot more joints and it would have looked like a jungle jim. also I wouldn't have been able to close the hood sides if I ever run a hood.
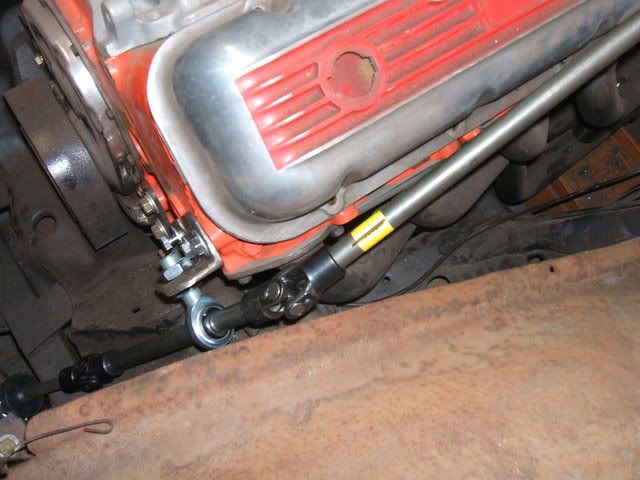
the way I ran it I have one joint at the rack, one joint at the valve cover and then a straight shot to the inside. another Heim joint hold the other end on a piece of square tubing that run across the cab behind the dash. from the side is is very clean and doesn't get in the way of closing the hood side or taking off the valve cover.
Picture1218.jpg
 
Last edited:
it's hard to show you in the pics but this is the best way I could see to run it. I have less than a 1/2" on both sides of the joint. this is very close. but I think it looks better than having 3 pieces of bar and 3 joints sticking out all different places. like I said if you are going with a small block you won't have this problem.
Picture1216.jpg

Picture1215.jpg
 
You are making some real good progress on the build.I would suggest that you make a standoff.Off the frame to mount that heim joint.Its just got everthing going against it.Heat from the header is going to melt the grease in the steering joint causing it to fail and not to mention the harmonics coming from the engine is going to eventually make that heim fail.It will even be sooner than later if that motor has cam and or gear drive.Just from what is holding the motor in there its all solid mounted.So there is no where for the harmonics to be absorbed.

I am not in any way putting you idea in the can.I also have alot of respect for guys that like to build there own stuff.But that is your steering and it is just not safe the way its set up to drive on public roads.If you loose that heim you will be in a world of trouble if you are on the freeway.

This is just my opinion and its your truck and your build.
 
Last edited:
35 Mastr is right when I saw that I had to take a step back... Youe motor looks as though it is solid mounted but you will still have issues with vibration (harmonics). That couls easily weeken that area. I had little room in my truck as well. I did a similar mount as you but I fabbed a bracket off the frame. Trust me you will be much happier.

Great build fabulous work! I love that you keptt he fenders. Lately I have been seeing too many truckc with an S10 fram an no fenders. Way goofy looking. Yours looks awsome!:D
 

Latest posts

Back
Top