You are using an out of date browser. It may not display this or other websites correctly.
You should upgrade or use an alternative browser.
You should upgrade or use an alternative browser.
The Roofus Special
- Thread starter Flipper_1938
- Start date

Help Support Rat Rods Rule:
This site may earn a commission from merchant affiliate
links, including eBay, Amazon, and others.
Bonehead
Skull Master
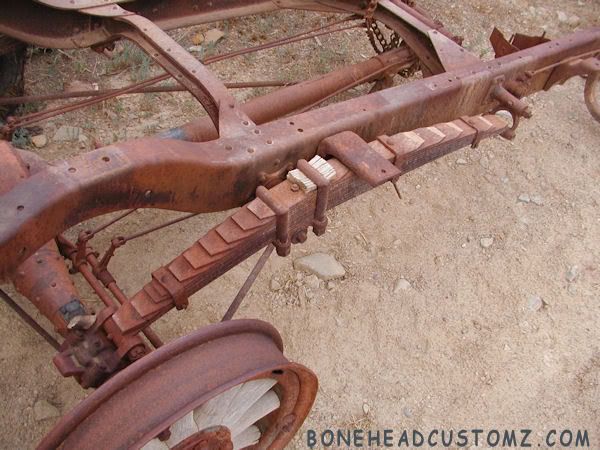
I am pretty sure it is 26 Buick. I think it is a great set up.
junkmagnet
Well-known member
thats awesome, thats the way i built my rockcrawler..
Flipper_1938
He recycles the right way
Finally figured out how the stock jag suspension worked....I think.
It pivoted on the lower half of the spring pin. The upper half was mounted in rubber such that the pin couldn't catch anything. as the spring cycled, the top portion of the spring pack could move front to back.
Here is my attempt to immitate the function.
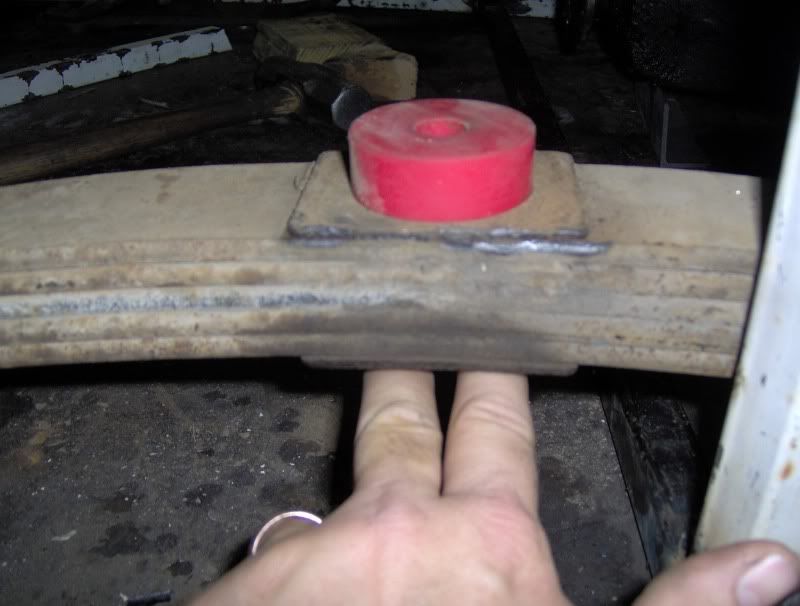
more almost free material was used for my spring boxes. ....cop car roll bars that dad bought at an auction. I used the 1/8" panel at the bottom.
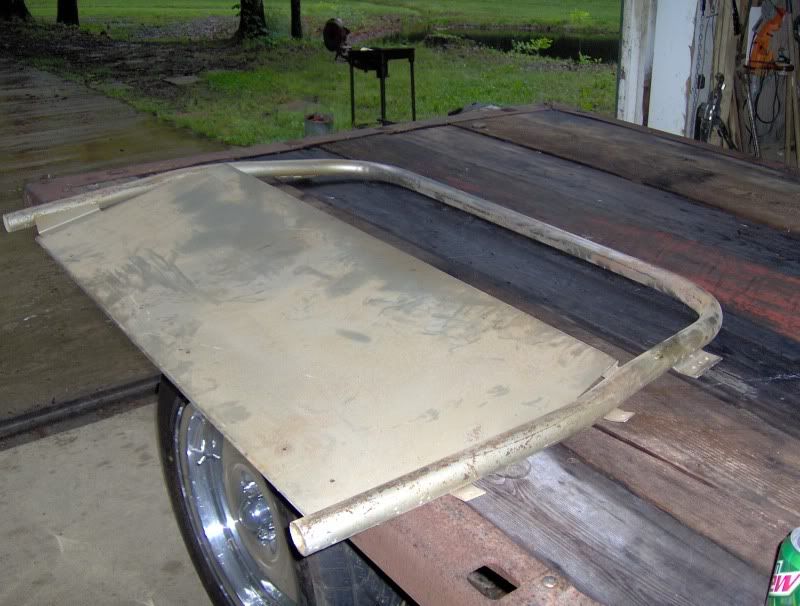
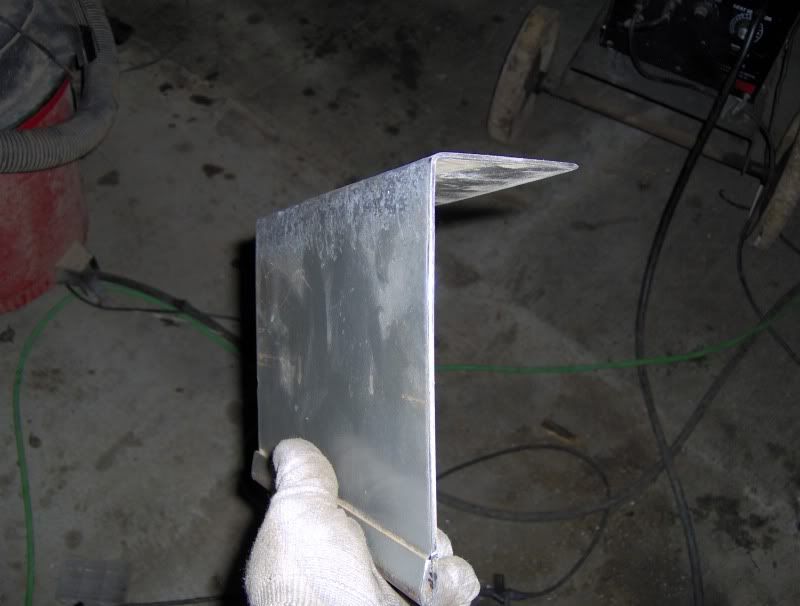
I overlapped the tops so I'd have double thickness on top.
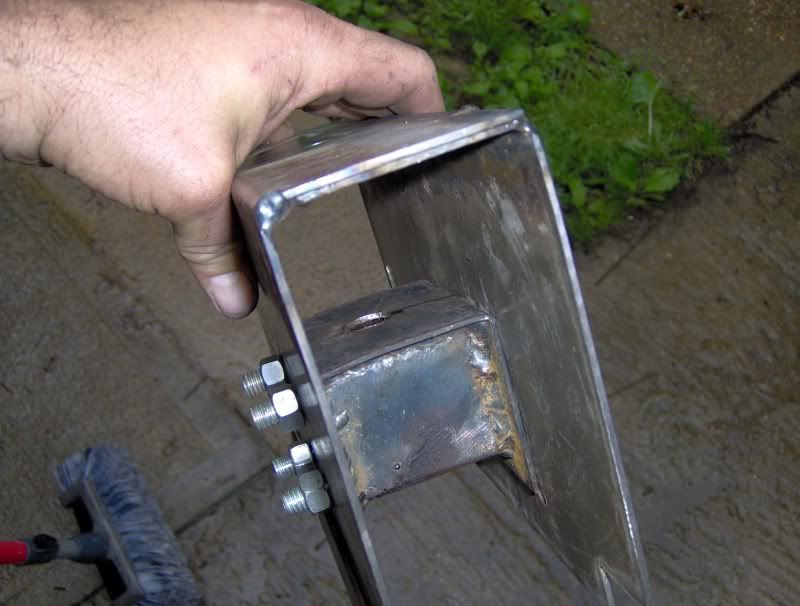
The insert captures the spring pin. It is secured by four 3/8" bolts and really beefs up the spring box when it is all bolted tight.
It pivoted on the lower half of the spring pin. The upper half was mounted in rubber such that the pin couldn't catch anything. as the spring cycled, the top portion of the spring pack could move front to back.
Here is my attempt to immitate the function.

more almost free material was used for my spring boxes. ....cop car roll bars that dad bought at an auction. I used the 1/8" panel at the bottom.


I overlapped the tops so I'd have double thickness on top.

The insert captures the spring pin. It is secured by four 3/8" bolts and really beefs up the spring box when it is all bolted tight.
Flipper_1938
He recycles the right way
Here's how the box fits into the overall car. The box I just made made will be behind the seat. The front bucket (upside down box) will be under the seat.
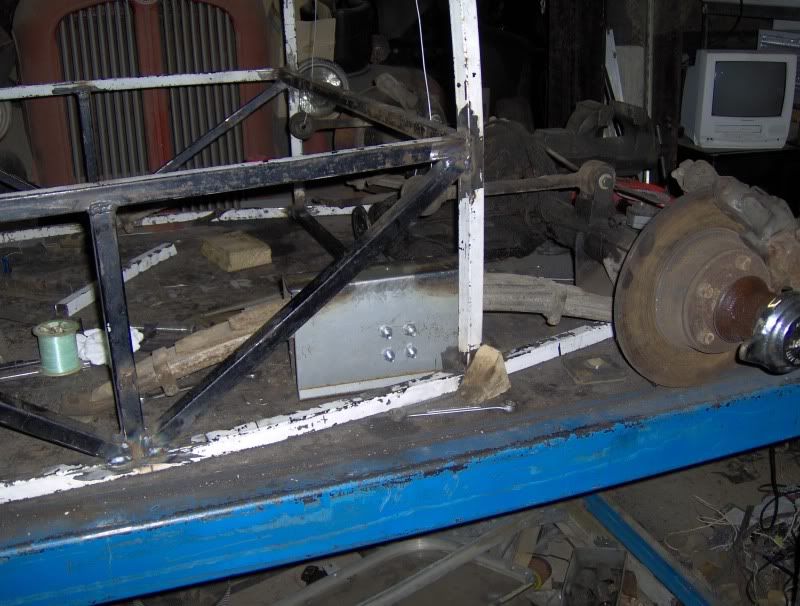
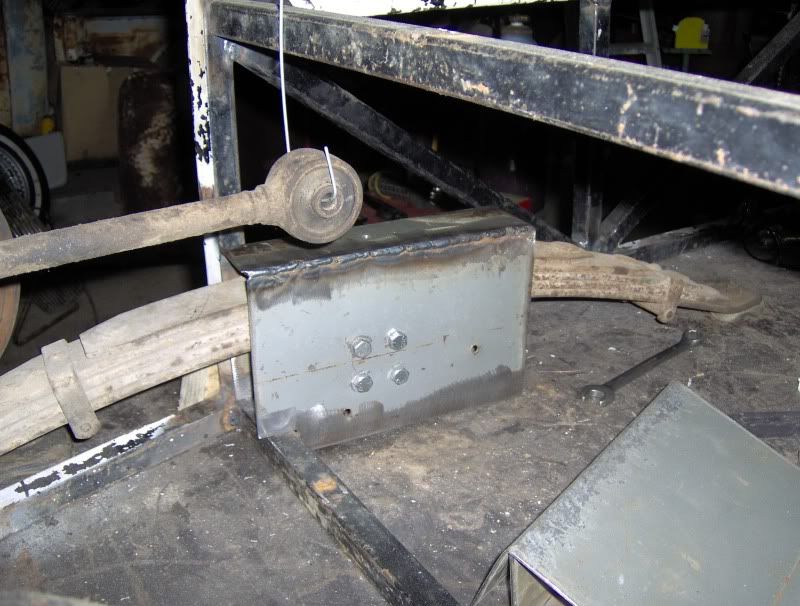
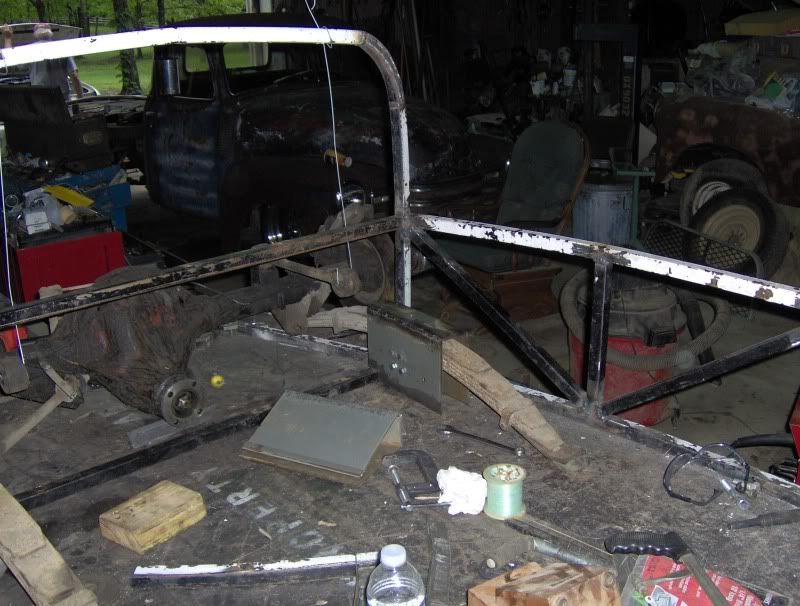
Here is a view that shows the eurothane bushing inside the box. It sits over the spring pin.
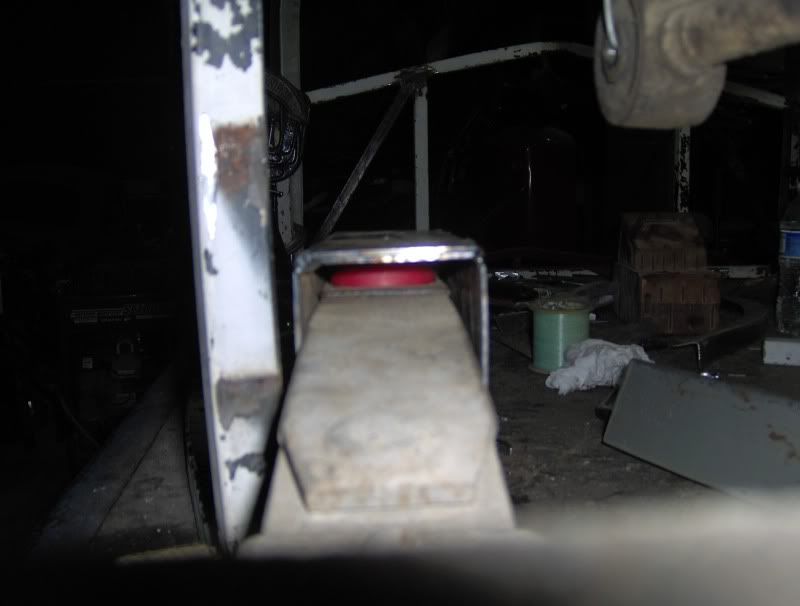
Still have a lot of figuring out to do. the nuts will be welded to the side of the box to make it easier to re-assemble in a finished car. Need to remeber to keep the bolts accesible when I build more of the rear bulkhead.


Here is a view that shows the eurothane bushing inside the box. It sits over the spring pin.

Still have a lot of figuring out to do. the nuts will be welded to the side of the box to make it easier to re-assemble in a finished car. Need to remeber to keep the bolts accesible when I build more of the rear bulkhead.
Flipper_1938
He recycles the right way
If you haven't guessed, these boxes are going to be tied into the frame/sides/floor and heavily supported.
These boxes to way longer to figure out than I would have ever figured.
These boxes to way longer to figure out than I would have ever figured.

$19.49
$34.99
How to Restore Ford Tractors: The Ultimate Guide to Rebuilding and Restoring N-Series and Later Tractors 1939-1962
Amazon.com

$209.99
$239.99
Solary Magnetic Induction Heater Tool - 1000W 110V Handheld Rusty Bolt Removal Tool with 8 Coils
solary

$18.86
Green Stuff World for Models and Miniatures Set of Resin Giant Rats 3509 (GSWD-3509)
Cobb Co. Tech & Hobby

$44.99
Bobby Unser (Indy Car), "Autographed" (JSA) Business Card (Scarce /Vintage) - Autographed NASCAR Cards
Sports Memorabilia

$229.99
$259.99
Solary Magnetic Induction Heater - 1000W 110V Handheld Bolt Removal Tool with 12 Coils
solary

$36.00
BTMLTAI Rat Fink Joint Movable Car Culture Model Kit - Dark Green Retro Rat Rod Toy for Custom Car Enthusiasts
shenzhenMLTprintingCo.,ltd

$229.99
$245.99
Solary Magnetic Induction Heater - Handhled Bolts Heating Removel Tool with 10 Coils and Portable Tool Box
solary

$24.29
$26.99
Ekouaer Women's Skorts Tight Biker Short Stretchy Breathable Sports Cute Skirts ArmyGreen
Ekouaer loungewear

$23.99
$40.00
Classic Car: The Definitive Visual History (DK Definitive Visual Histories)
Amazon.com

$5.72
$40.00
Classic Car: The Definitive Visual History (DK Definitive Transport Guides)
Amazon.com

$64.99
A.J. FOYT HAND SIGNED VINTAGE 5x7 COLOR PHOTO+COA LEGENDARY RACE CAR DRIVER - Autographed NASCAR Photos
Sports Memorabilia

$15.95
$34.99
How to Restore Your Collector Car: 2nd Edition (Motorbooks Workshop)
Steven L. Kurth, Bookseller
hotrod preacher
"Official RRR Chaplain"
this is one of the most interesting builds i've seen..(not knocking anybody else tho)
i love the creative concept of "re-inventing" things as you go..my mind doesn't function well in that area!!!

i love the creative concept of "re-inventing" things as you go..my mind doesn't function well in that area!!!
Flipper_1938
He recycles the right way
This is by far the most ambitious thing I have ever attempted due to the fact that I am not starting with a real car (even though I am using parts from real cars) and not really trying to copy an existing car. It is loosely based on cars that I have seen pictures of.
It is fun though.
It is a whole different kind of build than the 48 was. The 48 was built using the tech article on the HAMB about the S-10 frame swap as a starting place....and it was a real truck.
This build is almost like one of those craft artist that builds stuff out of "found objects". I started with the Caddy roof, everything else is being modified to work with that roof.
I'm just lucky to have picked a good parts car that has parts that look older/cooler than they really are.
Flipper_1938
He recycles the right way
Due to the automotive slowdown while chrysler re-organizes (I work for a supplier), my job has said we are going to a 4 day workweek. That means I have a months worth of 3 day weekends to work on my car. 
Bonehead
Skull Master
I was thinking about this, and thought about the shackle. Seems like you will need someplace for the length to go when the springs moves. You probably have it covered, but thought I had better mention it.
Flipper_1938
He recycles the right way
I was thinking about this, and thought about the shackle. Seems like you will need someplace for the length to go when the springs moves. You probably have it covered, but thought I had better mention it.
The forward "box" will be long enough to allow the spring to completely flatten out. It will also be braced up pretty good to handle the loads that may be put on it when the car corners hard.
I had to re-invent the wheel a little on this one. I should have studied the stock jag, just in case I wanted to use the whole suspension.
Oh well
Flipper_1938
He recycles the right way
I got my other spring box put together and started looking at how to anchor the top links and came to the conclusion that I needed more beef in my framework. I am adding some 1.5 x 1.5 front to back in a more conventional frame like position. I am also installing a 1.5 x 1.5 crossmember ahead of the forward spring support to provide additional support.
Flipper_1938
He recycles the right way
Here are the pics. This about where I thought I was going to get to last weekend.
I feel a lot more comfortable with the extra beef.
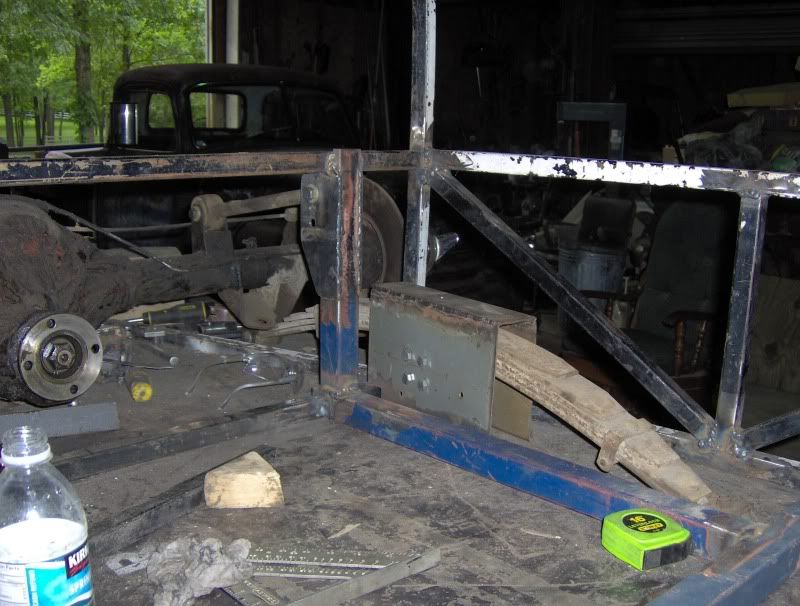
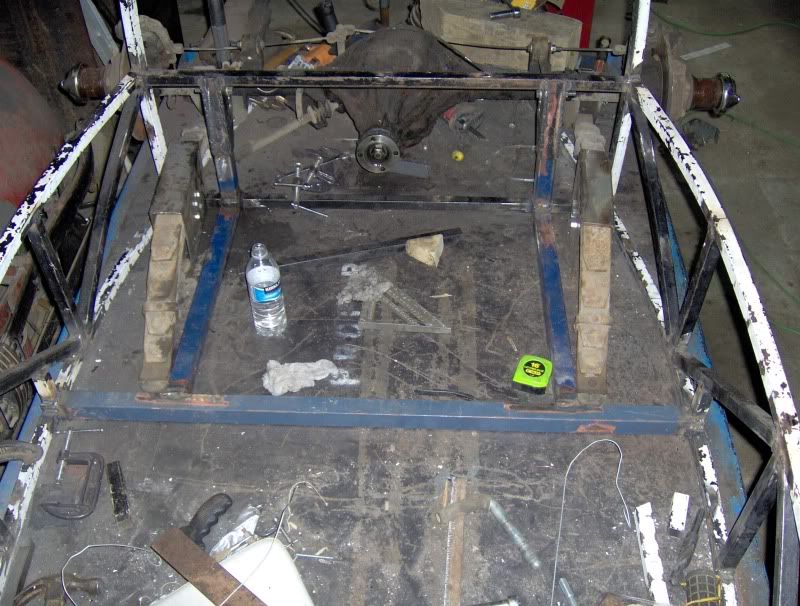
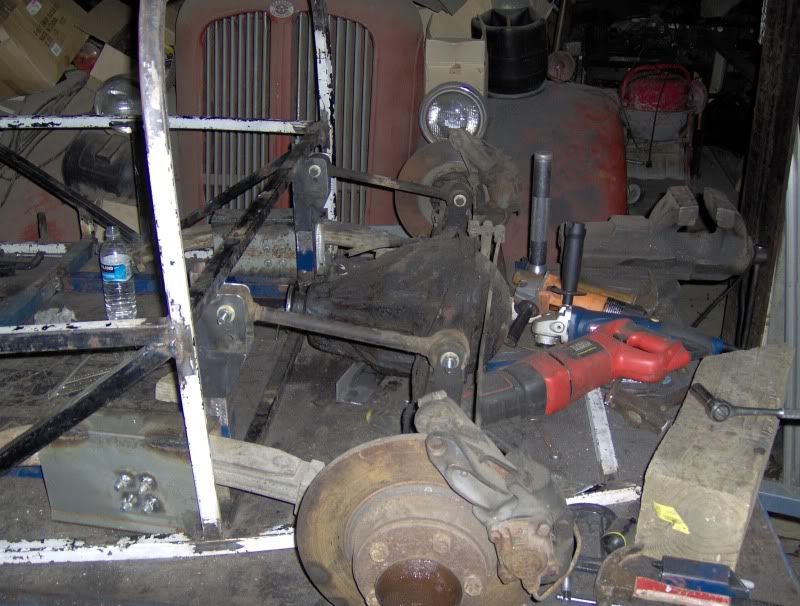
Since I am not sure exactly what spring rate I have, I built some adjustability in for the top links.
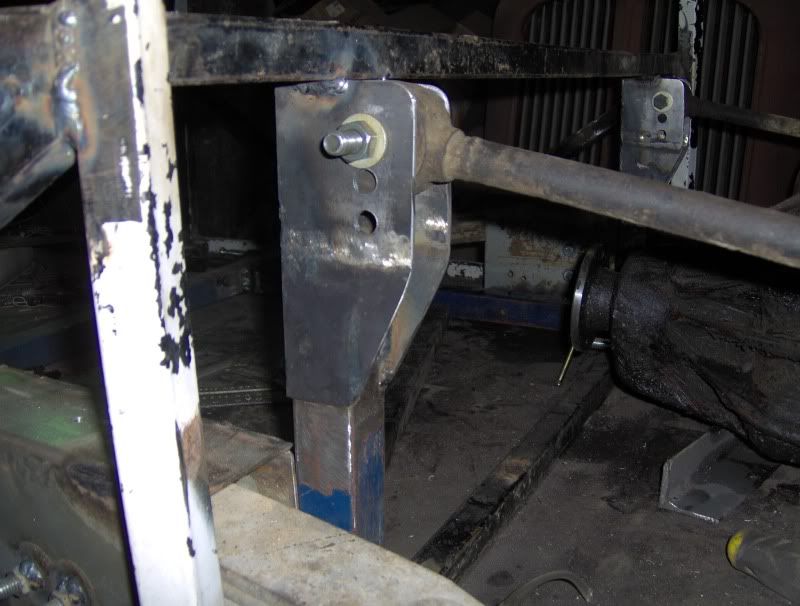
I feel a lot more comfortable with the extra beef.


Since I am not sure exactly what spring rate I have, I built some adjustability in for the top links.

Last edited:
Flipper_1938
He recycles the right way
Next weekend, I will add a diagonal for the link mounts and mount the spring boxes (verticle wall at back, angled wall at front and tied to the frame sideways down low).
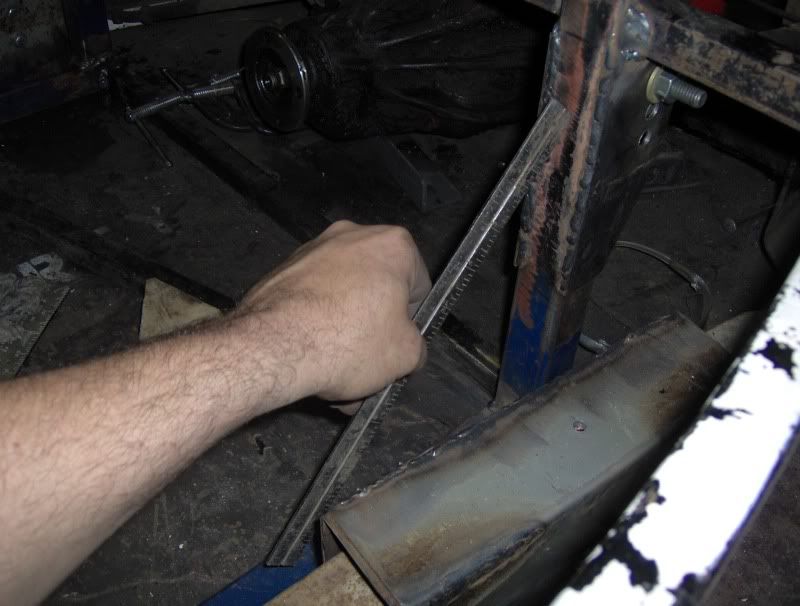
Hopefully after that, the pace will pick back up.

Hopefully after that, the pace will pick back up.
Flipper_1938
He recycles the right way
I jumped in with both feet today. I started wleding the spring boxes in solid. First though, I tapered the front edge of the boxes down for a little more butt room.
Mounting these things is like putting a puzzle together. It is hard trying to figure out how to weld it all together such that you can actually get to where you need to weld. ...and then get the next piece welded in.
I got them welded in enough that I was able to put a jack under the rear axle and cycle the suspension. My spring boxes work as intended....as the rear goes up, the front of the spring pushes down.
I will try to remember to take pics tomorrow and post them.
Flipper_1938
He recycles the right way
Here are the pics of the boxes getting welded in.
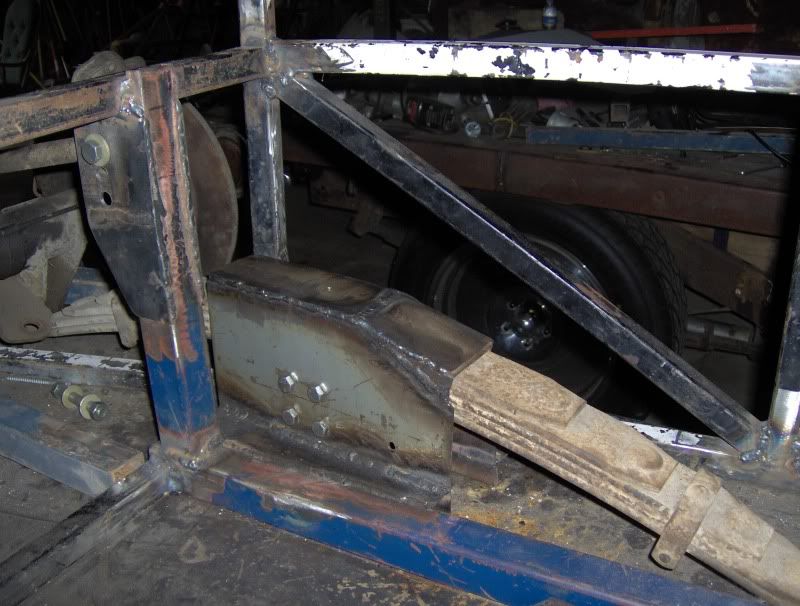
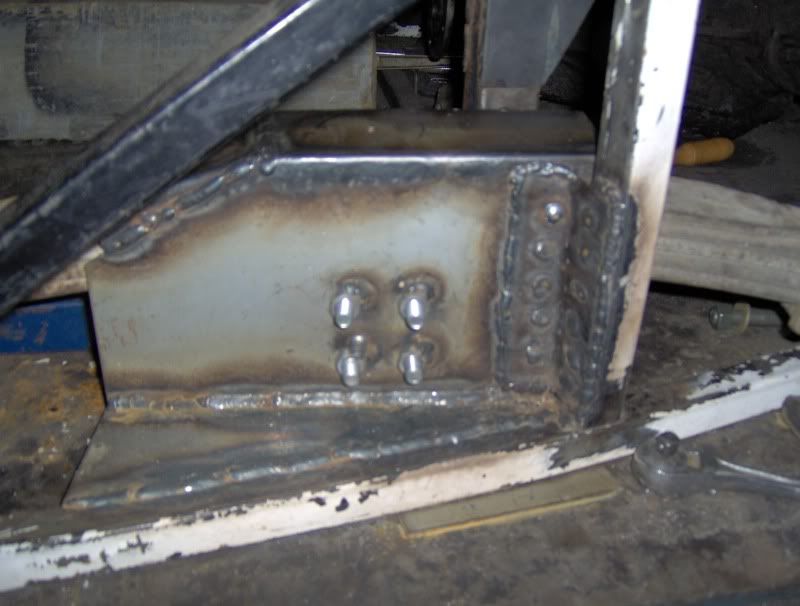
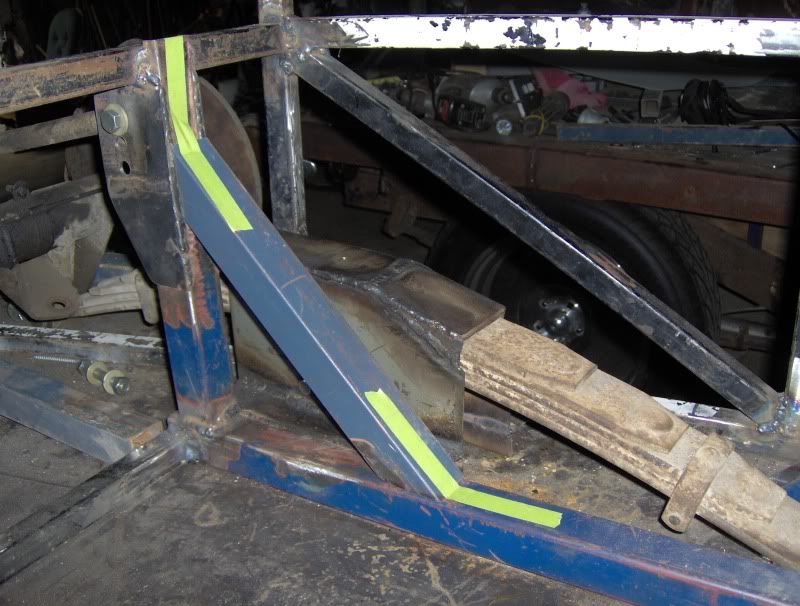
The link mount needs support. I will also tie the boxes in to these.
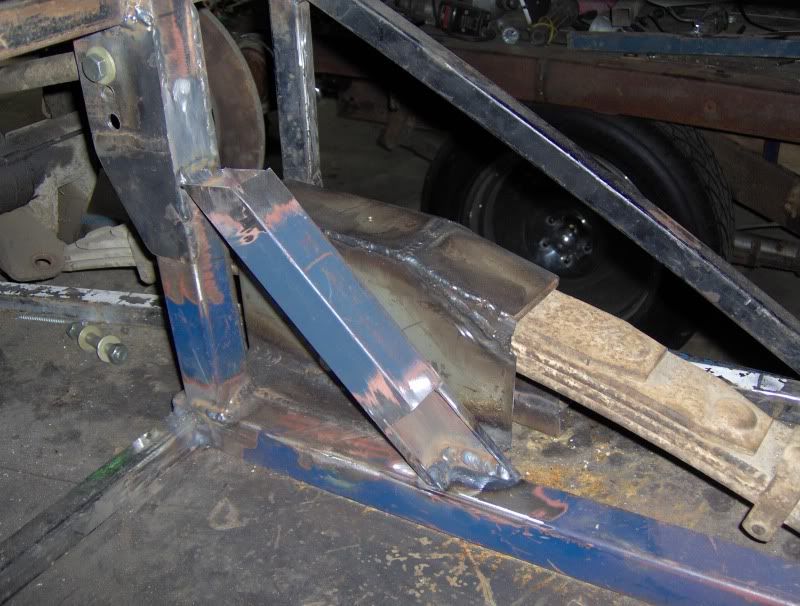
Stuff is too crowded to get to all seams. I cut the tube apart. Some of the welds are on the inside. After these welds are done, the tube gets put back together. Fun!


The link mount needs support. I will also tie the boxes in to these.

Stuff is too crowded to get to all seams. I cut the tube apart. Some of the welds are on the inside. After these welds are done, the tube gets put back together. Fun!

Flipper_1938
He recycles the right way
Tubes put back together
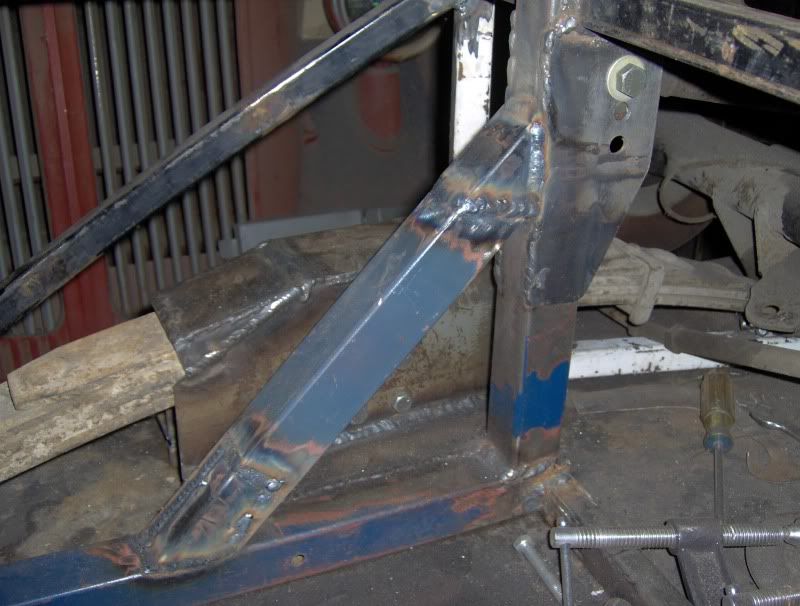
Boxes tied to the diagonal
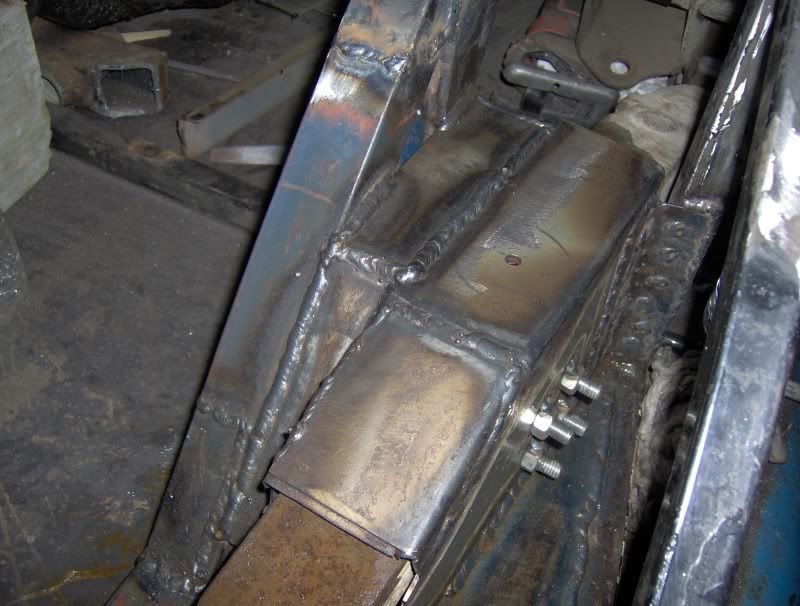
Pics of loading the suspension
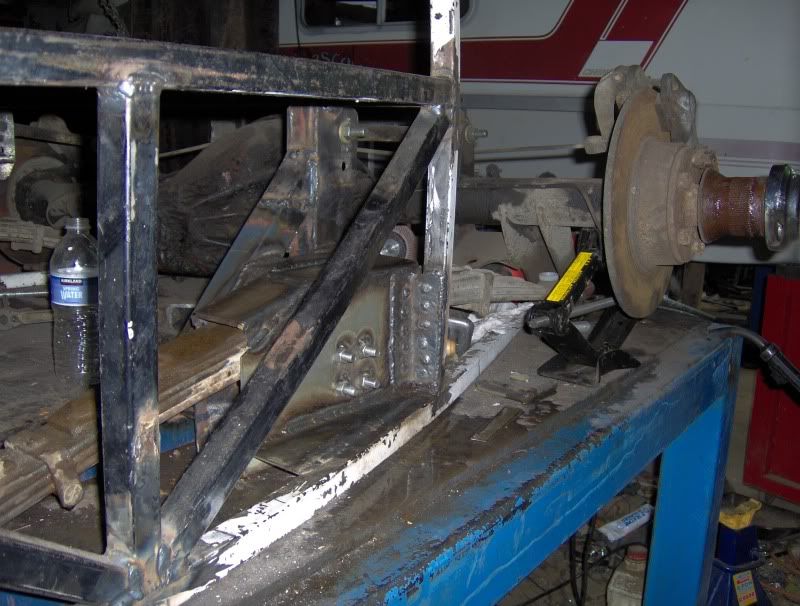
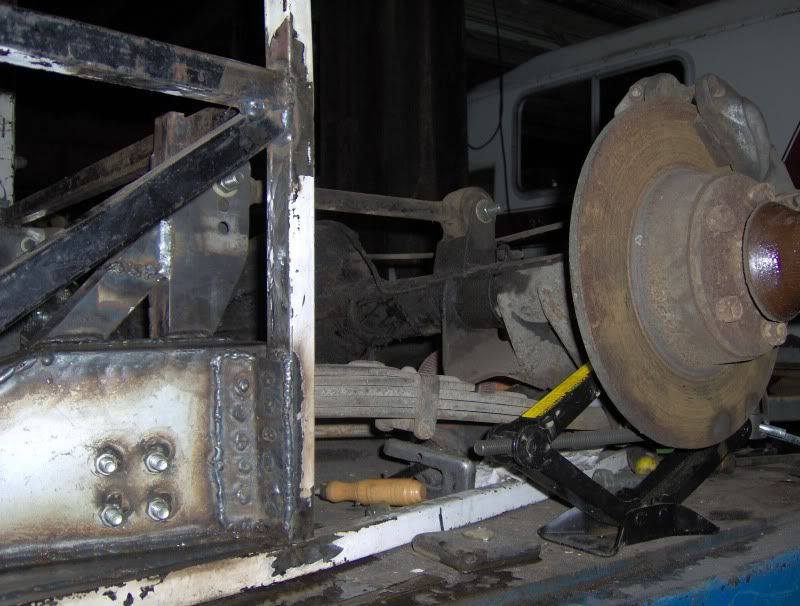

Boxes tied to the diagonal

Pics of loading the suspension


Flipper_1938
He recycles the right way
Dug back into the unbelievebly lucky to have parts stash and found a gas tank.
1952 Mercedes gas tank looks like it will work for this car.
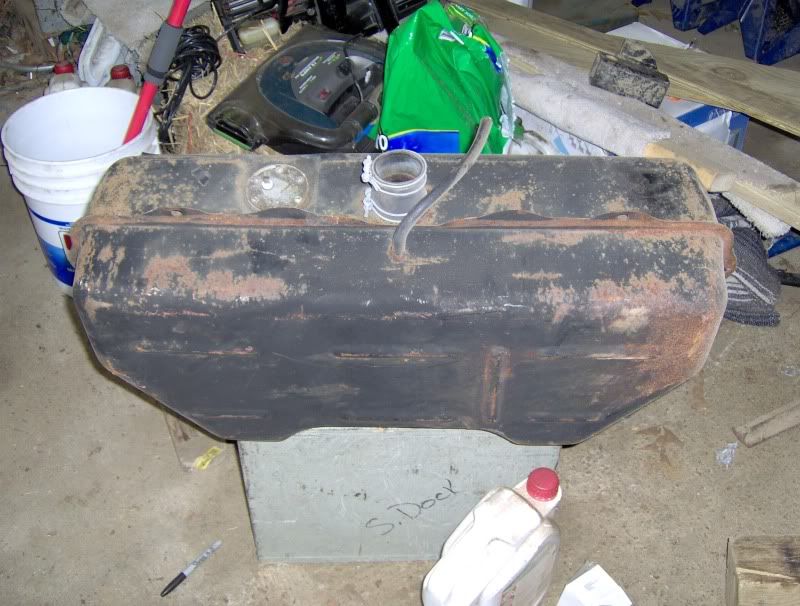
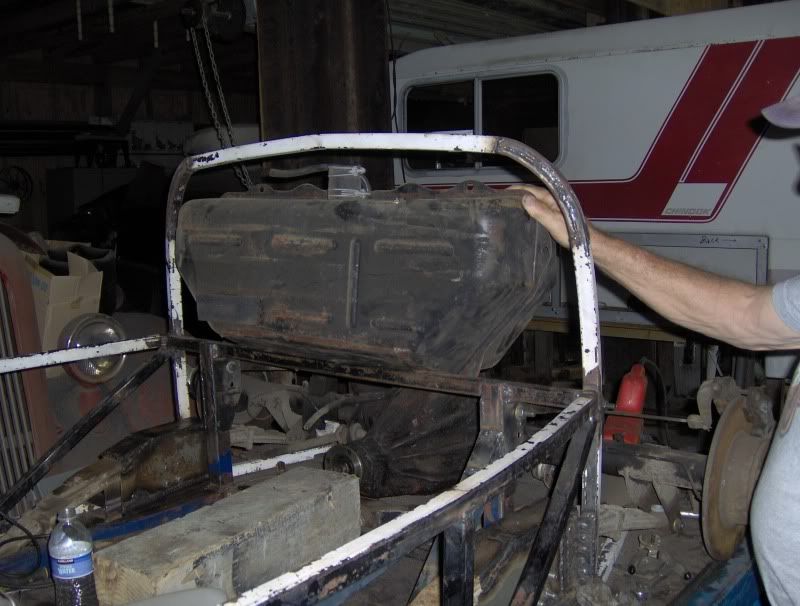
It should clear the links OK and has a little bit of clearance for the diff. Fuel inlet will work with a racecar style cap on the top of the boattail.
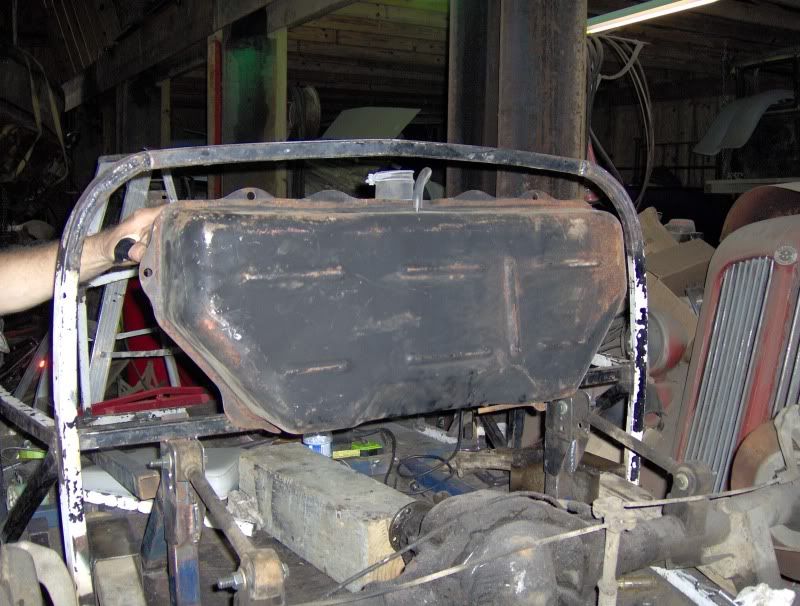
1952 Mercedes gas tank looks like it will work for this car.


It should clear the links OK and has a little bit of clearance for the diff. Fuel inlet will work with a racecar style cap on the top of the boattail.

Flipper_1938
He recycles the right way
This is where I ended the day. I plated in the opening above the boxes. I feels really solid.
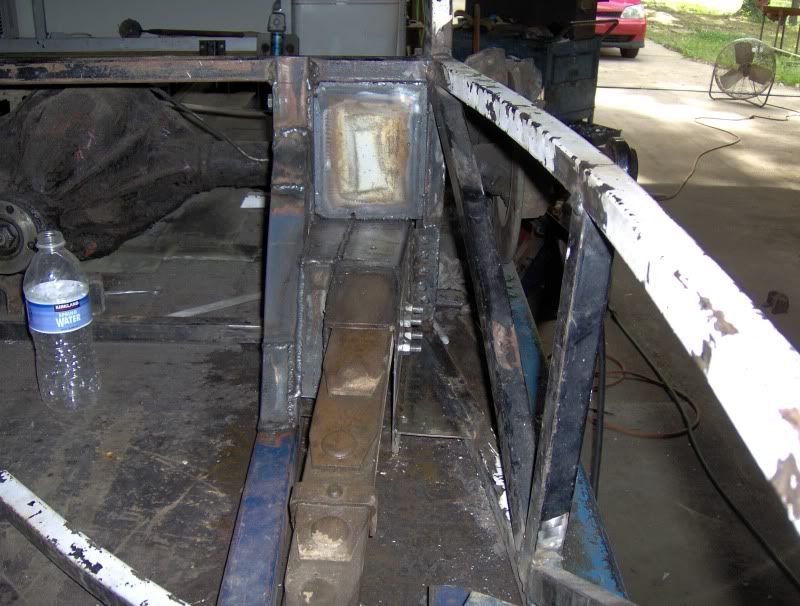
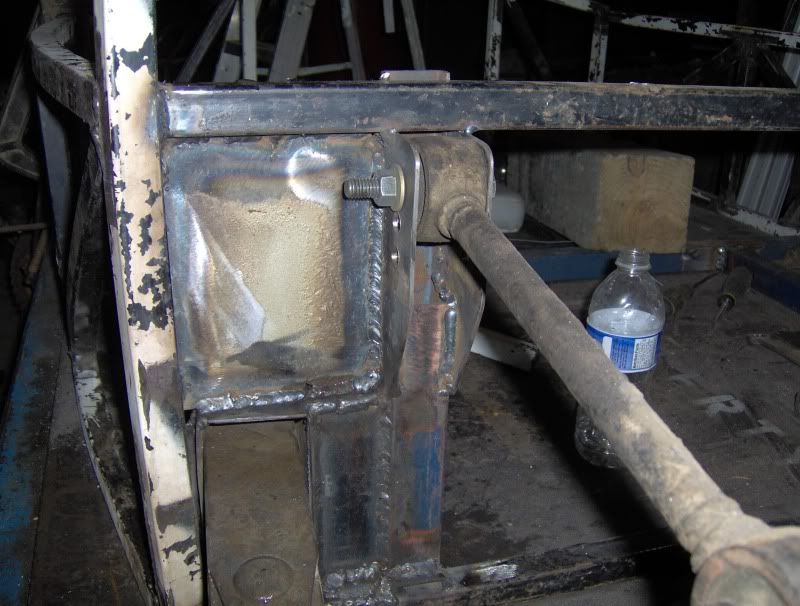


Flipper_1938
He recycles the right way
With any luck, I will re-hang the rear quarters and decide on what the next build step.
Not sure exactly what to do next.
I think I need to start the rearmost frame section/trunk floor. I think I need to start the upwards taper of the boattail at the rear axle...similar to this car.
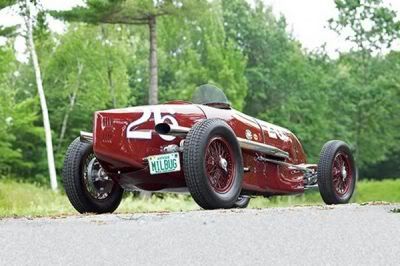
Not sure exactly what to do next.
I think I need to start the rearmost frame section/trunk floor. I think I need to start the upwards taper of the boattail at the rear axle...similar to this car.

