1940 Plymouth Truck

Rat Rods Rule

Help Support Rat Rods Rule:

This site may earn a commission from merchant affiliate links, including eBay, Amazon, and others.
FrontSuspension001-1.jpg

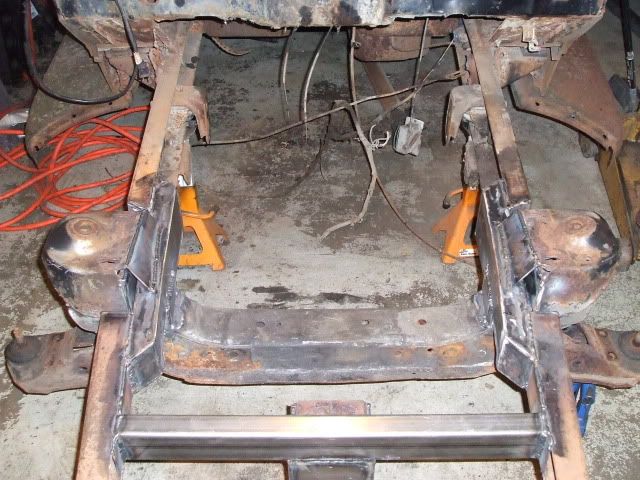
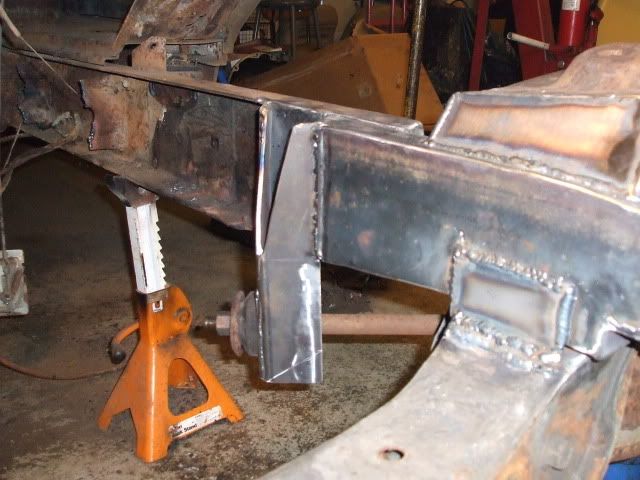
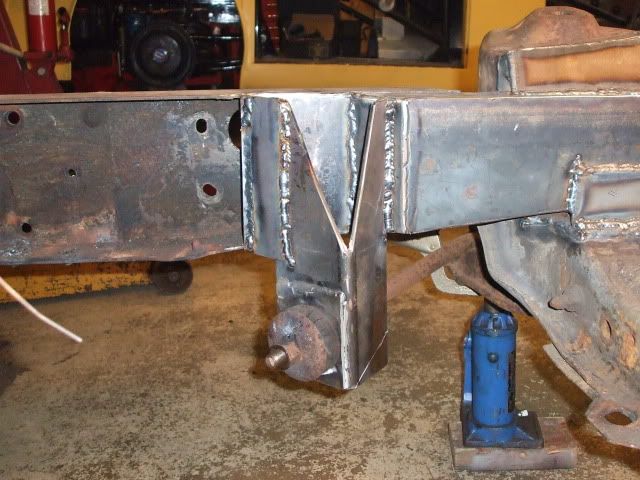
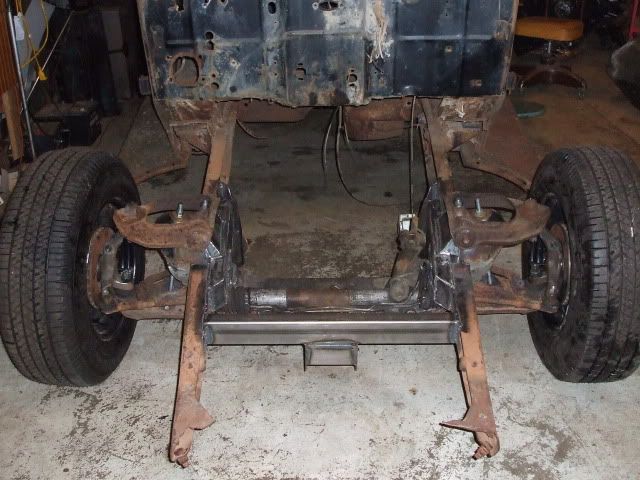
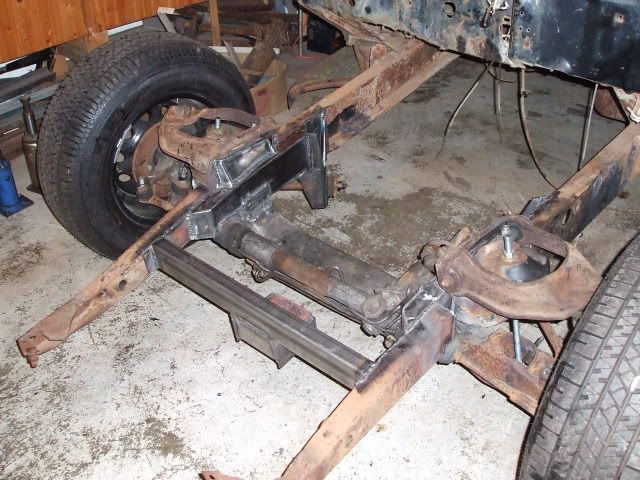
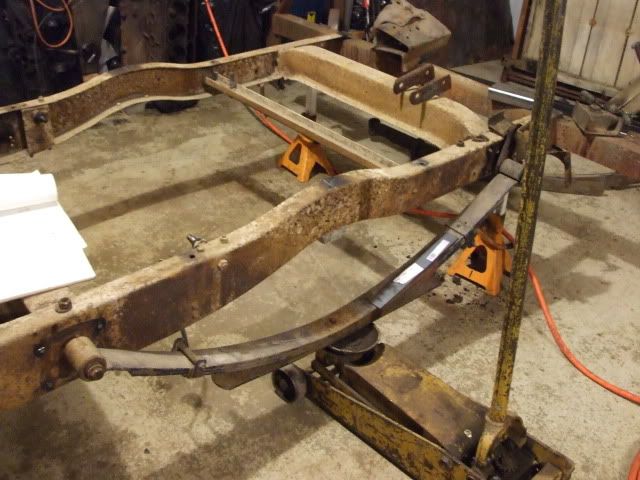
A full frontal view. There will be a little triangle filling the opening at the spring hat. Next is the strut rod mounts. The frame will be boxed from the "pinch" back to the strut rod mounting location to resist frame twist. I haven't installed a MII using a stock crossmember for at least 25 years. It is a lot of extra work compared to buying an after market crossmember.
 
I haven't installed a MII using a stock crossmember for at least 25 years. It is a lot of extra work compared to buying an after market crossmember.

That was a while ago. So, is it easier or harder than it was then:)

Looks very good Bob W. Of couse from the inventor of the "Bobber Truck", I would expect no less. Seriously though, I always enjoy following your projects.
 
SrtutRod002.jpg

I had some 3 1/2' by 3 1/2" thick wall box tubing. By spliting it I was able to make strut rod mounting brackets.
 
SrtutRod003.jpg

Another view. Needs a little cleanup grinding. Just can't seem to follow a line when welding vertical.:confused:
Bought a pair of tan leather seats from an Infinity with power everything. Not very rat rod-like but these old bones need the comfort on long hauls to the drag strip.:D Only $50 on Craigslist.
 
Very cool project! It is refreshing to see a low buck approach to the MII front end in this era of "kits". I have a question. How did you locate the rear strut rod? How much anti-dive did you put in it? I guess that's two questions actually.;)
 
looks good i like it i have the same problem trying to weld like that a welder i know told me to rember this ... push to penatrate and pull to tack.. hope that helps!!
 
MII

Great looking install! I've installed both aftermarket and stock.I get alot more satisfaction out of a stock install! I just done the same thing to my uncles 53 Chevy truck. I really enjoy the design part of it all. Your welds look fine![;) What's important is that they hold and you've got that covered. Great build!
 
MIIDone001.jpg

The front suspension is installed! When I flip the frame over there will be a bit more welding and shaping to do. My concern that it might come out too low didn't happen. It will sit high enough for a daily driver/tow vehicle.
The way I install is, the top of the crossmember is horizontal (front to back) and the vehicle is set at the desired rake. Since I'm a product of the 50's and 60's, it needs a bit of forward rake. I'm planning on a 3 degree rake. With the crossmember horizontal (front to back) the factory anti-dive angle is in the upper A arms.
 
MIIDone002.jpg

It took a lot of pieces to make this installation. More than a few cutoff wheels and Sawzall blades were used. I used threaded rod to hold the front A arms at ride height.
The front wheels are a bit larger than will eventually be used. It looks like the tread width will be right on.
 
MIIDone005.jpg

Here's how it sits now. Looks like the back needs to come down about 6 inches. The rear axle sits under the leaf springs. The spring pack contains 18 leaves and is 4 inches thick. I'll probably use S-10 rear springs since they ride so nice in my 2001 S-10 Extreme. Currently thinking of using a S-10 rear end out of a four wheel drive since they're around the width I need. The Plymmie rear is 61" and the S-10 is around 58"
 
Bob-My hat's off.[cl This truck looks incredible so far. Thanks for sharing your photos, just goes to show you don't have to build "cookie cutter" if you've got the experience and cajones to back it up. I just love to see examples of careful home built engineering. Looks like you didn't bend the strut rods out, either. Think you'll have room for exhaust later?

Regards,
Shea:)
 
Last edited:
Shea, I think the engine will be back far enough so the strut rods won't come into play. I have a set of Heddman headers for a 70's truck that I hope will fit. If not, some rear dump manifolds or Clipster-type shortie headers should work.
I'm now thinking of using a S10 rear frame half to ease the installation of the rear springs, etc. Not sure how much I'll have to raise the bed floor though.[S If the original frame is retained, it will take a deep C-notch to get this thing low in back. There's a LWB frame on the local Craigslist for $175. Anybody out there in RRR-land have any experience with this? Help is always appreciated.:)
 
Hmm...

The original springs on your truck do appear to have quite a bit less "arch" to them than a set of S-truck springs. If you squint your eyes and look at my avitar pic, you'll see what I mean. And yes, before somebody speaks up I know that removing my pickup box reduced rear weight allowing the springs to "spring up." ;)

Bob, I wonder if you could perhaps just use S-10 springs with your existing chassis by simply building some mounts to mount them outboard of the frame in similar fashion to the existing stockers. combining that with an axle flip, i.e. mounting the rearend above the springs like stock S10 as opposed to below the springs like your stock Plymouth, should get you the 5-6" lower that you want.

Would some rear frame/suspension measurements help you at all, Bob? I'd be glad to take a tape measure to mine if you need any numbers for planning, brainstorming, etc. Just let me know. Still no box on mine @ this time...;):(

Regards,
Shea:)
 
Thanksgiving011.jpg

I removed all the Plymouth stuff from the back and set the frame at ride height. My lunch buddy, Farmer Don had a pair of S-10 springs with the end mounts. It became clear that I would have to mount them outside the frame as shown (and as suggested by RRR's own Shea Laking) to get close to the desired ride height. Not feeling like making brackets this morning, I trucked to the junkyard to look for a rear axle. An S10 Jimmy 4 by 4 had the right width rear with a 3.42/posi. That's the same as in my daily driver S-10and I like that a lot. The extra good fortune is the springs are mounted outside the frame just like I want on the Plymouth. Also, the rig has an almost new reciever hitch bolted on the rear (where else would it be???). I'll have the frame cut just in front of the front spring mounts and take the whole back of the chassis. It's possible I'll be able to splice the back of the Jimmy frame into the Plymouth. A rear clip job. If that doesn't pan out, the spring mounts can be transferred to the Ply frame. One way or another I'll get this pig together.
 
Now that old school using a stock MII cross member. I have not used one in years I guess I'm getting lazy using the Chassis Eng. kits. Looks great and keep us posted on the build.
 

Latest posts

Back
Top