38 Fiat Topolino build

Rat Rods Rule

Help Support Rat Rods Rule:

This site may earn a commission from merchant affiliate links, including eBay, Amazon, and others.
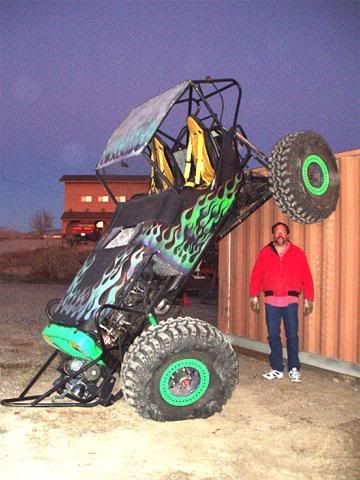
Monster trucks are in another catagory, but when I built this one, the u-joints lasted, and the angles were terrible.
highriskhoodup.jpg
 
BH, you just have too many toys and too much fun! This car building is serious stuff.;)
MD, In hot rod building all kinds of rules are broken and many times the results are just fine. I'm not familiar with the u-joint BH mentioned, but as long as you have a backup plan if your sharp angles prove to be a problem, then I'd give it a try.
My friend Terry, who has built many cars always tilts the engine a few degrees to the rear and sets the pinion horizontal. He's never had a problem with rapid wear or vibration.
In my Fiat (now Crosley) I set the engine very low, the pan is less than 4" off the ground and with a 32" tall tire the pinion was almost 15" off the ground, so the elevations of the tailshaft and pinion were greatly different. With a 17" driveshaft the angles were extreme, like yours. I didn't want to go 120mph at the dragstrip like that. That's why I took the extreme measure of tilting everything forward. Also, I saw it in an installation article in Chris Alston's Chassiswork catalog, on a drag car they built.
 
Quick update.
Slow steady progress.
Finally got all my questions answered and I have an understanding as to how a "tunable four link" works so now I can design the brackets and finish up the bars and the rearend will be hung.

Scored a nice set of QA1 adjustable shocks, so thats cool.

I have worked out the angles for the driveshaft. Center it and live with 7*. It should be ok. I will have to shorten one side of the housing and one axle by 4".

Put the frame (not quite done yet) back in the car and mocked things up again. Seats just fit, and they are small.
While I was at it I dug out a shifter I had and got it modified and mounted. Not quite done but it works well in this location. It is a B&M ratchet shifter and is designed to mount above the floor and stay clean, so I had to put a box around it to keep it clean from road dirt. Just to give you some refference, the handle is just under my right leg just behind my knee!:eek: Doesnt seem like it will be a problem but I may swoop the lever over and up a little, maybe not. I think its kind of cool where its at. I Will get a pic of it in the car tomorrow.

Maybe somebody can tell me why things take so long.:D:D

I am so excited to finally be building this car I cant stand it.:D

I absolutly love the look of this intake manifold. I know its not the most eficient, but will I get away with using it? I dont know much about hi-rise intakes. How might it perform?

Any air cleaner suggestions? The one in the pic is not the one I will use.
 

Attachments

  • nov 2008 shop camera phone 116.jpg
    nov 2008 shop camera phone 116.jpg
    77.4 KB · Views: 22
  • nov 2008 shop camera phone 115.jpg
    nov 2008 shop camera phone 115.jpg
    81.1 KB · Views: 23
  • nov 2008 shop camera phone 110.jpg
    nov 2008 shop camera phone 110.jpg
    87.2 KB · Views: 31
  • nov 2008 shop camera phone 006.jpg
    nov 2008 shop camera phone 006.jpg
    72.9 KB · Views: 38
Here is the shifter, box and bracket complete. It only took 2 days.:eek:
Nobody has told me yet why things take so long.:D

I decided since it would be living down low, I would use it as a TIG welding project. I learned a lot. It is not a great idea to weld sheet metal to 1/4" strap, but it can be done. The holes created while learning can also be filled.:eek:
 

Attachments

  • goldenrod 030.jpg
    goldenrod 030.jpg
    117.1 KB · Views: 31
  • goldenrod 032.jpg
    goldenrod 032.jpg
    104.2 KB · Views: 24
  • goldenrod 036.jpg
    goldenrod 036.jpg
    97.9 KB · Views: 18
  • goldenrod 042.jpg
    goldenrod 042.jpg
    89.1 KB · Views: 24
  • goldenrod 044.jpg
    goldenrod 044.jpg
    78.9 KB · Views: 37
And here is how I am gonna make uncool rear wheels look cool.:cool:

I should also mention that the shifter is in park in the pictures. In any gear, it lays back quite a bit.
 

Attachments

  • goldenrod 047.jpg
    goldenrod 047.jpg
    70.4 KB · Views: 47
  • goldenrod 043.jpg
    goldenrod 043.jpg
    86.4 KB · Views: 45
  • goldenrod 048.jpg
    goldenrod 048.jpg
    75.2 KB · Views: 44
  • goldenrod 046.jpg
    goldenrod 046.jpg
    70.3 KB · Views: 42
Holly crap maddog. That pic down through the roof really gives you the impression that this thing is just all motor. The car is looking great and I love your idea for the rear wheels. :D
 
Nice fab work, MD. Isn't it fun trying to cram everything into a little car?:D
Thanks and yeah, tons of fun.:eek: I never would have thought trying to save an inch on width on the shifter package and mounting it down low and off to the side, would have taken 2 days.

But if I can do that with several more things I will have that oneofakind thing I'm going for.:D

I've worked out an equation for estimating the length of a car build-

several more days X several more things = sometime in 2009 X <->money + other things in life = WHO KNOWS
 
I think I have the rear suspension worked out. I am using a tunable 4 link with coilovers mounted forward and operated with a bell crank.

Here are some pics. I have traveled it in the 3D model and worked everything out.

Some fine tuning still, a pivot for the bell crank, a couple cross members and presto, then I start actually making all those parts.

Good thing I have a pattern folowing flame cutter (poormans laser) and a good drill press.

Any ideas what kind of bushing or bearing I should use in the bell crank for the shocks?
 

Attachments

  • 17.jpg
    17.jpg
    79.8 KB · Views: 15
  • 18.jpg
    18.jpg
    75.4 KB · Views: 29
  • 19.jpg
    19.jpg
    100.8 KB · Views: 42
  • 13.jpg
    13.jpg
    110.6 KB · Views: 56
  • 14.jpg
    14.jpg
    99.3 KB · Views: 35
MD, you are such a CAD! I like the arrangement. There is an Anglia from England on the H--B that has a somewhat similar set up. Don't forget the Panhard bar. Since it is getting pretty crowded on the axle housing, you can put put a diagonal bar across the lower bars of your 4-bar. I've done it that way twice, once with a Chris Alston back half kit in my Anglia. Since your Fiat is going to be really light in the back, you can probably get by with regular 4-bar urethane bushings with a 5/8" hole. You could consider using 3/4" i.d. bronze bushings 2" long, to be sure of handling the load. You can add a zerk and make the bushings greasable.
 
MD, you are such a CAD! I like the arrangement. There is an Anglia from England on the H--B that has a somewhat similar set up. Don't forget the Panhard bar. Since it is getting pretty crowded on the axle housing, you can put put a diagonal bar across the lower bars of your 4-bar. I've done it that way twice, once with a Chris Alston back half kit in my Anglia. Since your Fiat is going to be really light in the back, you can probably get by with regular 4-bar urethane bushings with a 5/8" hole. You could consider using 3/4" i.d. bronze bushings 2" long, to be sure of handling the load. You can add a zerk and make the bushings greasable.

I am thinging about a watts link instead of a panhard bar. I have the urethane bushings with the 5/8" hole. Not sure if they will give me the twist I need for street driving. My plan is to set it all up and travel it in the shop. If it needs more I can replace one end on each bar with a hyme joint. Will that work? Is that done?

You mentioned the bronze bushing. Did you mean for the bell crank?

Thanks for the help.
 
Yes, MD, I was talking about the center pivot of the bell crank connecting the coilover to the rear axle. Watts linkage is better than a Panhard bar or a diagonal bar, if there is room for it and is especially good if you have lots of suspension travel. Spherical rod ends will provide more movement but transfer more shock and vibration into the vehicle. A problem only if you are expecting a Cadillac ride and quietness.
 

Latest posts

Back
Top