49 chevy truck booger

Rat Rods Rule

Help Support Rat Rods Rule:

This site may earn a commission from merchant affiliate links, including eBay, Amazon, and others.
joedoh ''tomorrow I will mount up the bed, should be easy peasy.''

that falls into the "famous" last word catagory:eek:

l can't count the time l thought that and 3 days later l was still working on it.

truck is looking good,

Later :cool:
 
haha you might be right, the weather says rain all day and since the 49 bed is in the side yard and its tough to get everything in the garage if I cant put stuff outside, i may go work on my plasma templates instead.


edit: well I tried. to be completely fair it didnt start raining till I put the floor on the frame. I spent an inordinate amount of time sweeping and waiting for the rain to break, the 49 bed needs some braces cut out and rain+electric grinder is probably ample fun but I will avoid it.

IMG_2280_zpsjhoamryy.jpg

IMG_2283_zpsvcuhed2g.jpg


what has two thumbs and didnt compensate for the curve of the back of the cab? THIS GUY
IMG_2282_zpshnw94ghg.jpg


so make that measurement 19" from the center of the bed mount.
 
Last edited:
right, but I measured from the s10 frame second bed mount to the back of the 49 cab. I added for some space just not enough for the big curve.
 
I can really only work on this thing mondays and tuesdays, and the baby got everyone sick this week so I broke my fever dragging stuff around. got the bed from the side yard, my daughter was home so I did it alone.
IMG_2302_zpss2g8oqk0.jpg

choppy choppy
IMG_2310_zps2fvut5y9.jpg

IMG_2311_zps2ahdvqpx.jpg

eagle eyed readers will notice the fenders are gone off the 46, I sold them (and a bumper) to a local guy doing an s10 swap.
IMG_2292_zpsks9ubmjl.jpg

This is his truck, nice looking!
IMG_0730_zps1fdtmup5.jpeg


there we go, tires held it almost right, had to let some air out of one :D
IMG_2319_zpskitkjblf.jpg


employed the help of my shop vac that was almost the perfect height!
IMG_2320_zpsa85h4xdd.jpg


my wife was home and my daughter is on spring break so I did this alone of course.
IMG_2323_zps5wmdj3jf.jpg

IMG_2325_zpsbjpoynrr.jpg
 
bolted down and roughly lined up
IMG_2326_zpscuirjow7.jpg

IMG_2327_zpsfsyjwolz.jpg


I will tack weld it in once I mock up a fender and a running board, but based on the measurements from the 47 I think this is just about right
 
thanks, I got it lined up and tacked and I might be biased but think it looks great. tubs, floor, and bed mounting in one swoop.

IMG_2328_zpsjsgh4goe.jpg

IMG_2330_zpstrxs3at8.jpg
 
need to get the floor squared and patched so I can blow it apart for finish welding.

IMG_2345_zpsxrqteaby.jpg

IMG_2346_zpsyzhdowen.jpg


drilled for spot welding to the braces
IMG_2349_zpsbt2cpbh3.jpg


not 100% welded yet but soooo much stronger.
IMG_2350_zps1dv9oalv.jpg
 
score! I was going to order drop leafs and blocks and install this extra 3.42 rear I have at the house to replace the 3.08 in the 84 frame. I spotted a 4.10 10 bolt on craigslist and thought I saw lowering blocks in the picture
Screen%20Shot%202016-03-24%20at%204.01.22%20PM_zps9rsdzzjw.png


sure enough, 3" blocks!
IMG_2362_zps7lblakt1.jpg


so for $50 I got drop blocks, AND 4.10 gears. and even recent monroe gas shocks. guy even used his tractor to load it, didnt break a sweat. yet.


there is a giant grass fire southeast of us and with all the wind and smoke it made for an eerie sight friday

IMG_2360_zpsdlbawghn.jpg


if you dont like the weather in kansas just wait, it will change, this is easter!

IMG_2373_zpsvx2adrls.jpg


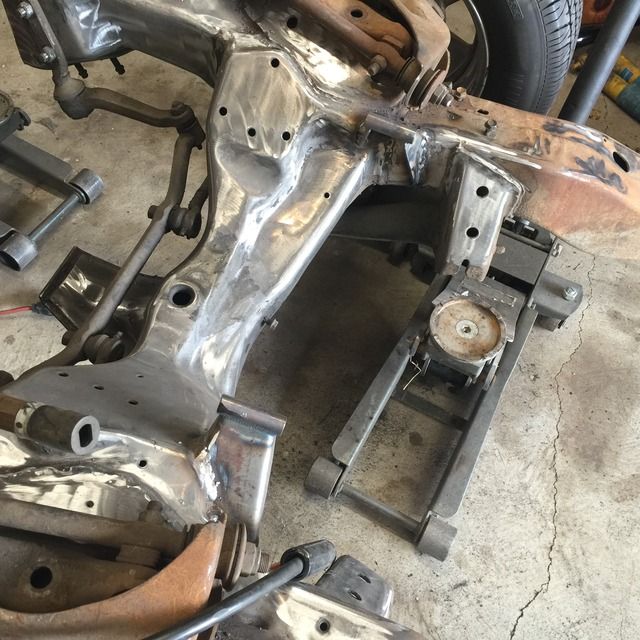
started blowing it apart for finish welding and painting the chassis today. going to lay in the exhaust and fuel lines and brake lines while its apart too. taking the cab off with the hood attached and by myself was pretty scary but it all worked out.
IMG_2374_zpskncl6aqz.jpg


cleaned out the garage too, gotta stay organized
IMG_2377_zps163zbtlo.jpg
 
weld weld weld all day long. weld weld weld while I sing this song. (if you get this reference you are a sad pathetic human. or a janitor)

IMG_2387_zpslju5vhka.jpg

IMG_2385_zps5hqgppr3.jpg

IMG_2386_zps8v2tr9gw.jpg


someone wanted pictures of the motor mounts
IMG_2383_zpsfxfjlvht.jpg

IMG_2382_zps0c9sas7n.jpg


I had to raise one of the rear mounts 3/8". this causes me a little consternation because the mounts were actually within 1/16" of each other when measured off the frame but the cab was definitely low on one side. had to be a variance on the floor, I thought about using a spacer but I just broke the tacks and raised it.
 
Learned a new word just now "consternation" so I can go to the shop and work a little smarter :D
Oh, good job on the mounts :) :cool:
 
haha a wise guy once said "you can make a hundred dollar paragraph with five dollar words".

beeps sleeps, so I did some quick work on a thursday. painted the bare steel
IMG_2416_zpspbgc8ob9.jpg


capped the back of the drivers side mounts, passengers sides and gussets for the core support mount are cut but ran out of time
IMG_2414_zpsdzstizvd.jpg

IMG_2415_zps8uc0jnzt.jpg


need to scrub the inside of the frame and the back half for paint next. got a huge bottle of simple green and some CLR. if it rains tonight I will push it outside and save water!
 
I did the backsides of the passenger and core mounts that night.


IMG_2419_zpsmyvblcgv.jpg

IMG_2418_zpsn198hruc.jpg


I saved water and let it rain on the frame, then scrubbed it down
IMG_2422_zpspiopl5nd.jpg

IMG_2423_zpsnu8mv30z.jpg

painted her up
IMG_2431_zpsjkvkggpc.jpg

IMG_2432_zpsywudc6yp.jpg


intervention time. we have a honda push mower we bought when we lived on a city lot, but when we moved to the big lot I got a hustler zero turn and we only used it occasionally to mow a steep hill right off the road. it had a bad case of RLS last season so I vowed to have it serviced. they wanted THREE HUNDRED DOLLARS PLUS PARTS to replace the carb and tune it up. I did a little looking online and the predator motors from cardboard freight were a dead ringer for the honda motors, so I picked one up. all but one mount lines right up, the drive pulley/blade mount bolted to the shaft, the ignition kill handle popped right in, and a quick mod to the throttle mated it. the mounts need a nut and bolt though, I will pick up some longer bolts tomorrow and see if I need the 4th mount or not. If I do, I will make an adapter plate for strength. amazing, even the honda gas tank and pull starter fit.
IMG_2429_zpsu8weub0t.jpg

IMG_2428_zps5kry8yqe.jpg

IMG_2430_zpsf2gwlxlq.jpg


if it works out good, I will pick up a horizontal shaft motor next and fix the gokart in the shed!
 
buoyed by my success with the lawnmower, I decided to throw together a motorcycle. I had this bike complete and it didnt run very well, and I wasnt getting any good offers, so when I got the chance to sell the motor and gas tank and fairings for what my bottom number was on the whole bike, I took it. I listed more parts from it for sale but no offers came my way. I had this forlorn little donor bike that gave some of its parts to my forever project ysr that I rode around town when I was 18. the donor was an 87 and it was wrecked in 87 with only 1600 miles. it sat in a leaky shed till 2004 when I bought it for parts. would the motor still work? I used the predator mower gas tank and banged out the dents in the ysr tank and cut out the rusty bottom so the mower tank would fit underneath. perfect! installed the engine and chain and cleaned the carb for the first time in 30 years and... VROOM! I have been terrorizing the neighbors with this, my forever bike has a 60cc kit and a DG pipe and I think this one is faster!
IMG_2433_zpsn0abqlop.jpg


after goofing off with that for a couple hours (literally! HOURS!), I started on cab rust. I wasnt going to replace the drivers floor, but it was kind of spongy. I started to replace just a small section and, well.
IMG_2441_zpsypy04wr1.jpg

spotwelds and tacks done. this floorpan didnt line up for ****, but its not a concours restoration either. The original floor was a nightmare for welding, spluttery and spitting. grind and grind and its still brown, and then you have ground so much it blows through.
IMG_2442_zps3hjaxbcj.jpg

need to do the kicks and small holes in the toe board tomorrow, and finish tacking both sides. switched up to the windshield. cut back to shiny metal, only going to need a small repair here, I was thinking this was a bigger deal.
IMG_2443_zpsajhoedtg.jpg
 

Latest posts

Back
Top