
You are using an out of date browser. It may not display this or other websites correctly.
You should upgrade or use an alternative browser.
You should upgrade or use an alternative browser.
49 chevy truck booger
- Thread starter joedoh
- Start date
Help Support Rat Rods Rule:
This site may earn a commission from merchant affiliate
links, including eBay, Amazon, and others.
peabody
Well-known member
buoyed by my success with the lawnmower, I decided to throw together a motorcycle. I had this bike complete and it didnt run very well, and I wasnt getting any good offers, so when I got the chance to sell the motor and gas tank and fairings for what my bottom number was on the whole bike, I took it. I listed more parts from it for sale but no offers came my way. I had this forlorn little donor bike that gave some of its parts to my forever project ysr that I rode around town when I was 18. the donor was an 87 and it was wrecked in 87 with only 1600 miles. it sat in a leaky shed till 2004 when I bought it for parts. would the motor still work? I used the predator mower gas tank and banged out the dents in the ysr tank and cut out the rusty bottom so the mower tank would fit underneath. perfect! installed the engine and chain and cleaned the carb for the first time in 30 years and... VROOM! I have been terrorizing the neighbors with this, my forever bike has a 60cc kit and a DG pipe and I think this one is faster!

after goofing off with that for a couple hours (literally! HOURS!), I started on cab rust. I wasnt going to replace the drivers floor, but it was kind of spongy. I started to replace just a small section and, well.

spotwelds and tacks done. this floorpan didnt line up for ****, but its not a concours restoration either. The original floor was a nightmare for welding, spluttery and spitting. grind and grind and its still brown, and then you have ground so much it blows through.

need to do the kicks and small holes in the toe board tomorrow, and finish tacking both sides. switched up to the windshield. cut back to shiny metal, only going to need a small repair here, I was thinking this was a bigger deal.

I TOTALLY like your motorcycle. .. I'm sure it was a blast to ride !
I have one I rode when I was 18-19, it was my best friends and roommates and we rode it all over wichita even on the highway. I bought it from him in 2001 in 4 milk crates and every time I found a parts bike for sale I bought it, so I have crazy parts, I could probably still make another one.
did the cab corner inner and outer

went ahead and cut twice :haha:.

I used the old one for a pattern and everything, turns out it was squished about an inch. :|
spot welds for the inner, nice and easy!

I have a few gaps to fill on the outside still. *SIGH*
almost finished the passenger floor and patched both kicks inside and out.

this hole in the drivers floor has a $3 plug, or some sheet for free ninety nine since there is nothing under it to check any more.

tomorrow is reassembly day! only two small patches left on the cab, then some bed floor welding, then its ready to go back together.
did the cab corner inner and outer
went ahead and cut twice :haha:.
I used the old one for a pattern and everything, turns out it was squished about an inch. :|
spot welds for the inner, nice and easy!
I have a few gaps to fill on the outside still. *SIGH*
almost finished the passenger floor and patched both kicks inside and out.
this hole in the drivers floor has a $3 plug, or some sheet for free ninety nine since there is nothing under it to check any more.
tomorrow is reassembly day! only two small patches left on the cab, then some bed floor welding, then its ready to go back together.
Last edited:


I didnt get to work on the truck again till today. Grandma (wifes mom) had a coolant leak (gush) on her CRV, so I had to run and fix it. She lives out in the country and its a haul to get there, diagnose, drive back to town for parts, then back to fix. Its all better now, till the next problem!
I milked around today getting things ready to assemble. fixed some more cab rust first

cut out the old seat frame and tried out the seat because I want to weld in some supports for where it mounts. Now I see why everyone uses these. Need to decide on a color and get it to the shop to be recovered

Got the core support welded up too. there was a big crease on the passenger fender, I used the 5lb sledge on one side and the 10lb on the other like a dolly, got that nice DING every shot and made short work of it.

couple more tacks on the bed

when I pulled the motor I cut the exhaust because one bolt on each side wouldnt come loose and I figured I would be doing custom exhaust. but its low mile exhaust, and after some thought I decided to weld my mistake. I may still do custom, but this will get it running and I can use it later

tomorrow I will pick up my favorite seam sealer, F26 construction adhesive. I used it on a bed I raised the floor in years ago and it is still in perfect shape after years in the sun. Best of all it gives strength to stitch welded seams, and takes paint. I will be on the lookout for a suitable sheetmetal piece for the trans tunnel too, maybe a shovel or a wheelbarrow.
I milked around today getting things ready to assemble. fixed some more cab rust first
cut out the old seat frame and tried out the seat because I want to weld in some supports for where it mounts. Now I see why everyone uses these. Need to decide on a color and get it to the shop to be recovered
Got the core support welded up too. there was a big crease on the passenger fender, I used the 5lb sledge on one side and the 10lb on the other like a dolly, got that nice DING every shot and made short work of it.
couple more tacks on the bed
when I pulled the motor I cut the exhaust because one bolt on each side wouldnt come loose and I figured I would be doing custom exhaust. but its low mile exhaust, and after some thought I decided to weld my mistake. I may still do custom, but this will get it running and I can use it later
tomorrow I will pick up my favorite seam sealer, F26 construction adhesive. I used it on a bed I raised the floor in years ago and it is still in perfect shape after years in the sun. Best of all it gives strength to stitch welded seams, and takes paint. I will be on the lookout for a suitable sheetmetal piece for the trans tunnel too, maybe a shovel or a wheelbarrow.
peabody
Well-known member
I love your build [cl
peabody
Well-known member
What seat is that ?
Reminds me of a 88 chevy pickup seat i had ....[P
Reminds me of a 88 chevy pickup seat i had ....[P
bob w
Still crazy after all these years!
Big dents require big tools. I like your style. The results are very good. What brand is that construction adhesive?
Last edited:
it is indeed. I got two for $100 at a local salvage, they had them on craigslist for 75 ea and I made an offer. used the last one in my 65, transformed it completely.

that steel in the fenders is no wimpy steel, I cant imagine what the fencepost looked like to create that crease but using the hammers was a perfect solution.
F26 is made by Leech Adhesives. I get it at Ace Hardware.
Big dents require big tools. I like your style. The redults are very good. What brand is that construction adhesive?
that steel in the fenders is no wimpy steel, I cant imagine what the fencepost looked like to create that crease but using the hammers was a perfect solution.
F26 is made by Leech Adhesives. I get it at Ace Hardware.
today was seam sealer, be sure to spread it out and catch all the pinholes! Will have to do the bottom side once the cab is mounted.

dropped off the bench seat at the upholstery shop, trying a new guy who says he can work magic in short time. went in thinking ivory, reconsidered to a parchment like in late model higher end cars. here it is in 3 different lights
natural light kitchen

under florescent

garage door open mostly mottled sun

the idea is to paint the dash and wheels to match. speaking of wheels, I am undecided between mobsteel 20s, wheel vintique 15" smoothies, or wheel vintique 15" artillery. I had the smoothies on the 47 gmc and loved the look. I will decide this week and make the order, opinions welcome but not necessary (its not a democratic build!)
dropped off the bench seat at the upholstery shop, trying a new guy who says he can work magic in short time. went in thinking ivory, reconsidered to a parchment like in late model higher end cars. here it is in 3 different lights
natural light kitchen
under florescent
garage door open mostly mottled sun
the idea is to paint the dash and wheels to match. speaking of wheels, I am undecided between mobsteel 20s, wheel vintique 15" smoothies, or wheel vintique 15" artillery. I had the smoothies on the 47 gmc and loved the look. I will decide this week and make the order, opinions welcome but not necessary (its not a democratic build!)
05snopro440
Well-known member
today was seam sealer, be sure to spread it out and catch all the pinholes! Will have to do the bottom side once the cab is mounted.
dropped off the bench seat at the upholstery shop, trying a new guy who says he can work magic in short time. went in thinking ivory, reconsidered to a parchment like in late model higher end cars. here it is in 3 different lights
natural light kitchen
under florescent
garage door open mostly mottled sun
the idea is to paint the dash and wheels to match. speaking of wheels, I am undecided between mobsteel 20s, wheel vintique 15" smoothies, or wheel vintique 15" artillery. I had the smoothies on the 47 gmc and loved the look. I will decide this week and make the order, opinions welcome but not necessary (its not a democratic build!)
I like my WV Artilleries because they're different. I would stick with 15's just because the ride is so much better (and in my opinion they look better). I'm interested to see the finished seat.
I think I am going with artillery. I like the look, and the smoothie caps fit. the mobsteels just look too big to me on an AD
I needed to shorten the exhaust, it was from an extended cab and I moved the motor back, so its about 10-12" too long in the middle. Started the cut.

I started laying in the fuel lines and wiring harness and brake lines. I cant find my complete brake line setup so I called a buddy who is parting a blazer and will pick those up tomorrow. I also cant find my gas tank strap so I guess his blazer will donate those too.
I did notice that the motor mount on the drivers side looked a little crooked, I checked it and sure enough it was off almost 3/8. I sliced it and will weld it before I stab the motor.

then I decided to tackle the pedals. I needed to clear off the firewall and get the gauges out anyway to convert them. what a real beyotch, everything fought me all the way, but I think tomorrow I can mock up the pedals and maybe even paint the dash

gauge rings might clean up with some steel wool but I will need to print new gauge faces

that F26 set up like flexible concrete, I love that stuff. the floor feels so strong now, glad I did both floor halves.
I got a call from the seat guy yesterday too, he was working the weekend to meet his promise. What a guy, hope it comes out gorgeous!
I needed to shorten the exhaust, it was from an extended cab and I moved the motor back, so its about 10-12" too long in the middle. Started the cut.
I started laying in the fuel lines and wiring harness and brake lines. I cant find my complete brake line setup so I called a buddy who is parting a blazer and will pick those up tomorrow. I also cant find my gas tank strap so I guess his blazer will donate those too.
I did notice that the motor mount on the drivers side looked a little crooked, I checked it and sure enough it was off almost 3/8. I sliced it and will weld it before I stab the motor.
then I decided to tackle the pedals. I needed to clear off the firewall and get the gauges out anyway to convert them. what a real beyotch, everything fought me all the way, but I think tomorrow I can mock up the pedals and maybe even paint the dash
gauge rings might clean up with some steel wool but I will need to print new gauge faces
that F26 set up like flexible concrete, I love that stuff. the floor feels so strong now, glad I did both floor halves.
I got a call from the seat guy yesterday too, he was working the weekend to meet his promise. What a guy, hope it comes out gorgeous!
peabody
Well-known member
Love your truck. [cl[P
thanks!
big storms today so I wont get my brake lines, needed to put the motor back in for the last time. so I worked on the pedal mount.
a bit of poetic wax: I use the 98-03 s10 almost exclusively. some guys see it as harder, but I like the bused electrical system, anti theft key security, high pressure fuel system, efi, cruise, there is a hundred reasons for me. If you like putting in a painless wiring kit and using the earlier column and a carburetor, I wont bother convincing you my way is better. My personal opinion is that I think mixing and matching of parts and tribal knowledge is what keeps a lot of these swaps from being successful, and why even some (not all) guys who finish them complain about all the little fab needs. I use the whole donor, then worry about engine upgrades, or suspension upgrades, etc. keeping the scope and scale small and making sure to use parts that were already designed to work together is a good way to be successful. /wax
I am going to post this in the how to section when I am done, but for now, here we go.
the 98-03 steering column mounts to the pedal assembly. the pedal assembly mounts to the sheetmetal brackets and boxing on the firewall. the booster mounts to the firewall and does not share a connection to the pedal assembly or the brackets or boxing. this is a real conundrum, because it needs a precise relationship to the booster to make sure the pedal stroke is correct. seen below is the top of the aluminum pedal assembly

and the bottom, you can see the upper and lower column mounts

I need to duplicate the relationship between the pedal mount and the booster hole on the firewall to build my interface bracket. luckily I never throw anything away. I have a whole firewall section from a blazer I parted a few pages back. Its heavy and awkward, but luckily my wife and daughter were home so I went ahead and moved it myself. (ba dum bum tsss)

here is the boxing and mounting and booster hole in all its glory

This is how I will make my jig for the interface bracket. I like using coat hangers, for bolt holes I wrap one around a screwdriver then cut it into rings that slip over bolts. I made two sizes small and large


then I just start building.


big storms today so I wont get my brake lines, needed to put the motor back in for the last time. so I worked on the pedal mount.
a bit of poetic wax: I use the 98-03 s10 almost exclusively. some guys see it as harder, but I like the bused electrical system, anti theft key security, high pressure fuel system, efi, cruise, there is a hundred reasons for me. If you like putting in a painless wiring kit and using the earlier column and a carburetor, I wont bother convincing you my way is better. My personal opinion is that I think mixing and matching of parts and tribal knowledge is what keeps a lot of these swaps from being successful, and why even some (not all) guys who finish them complain about all the little fab needs. I use the whole donor, then worry about engine upgrades, or suspension upgrades, etc. keeping the scope and scale small and making sure to use parts that were already designed to work together is a good way to be successful. /wax
I am going to post this in the how to section when I am done, but for now, here we go.
the 98-03 steering column mounts to the pedal assembly. the pedal assembly mounts to the sheetmetal brackets and boxing on the firewall. the booster mounts to the firewall and does not share a connection to the pedal assembly or the brackets or boxing. this is a real conundrum, because it needs a precise relationship to the booster to make sure the pedal stroke is correct. seen below is the top of the aluminum pedal assembly
and the bottom, you can see the upper and lower column mounts
I need to duplicate the relationship between the pedal mount and the booster hole on the firewall to build my interface bracket. luckily I never throw anything away. I have a whole firewall section from a blazer I parted a few pages back. Its heavy and awkward, but luckily my wife and daughter were home so I went ahead and moved it myself. (ba dum bum tsss)
here is the boxing and mounting and booster hole in all its glory
This is how I will make my jig for the interface bracket. I like using coat hangers, for bolt holes I wrap one around a screwdriver then cut it into rings that slip over bolts. I made two sizes small and large
then I just start building.
I use a lot of triangulation to maintain the relationship and make the jig strong. a while later I have a nice jig. notice I even picked up the stud at a 45 degree angle with a ring


now that I have captured all the clearances, I am ready to start building my bracket, I trial fit it on the firewall of the 49 and it will work out swimmingly. not bad for about 2 hours of work.


I came in to make dinner, I may get back out there this evening to build the bracket.
now that I have captured all the clearances, I am ready to start building my bracket, I trial fit it on the firewall of the 49 and it will work out swimmingly. not bad for about 2 hours of work.
I came in to make dinner, I may get back out there this evening to build the bracket.
sgtpontiac
Older, Wiser and Still Buildin'
Thats a really unique way to do it...
Don't think I've ever saw that before.....neat...glad you can see it in your minds eye cause I was getting cross eyed trying to figure it out...LOL..
Don't think I've ever saw that before.....neat...glad you can see it in your minds eye cause I was getting cross eyed trying to figure it out...LOL..
Don't think I've ever saw that before.....neat...glad you can see it in your minds eye cause I was getting cross eyed trying to figure it out...LOL..
haha it will all be clear shortly!
I didnt get back on the jig, I ate dinner and got a ding from my email. I have been looking for a replacement bed for my 46 (it came with a 47 bed a couple pages ago). 46 for parts. KC number, but pictures showed a bed.

called. guy was in KC but bed was in south haven with his dad, so about an hour. I always say be the first to call... but....

I am at the 1, south haven is somewhere down in the red haha. he said he wouldnt sell the fenders or bed separate, I had to buy the whole truck. Then he quoted a price that made me forget the rain and hail and jump in the truck. I hid under some underpasses, eventually it cleared up enough to drive more than 25mph on the highway. for those that have never seen green hail clouds,

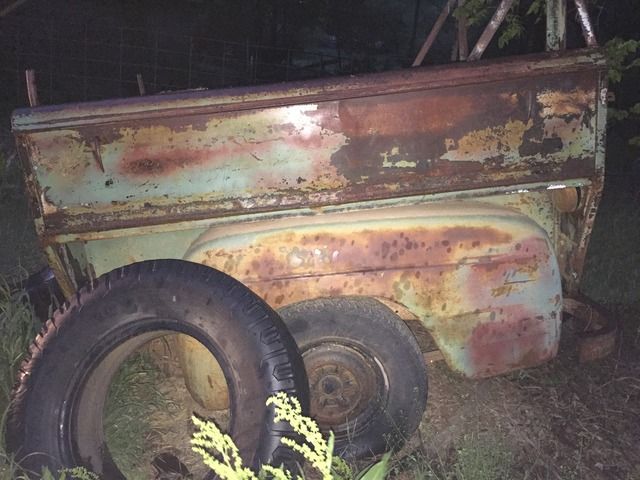
I got there and we loaded in his truck to go to the pasture, good fenders, and a cowl tag! sold!


then he says its a GMC tailgate!

well all I can think is too bad I dont have a chevy tailgate because the GMC is hard to find. he says "thats a long bed, you can see they moved the fenders up". I think it looks kind of neat and will keep it that way. "I have a shortbed too if you would rather make a shortbed". wait what?


ok, sold again! "I have another 47-55 shortbed too". okaaaaay, sold again? (I forgot pictures of this one, but its clean and no real rust).
then as we are driving around he says, "that one is a phone company utility bed" and waves at a 48 ford shortbed with some utility boxes on it. no way! I have never seen anything like it, I'll take it! sold again!

honestly, I could have kept buying till I was in the poorhouse, but I had to rein it in. He showed me his projects, a 53 chevy 1/2 in perfect shape, a 49 ford 1/2 in perfect shape, a 27 T converted to a pickup. Here he is next to the ford


anyone ever seen a hood ornament like this?

so tomorrow I have to arrange pickup of my pickup, and 3 extra beds. sheesh!
honestly, I could have kept buying till I was in the poorhouse, but I had to rein it in. He showed me his projects, a 53 chevy 1/2 in perfect shape, a 49 ford 1/2 in perfect shape, a 27 T converted to a pickup. Here he is next to the ford
anyone ever seen a hood ornament like this?
so tomorrow I have to arrange pickup of my pickup, and 3 extra beds. sheesh!
forbigpicture
Please stand by.......
WOW!!!! JACKPOT!!!!![cl[cl
and good info on making the bracket.....
[P[P[P
and good info on making the bracket.....
[P[P[P
smallfoot
He's rockin' the "Nuttin Special"!
Sometimes you fall into the cesspool and come out smelling like a rose....[cl