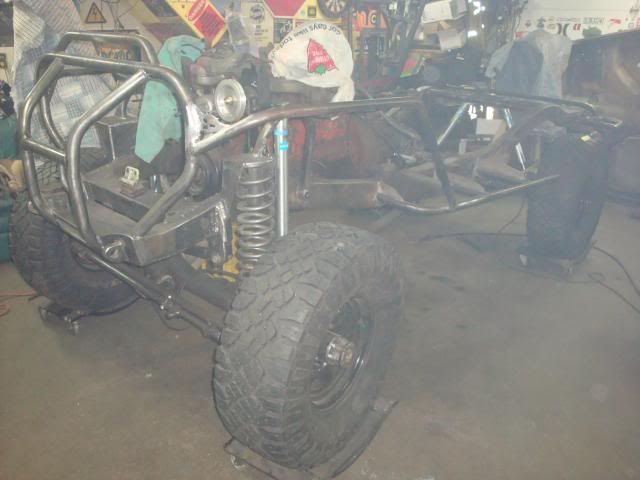
Ratty fj40 Land Cruiser clustertruck....

Rat Rods Rule

Help Support Rat Rods Rule:

This site may earn a commission from merchant affiliate links, including eBay, Amazon, and others.
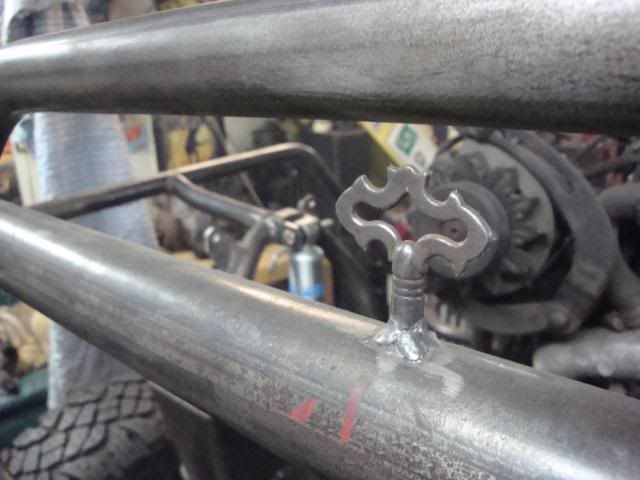
Throttle cable apparatus invented.


Rad support rod sleeved (was all bent to ****).


Also took the time to fix up a couple things that turned out a little crooked and were buggin the crap out of me. The main hoop of the front bumper was out 1/4" from pass to driver side so that got straightened out. The ps coil bucket was leaning towards the front of the van and the coil wasnt centered so that got chopped off and re welded.

D
 
Couple friends stopped by so I took advantage and made them work. Got the roll cage out.... in the garage lol. Took off the rear tires, dropped the rear axle on some big chunks of wood and managed to squeak it out of the tub. Its a heavy mofo.

Then a couple more friends popped in and we had enough guys to get the tub off. It got heavier since the last time it was off as well..

Yesterday I finished welding the sliders on and relocated my ladder bar mount up higher on the cross member. It was hanging low an I got about 2.5-3" more clearance. Then Randy suggested flipping the trac bar itself since I had everything apart. Smart, have a bunch more room under it now.

Also found that notorious oil galley plug on the block. Gotta think about drilling and tapping it for a threaded plug since the van is torn apart.


Did the 2lo mod since the tub was off. 2 cuts to the t case shifter bracket and now it has 2wd low. The original shift pattern is an L pattern 2wd,4wd,then to the right for neutral and 4lo. With the bracket cut I can go from 2wd straight to 4lo or from 4lo to 2 lo, 2hi to 2lo. It now shifts in an x and or O pattern and theres a neutral between 2hi and 2lo if that makes sense... Should come in handy w the auto locker in the front.


Trac bar before
DSC04370_zpsfcb0970b.jpg


After


D
 
No suspension links in the rear. Leaf springs and an anti wrap bar or ladder bar, could be what youre seeing?

Im keepin it leaf sprung in the rear for load carrying and to add some stability to the coils in the front.

D
 
Holy gussets are the backbone of invinciballs..

Recycled Randys old receiver into some 3/8" knuckle ball gussets top and bottom, "boxed" the lower front chock mounts, made more gussets here and there, and recycled Petes old motorbike sprocket. Sunk a dimple died 1/4" roof bolt washer into the winch mount for drainage... Cut up the lower rad shroud and made it fit better since the po just rammed it between the frame rails all bent to ****. Welded up more rivet holes in the frame....

Lost track of every little thing lol.


D
 
I don't know much about the machine you are building, nut I can tell you are a very good fabricator. Do you have previous experience with Bilstein shocks?
 
Randy popped by and we threw on new rear spring hangers then realigned the rear axle/leafs. We were 1/4" out last time and the leaf hangers twisted a bit when welding so thats the reason for the extra BS. Managed to get all of the welding at the rear of the frame knocked off yesterday and Im happy to say there was no twisting lol. To top it off, after measuring a million times the rear axle is now out 1/64" and thats more than good enough for me. Got most of the welding on the rear axle done as well, just have to add a tab or two for brake lines.

After one failed attempt due to a leaky engine hoist cyl. we got the motor pulled. Lots of fun.

Next is pulling the front axle/suspension and finish welding, then have to clean up the frame where I couldnt reach with the motor in.... Yay....


Now I just need more floor space...

D
 
Got the front end all apart today. Finish welded the radius arm wedges and the track bar mount on the axle and welded more on the frame. Cleaned the axle up a little before callin it a day.


D
 
thanks.....&

thanks for taking the time to take & share all the pix......lotsa neat fab work & ideas.....
I'm sure this has been covered, but when you are welding all those brackets etc to your axle housings, how are you keeping them from warping? just skipping around?
thanks again, really enjoy your build
 
Yup skip around. Theyre beefy housings to start with though.

Epoxy primed and painted a couple few things. The steering box color was chosen last minute while high on paint..


D
 
That is a lot of work! Looks great all painted up. I like the color of the steering box!

What color is the gold on the valve cover and other bits? Looks like a satin or almost flat gold color in the pics?
 
Thanks, the gold is vht engine enamel and the bronze (steering box) is duplicolor bronze wheel paint.

D
 

Latest posts

Back
Top