You are using an out of date browser. It may not display this or other websites correctly.
You should upgrade or use an alternative browser.
You should upgrade or use an alternative browser.
1937 Chevy Coupe
- Thread starter Dr Crankenstein
- Start date

Help Support Rat Rods Rule:
This site may earn a commission from merchant affiliate
links, including eBay, Amazon, and others.
Dr Crankenstein
Rocket Surgeon
Thanks for your comments, fellas. 
Saturday: B-tard worked to rebuild the (original) trunk supports, while I dug back into the tailpan mess...
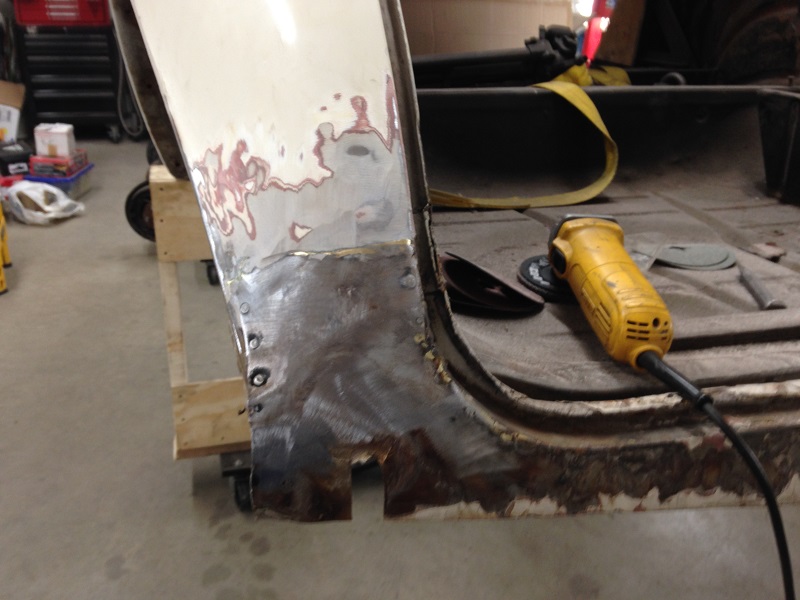
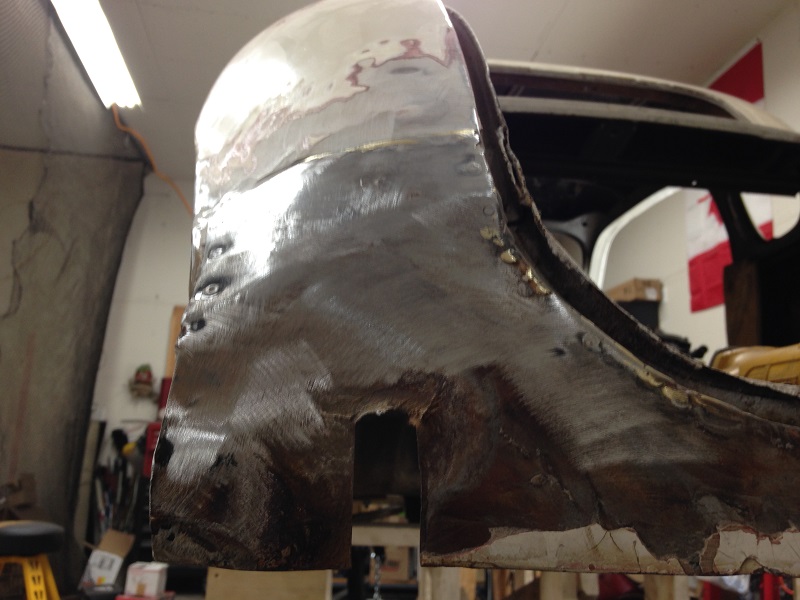
In the photos above, you can see the brass joint and a thick "cap" of BondoTM . (This can't be good.)
I ground some more, created more "shop flour" and discovered this flower...
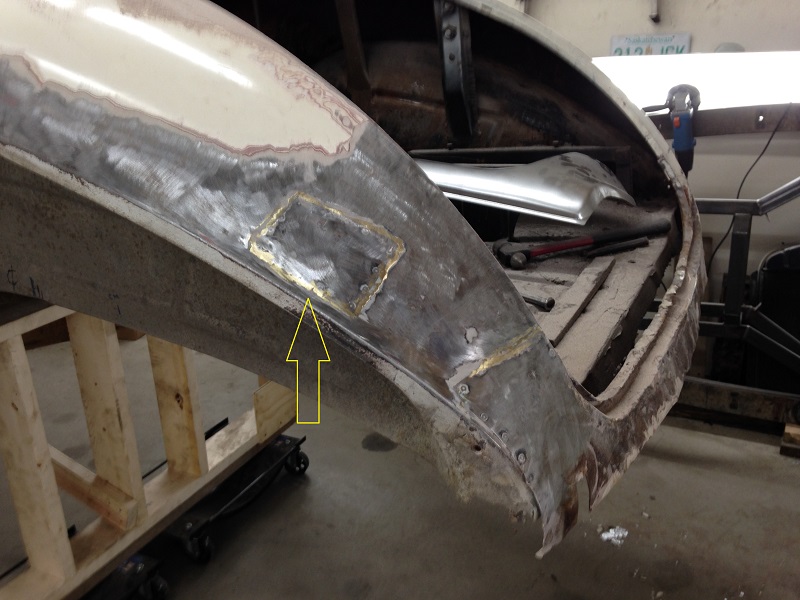
What, in the blue flying blazes is that? (Censored for family viewing.)
B-tard returned to the scene of the crime and we scratched our heads for a minute or two... until the bulb lit...
A look inside told the tale...
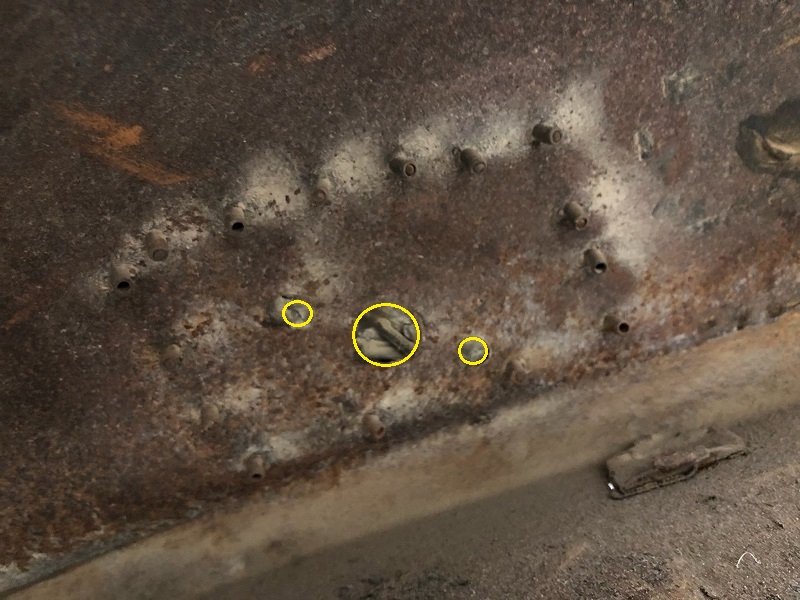
15 more pop-rivets. The "patch" served no sensible purpose, except to cover three small holes. Those three holes (indicated above) once mounted a single taillight as seen below...
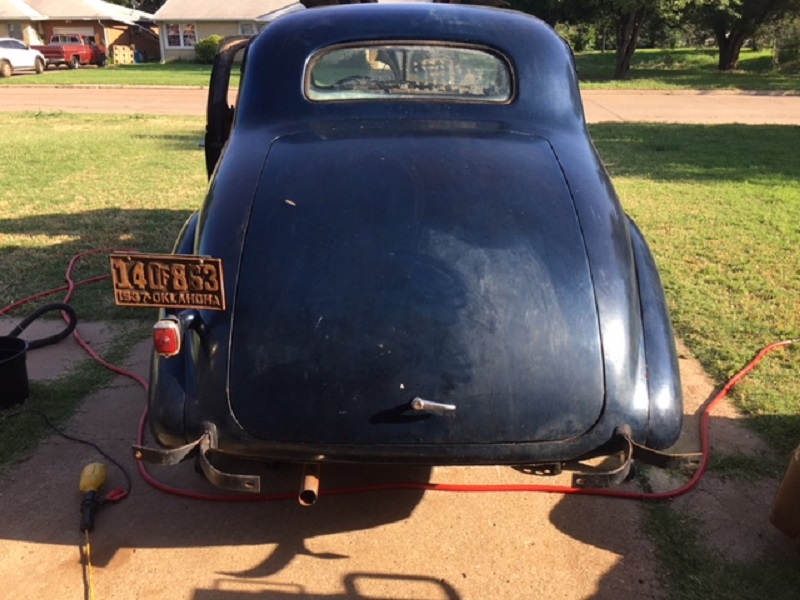
At that point, the flour grinder wore out his welcome and we tried a heat gun. Much to my surprise, a heat gun and a scraper is very effective... peels everything down to bare metal... though it's fairly slow going, we removed paint, primer and filler up and up the quarter panel, nearly to the sail panel.
It's obvious (now) the plastic sculptor "thickened" the entire quarter panel in effort to blend and conceal the patch, which he certainly did.
The crappy "high" patch will be removed and we'll fit the new tailpan with no other point of reference but the trunk lid.
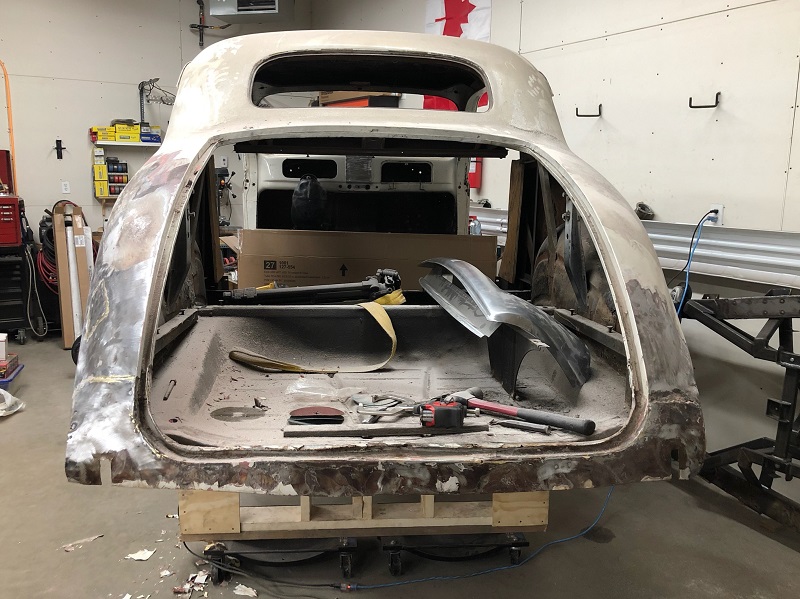
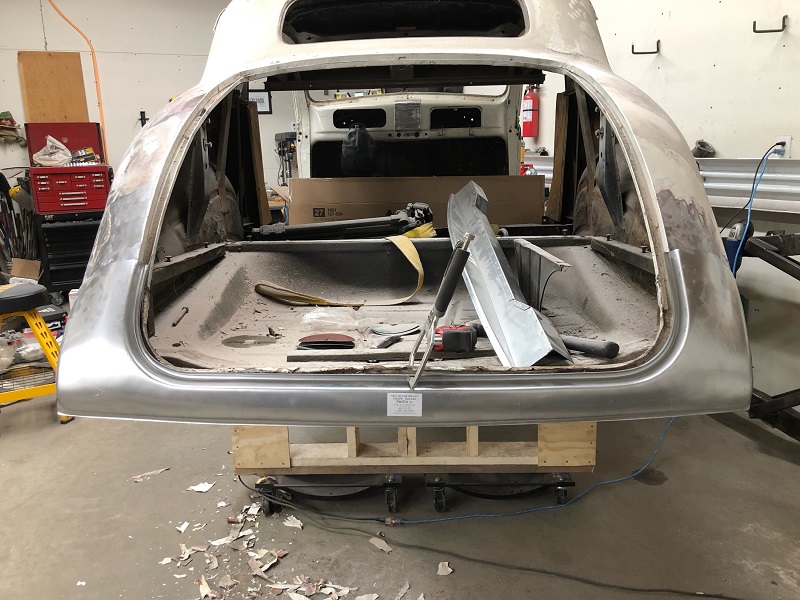
dutch? The replacement panel is obviously a touch too wide, though it's loosely laid over the existing mess and less than an accurate representation. I believe we should fit and gap the tailpan according to the trunk lid.
Any and all recommendations are welcome. We're looking for perfection on this project...
.
Saturday: B-tard worked to rebuild the (original) trunk supports, while I dug back into the tailpan mess...
In the photos above, you can see the brass joint and a thick "cap" of BondoTM . (This can't be good.)
I ground some more, created more "shop flour" and discovered this flower...
What, in the blue flying blazes is that? (Censored for family viewing.)
B-tard returned to the scene of the crime and we scratched our heads for a minute or two... until the bulb lit...
A look inside told the tale...
15 more pop-rivets. The "patch" served no sensible purpose, except to cover three small holes. Those three holes (indicated above) once mounted a single taillight as seen below...
At that point, the flour grinder wore out his welcome and we tried a heat gun. Much to my surprise, a heat gun and a scraper is very effective... peels everything down to bare metal... though it's fairly slow going, we removed paint, primer and filler up and up the quarter panel, nearly to the sail panel.
It's obvious (now) the plastic sculptor "thickened" the entire quarter panel in effort to blend and conceal the patch, which he certainly did.
The crappy "high" patch will be removed and we'll fit the new tailpan with no other point of reference but the trunk lid.
dutch? The replacement panel is obviously a touch too wide, though it's loosely laid over the existing mess and less than an accurate representation. I believe we should fit and gap the tailpan according to the trunk lid.
Any and all recommendations are welcome. We're looking for perfection on this project...
.
Attachments
Last edited:
Old Iron
Well-known member
[P[P[P
Torchie
Well-known member
I would tack weld the trunk lid in place and cut all crap out. Maybe make a few cuts before tacking ,which are hard to reach when the trunk lid is fixed.
Agree with dutch. Get the lid in place and square and everything up.
The lid will give you the gaps you need.
If you don't want to tack weld it in place I would mount it back on it's hinges and put in some internal bracing so that you can open the lid for access to your working area.. The gaps around the lid are what is going to draw peoples eye.
That looks like a decent piece of replacement metal . I wish I could find something like that for the Dodge.
You think your's is a mess.
I'll trade you.
That floor jack on the left holds up the trunk floor and that side. The entire area between both sides needs to be replaced. It will all have to be hand formed as I have never found a replacement panel
[P [P [P
Torchie
Torchie
Attachments
zzrodder
It ain't grey hair, it's chrome!
Yee ouch, right now I'm feeling pretty lucky after seeing that mess, Dutch has the right advice on how to proceed. Crazy how much work went into patching that light mount, obviously someone had a torch, they could have just welded up the holes in the first place..... Torchie, I feel for you man, it's the downside of having a less common vehicle, hard to find organ donors and no repop parts....

$26.99
Ekouaer Women's Skorts Tight Biker Short Stretchy Breathable Sports Cute Skirts ArmyGreen
Ekouaer loungewear

$44.99
Bobby Unser (Indy Car), "Autographed" (JSA) Business Card (Scarce /Vintage) - Autographed NASCAR Cards
Sports Memorabilia

$229.99
$259.99
Solary Magnetic Induction Heater - 1000W 110V Handheld Bolt Removal Tool with 12 Coils
solary

$24.99
1976 Hot Wheels 31' Doozie Convertible Orange Brown Vintage Toy Car Hong Kong
Hockey Card World Inc.

$198.99
1992, Richard Petty, "Autographed" (Beckett) "STOCK CAR" Magazine (Vintage) - Autographed NASCAR Magazines
Sports Memorabilia

$205.19
$239.99
Solary Magnetic Induction Heater Tool - 1000W 110V Handheld Rusty Bolt Removal Tool with 8 Coils
solary

$34.99
1980's The Sunshine Van Bedford CF Red Summer Vintage Toy Car Hong Kong
Hockey Card World Inc.

$29.99
1979 Matchbox Superfast Yellow Citroen CX Vintage Toy Car Made in England
Hockey Card World Inc.

$11.75
Cable Car Turntable Powell & Mason -San Francisco California - Vintage Linen Postcard
grinvideoproductions

$159.99
$179.99
Solary Magnetic Induction Heater Kit - 1000W 110V Induction Heat Bolt Removal Tool
solary

$64.99
A.J. FOYT HAND SIGNED VINTAGE 5x7 COLOR PHOTO+COA LEGENDARY RACE CAR DRIVER - Autographed NASCAR Photos
Sports Memorabilia
Skip
Well-known member
After looking at the photos in the early pages of this build, I am thinking that the replacement panel may be closer to accurate than it seems. Guessing that the back end may be pinched in a bit. I agree with Dutch that using the trunk lid as a guide is a great idea.
Dr Crankenstein
Rocket Surgeon
Crazy how much work went into patching that light mount, obviously someone had a torch, they could have just welded up the holes in the first place.....
I'm still stunned... but I'm glad the car didn't have two taillights!
Torchie: Our tailpan was as bad as yours... before the tin, pop-rivet and brass Bondo King came to town.
We are fortunate to have a replacement panel, but it's not an NOS piece by any stretch of the imagination.
Thanks for your advice, fellas. We will work with the trunk lid as our guide, which brings to mind another issue...
When we first disassembled the car, the lid didn't fit very well. At the time, I thought it might be bent or twisted. Now I believe, the taller, thicker, plasticized quarter panel was the bulk of the problem.... hopefully, we'll solve that mystery this weekend...
.
Torchie
Well-known member
[P [P [P [P [P .
Torchie
Torchie
BillM
Well-known member
Thanks Doc, watching to see how this "pans" out!
forbigpicture
Please stand by.......
Pass the butter OI......
[P[P[P[P
[P[P[P[P
Dr Crankenstein
Rocket Surgeon
Today, we removed the useless patch... drilled out the 15 rivets and carefully diced the patch up, hoping to avoid a cut-out...
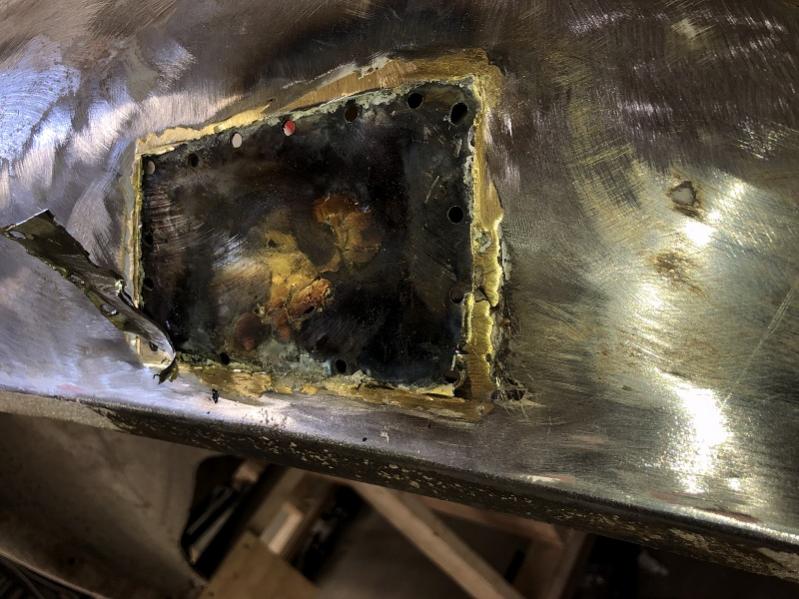
coming along, you can see the original taillight's "footprint" and the three holes nearly brazed shut...
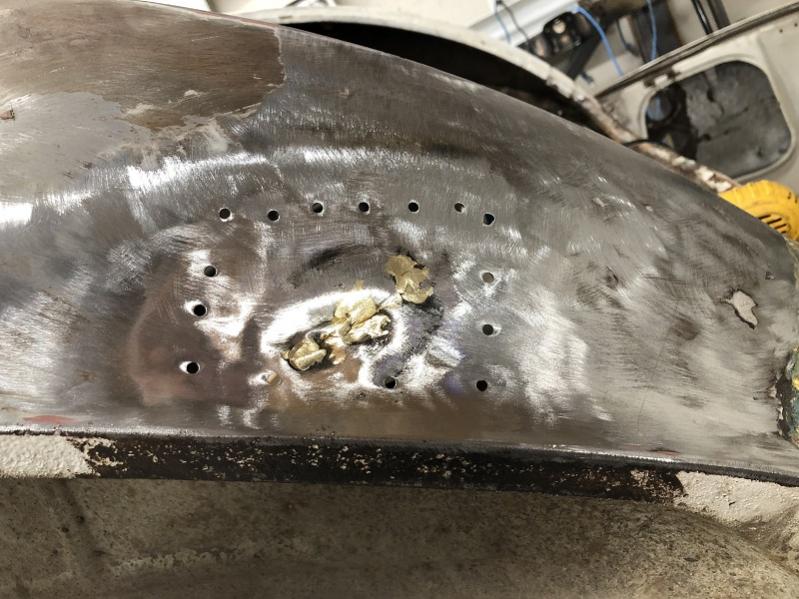
Some hammer, punch and dolly work along the way... brass completely eradicated...
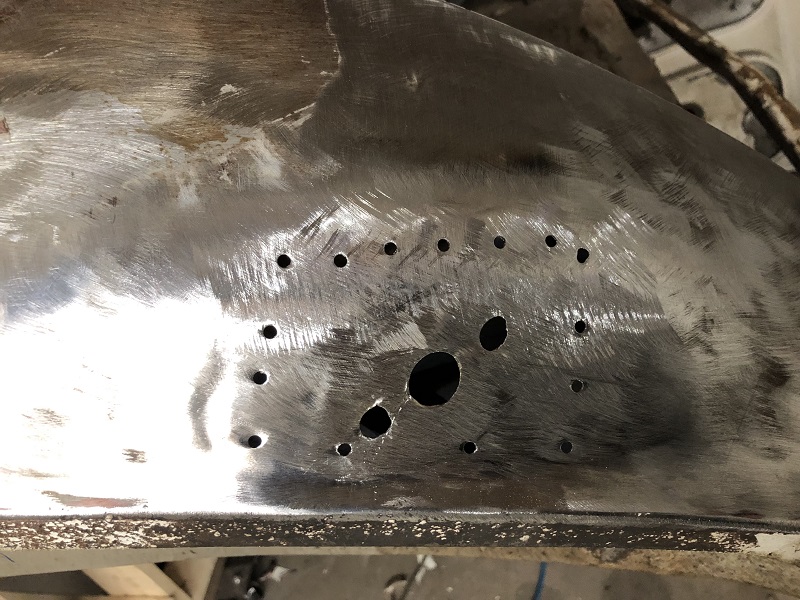
I'll fill all those holes in a more sensible fashion.
Next, we laid the trunk lid in place... as we suspected, it's bent and twisted due to the dreaded "rear admiral."
Below, I stripped the lid's corner and found the evidence...
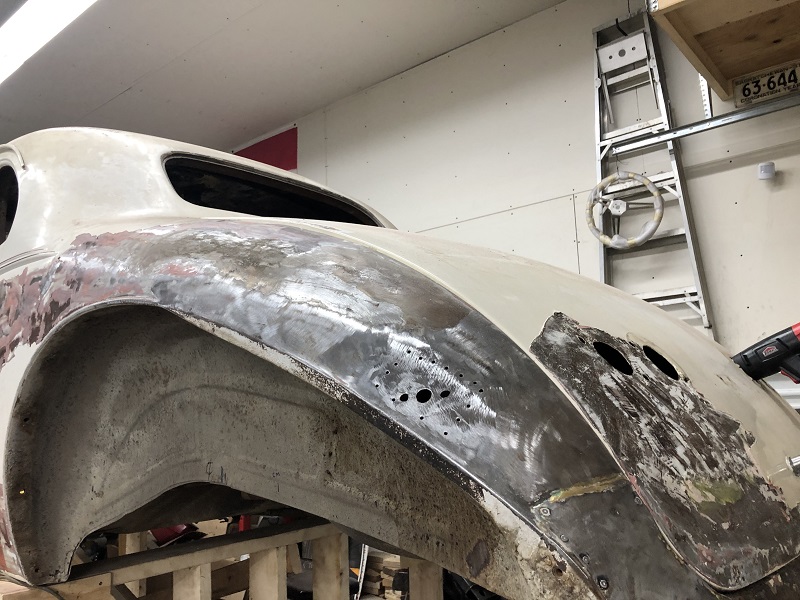
The pictures don't show it, but there was a large (filled) dent in the lower left corner of the lid...
So, the lid is buggered up. It's somewhat scrunched and 1/2" too tall, especially on the driver side...
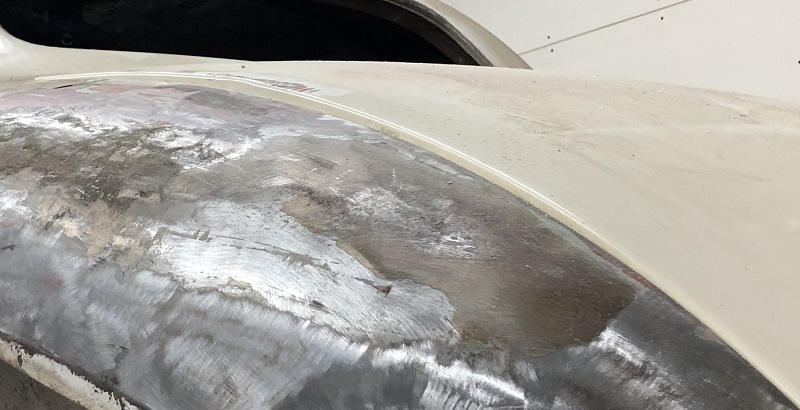
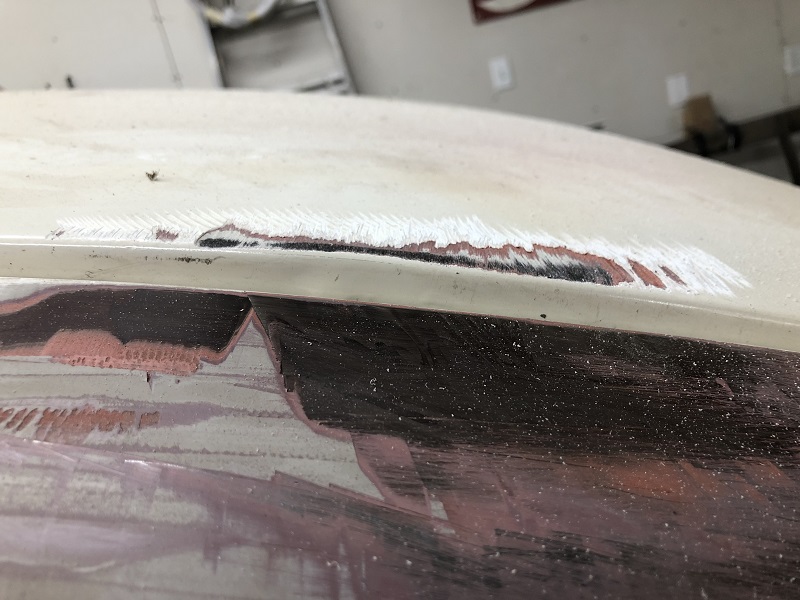
Obviously, we need to iron and "stretch" the lid to fit properly... this should be fun...
.
coming along, you can see the original taillight's "footprint" and the three holes nearly brazed shut...
Some hammer, punch and dolly work along the way... brass completely eradicated...
I'll fill all those holes in a more sensible fashion.
Next, we laid the trunk lid in place... as we suspected, it's bent and twisted due to the dreaded "rear admiral."
Below, I stripped the lid's corner and found the evidence...
The pictures don't show it, but there was a large (filled) dent in the lower left corner of the lid...
So, the lid is buggered up. It's somewhat scrunched and 1/2" too tall, especially on the driver side...
Obviously, we need to iron and "stretch" the lid to fit properly... this should be fun...
.
Attachments
Last edited:
Torchie
Well-known member
What. No pics.


[P [P [P
Torchie
[P [P [P
Torchie
Dr Crankenstein
Rocket Surgeon
Attachments wait for no man. Edited and fixed, I think...
.
.
Torchie
Well-known member
You may be able to set that lid down on the ground and apply some downward pressure on it to get in back into shape and take some of the arch out of it.
If your tail pan area was in better shape I would do it on the car with a block under the DS corner.
Just some thought s from an old body shop man......
[P [P [P
If your tail pan area was in better shape I would do it on the car with a block under the DS corner.
Just some thought s from an old body shop man......
[P [P [P
Dr Crankenstein
Rocket Surgeon
Thanks Torchie.
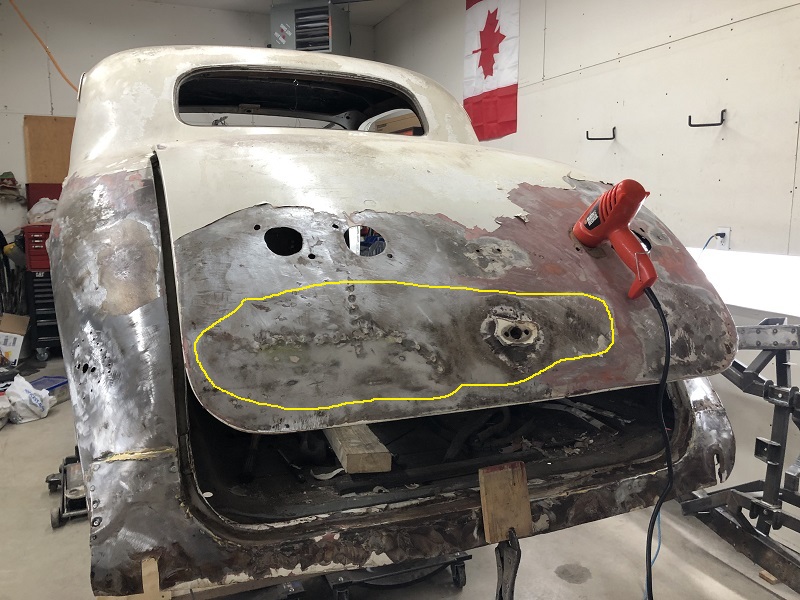
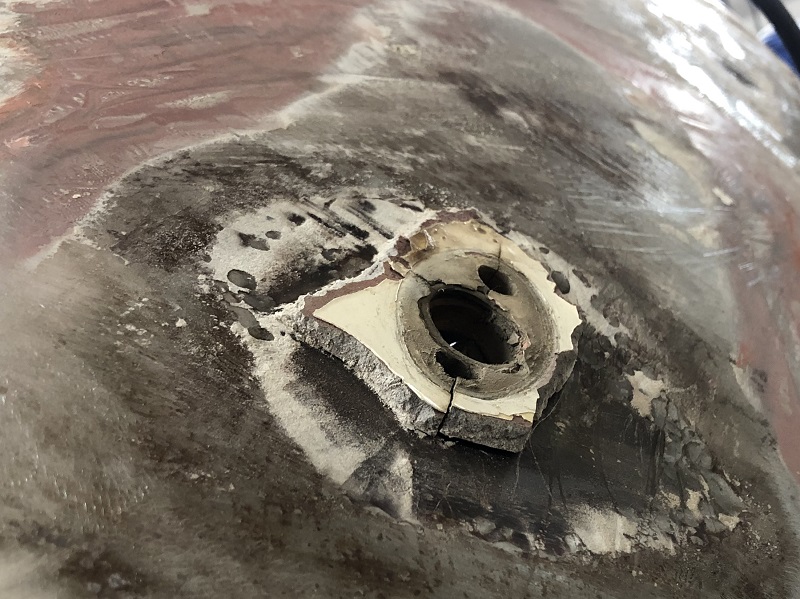
Yesterday, we stripped more paint, primer and filler, including the entire trunk lid.
Here's a better look at the damages...
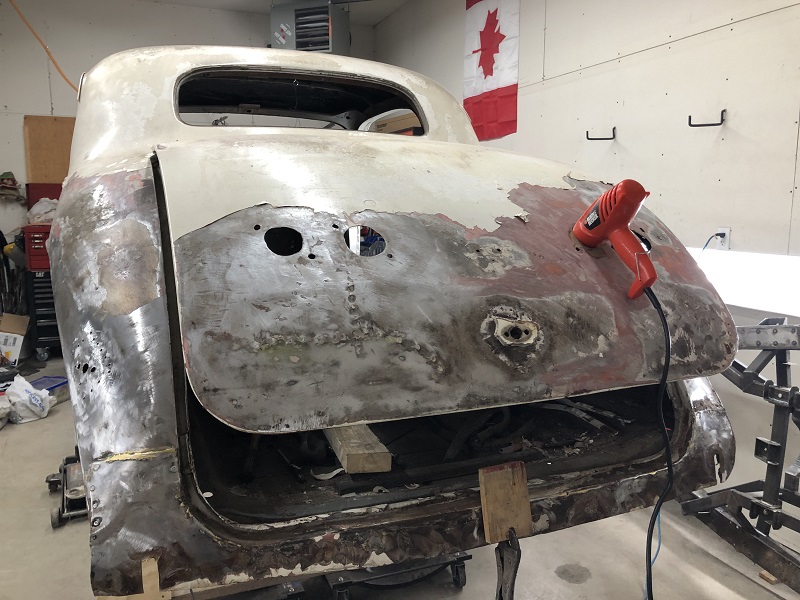
You can see the perimeter of the Wham-O and a deep, dark circle around the handle...
Handle area up close. Yep, that's 1/2" of filler, formerly supporting a Stanley garage door handle. Ha!
20 stretched nipples from the old "screw and jerk" slide hammer stunt.
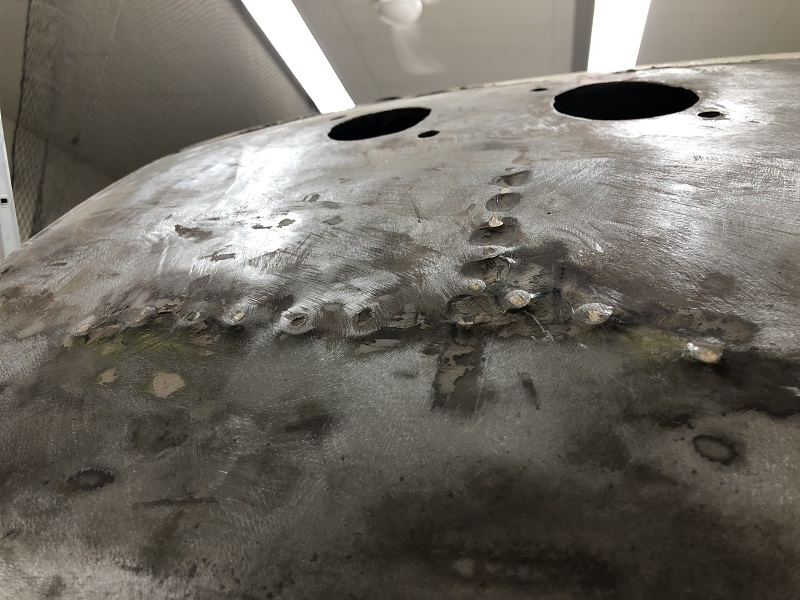
On the positive, we don't have any rust holes!
.
Yesterday, we stripped more paint, primer and filler, including the entire trunk lid.
Here's a better look at the damages...
You can see the perimeter of the Wham-O and a deep, dark circle around the handle...
Handle area up close. Yep, that's 1/2" of filler, formerly supporting a Stanley garage door handle. Ha!
20 stretched nipples from the old "screw and jerk" slide hammer stunt.
On the positive, we don't have any rust holes!
.
Attachments
You've got you're work cut out for you.[ [P
[P
bob w
Still crazy after all these years!
I'm going to enjoy this repair...[cl
Torchie
Well-known member
Somebody hit the old girl pretty hard.
Whats the inner frame work of the trunk lid look like? Any signs of damage or repair?
As much damage as was covered up on the outside, it would be surprising not to see some wrinkles on the inside.
[P [P [P
Torchie
Whats the inner frame work of the trunk lid look like? Any signs of damage or repair?
As much damage as was covered up on the outside, it would be surprising not to see some wrinkles on the inside.
[P [P [P
Torchie


