You are using an out of date browser. It may not display this or other websites correctly.
You should upgrade or use an alternative browser.
You should upgrade or use an alternative browser.
28 Fast Four build
- Thread starter DozerII
- Start date

Help Support Rat Rods Rule:
This site may earn a commission from merchant affiliate
links, including eBay, Amazon, and others.
DozerII
Well-known member
we found on our Diamond T frame that the rivets were tapered. We had to grind the side with the bigger head off, then they would come out.
Maybe the same on these. [S
DozerII
Well-known member
Torchie
Well-known member
[P [P [P
Torchie
DozerII
Well-known member
I'm really impressed with the quality of fit on the pieces in the kit and the detail they went into in the instructions. They are even making it easy for me to figure out.
DozerII
Well-known member
Cross member, and spring towers assembled, cut and fit for spindle height.Set in position.
Cross member is level front to rear and side to side. Spring towers are proper distance apart and tilted back at 4 degrees as per instructions.
All of you with more experience with these see anything obvious I have done wrong.
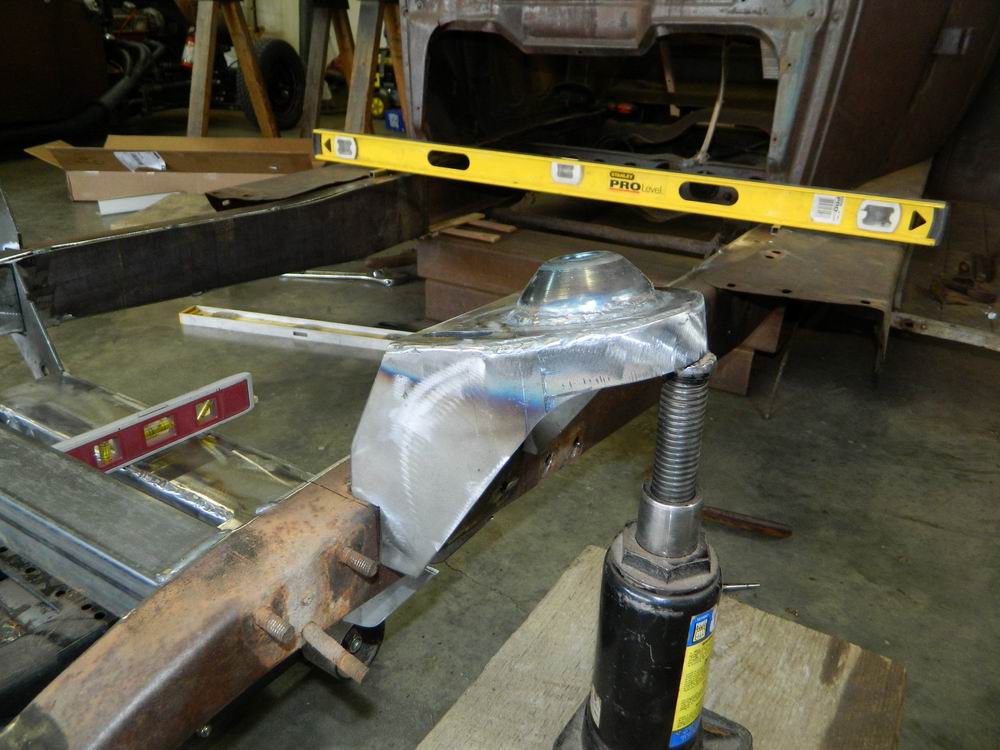
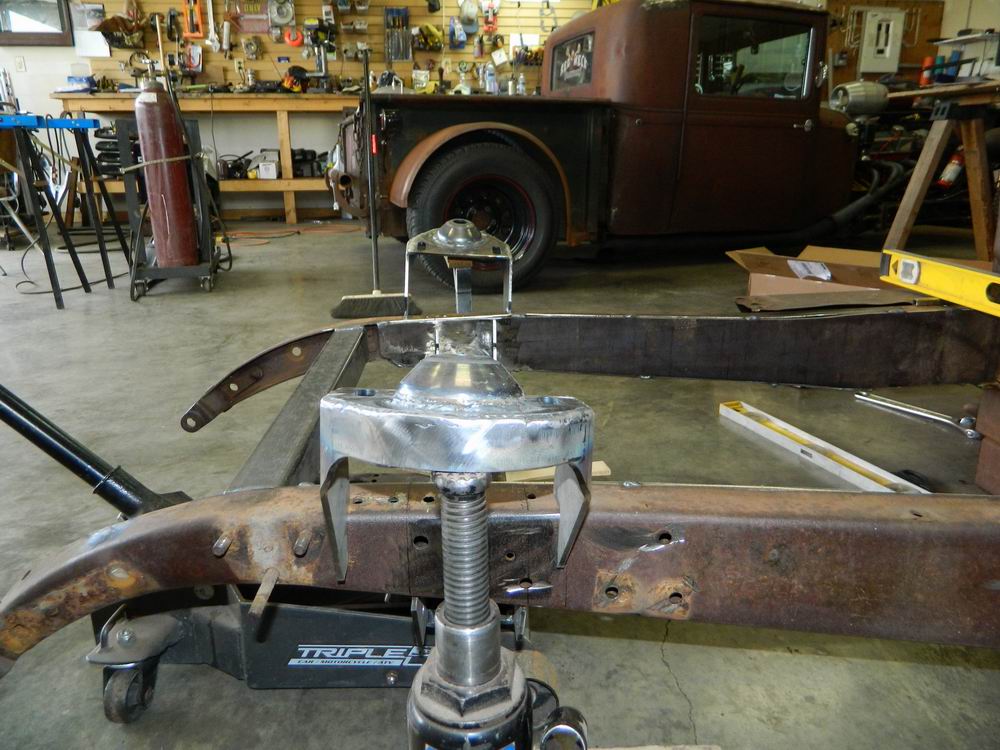
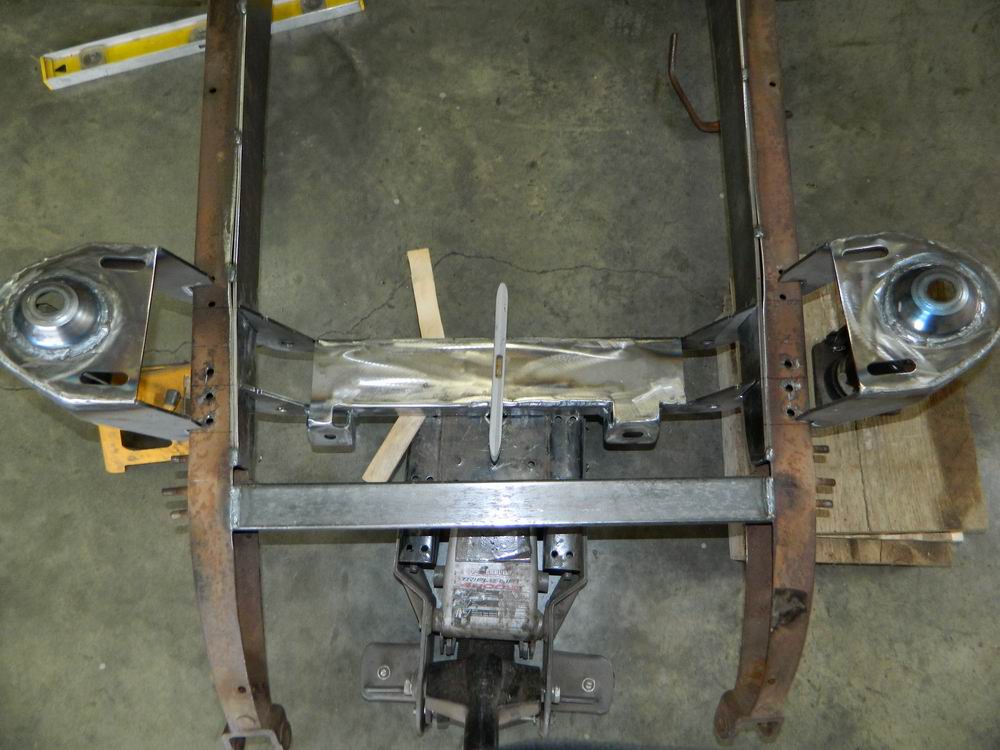
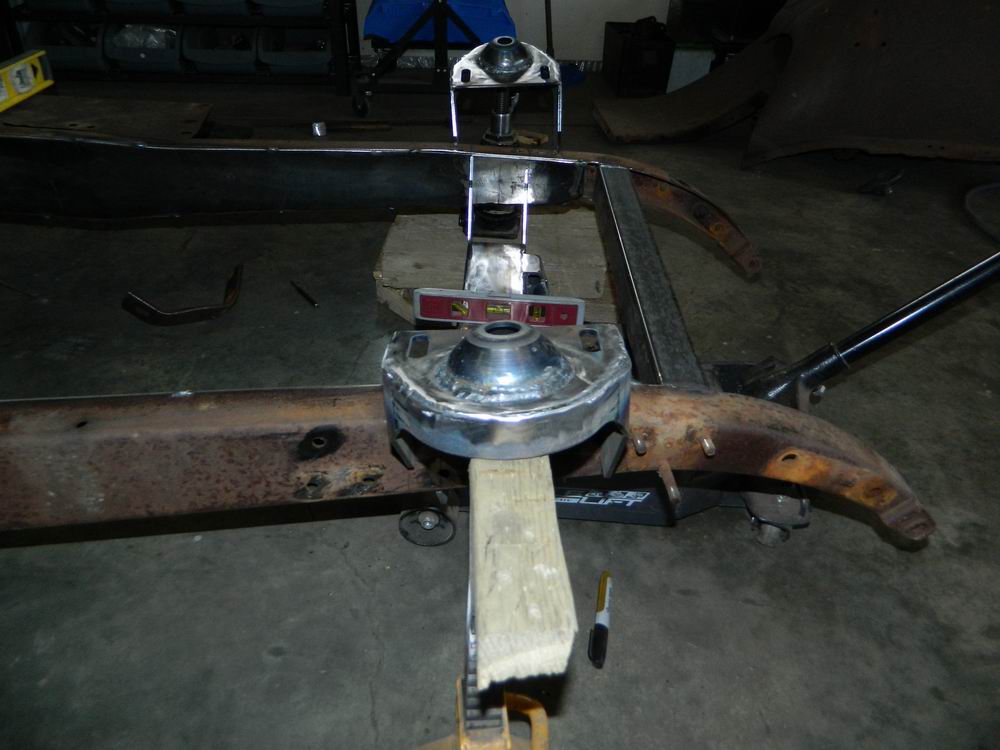
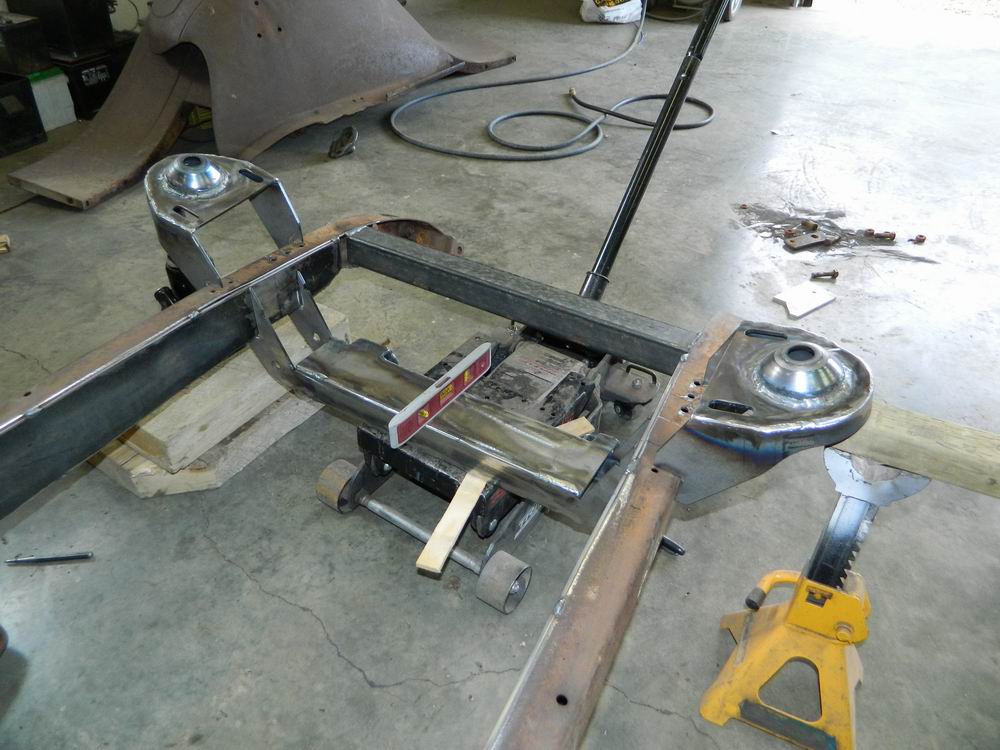
Cross member is level front to rear and side to side. Spring towers are proper distance apart and tilted back at 4 degrees as per instructions.
All of you with more experience with these see anything obvious I have done wrong.
Attachments

$64.99
A.J. FOYT HAND SIGNED VINTAGE 5x7 COLOR PHOTO+COA LEGENDARY RACE CAR DRIVER - Autographed NASCAR Photos
Sports Memorabilia

$34.99
1980's The Sunshine Van Bedford CF Red Summer Vintage Toy Car Hong Kong
Hockey Card World Inc.

$205.19
$239.99
Solary Magnetic Induction Heater Tool - 1000W 110V Handheld Rusty Bolt Removal Tool with 8 Coils
solary

$229.99
$259.99
Solary Magnetic Induction Heater - 1000W 110V Handheld Bolt Removal Tool with 12 Coils
solary

$24.99
1976 Hot Wheels 31' Doozie Convertible Orange Brown Vintage Toy Car Hong Kong
Hockey Card World Inc.

$26.99
Ekouaer Women's Skorts Tight Biker Short Stretchy Breathable Sports Cute Skirts ArmyGreen
Ekouaer loungewear

$29.99
1979 Matchbox Superfast Yellow Citroen CX Vintage Toy Car Made in England
Hockey Card World Inc.

$44.99
Bobby Unser (Indy Car), "Autographed" (JSA) Business Card (Scarce /Vintage) - Autographed NASCAR Cards
Sports Memorabilia

$159.99
$179.99
Solary Magnetic Induction Heater Kit - 1000W 110V Induction Heat Bolt Removal Tool
solary

$11.75
Cable Car Turntable Powell & Mason -San Francisco California - Vintage Linen Postcard
grinvideoproductions
Dr Crankenstein
Rocket Surgeon
Is your frame set at RIDE HEIGHT??? If so, I have nothing else to add. (I'd expect Horton gave good instructions and dimensions!)
.
.
bob w
Still crazy after all these years!
Do the instructions say to mount the spring hats slightly behind the crossmember centerline? Makes it easier to get some caster in the front suspension.
DozerII
Well-known member
Is your frame set at RIDE HEIGHT??? If so, I have nothing else to add. (I'd expect Horton gave good instructions and dimensions!)
.
Yes it is set at right height, the instructions with the Hortons kit are very detailed and well written.
Do the instructions say to mount the spring hats slightly behind the crossmember centerline? Makes it easier to get some caster in the front suspension.
Yes Bob I can remember the exact measurement but it's there for anti-dive as well as caster..
Thanks for the replies.
sc5080
Well-known member
Looks like a really quality kit. Should make for a nice ride and handling.
I like it. Carry on.[P
MercuryMac
Builder Junky!
My only concern is the same as Bob W's. Could you bolt on the two A frames and check if the upper ball joint is behind the lower one, for proper caster? I hate to keep harping, but I have to cut my front axle all out of the frame and weld it back in properly, and I'm not looking forward to this operation. Good luck to you.
DozerII
Well-known member
Looks like a really quality kit. Should make for a nice ride and handling.
Very well put together, and I hope so
I like it. Carry on.[P
Thanks Kenny
My only concern is the same as Bob W's. Could you bolt on the two A frames and check if the upper ball joint is behind the lower one, for proper caster? I hate to keep harping, but I have to cut my front axle all out of the frame and weld it back in properly, and I'm not looking forward to this operation. Good luck to you.
Everything is only tacked together waiting for parts to come in. I got the control arms yesterday and rotors but no spindles. Then I can check to make sure I have positive caster before final welding.
I read on line that the specs for this suspension is 7.1 degrees positive, sound right??
Old Iron
Well-known member
That sounds like an awful lot on an a-arm setup.
I was thinking 2 to 3
Here's what I found
I Own A Alignment Shop --barney's Alinement,wauseon Ohio I Have Found That 1980 Monte Carlo Spec Is A Good Place To Starts Work S Good On Must Rods .5 Postive Camber On Left .2 Postive Camber On Right 3 Deg Postive Caster On Left 3.5 Postive On Right .30 Toe -in
0-1/2 degrees positive camber
1 1/2-2 dgrees positive caster for manual rack & pinion.
3/16" toe
Stock Mustang II used 1/8" toe, but most of us aren't using 4" wheels with bias tires.
DozerII
Well-known member
That sounds like an awful lot on an a-arm setup.
I was thinking 2 to 3
Here's what I found
I Own A Alignment Shop --barney's Alinement,wauseon Ohio I Have Found That 1980 Monte Carlo Spec Is A Good Place To Starts Work S Good On Must Rods .5 Postive Camber On Left .2 Postive Camber On Right 3 Deg Postive Caster On Left 3.5 Postive On Right .30 Toe -in
0-1/2 degrees positive camber
1 1/2-2 dgrees positive caster for manual rack & pinion.
3/16" toe
Stock Mustang II used 1/8" toe, but most of us aren't using 4" wheels with bias tires.
Thanks Old Iron, I kinda wondered if 7 sounded a little extreme.
MercuryMac
Builder Junky!
Three degrees positive sounds a lot better to me too.
Dr Crankenstein
Rocket Surgeon
My notes are similar to Old Iron's specs...
- 1.5° positive caster for manual steering. 3.5° for power steering.
- .25° positive to 0° camber.
- 1/8" toe-in.
.
- 1.5° positive caster for manual steering. 3.5° for power steering.
- .25° positive to 0° camber.
- 1/8" toe-in.
.
DozerII
Well-known member
Three degrees positive sounds a lot better to me too.
My notes are similar to Old Iron's specs...
- 1.5° positive caster for manual steering. 3.5° for power steering.
- .25° positive to 0° camber.
- 1/8" toe-in.
.
Thanks Guys.
Sure glad I waited till the control arms and spindles arrived before final welding.
With the cross member and spring towers tacked in position, control arms and spindles installed and with the upper control arm in the middle of the adjustment holes I have -2 degrees caster and -8 degrees of camber[S The best I can adjust it too with the upper arms pulled all the way in is 0 caster and -1 camber. So now I have been on the phone and emailing back and forth with Hortons (great tech service) trying to figure it out.
MercuryMac
Builder Junky!
I've never felt so good, knowing I'm a pain in the a$$, ---- harping like that.
Keep up the good work.
Could you put the hats on the opposite sides and gain any 'front to back' advantage, or maybe the upper A frames could be swapped side to side if they are not symmetrical?
Keep up the good work.
Could you put the hats on the opposite sides and gain any 'front to back' advantage, or maybe the upper A frames could be swapped side to side if they are not symmetrical?
Dr Crankenstein
Rocket Surgeon
Mac, MII control arms are symmetrical, left or right... uppers will swap side for side, lowers will swap side for side, at least to my knowledge.
Dozer, I think you have a problem with relation to axle centerline.
Pictures are far from geometrically correct... that said, I believe your cross member is too far back and the spring hats are too far forward...
I suspect you need to correct for "plumb", where the centerline remains constant, but the upper and lower extremities rotate on the axle centerline...
If you determine axle centerline (bird's eye view) and mark it across the horizontal flats of the frame, that's your reference mark... find ride height and hang your cross member perfectly centered and perfectly vertical (90°) to your centerline mark. Place your spring hats on that same centerline mark and you should be in the ballpark for alignment.
What I'm suggesting, is you may be working from a "squared" axle line, when you should be working from a line plumb to the world. I don't know how to explain it any better.
I surely understand your frustration. It's complicated simplicity and I'd be happy to help if I can. (Again, you know my number... )
)
.
Dozer, I think you have a problem with relation to axle centerline.
Pictures are far from geometrically correct... that said, I believe your cross member is too far back and the spring hats are too far forward...
I suspect you need to correct for "plumb", where the centerline remains constant, but the upper and lower extremities rotate on the axle centerline...
If you determine axle centerline (bird's eye view) and mark it across the horizontal flats of the frame, that's your reference mark... find ride height and hang your cross member perfectly centered and perfectly vertical (90°) to your centerline mark. Place your spring hats on that same centerline mark and you should be in the ballpark for alignment.
What I'm suggesting, is you may be working from a "squared" axle line, when you should be working from a line plumb to the world. I don't know how to explain it any better.
I surely understand your frustration. It's complicated simplicity and I'd be happy to help if I can. (Again, you know my number...
.
Similar threads
- Replies
- 0
- Views
- 2K
- Replies
- 2
- Views
- 3K


