41-46 s10 swap pictures

Rat Rods Rule

Help Support Rat Rods Rule:

This site may earn a commission from merchant affiliate links, including eBay, Amazon, and others.

joedoh

Well-known member
Joined
Oct 5, 2015
Messages
1,725
Location
doodah ks
I apologize for my absence, between spurious and fitful supply of parts for my 47-55.1 kits I have spent a large amount of what was supposed to be building time, and therefore personally enjoyable time, hunched over my small cnc table cutting parts for orders. because I am an idiot who loves misery I also insist on iterative design changes at every order, so the lead time for cut parts takes 3x longer because they have to change the nesting and update it instead of just cutting what i ordered last time. :(

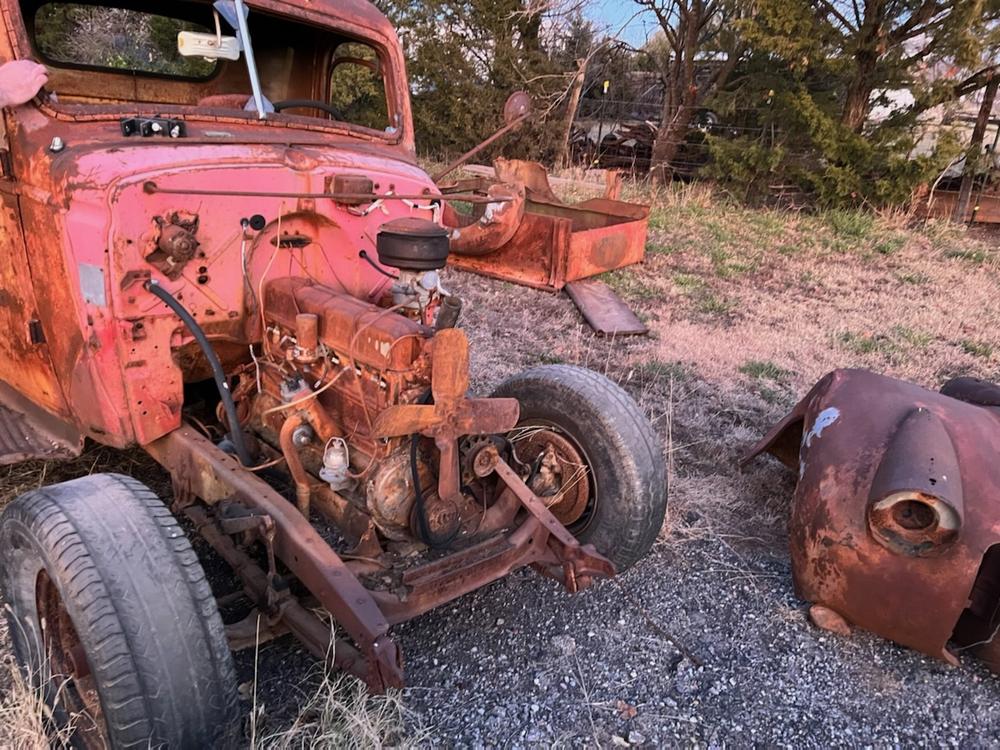
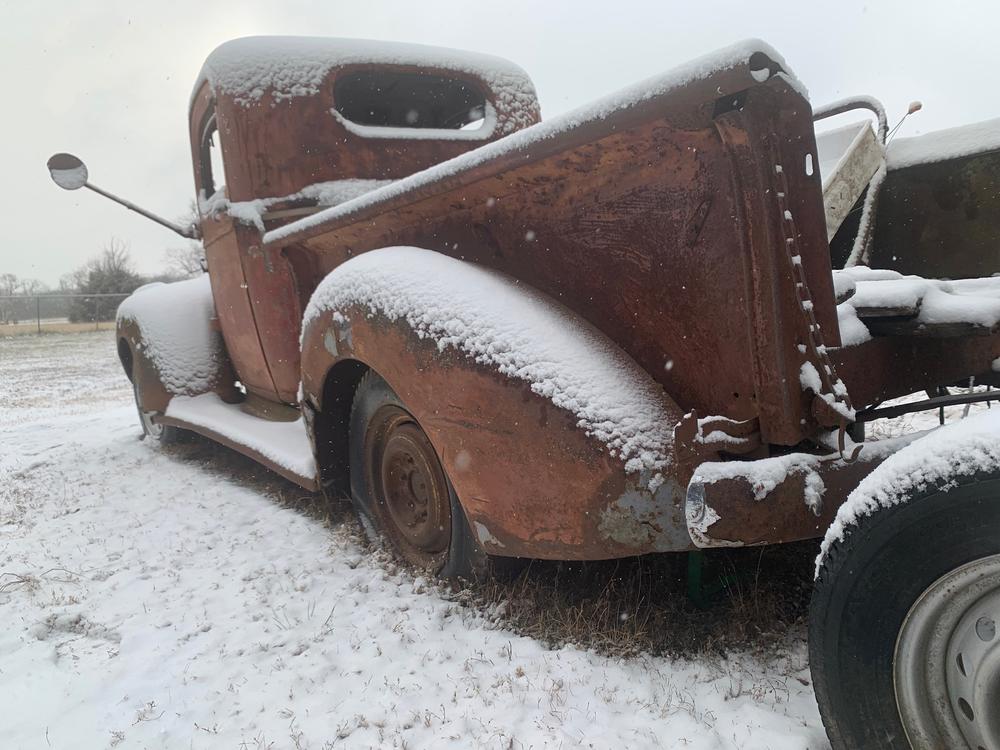
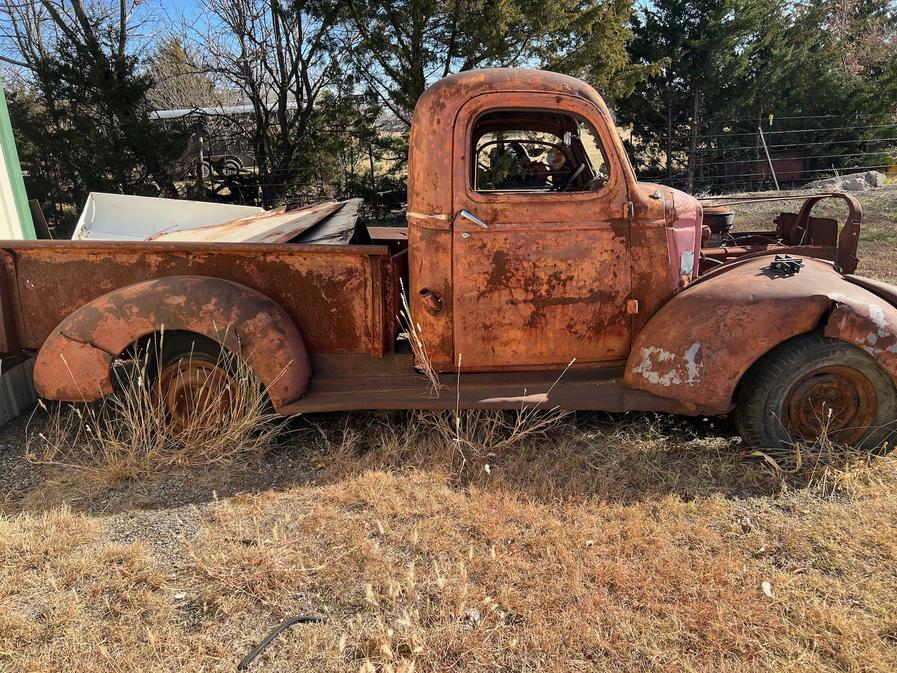
i planned to do 48-52 fords next and even bought a couple 1/2 tons to start with but the incessant cutting and all the rental problems... ugh. i keep getting asked for a 41-46 kit, i have pictures of the two I did in some of my ads. i had some patterns but they sucked and building it as 4 piece parts sucks too, i would rather have a cant-mess-it-up-on-a-bet folding set like the AD stuff. my friend had a 46 and kept it at my storage building as yard art when he took a contract job in florida, good enough to start with anyway.
attachment.php

attachment.php

attachment.php


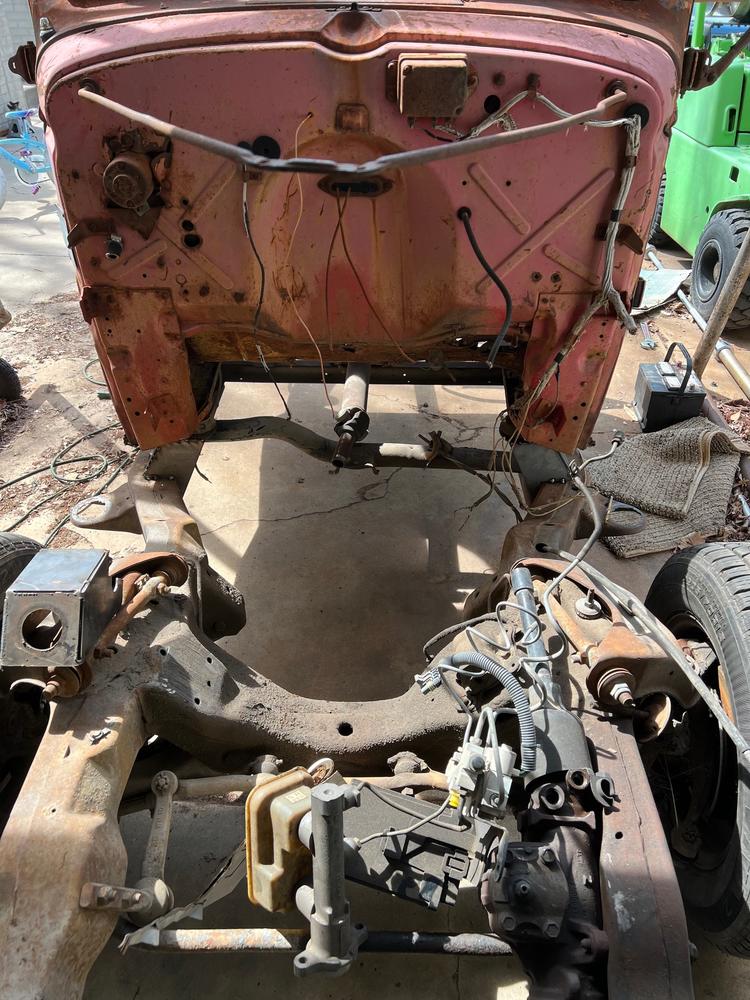
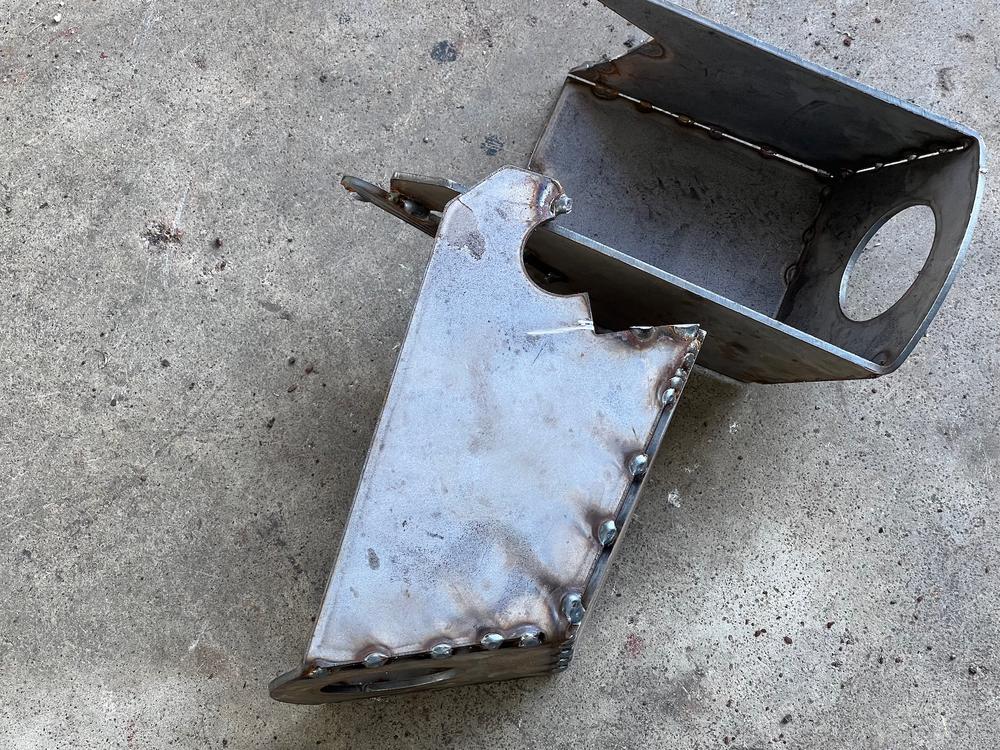
I did the 3D on the mounts and popped out an improved set to try out the cab. worked wonderfully (the second time, as usual)
attachment.php

attachment.php


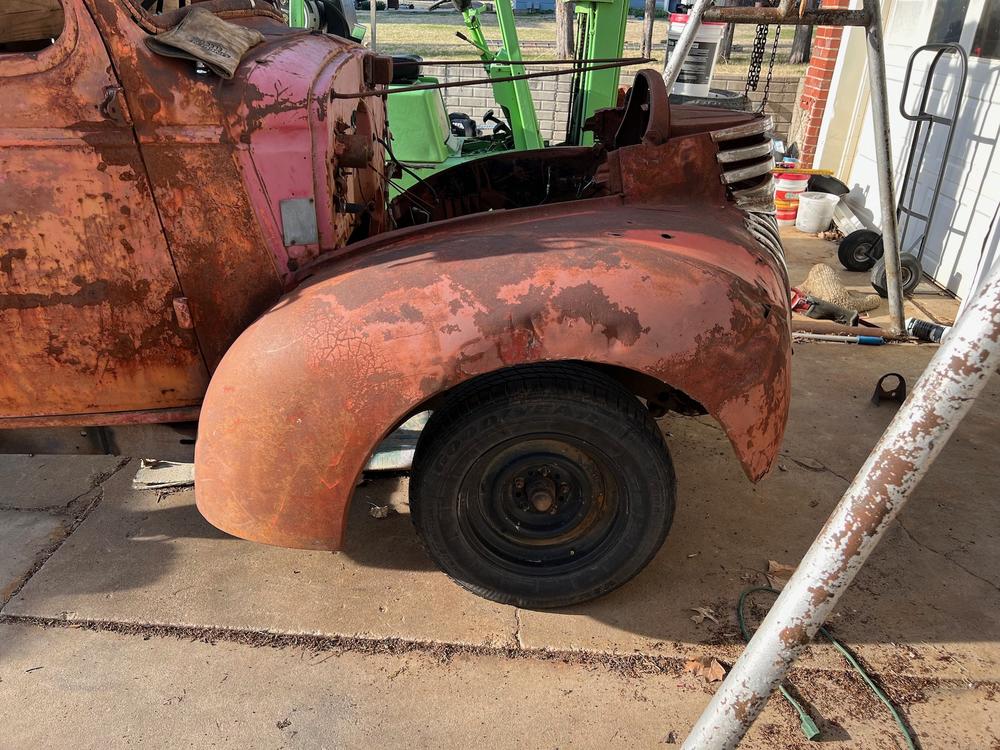
he had a 1 ton front clip that was in better shape and so I popped that on for a look too.
attachment.php


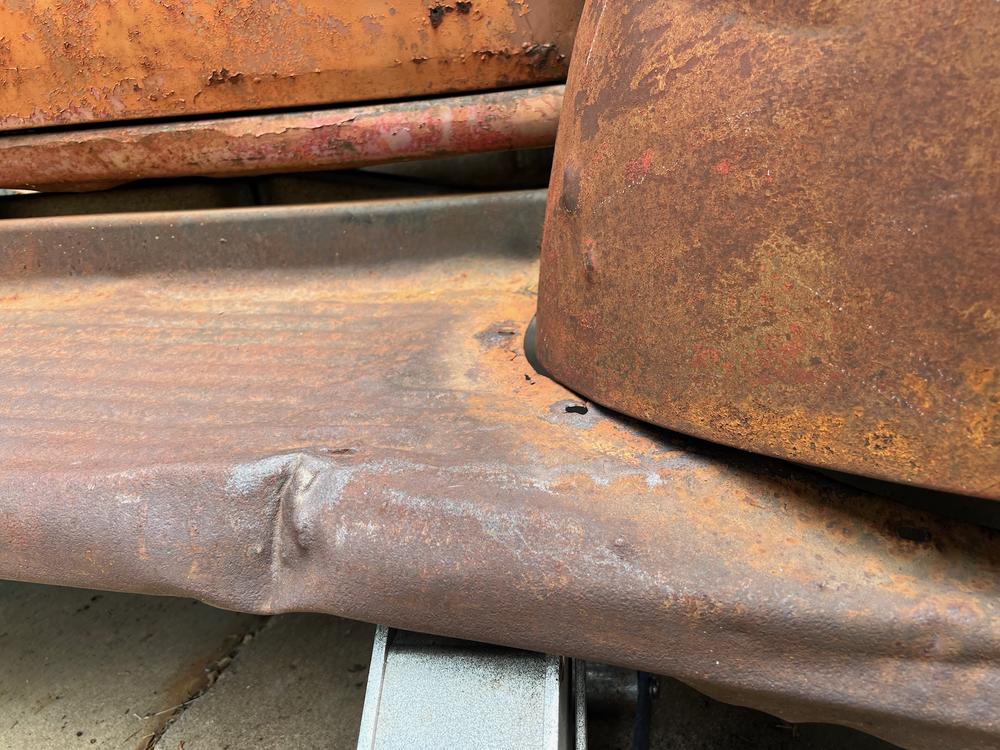
everything looking ok, I started on making the running boards fit. but a big problem, no matter how i moved the front clip and cab around the running boards were way below the cab. weird!
attachment.php


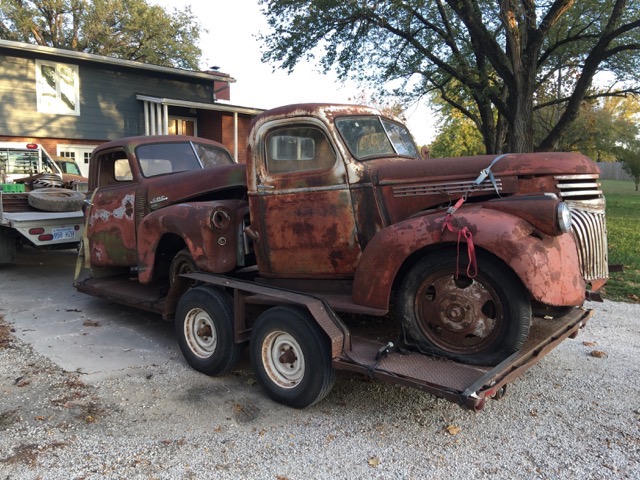
then i realized the problem, the one ton front clip had running boards taht were two inches taller than 1/2 ton. look at the vertical section under the door
attachment.php


that meant that the back of the fender dropped two inches lower than a 1/2 ton, even though the wheelarch measured almost the same radius. a quick section was needed. success!
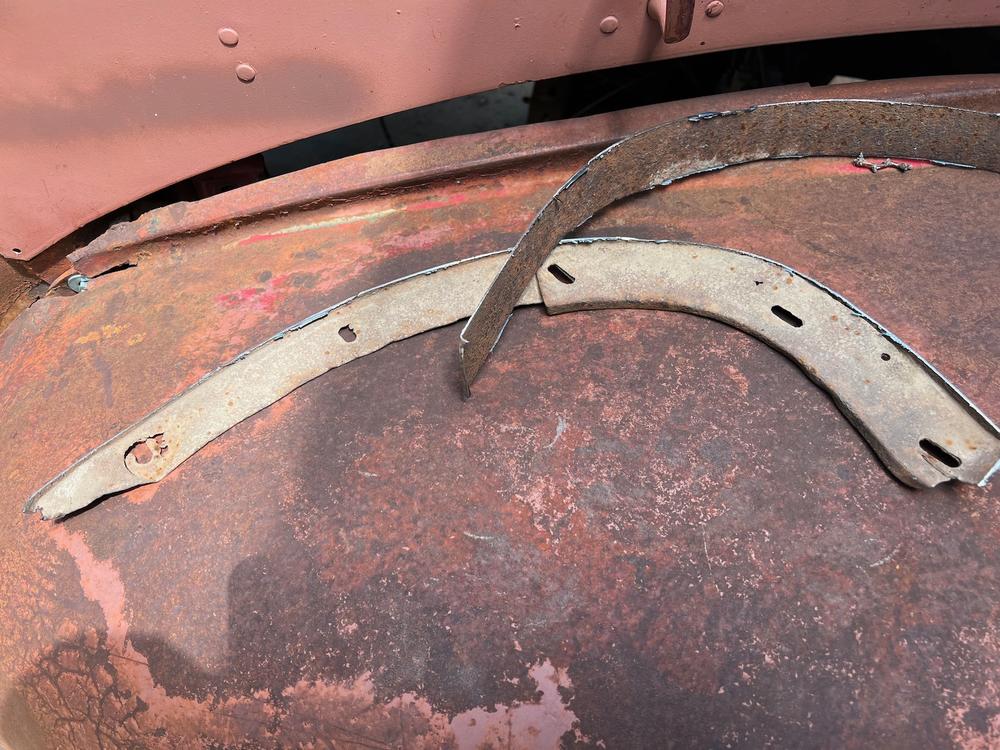
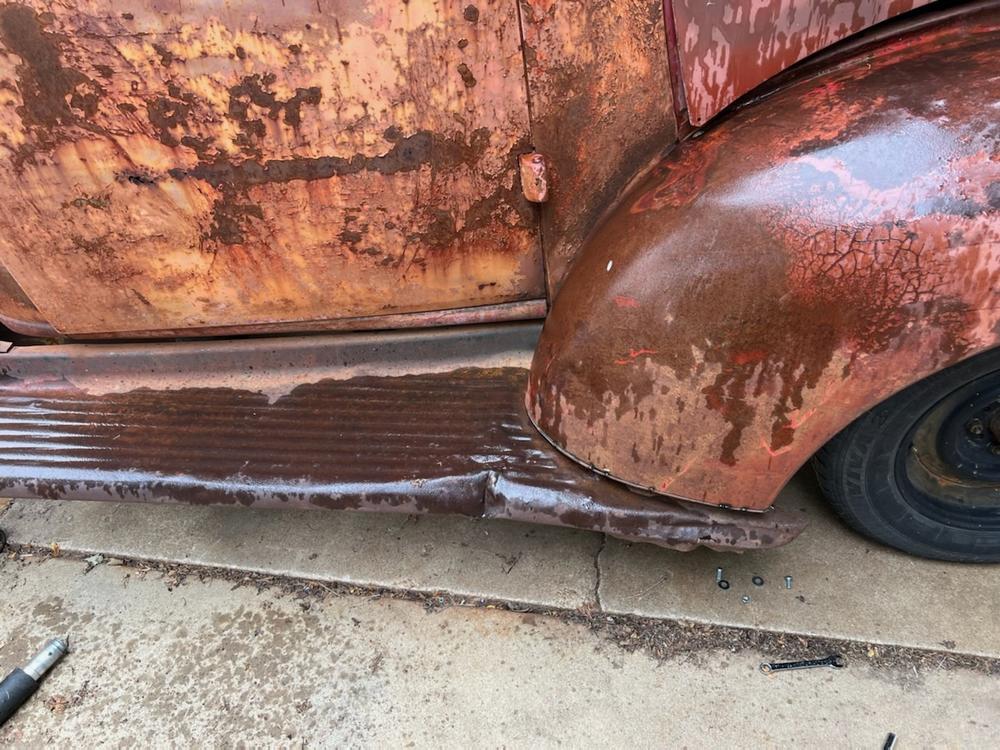
attachment.php

attachment.php


so now the runningboards were sorted, i needed mounts for them and the front clip.

more in next post
 

Attachments

  • 66033505687__F06E49DB-420A-49BC-98E1-85A637D1854A.jpg
    66033505687__F06E49DB-420A-49BC-98E1-85A637D1854A.jpg
    225.2 KB
  • AE8EB2F4-0F54-41DC-805D-8B7ED1B2857C.jpg
    AE8EB2F4-0F54-41DC-805D-8B7ED1B2857C.jpg
    205 KB
  • 67010401307__AF36CF6C-5B90-48DC-A1AB-C564FD3F97EE.jpg
    67010401307__AF36CF6C-5B90-48DC-A1AB-C564FD3F97EE.jpg
    151.6 KB
  • 67063425684__C68BC87A-1483-4AAB-A77F-5658DBBEC8B2.jpg
    67063425684__C68BC87A-1483-4AAB-A77F-5658DBBEC8B2.jpg
    190 KB
  • IMG_2214.jpg
    IMG_2214.jpg
    207.2 KB
  • IMG_2561.jpg
    IMG_2561.jpg
    166.1 KB
  • IMG_4674.jpeg
    IMG_4674.jpeg
    136.2 KB
  • 67778483253__1A3D765A-0A8B-433F-83D2-F21B86F40DB6.jpg
    67778483253__1A3D765A-0A8B-433F-83D2-F21B86F40DB6.jpg
    169.3 KB
  • IMG_2588.HEIC.jpg
    IMG_2588.HEIC.jpg
    181.3 KB
  • B149AAB0-88B0-42BC-AFA2-F4DD31B62D78.jpg
    B149AAB0-88B0-42BC-AFA2-F4DD31B62D78.jpg
    102.8 KB
I had existing designs for the 47-55.1 running boards but they didnt fit between the frame and the running board mount, so I redesigned them and will use the same part for both kits now.

attachment.php

attachment.php


the front clip of the 41-46 mounts back at least 4 inches from where the 47-55.1 does though so I coulndt use those mounts, and where the core support falls is right over the power steering hoses too so it needs more room. I came up with a 100% bolt on setup that keeps the room over the power steering box.

attachment.php

attachment.php


everything fit well except the lower core closeout bracket, because i had welded in a piece of rectangle to keep the front clip square while building. i will trim this one and install it but the future trucks it will fit perfectly.

attachment.php


that one ton front end is really in poor shape but better than the 1/2 ton stuff which looked like someone had crumpled it then on reconsideration uncrumpled it.

attachment.php


since I have 4 pictures left in this post I will talk about the frame, it was an ext cab 123" wheelbase and the 41-46 is 115", so a longbed s10 118 doesnt really fit that well. i decided to take 8" out at the factory splice.

attachment.php

attachment.php

attachment.php

attachment.php


by doing it at the factory overlap you dont need any fish plates or reinforcements, as long as you get good penetrating welds, and I am pretty sure we did.

btw the frame shortening is the last thing my friend larry and I worked on before he went in the hospital for his second round of thyroid cancer. he died 6 weeks later. cancer is terrible.
 

Attachments

  • IMG_2578.jpg
    IMG_2578.jpg
    228.2 KB
  • D58C6108-670C-4FF2-A261-176E6215C8A0.jpg
    D58C6108-670C-4FF2-A261-176E6215C8A0.jpg
    140.3 KB
  • 9B4A497A-7C57-493A-AB63-0A156AEA1549.jpg
    9B4A497A-7C57-493A-AB63-0A156AEA1549.jpg
    101.5 KB
  • EF4D1965-D48B-4776-8B35-534EB4688ED5.jpg
    EF4D1965-D48B-4776-8B35-534EB4688ED5.jpg
    153.7 KB
  • 93C4FEA3-9AA6-46CE-8323-953D956C290C.jpg
    93C4FEA3-9AA6-46CE-8323-953D956C290C.jpg
    184.9 KB
  • IMG_2583.HEIC.jpg
    IMG_2583.HEIC.jpg
    149.1 KB
  • 67805002879__27C8D117-5B66-4F16-8460-5AC18A732C31.HEIC.jpg
    67805002879__27C8D117-5B66-4F16-8460-5AC18A732C31.HEIC.jpg
    148.6 KB
  • IMG_2570.HEIC.jpg
    IMG_2570.HEIC.jpg
    88.2 KB
  • IMG_2587.HEIC.jpg
    IMG_2587.HEIC.jpg
    102 KB
  • IMG_2586.HEIC.jpg
    IMG_2586.HEIC.jpg
    156.2 KB
i could mount the bed and bumpers now but thats easy peasy work, the 47-55.1 parts fit, so i decided to tackle steering and pedals. start by removing the dash and marking the centerline of the steering on a straightedge clamped to represent the bottom edge of the dash.

attachment.php


hold your s10 pedal bracket up so that the upper column mount is centered on the mark you made and the booster side is flat against the firewall, then mark the 4 booster holes on the firewall.

attachment.php


i use a 5 degree plate I designed, welding it in strengthens the firewall like you wouldnt believe because it doubles the thickness and the bends make it stiffer too. the 5 degrees is for the s10 maser which is made to have that tilt so the rear reservoir doesnt go dry on hard braking (the rear cylinder is the front brakes on s10s and really most GM after 1970)

attachment.php

attachment.php


the s10 column has a lower closeout on it that wont fit in its current orientation so with some careful grinding you can grind gently through the weld that holds it on and reuse it.

attachment.php


I slotted the column mount holes a little more so that the steering wheel wasnt a nut smoosher and let the column go another inch or two into the dash. I tack welded in some bolts so I didnt have to hold them to get the column mounted.

attachment.php


I built an upper bracket to the original dash brace location on the firewall.

attachment.php


the columns in these work out nice if they have a more horizontal position than stock, if youput a modern column in at that angleit looks like a bus steering wheel. I also move it up a couple inches so that its more comfortable, this means trimming the bottom of the dash. I use a 3" holesaw as a pattern, rough cut it with a slicer and then sand it nice with a flap disc.

attachment.php


it looks like a ton in that picture but in the final shot you can see its really not raised much and has a great position in the cab.

attachment.php


i want this done and outta here on the 4th of july, should just make it. more tonight!
 

Attachments

  • IMG_2596.jpg
    IMG_2596.jpg
    119.6 KB
  • IMG_2617.jpg
    IMG_2617.jpg
    145.8 KB
  • IMG_2614.jpg
    IMG_2614.jpg
    155.7 KB
  • IMG_2613.jpg
    IMG_2613.jpg
    118.1 KB
  • IMG_2612.jpg
    IMG_2612.jpg
    121.7 KB
  • IMG_2600.jpg
    IMG_2600.jpg
    114.3 KB
  • IMG_2594.jpg
    IMG_2594.jpg
    96.3 KB
  • IMG_2591.jpg
    IMG_2591.jpg
    142.4 KB
  • IMG_2609.jpg
    IMG_2609.jpg
    103.8 KB
absolutely nothing. which is to say I planned it very carefully that the running boards just barely clear the frame, are level with the bottom of the frame, and there was no cutting of the frame needed at all. pretty neat eh?
 
I wondered where you'd gone, but it sure looks like you've been busy JD! Sorry to hear about the loss of your buddy,
 
yeah loss is funny, not funny "ha ha" but funny like sometimes you pick up the phone to share a picture and then remember, then you dont do anything for a day or three.


i decided to be "efficient" (lazy) and just pull the cab to do finish welding on all the brackets, leaving the front clip and running boards installed. why undo many bolts when few bolts do trick?

when I was scooting the a frame into postion i felt a stitch in my calf muscle, like you get from not stretching. it wasnt the calf muscle cramp though, it was a wasp nest in the a frame. they were pretty upset i was dragging their home around. some wasp killer and some spray foam and no more prob.

attachment.php


pulled cab, welded everything up. shot some chassis paint

attachment.php


secured the column top and bottom, no shake at all, very sturdy. I dont like a wobbly steering column, this one is like a rock in the dash.

attachment.php


reset the bottom bracket and tacked it on. worked great.

attachment.php

attachment.php


today I am mounting the bed and bumpers (well bumper mounts, since he doesnt have any bumpers except that one destroyed one. maybe i can mount it
 

Attachments

  • 67838660734__3E9BD403-5759-4443-B758-3F521C8E62CC.HEIC.jpg
    67838660734__3E9BD403-5759-4443-B758-3F521C8E62CC.HEIC.jpg
    136.5 KB
  • 67840597857__0C15F8DE-4C2A-4108-A8A0-4B5B888F1453.HEIC.jpg
    67840597857__0C15F8DE-4C2A-4108-A8A0-4B5B888F1453.HEIC.jpg
    118.3 KB
  • Screen Shot 2022-07-02 at 11.04.45 AM.jpg
    Screen Shot 2022-07-02 at 11.04.45 AM.jpg
    96.4 KB
  • 67838327949__019F3CD9-96B5-4180-980B-67CCA08AB9B8 (2).jpg
    67838327949__019F3CD9-96B5-4180-980B-67CCA08AB9B8 (2).jpg
    103.6 KB
  • 67838332370__5809BB51-48E5-410F-BB30-BFE58360377A (2).jpg
    67838332370__5809BB51-48E5-410F-BB30-BFE58360377A (2).jpg
    162 KB
happiness is putting the cab on for the last time. check out that alignment!

attachment.php


bed kit works perfectly! wood will lay right on top of the rectangle tube and the framerail above the axle.

attachment.php


tiny garage, cant show alignment but its really good.

attachment.php

attachment.php


front clip had a big twist in it, i tack welded a length of tube to the core support and used the torque to move things around till they fit.

attachment.php


drill and tap all the old stuck bolts. previously both trucks (the one ton clip and the original 1/2 ton clip) were farmer welded in place. you can see the remnants of brazing on both the half ton support rod and the one ton core support

attachment.php


bullnose on, alignment on this side good! pass fender still need a lot of tug.

attachment.php


getting very close to empty! still gas on the little gauge even though that needle is bottomed out on the big gauge.

attachment.php


just need front bumper mounts installed. I was getting really tired and bent up the mounts and realized I made two rights. bent another and it was a right again. time to quit for the day haha. (cooling the welds in front of the fan)

attachment.php


delivery day is thursday, making instruction for the kit this week and then its on to the 55. kit should work well!
 

Attachments

  • IMG_2631.HEIC.jpg
    IMG_2631.HEIC.jpg
    111.6 KB
  • IMG_2654.HEIC.jpg
    IMG_2654.HEIC.jpg
    140.1 KB
  • 67858206582__5178C4AC-4A65-40DC-949F-CB0A57E84A53.HEIC.jpg
    67858206582__5178C4AC-4A65-40DC-949F-CB0A57E84A53.HEIC.jpg
    136 KB
  • 67858196893__0E2DA832-46B0-42FF-A1C9-BA254906858C.HEIC.jpg
    67858196893__0E2DA832-46B0-42FF-A1C9-BA254906858C.HEIC.jpg
    103.8 KB
  • 67858180443__41C9CAE3-48A9-4C79-BC9C-9894C26AD10E.HEIC.jpg
    67858180443__41C9CAE3-48A9-4C79-BC9C-9894C26AD10E.HEIC.jpg
    96.3 KB
  • 67858158875__A7F69D2D-3808-4E1D-AE80-816D7F36DB36.HEIC.jpg
    67858158875__A7F69D2D-3808-4E1D-AE80-816D7F36DB36.HEIC.jpg
    135.5 KB
  • 67857412441__86D3712C-24F8-405F-BC10-79F5F4A36444.HEIC.jpg
    67857412441__86D3712C-24F8-405F-BC10-79F5F4A36444.HEIC.jpg
    132.4 KB
  • IMG_2645.jpg
    IMG_2645.jpg
    173.6 KB
  • 67858457010__B1DB0E3A-04FF-4DF0-BED5-CC79B1A5C549.HEIC.jpg
    67858457010__B1DB0E3A-04FF-4DF0-BED5-CC79B1A5C549.HEIC.jpg
    133.6 KB
What a great service to provide these kits Joe. Do you get feedback from customers? Sorry about your friend.
 
thanks guys!


i do get feedback. every order I make iterative design changes based on the feedback. I could just order what I ordered before and have it next day instead of making design changes and waiting 3 weeks to get them programmed and nested. I also offer the updated parts to guys that havent installed their kits yet. however, I have offered tiers of rebates from $50 to a full refund for youtube videos of the install. no one has taken me up on that yet.

with new design stuff I offer a full rebate +20% to the guy with the first article, in the form of payments on each kit sold. so if a kit is $600 (this kit will be $600 shipped) the first article guy gets 10% every kit sold till 10 kits are sold, then $120. since nick is a good friend and we have done work together before, I refunded him up front and really he is only paying for the extra stuff, like the pedals and column, and the labor to install. works for him, works for me. although he didnt plan for wheels and his current plan is borrow my set up wheels. :mad:

as far as time goes, I have about two weeks of 4-5 hour weekdays in this. it helps I have done two before and really helped to have larrys here to measure from. (he bought a cab kit years ago of the old design). my wife got to see the design process on the front clip parts, she was amazed how fast it went from brain to 3D to cut to iterative change to cut and done, like 5 hours. mounting the bed took maybe an hour. when you let the parts do the work its great.

I will start the 55 today, my plan is to make my 47-55.1 kit 100% bolt on, that is the #1 request I get. then I will do a 53 to final proof it, and order the laser parts.
 
absolutely nothing. which is to say I planned it very carefully that the running boards just barely clear the frame, are level with the bottom of the frame, and there was no cutting of the frame needed at all. pretty neat eh?

If you're providing these kits to customers, I hope they don't have running board to frame clearance problems. Looks like your running boards meet the fender farther forward than they should. Maybe because you're using bigger truck fenders with the bigger wheel opening? Or when you shortened the wheelbase, were the running boards left regular length? The running board should also be tucked under the rocker and isn't, so I'm wondering how it would all line up. I haven't known anyone that has done a 41-46 on an S-10 without some type of work there to fix the clearance issue, so its curious that yours just fits. I hope it works out well if you've figured something new out.

attachment.php

Image of another 46 for what the regular alignment looks like for comparison.
attachment.php
 

Attachments

  • Screenshot 2022-07-07 085707.jpg
    Screenshot 2022-07-07 085707.jpg
    89 KB

Latest posts

Back
Top