You are using an out of date browser. It may not display this or other websites correctly.
You should upgrade or use an alternative browser.
You should upgrade or use an alternative browser.
'48 Olds
- Thread starter Sam_Fear
- Start date

Help Support Rat Rods Rule:
This site may earn a commission from merchant affiliate
links, including eBay, Amazon, and others.
Snake Farm
Ol school snake charmer!
Wow wow wow Sam, this thing just keeps getting better and better. There are so many subtle mods involved with this chop that no one but us folks here will ever know about......Dick Dean is definitely smiling down and Bill Hines should be bowing down to you before it's over
You really should consider changing your name to "Sam_ No Fear"....I would
You really should consider changing your name to "Sam_ No Fear"....I would
Gastrick
One of the Dirty Dozen!
hotrod preacher
"Official RRR Chaplain"
WoW Sam (no) fear ! you are doing an amazing job....i hate welding sheet metal b/c i always get i na hurry and wind up w/warpage ....my hats off to you for patience and "tenacity" ......looking good[cl[cl
and gastrick that pic is one cool car-it does remind me of sams to some degree.....

and gastrick that pic is one cool car-it does remind me of sams to some degree.....
blacksheep
Well-known member
Sam , this car is going to be awesome dude. Can't wait to see what you do next.[cl[cl
Cool pic Gas! Wonder what the front looks like? Those are Caddy front fenders so I wonder if that's what it started life as. Rear fenders look more like early 50's. Flares on all and bubble skirts! WAY above my level!
Time to go [ . Hopefully I have a few progress pics later.
Thanks for the boost fellas!
Time to go [
Thanks for the boost fellas!

$205.19
$239.99
Solary Magnetic Induction Heater Tool - 1000W 110V Handheld Rusty Bolt Removal Tool with 8 Coils
solary

$229.99
$259.99
Solary Magnetic Induction Heater - 1000W 110V Handheld Bolt Removal Tool with 12 Coils
solary

$159.99
$179.99
Solary Magnetic Induction Heater Kit - 1000W 110V Induction Heat Bolt Removal Tool
solary

$34.99
1980's The Sunshine Van Bedford CF Red Summer Vintage Toy Car Hong Kong
Hockey Card World Inc.

$64.99
A.J. FOYT HAND SIGNED VINTAGE 5x7 COLOR PHOTO+COA LEGENDARY RACE CAR DRIVER - Autographed NASCAR Photos
Sports Memorabilia

$11.75
Cable Car Turntable Powell & Mason -San Francisco California - Vintage Linen Postcard
grinvideoproductions

$26.99
Ekouaer Women's Skorts Tight Biker Short Stretchy Breathable Sports Cute Skirts ArmyGreen
Ekouaer loungewear

$198.99
1992, Richard Petty, "Autographed" (Beckett) "STOCK CAR" Magazine (Vintage) - Autographed NASCAR Magazines
Sports Memorabilia

$44.99
Bobby Unser (Indy Car), "Autographed" (JSA) Business Card (Scarce /Vintage) - Autographed NASCAR Cards
Sports Memorabilia

$24.99
1976 Hot Wheels 31' Doozie Convertible Orange Brown Vintage Toy Car Hong Kong
Hockey Card World Inc.

$29.99
1979 Matchbox Superfast Yellow Citroen CX Vintage Toy Car Made in England
Hockey Card World Inc.
Flipper_1938
He recycles the right way
Your pictures make it look easy 
Keep up the good work [P
Keep up the good work [P
Gastrick
One of the Dirty Dozen!
Nice update. I think that looks very good and has a nice natural flow thats pleasing to the eye.
Got Rust?
Well-known member
lookn' good.[P
Forgot to mention how I did the center posts. Aligning them with the uncut door so the edge was straight, tack, then made a cut at the belt line and folded the whole thing inward.
Seems most people move the B-pillar by cutting above the drip edge, but I made the cuts below the drip edge. Maybe a little more work breaking it apart and welding on the inside, but I didn't didn't want to mess with the roof and drip edge.
Next will be the doors...
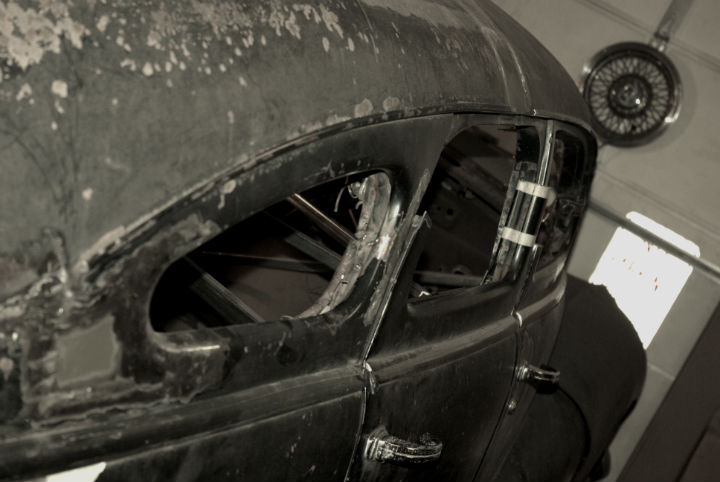
Seems most people move the B-pillar by cutting above the drip edge, but I made the cuts below the drip edge. Maybe a little more work breaking it apart and welding on the inside, but I didn't didn't want to mess with the roof and drip edge.
Next will be the doors...
Attachments
TiredIronGRB
Traditionalist
I can't believe how well this is working out, to be honest I thought you were messing up a nice car but you have made a really cool car into a one of a kind cool car!
Got going on the doors. Also did the drip rails.
Decided to do the rear door first. Started by making cuts on the backside at the belt line and leaning the window frame in.
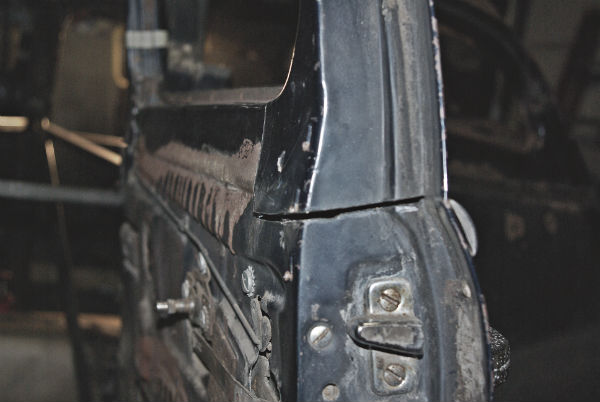
Then cuts to lean the rear part forward to match the curve of the door frame.
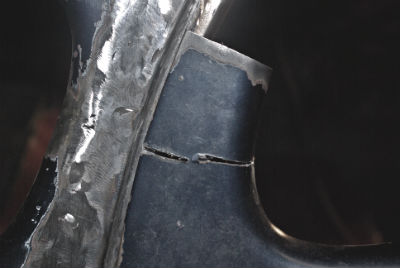
Attach the split top pieces aligned to the lower sections...
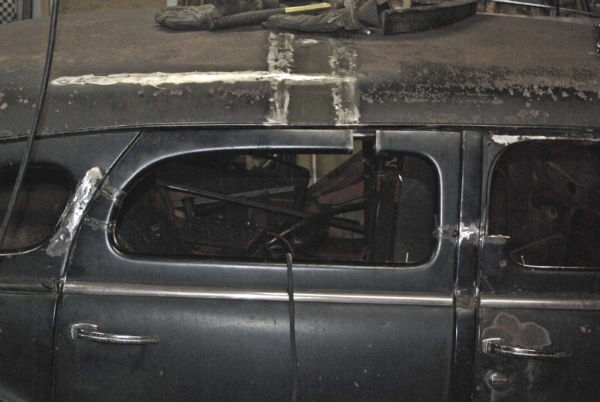
Align the two sections to each other...
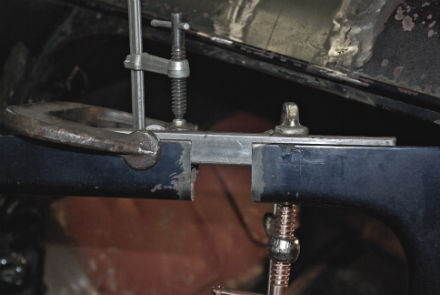
Add a splice, and done!
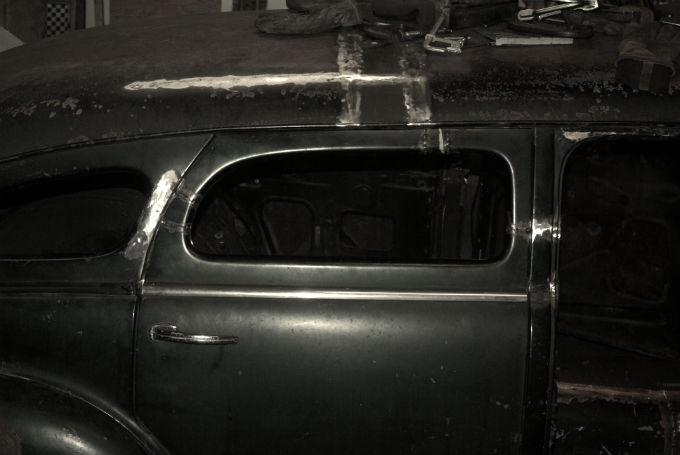
Decided to do the rear door first. Started by making cuts on the backside at the belt line and leaning the window frame in.
Then cuts to lean the rear part forward to match the curve of the door frame.
Attach the split top pieces aligned to the lower sections...
Align the two sections to each other...
Add a splice, and done!
Attachments
Bonehead
Skull Master
wild! really looking good.
DJ3100
Well-known member
Sam, I haven't been saying much, but I've been watching with awe. Chaulk me up for an additional AMAZING!
You're making it look easy.
You're making it look easy.
Got Rust?
Well-known member
Look'n gooood.
I think your doing great work, 4 door just makes it more unusual.
I think your doing great work, 4 door just makes it more unusual.
Gastrick
One of the Dirty Dozen!
Looks super Sam. Very nice. Are you going to have any issues to deal with ref windows rolling up with the frames leaned in?
Similar threads
- Replies
- 10
- Views
- 1K


