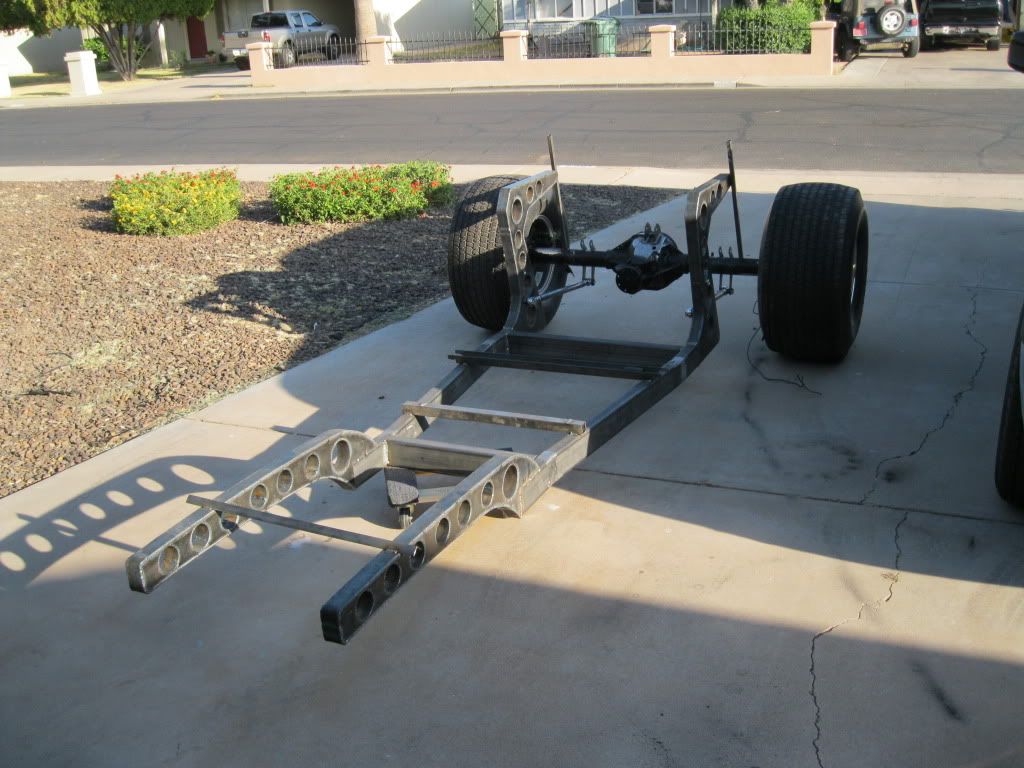
My 1941 Dodge Truck Build

Rat Rods Rule

Help Support Rat Rods Rule:

This site may earn a commission from merchant affiliate links, including eBay, Amazon, and others.
Is that 1/4" plate? I am always amazed at the forces involved in steering - I would be concerned about strength.

Will you be using tapered tie rod ends? Would you add a bung to get enough surface area for the rod end?

That welding table looks pretty handy. I have 2 platens that I can put together, level and build frames on. The problem with them is that there is no access to the center of the frame. With yours you can duck inside the table and get to those hard to reach welds.
 
The steering arms will be water jetted out of 3/8" thick steel. The caliper brackets are roughly 0.345" in thickness. They were probably made in China, hence the "weird" thickness. I'll be using 5/8" heim joint.

I'm not really sure of how much force it takes to steer a car. I did the numbers in my head last night, and what I came with is that the pitman arm applies roughly 120 lbs of force to the steering link. With a manual steering box, I assumed "on average" you'd be applying about 5 lbs of force on a steering wheel that is 8" in radius. With an 18:1 steering gearbox ratio and a 6" pitman arm, you end up at roughly 120 lbs of force.

I have to work on the exact geometry of the steering arm to find out what the stress plot looks like, but most of the load will be shear stress with little bending. The plate will be plenty strong, leaving the weld as the weak link.

A lot people seem to use these steering arms that are made from 1/4"-3/8" flat plate. Has anybody heard of these failing? I'd be really interested to know.

1230958493440-795130104.jpg
 
You have to remember that the forces on the arms is across the longside not across the 1/4"-3/8" thickness. As long as the web is thick enough then they will be fine. Look at an F1 car suspension. The A arms you can actually grab and move up and down/bend them but try and move them in and out (compression and tension) and there is no way you are moving them. just my $.02
 
Motorhead, Great looking frame going on! Been watching your updates. I have in mind something very similar. A big thank you & everyone that post pics of frame builds. I am planning a hole'y frame rails with a very subtle curve in it. My question is, are you going to run a bed on the back? How much of a kick up is your back section? What was the gauge of your frame steel,.120 ,.180 , ??

Many more questions to come!LOL Thanks

Thanks!

There won't be a bed. It's suicide axle front and back. The kick up in the back is 29". The steel is 3/16" thick, although the big lightening holes use 3/8" wall DOM, because that's all that was available.

Just so you know, building a frame like mine takes a lot longer, at least 10-15 times longer. I'm dead serious. You can build a regular frame in 3-4 hours. I have probably close to 50 hours in mine and I'm not done yet. Just trying to prepare you for what's ahead! :D

Good luck! :)
 
but look at it this way, the value of a truck built with a straight 2X4 box frame is way less that one with a boxed stock frame, or a total custom one off frame like yours that has style and attitude. So the 40-50 hours will pay back dividens in the end product. Now it isn't "just anohter 41 dodge" any more. It is set apart from the others. Just my $.02
 
Lightning holes. That's what their called! Well I've got a whole new vocabulary to learn with these Rats.LOL

Iv'e got the frame pictured in my mind how I would like it to turn out. Yeah I know all about time in a project. Our 70' Boss 302 took 5/12 yrs & 1200-1400 hrs. but I'm as slow as a turtle!
 
I agree, but putting that many hours in a frame might discourage some people from ever finishing the project.
 
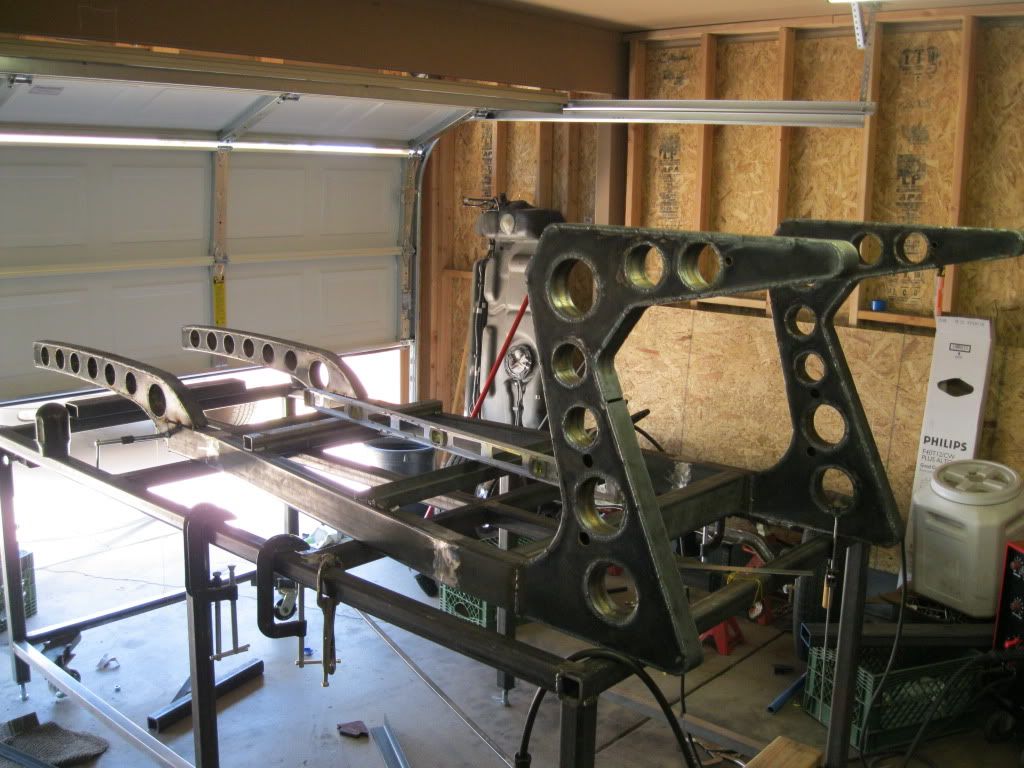
I spent most of today monkeying around the garage and listening to Testament and old Metallica. The frame is all squared up and for the most part welded. I managed to get it square within 1/32". I blame that on the slack of the tape measure, haha! ;)

I probably have 5 linear feet of welding left and I'll be done. It sure feels good! :D

IMG_0098.jpg
 
I didn't notice AC in the shop when you built it. How you doing with 109?
Or is that why you still have 5' left?

Frame looks awesome!
 
DId you make any provision for running wires, brake and fuel lines inside the frame? Got plans for the master cylinder location?
 
I didn't notice AC in the shop when you built it. How you doing with 109?
Or is that why you still have 5' left?

Frame looks awesome!

Thanks!

I have a couple of fans running in the garage, but no A/C. I bought a little swamp cooler for the garage, but I need to put it outside and run a duct in. It kind of cools when it's inside the garage, but after a while, it gets pretty humid. I still haven't figured out what to do, so for now I try to drink a lot of ice water and take breaks. It's the not the most ideal situation, but at least I'm in the shade, LOL! :)

DId you make any provision for running wires, brake and fuel lines inside the frame? Got plans for the master cylinder location?

No, I still don't have a solid plan to run the wires. I'm not a big fan of running wires and brake/fuel lines inside the frame rails. If something goes wrong, it'll make everything a lot harder. More than likely, I'll run everything in the driveshaft tunnel. I've thought about tucking the tail light wires in the frame, but I still don't know where I'm putting the tail lights.

I'm still debating whether I should run a tandem master with a proportioning valve or a dual master cylinder setup where I can adjust the bias, like a Wilwood. Regardless of what master cylinder setup I run, it'll be hidden. I'm not too crazy about the look of firewall mounted master cylinders on fenderless/hoodless cars.
 
Fans help a lot. The swamp cooler will work great until monsoons hit, but like you figured out they have to be outside or the humity goes through the roof. I'll be running my swamp cooler 24/7 to keep the iron from heating up when the lows hit the high 70's.

I had a problem getting the wires to the front. Looks like you'll have the same issue with those lightening holes. With hi and low beams, left and right turn, parking, fan?, horn and a ground it gets to be quite a bundle. You've got a while to go before you need to figure all that stuff out, though.
 
I had a problem getting the wires to the front. Looks like you'll have the same issue with those lightening holes. With hi and low beams, left and right turn, parking, fan?, horn and a ground it gets to be quite a bundle. You've got a while to go before you need to figure all that stuff out, though.

There's actually room between in the frame rails to fish wires through, but I'm glad you brought this up, because I had totally forgotten about the air lines that are going to the front. I still haven't come up with a solid way hide them or make them unnoticable.

Should I paint the frame or powder coat it?
 
I forgot about the air lines.

I like powdercoat except that it is hard to repair. It seems like there is always something to add or fix after you think the frame is done. I guess if I did powder coat the frame it would be after the whole thing was assembled and driving -then take it apart and powdercoat. I've never done that - once it goes together it stays together.

You might consider doing both. Get it sandblasted and powder coated then come back and paint it with something to make it pop towards the end of the build. The powder coating will give you a great base and keep it from rusting while you're working on it. Any fixes, changes or additions just prime with a rattle can.
 
I really want to powder coat, but the fact that it's tough to repair it makes me not want to do it. Arghhhh, decisions, decisions....

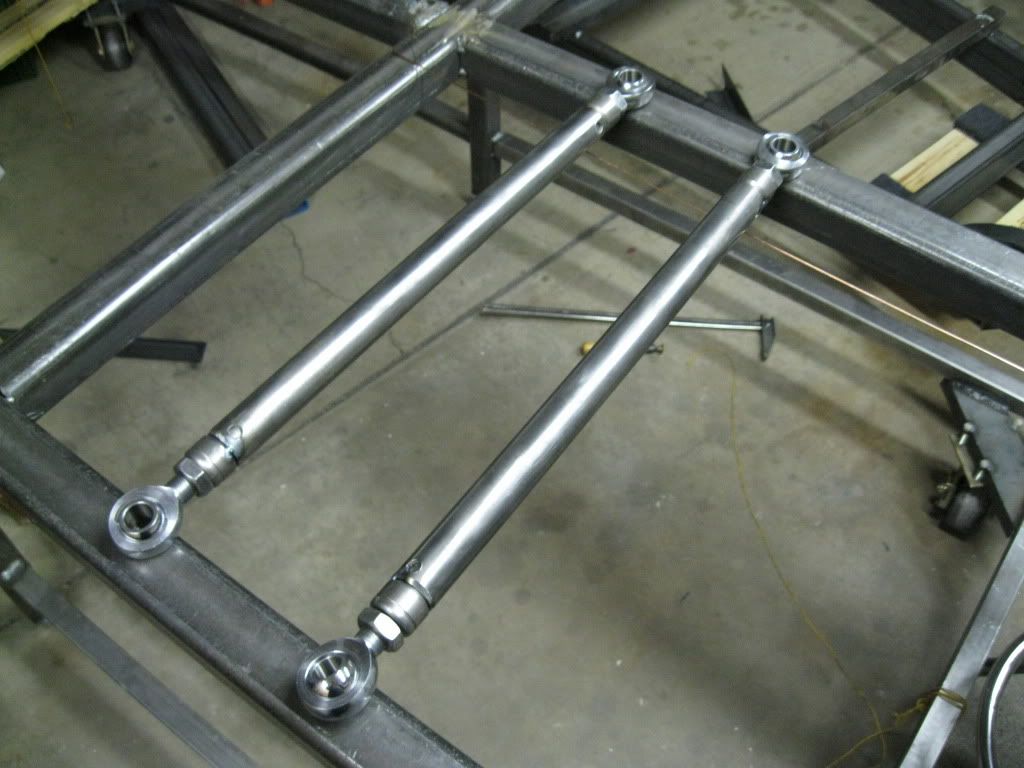
I started on the rear 3-link setup. I got the lower 2 links cut and tacked together. I'm still waiting for my hardware to arrive.

IMG_0108.jpg


I originally designed the rear suspension to have the lower links on the outside, but now that I look at it, I want to put them on the inside of the frame rails. What do you guys think?
IMG_0106.jpg


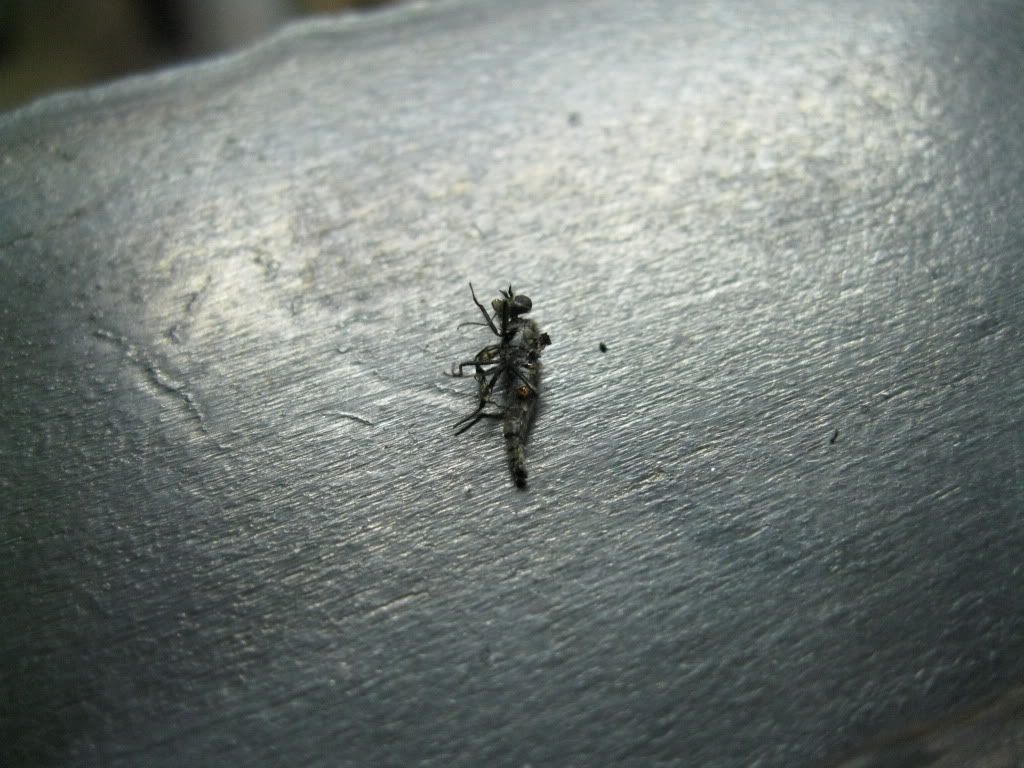
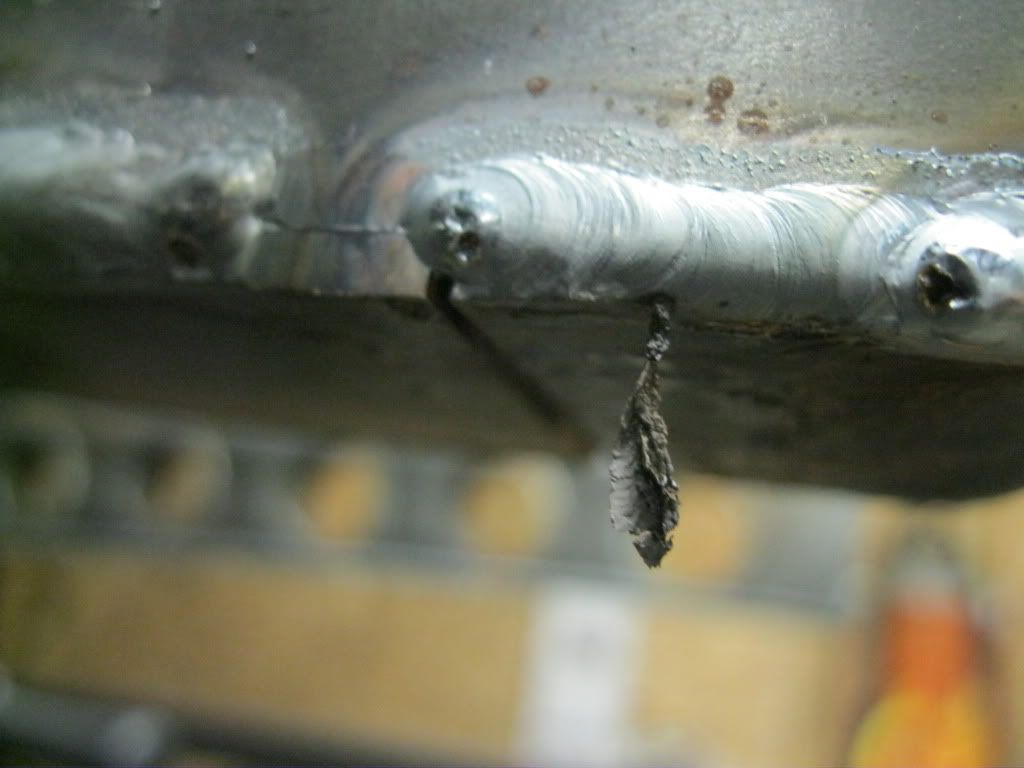
Oh, and something funny! This is like the third or fourth time this has happend to me. A couple of nights ago, a suicidal moth flew into my weld. There was a bright flash and then I stopped to see what happend. Here's the carnage:

IMG_0102.jpg


Burnt off wings:
IMG_0103.jpg
 
Great bug Zapper !! If your frame rails are going to be visible when viewed from the side, it would look cleaner if they were inside the frame, especially since the frame is a major visual feature on your truck. That is unless, like Indian Larry said, you want to see the "gizmoness".... Other than that, I guess the drawback to inboard mounting is that it would be more 'tippy' since the suspension ends up being narrower, though that could be greatly reduced by mounting the shocks as far out as possible ??
 
Great bug Zapper !! If your frame rails are going to be visible when viewed from the side, it would look cleaner if they were inside the frame, especially since the frame is a major visual feature on your truck. That is unless, like Indian Larry said, you want to see the "gizmoness".... Other than that, I guess the drawback to inboard mounting is that it would be more 'tippy' since the suspension ends up being narrower, though that could be greatly reduced by mounting the shocks as far out as possible ??

The rear suspension is pushrod. The pick up point for the shocks and airbags is roughly 14" from the center of the axle. Do you think that would be "tippy"? Regardless of the shock placement, I think the suspension on this car would be a little "tippy" because the unsprung to sprung mass ratio isn't in my favor.

Could shorten you're arms and come out of the center of frame. How are you going to get you're triangulation?

I actually ended up mounting the lower arms between the frame rails. The upper link is triangulated. You can see the pictures below.

Real nice work, looking good.

Thanks bud! :)

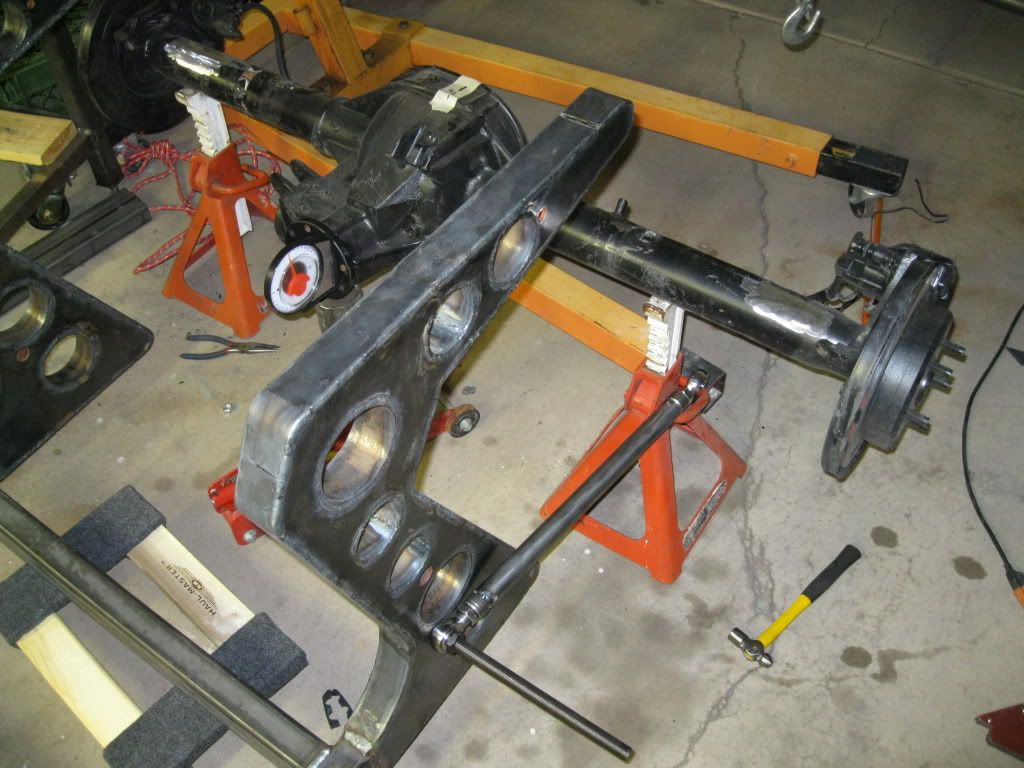
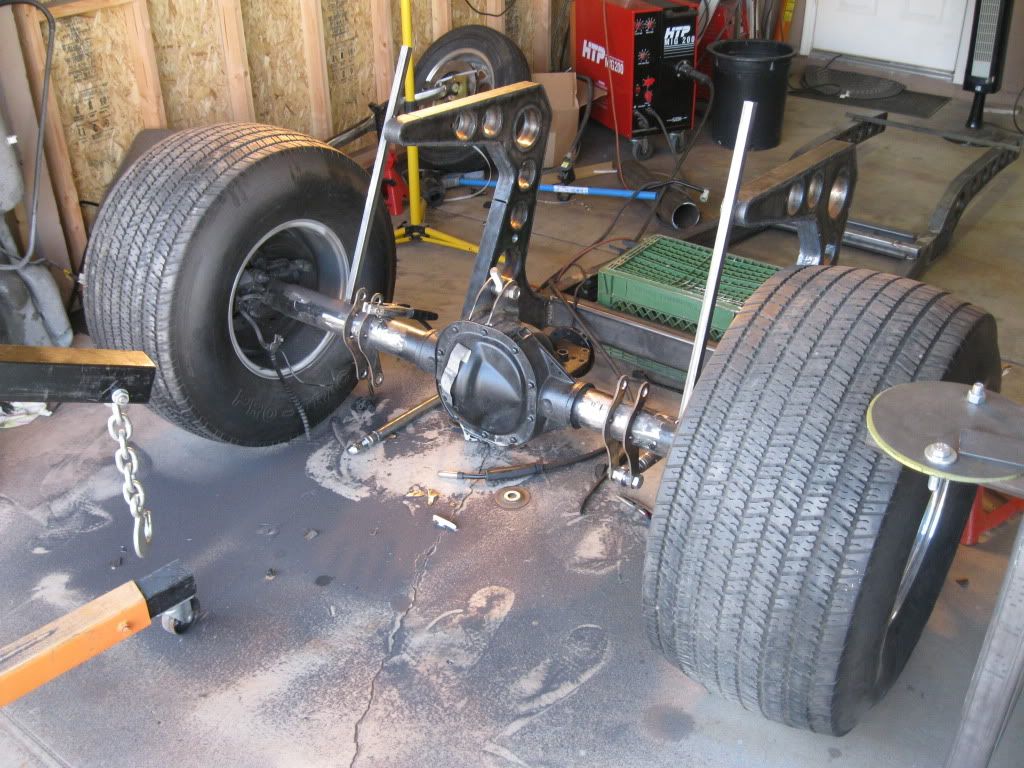
I worked on the rear suspension yesterday and today. I almost have a wheelbarrow! :D

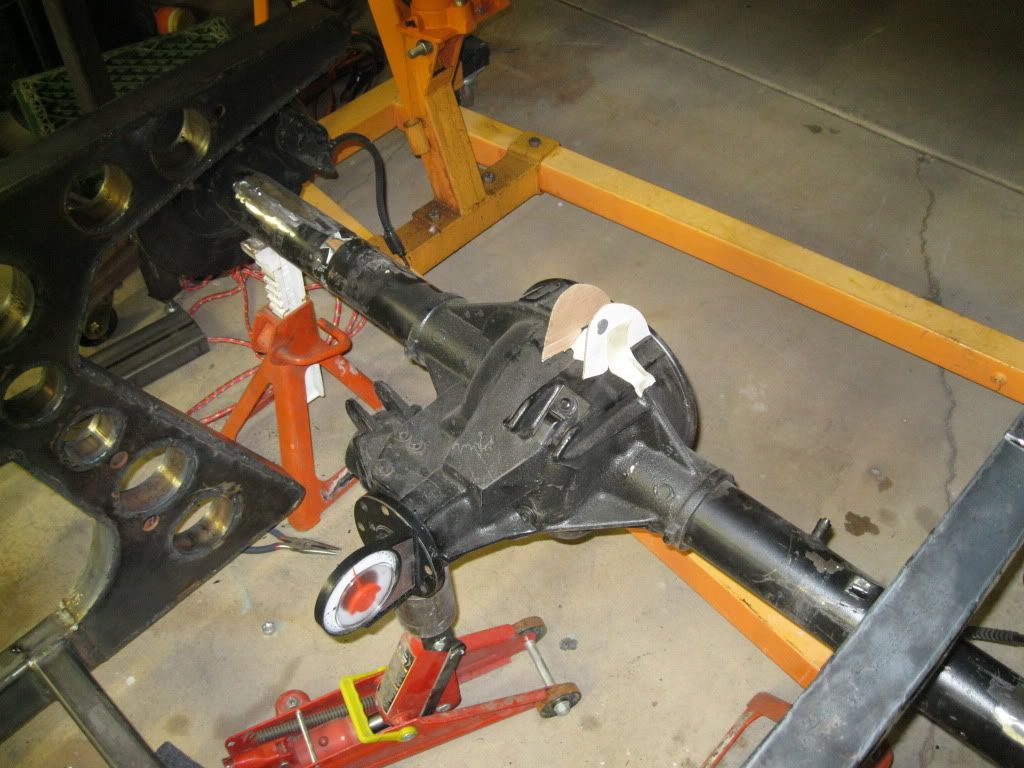
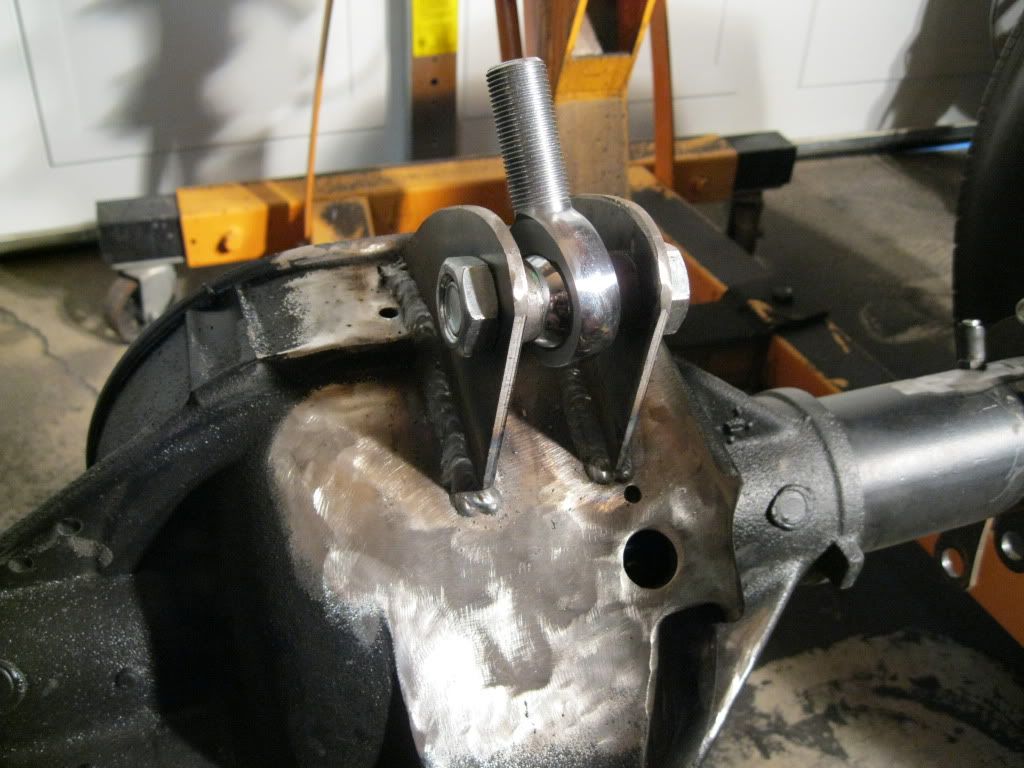
I didn't have any appropriate brackets in my "assortment" of water jetted brackets, so I made some cardboard templates and made some brackets the old school way, with a grinder!
IMG_0111.jpg


I also cut a lot out of the differential housing to make the top of it "flat" and less unsightly. You can kind of see how much I cut out by comparing the picture below to the picture above. I was a little skeptical about welding mild steel brackets to the cast center section. I did some research and the center section is cast steel, not cast iron. It welded fine and feels pretty strong.
IMG_0117.jpg


I hate grinding. I hate the noise, I hate the dust, I hate the vibration, I hate everything about it, LOL! The rear view of this mess:
IMG_0119.jpg


I made some struts out of square tubing and rolled it outside.
IMG_0120.jpg


That's it for now. I'll work on the upper link tomorrow and then I'm off to the front suspension.

Thanks for looking! :)
 

Latest posts

Back
Top