Second Wind - a Packard Gasser

Rat Rods Rule

Help Support Rat Rods Rule:

This site may earn a commission from merchant affiliate links, including eBay, Amazon, and others.
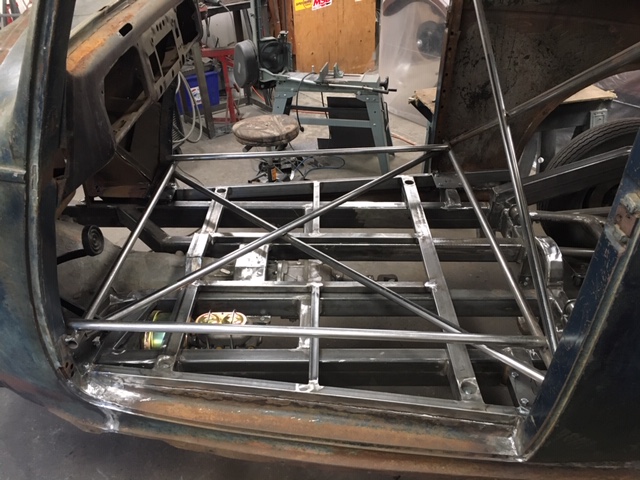
Looking like jungle gym with all the tubing :eek:
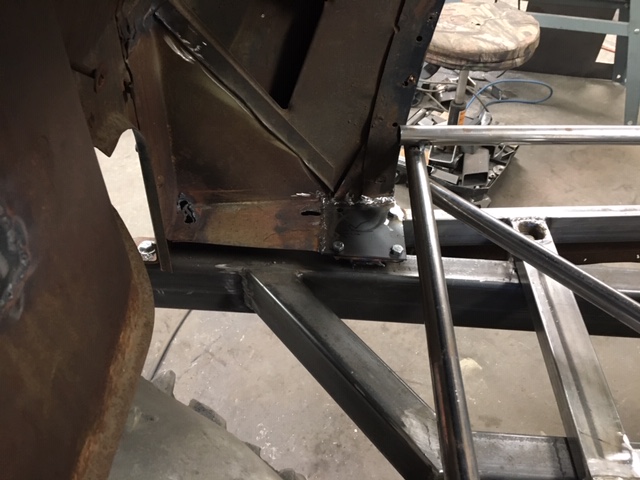
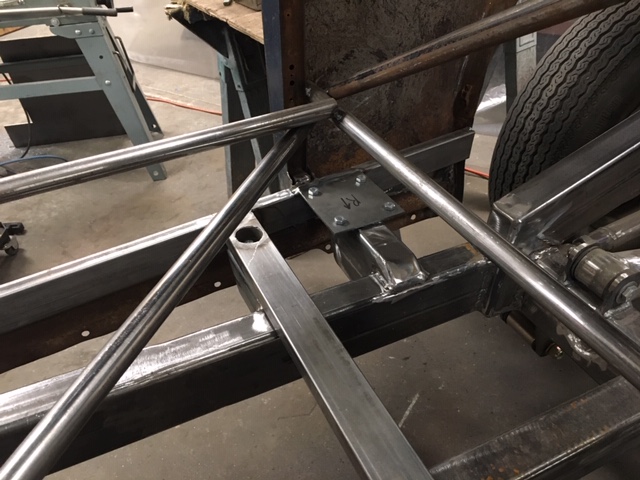
Making progress on the floor structure and body mounts, also adding mounting points for a roll cage. I want to be able to still take the body off the frame once the cage is in, so each mounting plate bolts to a corresponding plate welded to pedestals off the frame. Like Frankie said - "I did it my way"
attachment.php
attachment.php
attachment.php
 

Attachments

  • IMG_4393.JPG
    IMG_4393.JPG
    122 KB
  • IMG_4394.JPG
    IMG_4394.JPG
    102.6 KB
  • IMG_4395.JPG
    IMG_4395.JPG
    134.5 KB
Working my way to the rear with the floor structure and body mounting. First I made some bracing/supports for the rear of the body, squared it up and shwacked out the remaining bit of the trunk floor. I had planned to use the tailpan I have from the 36 Packard that I still have, but it's pretty crispy too, so I'll just have to make a whole new tailpan and trunk lip like I did for the last Packard coupe. The trunk opening was originally all framed with wood so I'll also have to redo that with 1" square tubing. [;)[;)

attachment.php
attachment.php
attachment.php
 

Attachments

  • IMG_4397.JPG
    IMG_4397.JPG
    124 KB
  • IMG_4399.JPG
    IMG_4399.JPG
    106.7 KB
  • IMG_4400.JPG
    IMG_4400.JPG
    118.3 KB
Went to Pick n Pull today with my trusty battery powered axe and scalped a 96 Grand Marquis :D
The shape of it works pretty good, the curve from the front of it matches the bubble at the rear of of the Packard roof nicely.

attachment.php
attachment.php
attachment.php
attachment.php
 

Attachments

  • IMG_4402.JPG
    IMG_4402.JPG
    139.2 KB
  • IMG_4403.JPG
    IMG_4403.JPG
    140.7 KB
  • IMG_4404.JPG
    IMG_4404.JPG
    156.6 KB
  • IMG_4406.JPG
    IMG_4406.JPG
    119.2 KB
The Marquee's and Crown Vics are the roof donors that you use on a lot of your projects isn't it?

I see you've been paying attention to my habits :D
Yeah, they have the right shape for these 30's cars, hard to find newer cars with a large enough piece to work with, and I'd hate to cut the roof from some 40's car to do it.
 
Diving right in on the skin graft :rolleyes:
As usual, if you think something is going to be easy - it aint. After melting off the rotten old lead from the roof seams, it was clear that I couldn't leave the bashed in lap joint as is, so I cut it out on both sides and welded some new metal in. They weren't bashful about slapping on the lead at the factory, I guess it was quicker than trying to make nice butt welded seams.
Got the roof skin tacked in place, lots of fiddling and hammering to get the seams flush and smooth, watching out for warpage and working it out right away. One thing I've learned doing this stuff is - don't kid yourself into thinking you can just bash it out later - you've gotta fix any warps as you go or you're gonna be slinging a lot of Bondo.

attachment.php
attachment.php
attachment.php
attachment.php
 

Attachments

  • IMG_4417.JPG
    IMG_4417.JPG
    102.5 KB
  • IMG_4422.JPG
    IMG_4422.JPG
    111.7 KB
  • IMG_4420.JPG
    IMG_4420.JPG
    106.7 KB
  • IMG_4419.JPG
    IMG_4419.JPG
    106.4 KB
Most have no clue how long and tedious a roof filler panel is to install until they do one for themselves.
You make it look like a piece of cake.
 
Starting work on the rusty and beat up rear of the body, replacing rotten bits first.

attachment.php


Added a strut from the body to the floor structure to keep the outer body panel in position. It will also give a mounting surface for the wheel tub.

attachment.php


Making the first corner piece, beat on the sandbag then smoothed with a planishing hammer.

attachment.php


Made a new bottom lip for the trunk opening that the weather stripping sits in and so I could get a better handle on the shape and size of the new metal to go in, I roughly beat the old tailpan into a shape sorta resembling what it once was....

attachment.php
 

Attachments

  • IMG_4475.JPG
    IMG_4475.JPG
    104.4 KB
  • IMG_4476.JPG
    IMG_4476.JPG
    95.8 KB
  • IMG_4478.JPG
    IMG_4478.JPG
    101.5 KB
  • IMG_4479.JPG
    IMG_4479.JPG
    122.1 KB
You sure don't collect dust.

Not right now but I will soon - knee surgery on Friday will put me out of commission for 6 weeks or so :

In the meantime, I finished welding up the top insert, more hammer and dolly fine tuning to do but its mostly lookin' good. Got both rear corners formed and tacked in, hoping to finish the tailpan tomorrow before the gong goes off....:D

(
attachment.php
attachment.php
 

Attachments

  • IMG_4481.JPG
    IMG_4481.JPG
    125.6 KB
  • IMG_4484.JPG
    IMG_4484.JPG
    120.4 KB

Latest posts

Back
Top