Roadster pickup from leftovers.

Rat Rods Rule

Help Support Rat Rods Rule:

This site may earn a commission from merchant affiliate links, including eBay, Amazon, and others.
looking very nice don, overall stance looks perfect...

i always foget to stop in and check up on the build... im not use to reading a sticky thread regulary
 
Thanks. I'm like you, I forget to look in the builds and sometimes someone has posted something and I feel bad because I kinda ignored their post. Then I find it later on. :eek:

I had pretty much made up my mind that I was going to use the Autoweld four link setup Dan had left over from his rpu build (he went with polished SS in the end) but when we sat down to look at it today we realized the 3 link setup we have from Suicide Doors would actually work better and eliminate some parts, like a panhard bar.

The problem was that Dan originally ordered these for his Fordor project and had them custom made a little longer than the usual ones Suicide Doors sells. Because of how short I want my back they were about 4 inches too long, so we decided to cut them up and reweld them 4 inches shorter.

Suicide Doors really overbuilds these bars, they are 1.5 inches OD with a 1/4 inch wall thickness. So once we cut them up we found some solid round stock in the shop that was 1 inch in diameter which slipped tightly inside the cut portions. We cut the round stock in 8 inch pieces and inserted them into the tubes before welding. Dan rosette welded them in place first of all, then he fully welded the two halves back together. If anything it is stronger than the original uncut bars.

That is how far we got today, which leaves us needing to build brackets to mount them to the frame and rear axle. The 3 bar setup will take a little bit of the room I had planned for a gas tank, but I still have room for maybe a custom made one or I might find a fuel cell the right size to tuck inside the bed.

Here are some pictures of the 3 link setup during and after welding. Also, there is a picture of one of the 4 inch sections we cut out so you can see how thick these things are.

Don


myrpu3barmods002.jpg


myrpu3barmods003.jpg


myrpu3barmods004.jpg


myrpu3barmods005.jpg
 
Don, How long is the upper link now? Are the lower links the same length? The bed length looks perfect to me.
 
Thanks, Bob. We shortened both the upper and lower links by 4 inches so they are all 14 inches center to center now. That might seem a little short, but Suicide Doors designed this system to be used on bagged S10 and similar cars where the swing from up and down might be 8 inches or more.

We are going to mount them so the top Y and the bottom two bars are in the same plane and swing together.

Don

For reference, here is how we had these mounted in the 39 Dodge pickup we built. The major difference is that there is nothing to weld brackets to on an S10 rear, so you have to use that flat adapter plate that bolts on. I am using an 8 inch Ranchero rear this time which will allow us to weld mounting brackets right to the housing.

dodge3linkrear2-1.jpg
 
Thanks, SF.

George! Where the heck have you been? Haven't seen you for a while, or maybe I've been missing your posts. What are you up to these days?

Don
 
I went over to the shop this afternoon and got the pieces for my axle brackets finished up. Tonight I'll toss them in the blast cabinet then Dan can weld them up for me.

That piece in the picture with the stainless stud sticking out of it is the back wall of the bracket and will hold my coilover shock.

Don

myrpurear3linkbrackets001.jpg


myrpurear3linkbrackets003.jpg


myrpurear3linkbrackets006.jpg
 
Dan and I went to the shop tonight when he got home from work, and he spent a lot of time smoothing and welding the axle brackets. They came out great, look like they were stamped out of one piece of steel. Dan always spends lots of time on parts that will never be seen.

While he was doing that I started to clean up the rear axle housing. I used Don's plasma cutter to remove the old spring pads, and I have to say I have a new respect for it. It really did a nice job and cut right through them. I didn't even burn myself once. I may have to borrow that thing more often. After that I ground it a little smoother and got it ready for Dan to weld the mounts on.

The next step is to weld the mounts to the rear axle housing, then we can build the frame brackets to mount the front of the lower bars to the frame. Those shouldn't be too hard, as they are pretty much flat and fairly simple. Here are some pictures from tonight.

Don

myrpumoreworkon3bar001.jpg


myrpumoreworkon3bar003.jpg


myrpumoreworkon3bar002.jpg


myrpumoreworkon3bar004.jpg
 
NICE

Hey Don. I have to say again that your kid Dan is incredibly talented (and fussy). [cl I used to be fussy (sort of), but old age has taken it away from me!! :rolleyes: haaahaaaa perley
 
Haha, me too, Perley. :D I thought they were ready for welding, just needed tossed in the blast cabinet first, but noooooooooooo. He had to spend about an hour each smoothing them out. :rolleyes: At this rate I should be about 95 when this thing gets done.

Don
 
Tomorrow we are planning on welding the rear mounts for the lower bars to the rear end housing so tonight I went to the shop to get a jump on it. We needed a way to hold the two brackets totally square to the housing and to each other, so I made up a simple jig that will hold them in place while welding.

I didn't want to waste any good steel so I used a piece of 3 x 5 angle iron we had and then I cut up two pieces of 2 x 4 box tubing for the parts that go inside each bracket. The inside dimensions of each bracket we made is just a hair over 3 inches so the 3 inch tubing will keep it totally square. I clamped it all to our welding table, squared it up, and put some tack welds on to make it one piece.

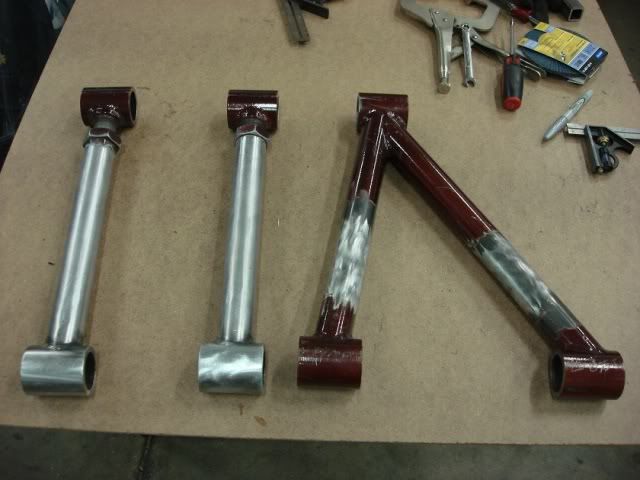
We can also use the same jig to hold the front brackets that go on the front end of the lower bars until we get them welded onto the frame. That way the front and rear mounts will be exactly the same distance apart eliminating any bind or misalignment.

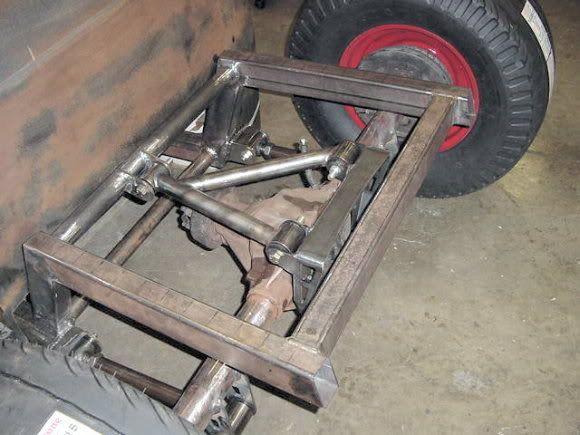
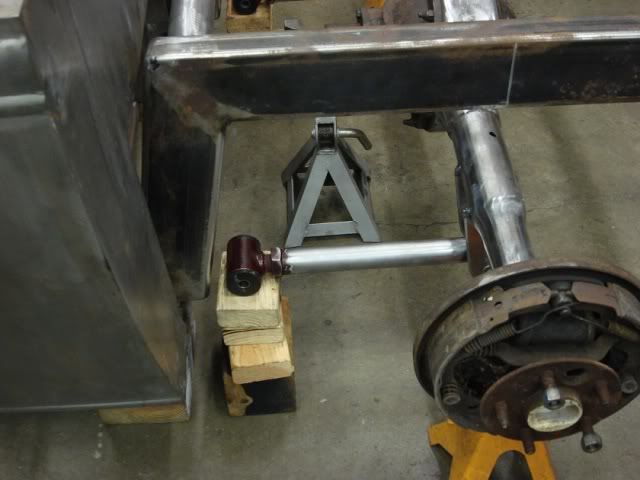
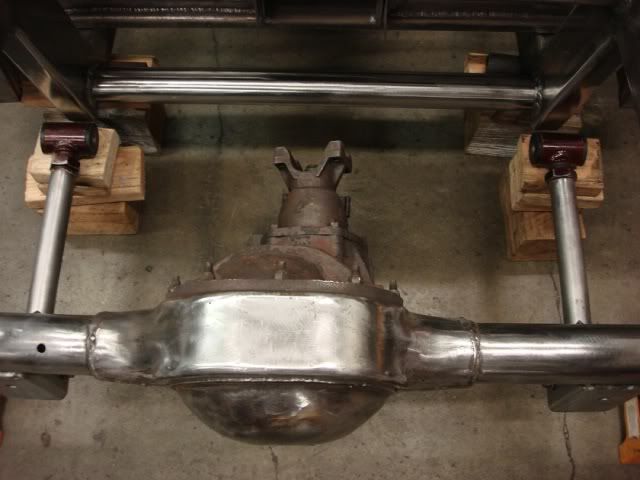
I also squared up the rear end under the car in the exact position it will end up, then slid the jig and brackets under for a trial fit. A couple of blocks of wood shoved the jig and brackets tight against the rear end, ready for welding. Tomorrow we will set the yoke angle at 3 degrees up and weld it all up.

Here are some pictures from tonight.

Don

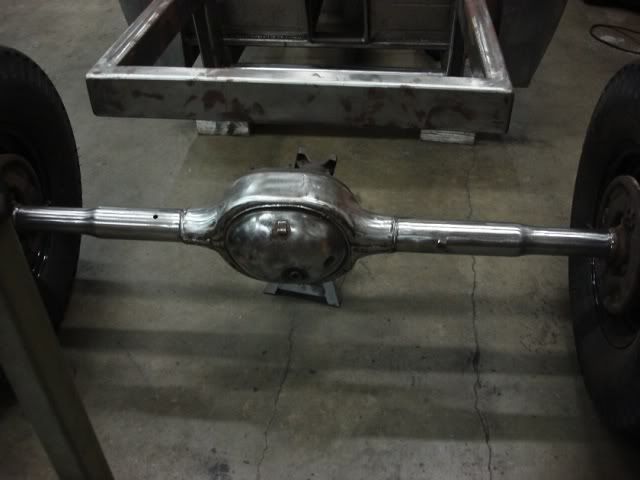
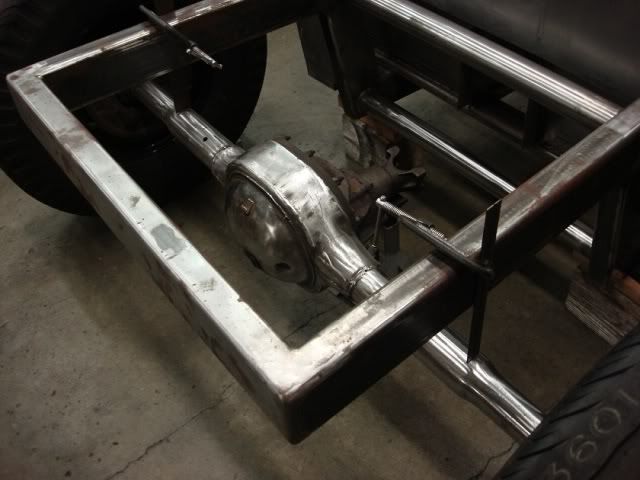
Here is the rear end all squared up to where it will be in the frame.

myrpujigforrearmounts001.jpg


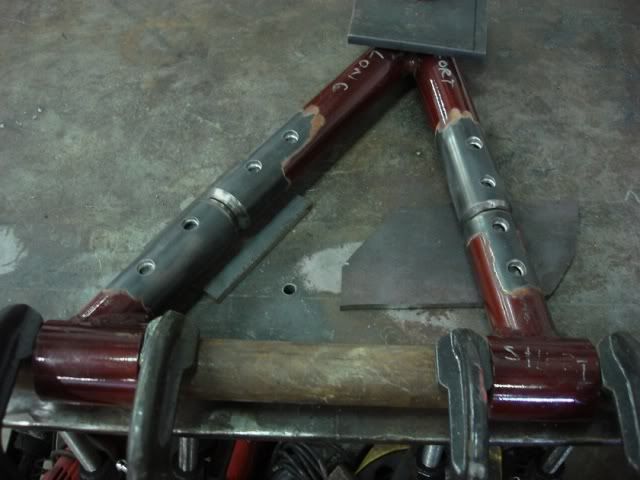
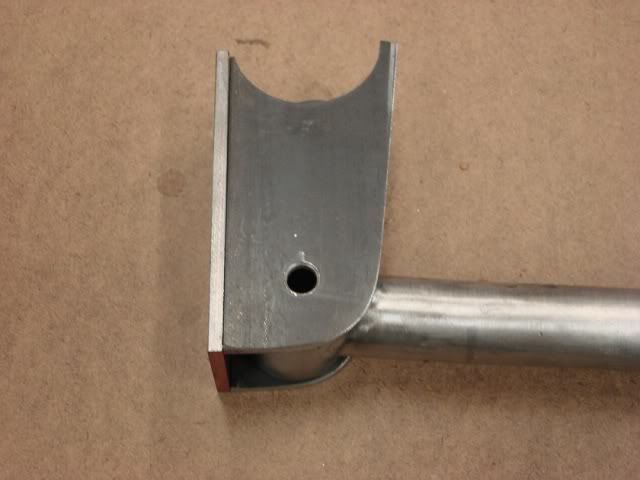
This is the simple jig I built.

myrpujigforrearmounts004.jpg


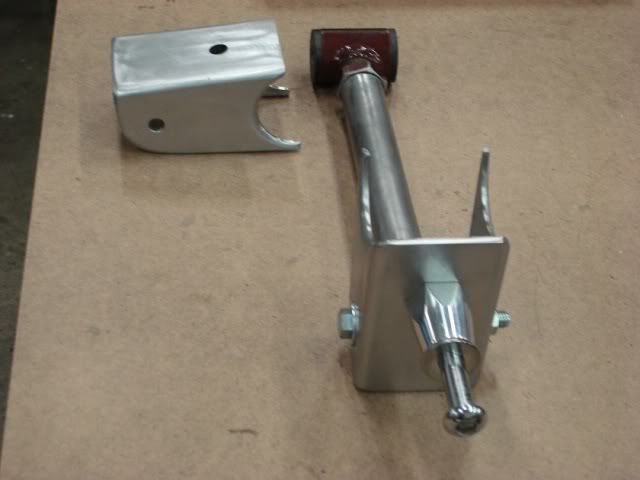
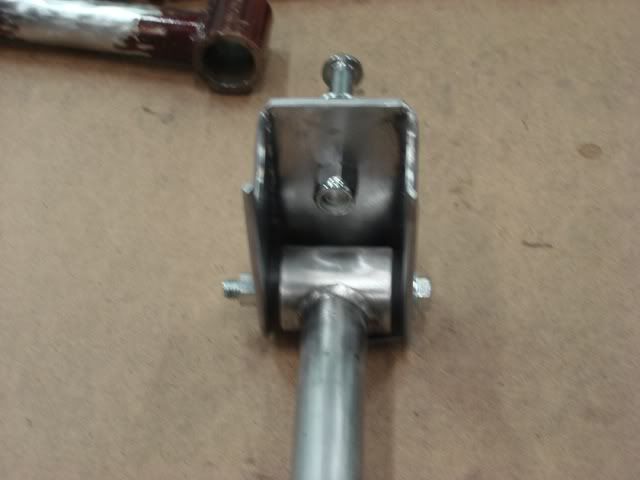
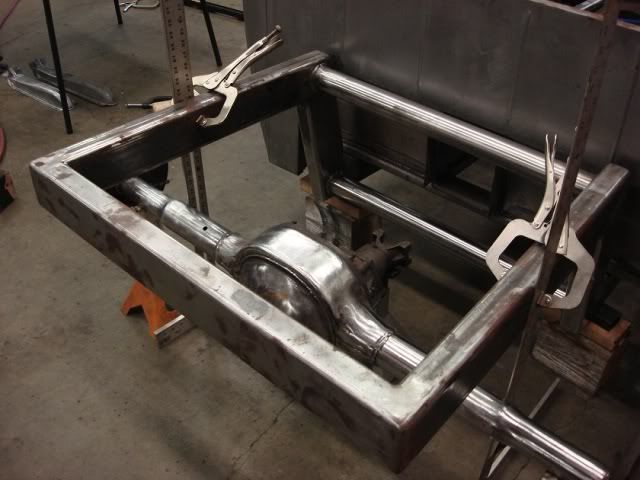
Jig with brackets clamped in place.

myrpujigforrearmounts005.jpg


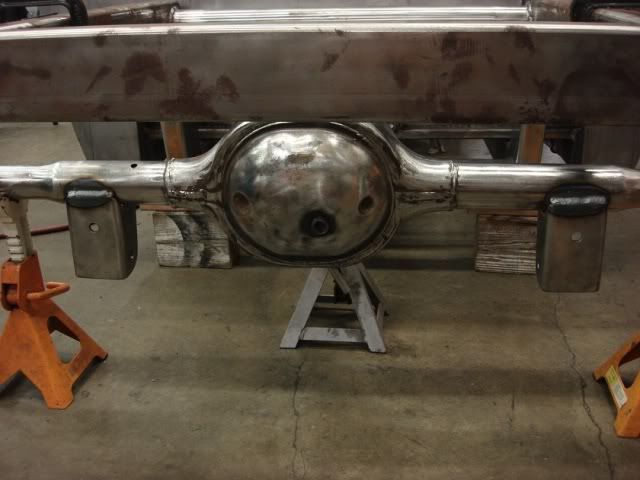
The whole thing positioned under the rear end, ready to weld on.

myrpujigforrearmounts006.jpg


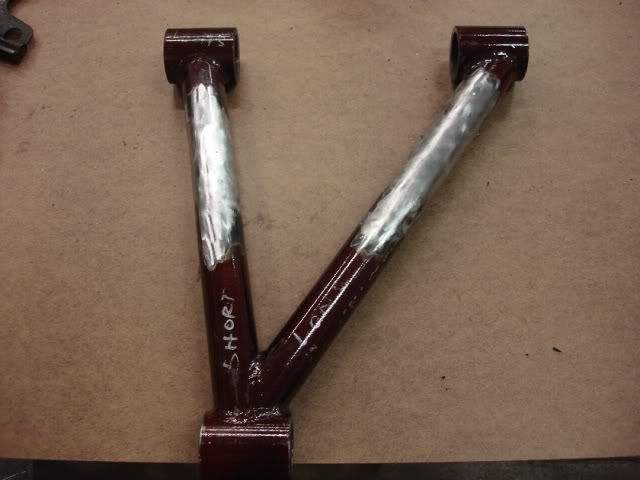
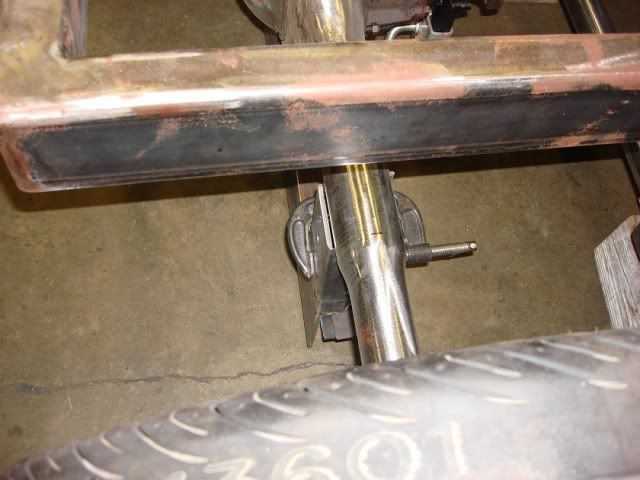
And a side view of the bracket.

myrpujigforrearmounts008.jpg
 
Thanks. No, I think the entire running gear is going to be the same off white as the engine..........at least that is the plan for now. That could change though as things go on. :)

Don
 
Thanks. No, I think the entire running gear is going to be the same off white as the engine..........at least that is the plan for now. That could change though as things go on. :)

In Florida steel goes from shiny to rusty in about a day. :(

Don
 
That`s cool too, I just would be tempted by the shiny....

Don`t feel bad, the same thing happens here too. They have to have a way to keep it shiny though, look at the bare metal style hotrods(not sure what the name is).
 
Some people use Gibbs to keep it shiny (for a while) but it takes a lot of upkeep. I'm naturally lazy so I try to keep maintenance to a minimum. :eek:

Don
 
Oh, thats no fun. I`d just paint it the same color as the rest of the driveline then. Or paint it silver for a compromise ;)
 
We got some more time in today, working on the lower bar mounts. It took a while to get the rear end exactly square in all directions, but we finally got it right where it should be. Then Dan put a couple of welds on the brackets to hold them in place until we can remove the rear and do the final welding.

Tomorrow we are going to work on the mounts that go on the frame and hold the front of the lower bars in place. Still a lot of work to do on the rear end mounting , but getting closer. Here are some pictures from tonight.

Don

First we squared up the rear axle in every direction.

myrpujigforrearmounts001.jpg


myrpumorelowerbarwork003.jpg


Then we welded on the lower brackets:

myrpumorelowerbarwork004.jpg


And tried the lower bars for a trial fit.

myrpumorelowerbarwork005.jpg


myrpumorelowerbarwork007.jpg
 

Latest posts

Back
Top