1936 chevy low cab build 1.5T

Rat Rods Rule

Help Support Rat Rods Rule:

This site may earn a commission from merchant affiliate links, including eBay, Amazon, and others.
Nice work I really like the shifter, I too made my own but I don't like how easy it is to change gears or bump out of park so I will be incorporating your idea into mine.
 
my $.02 would be to get a PTO knob or a splitter knob like on an 18 wheeler shifter and just run an external rod down to it. it would look cool all expossed and mechanical. [;)
 
this is a rude example but give a placement...
 

Attachments

  • 296.jpg
    296.jpg
    24.3 KB
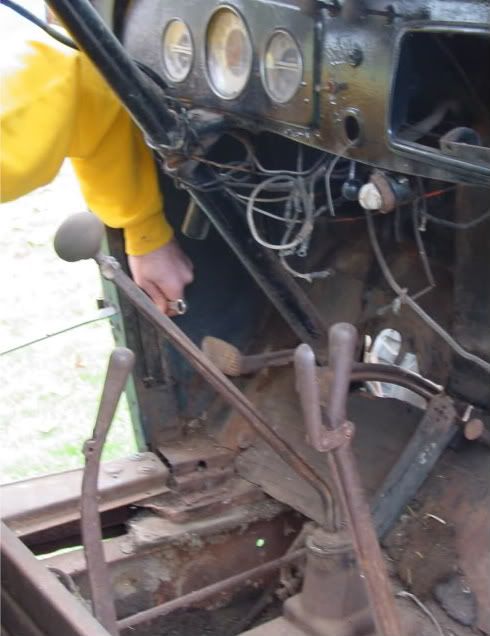
The original shifter had a reverse lock out.. so what I needed was basically already in place. Its self contained on the shifter arm... I just modified the little piece that slides up and down by welding on some "wings" for a lack of a better term and those engage the lockouts...

Its just on the other side of the shifter .. I thought I explained it...guess maybe I should have shown that, I dont alway do the greatest descriptions of what I have done...

I dug back through some photos on photobucket...(yikes november 1st 2008) knew I had to be able to see it in there somewhere... You can see the rod that runs up the side..
DSC01948.jpg


funny thing about that photo... my buddy whose arm that is in the photo is the only buddy that has helped me on this project.. besides my dad... Anyway he had not seen the truck since that day when we took it apart, he stopped by last weekend. A lot has changed since that picture was taken.. just about every surface has been modified..
 
It is fun to look back & see how your project has come along for sure. I've only had the experience of restoring our Boss 302 which took forever to finish. Just seems to bring back a lot of good times to see a pics as a project comes to life.

Corpo, I see you live west of Chi town in corn& bean country. Tell me how the planting progress is up that way. Here in eastern Indiana we are getting waaaay behind because of the wet weather.

Thanks,Rex
 
It is fun to look back & see how your project has come along for sure. I've only had the experience of restoring our Boss 302 which took forever to finish. Just seems to bring back a lot of good times to see a pics as a project comes to life.

Yeah its fun to look back.. but at the same time it makes me realize how slow I build.. some guys have done 3-4 cars in the time I have not even done 1

Corpo, I see you live west of Chi town in corn& bean country. Tell me how the planting progress is up that way. Here in eastern Indiana we are getting waaaay behind because of the wet weather.

Thanks,Rex
The fields around here were seeded last weekend for the most part.. we have definitely had some wild weather this year.. tons of hail yesterday
 
Well the mail man delivered a very important piece for the build this weekend.. I have been looking for a top half to my windshield frame since I got the truck. Finally tracked one down, I was told that this was the best one the seller had ever seen... in fact better then the one he used on his build. I paid a pretty decent dollar for it, but its perfect.. restorers would love to have it.. oh well it mine now!
 
Hey CORPO what are you going to do as far as getting the truck licensed? I went today to transfer the title I have for my 42 and I can llicense it as commercial since that is what it was last licensed as or I have to fill out paperwork explaining everything that ahs been done to it and then take it ibn to be inspected
 
my truck has a new Vin and title.. the guy I bought it off of had it all sorted out... the only problem is that my truck still had the vin place.. now the title doesn't match the original plate.. so I am going to have to by one of those plates on ebay and have it engraved with the new vin...

my title reads.

1936 truck, Black

Thats it, no reference to it being a commercial grade vehicle

When I went to the DMV to have it transfered into my name I asked about getting it licensed and they said all i need is the title and proof of insurance and id be good to go...
 
O ok cool.... Yeah mune doesn't say anything about it being a commercial vehicle the lady at the dmv noticed that the last time it was licensed it had Y plates on it which in minnesota means commercial vehicle
 
Starting to look like something now...

Got the windshield and regulator in... a few other odds and ends.. like hung the review mirror so I could get the full affect as I sat there and made engine noises..

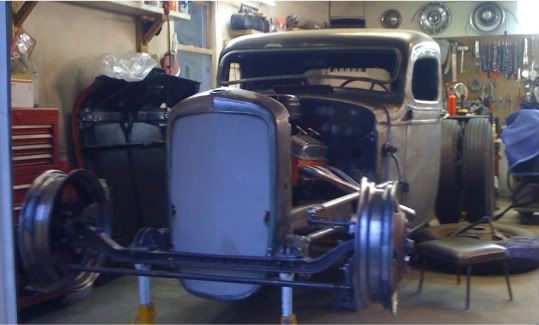
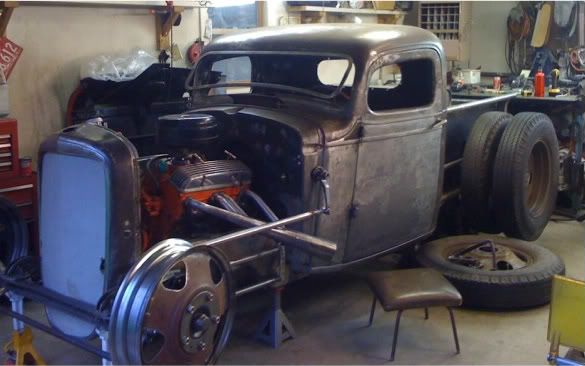
But mostly been sorting out the grill radiator situation... To me this is a make or break on the overall looks of a project. I had origonally intended to put the shell out in front of the axle which would have been nice and simple.. but instead I have chosen to torture myself and put it where I think it NEEDS to be in order to look right.. So I have been re working the front of my frame so I can squeeze the peak of the shell i between the axle and the frame....

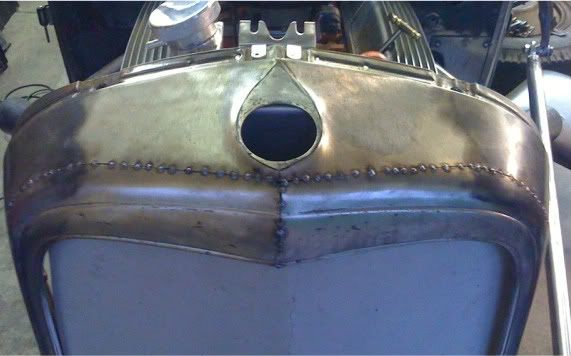
Needed to reduce the peak of the grill to help with the clearance situation... I took about 5/8" out of the peak...

a610e6fa.jpg


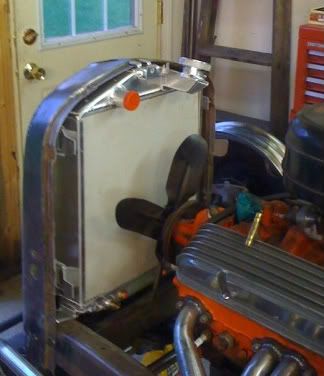
The radiator is about as good of a fit as I could have possibly hoped for.... short of a custom one...... Except that I will have to run an electric fan.. (pretty sure)
48a1c7f2.jpg


I may still try to lower it about 1/2" but its going to be alot of work to achieve that...

37ad661f.jpg


Its forward of stock position by about 3-4"
9387d9df.jpg
 
Starting to look like something now...


I may still try to lower it about 1/2" but its going to be alot of work to achieve that...
Its forward of stock position by about 3-4"
9387d9df.jpg

You were right. The grill belongs behind the axle.

Roll that sucker outside (by whaterver means necessary) so you can look at the profile from 40ft away. That will tell you if you are close enough with the grill placement up and down.

I usually waste a roll of masking tape, taping across the void to help me see the real lines. The grill shell needs to line up with the cab.

Oh yeah, raising the body by a little may be an option too.
 
CORPO I hate to say this because I know it would be a lot of work, but I think it needs to be laid back just slightly!! IMHO

BUT it does look good the way it is too!!
 
I like the straiht up as well. With the big square rear tire set it give it that tough bullish quality. kinda like a full backs swagger. don't know if that made any sense....[S[cl
 
Excellent behind the axle. And even if the rad shell is level with the cowl it has to LOOK level. I'm thinking brace rods from the radiator to the cowl.Maybe even welded chains (not too big) to continue that working truck look. [P
 
I think the grille looks great straight up, I always try to get my grille shells an inch below the cowl, if you look at a stocker, they are always lower than the cowl. Obviously that's some work, looks like you'll need to lower the rad between the frame rails to get it down any more.
 
Thanks for all the input guys... I appreciate it ....I didnt mess with it tonight.. just letting it settle in... live with it for a while

Flipper.. I know I could raise the cab..... but I dont think I could bring myself to do that after fighting a battle to keep it all low...

rainman.. I dont think I can squeeze any lean out of it... I have built myself into such a tight spot as it is...

zz probably a 1/2" is the most I can go... because I cant cut into that cross member it houses the bags...I might be able to squeeze that half inch by puting a slight notch into the frame cause the cross member is below the edge of the rail... or i will have to modify the brackets which are aluminum and my welder doesn't do aluminum... ( not that I am very good at welding aluminum anyway)


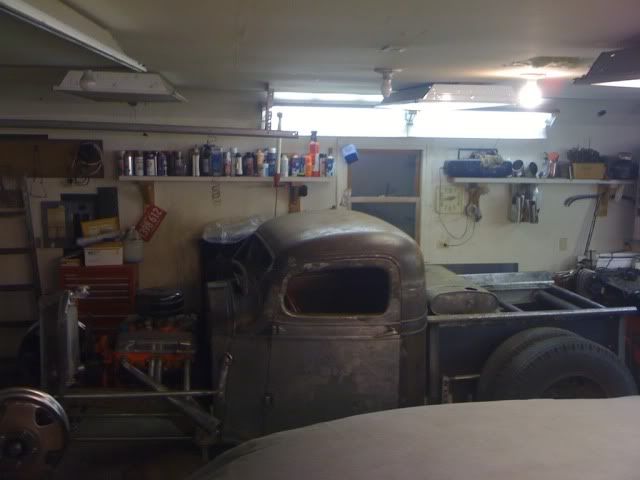
heres the closet thing I can get to a profile shot..
130e46c0.jpg


tinkered on a few other items
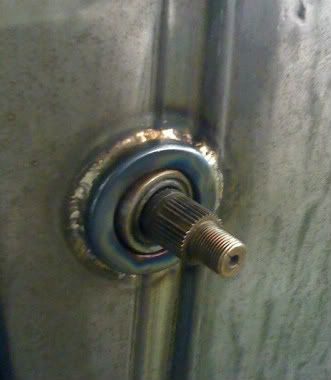
Trimmed out the hole for the cowl steering.. pretty happy with how this turned out. Found a interesting little formed piece and thought to myself man that would look nice... put a hole in the center and sleeved it, worked out pretty well.. I silicon bronzed it on there...
441b0c0c.jpg


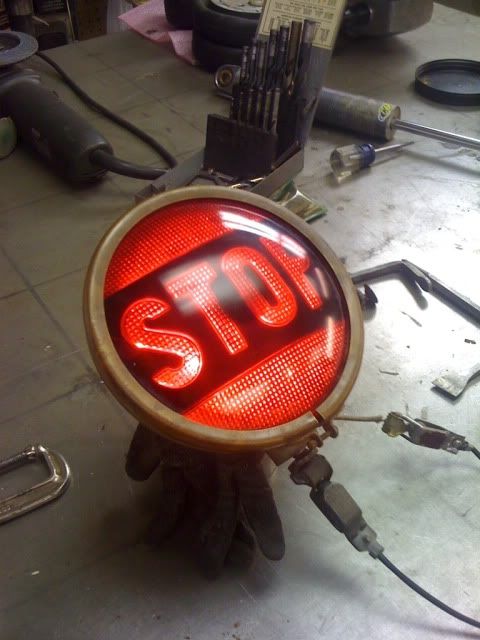
And then theres this.. Going to be my 3rd break light once I figure out where to put it

Big thanks to Junker39 for answering my add for a 6.5" light housing for my stop light, anyway quick clean up/Disassembly and test fit and it is darn close. Unfortunately,I will need to sand open the center of the retaining ring just a slight bit to get it to engage fully but couldn't ask for a better solution.. short of the exact housing the lens came from.. The only reason I say Unfortunately is because I will ruin the awesome patina that was under the paint...

Can you believe the old bulb fired right up???n Its really bright straight on.. but my phone didnt like that.. Thanks again junker
002abf2c.jpg
 

Latest posts

Back
Top