1946 Chevy Bobber Truck Chop Build

Rat Rods Rule

Help Support Rat Rods Rule:

This site may earn a commission from merchant affiliate links, including eBay, Amazon, and others.
Here'z mine. I havent driven it yet, but i do like the look..
D/b
 

Attachments

  • FOR UNCLE BARRY.jpg
    FOR UNCLE BARRY.jpg
    56.1 KB
  • SPRINGS.jpg
    SPRINGS.jpg
    3.8 KB
  • 3k33p53o45Y15X65S3a6e5f5845ffa6851de8.jpg
    3k33p53o45Y15X65S3a6e5f5845ffa6851de8.jpg
    6.7 KB
  • GEOMETRY.jpg
    GEOMETRY.jpg
    3.8 KB
  • TIN MAN.jpg
    TIN MAN.jpg
    56 KB
Seems like it's been a long Winter and not much progress, but finally getting a few things done.

100_0517.jpg


100_0515.jpg

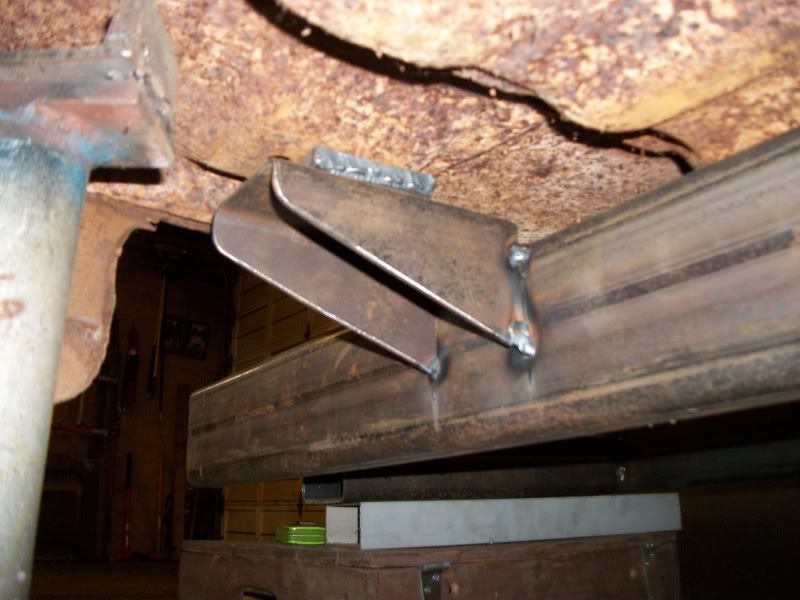
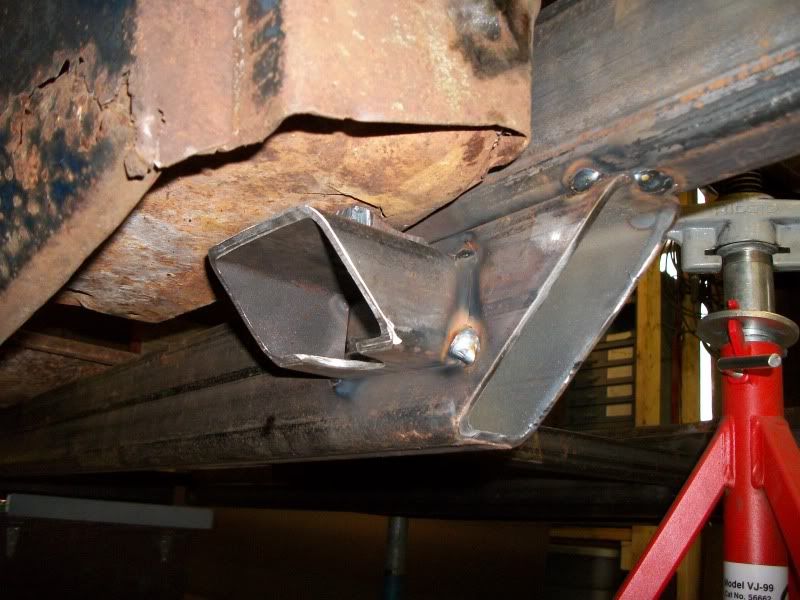
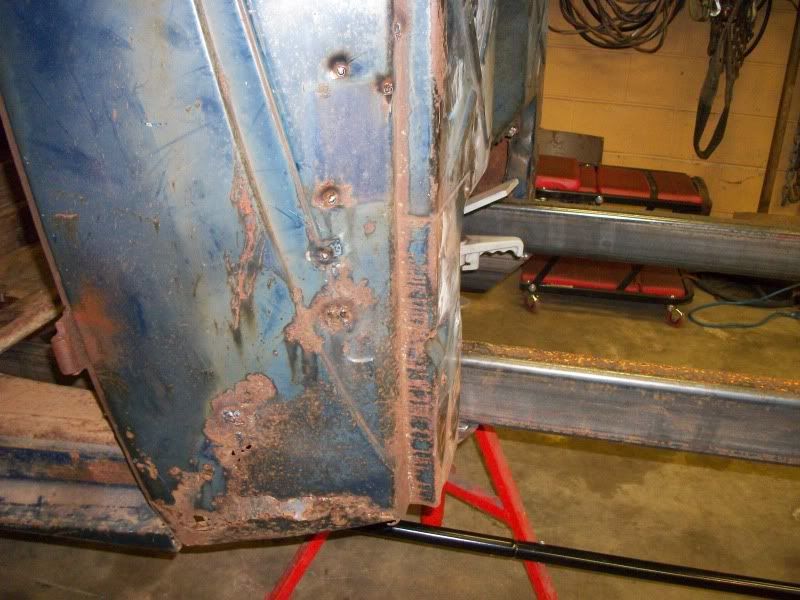
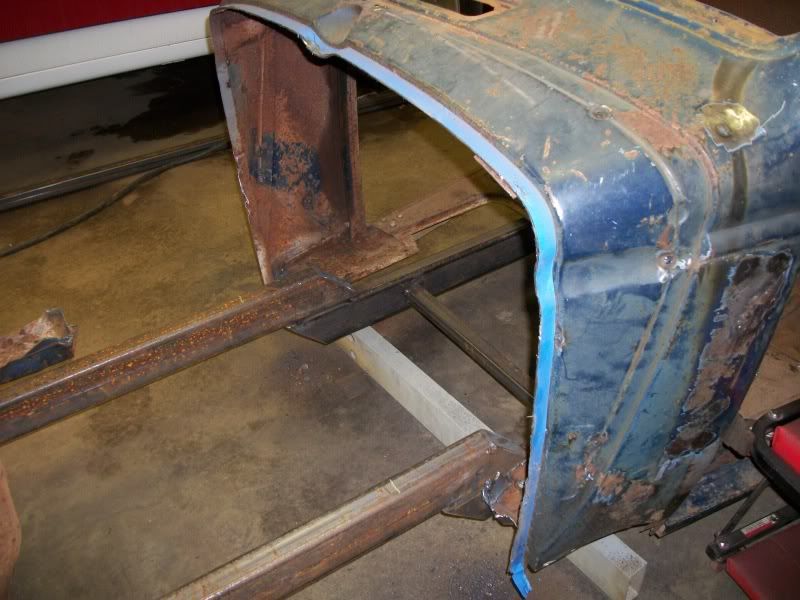
Body mounts and "Z". Probably gonna "Z" it some more.

100_0522.jpg

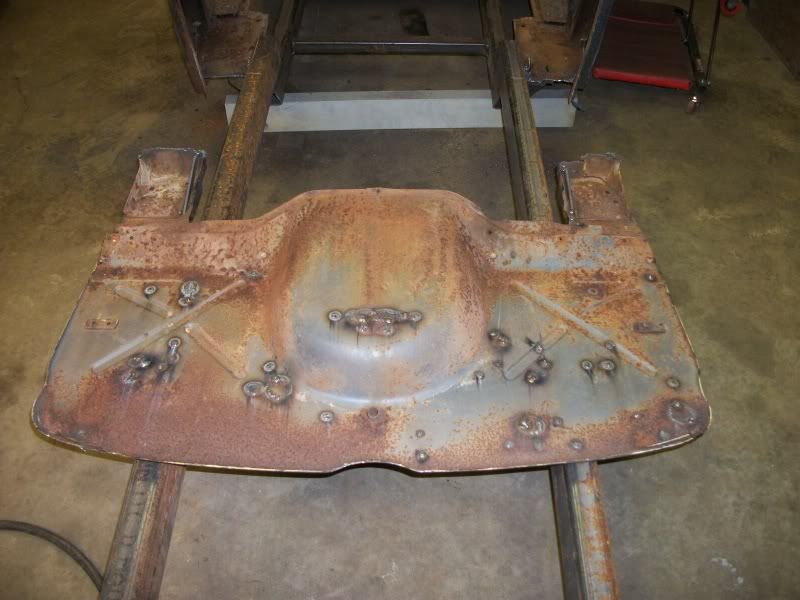
Holes in firewall welded mostly up.

100_0538.jpg

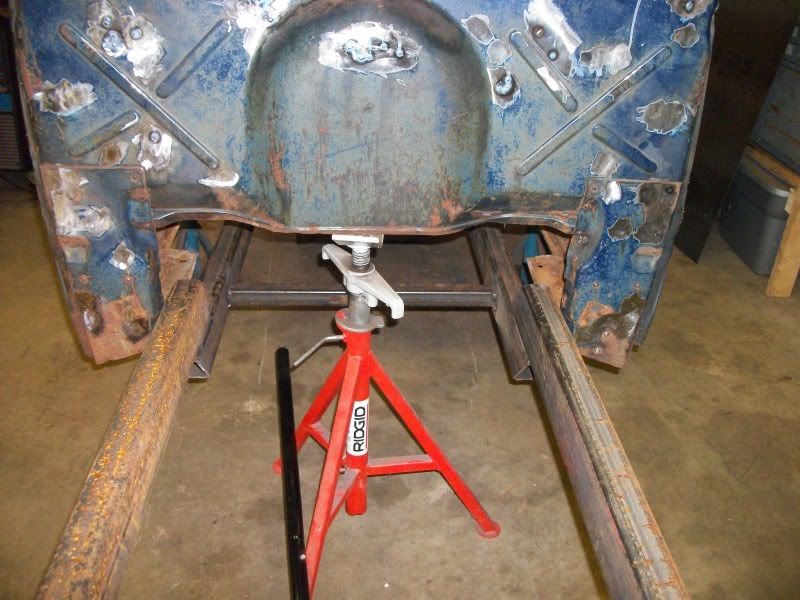
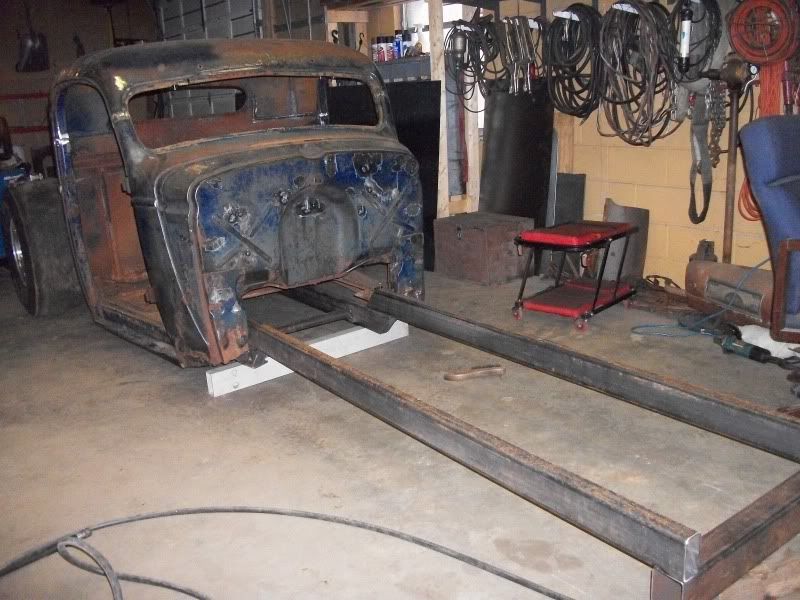
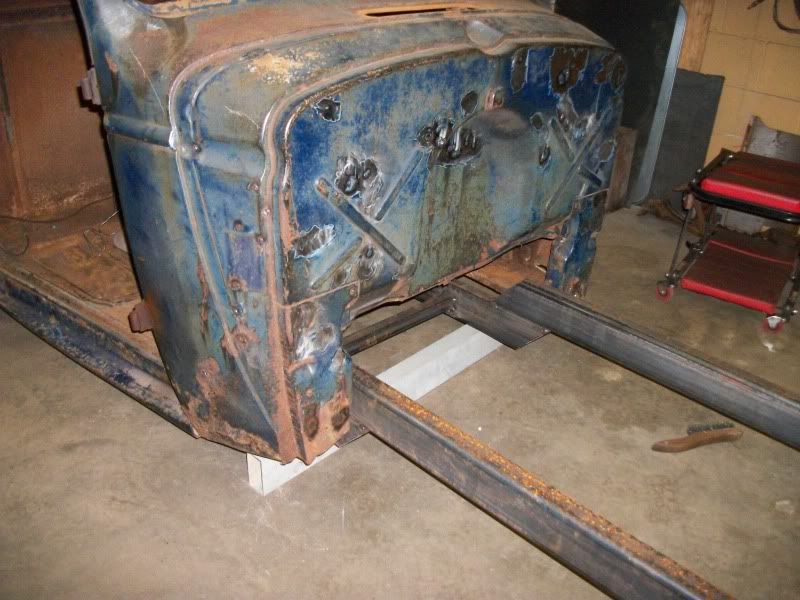
Front frame mock up.

100_0531-1.jpg


100_0545.jpg


100_0547.jpg

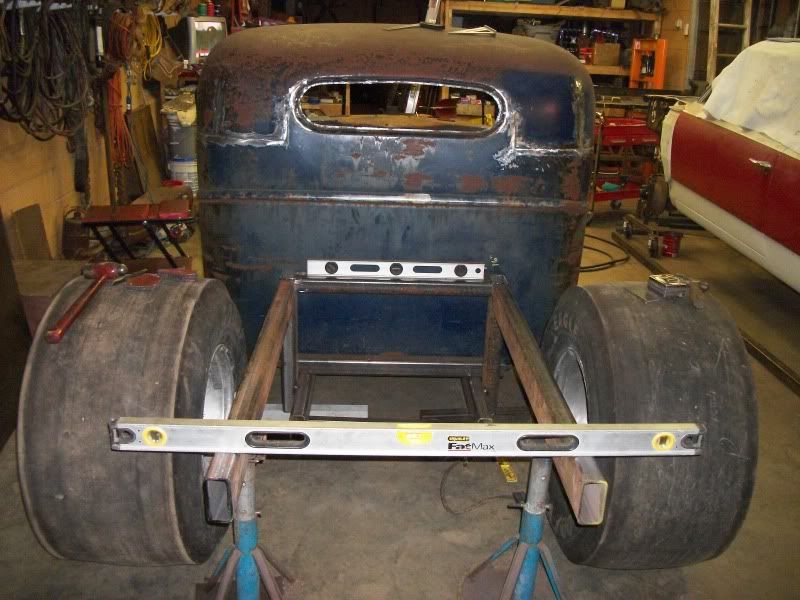
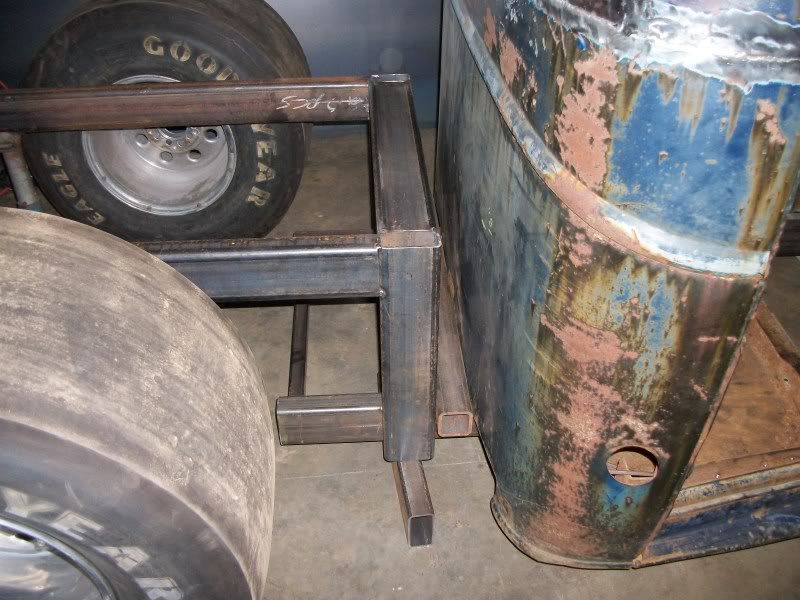
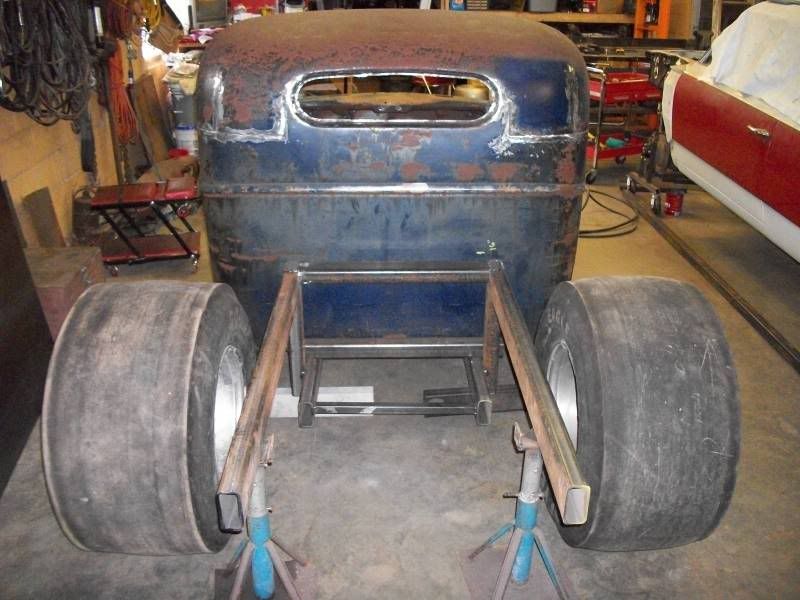
Rear frame mock up with a 16" rise.
 
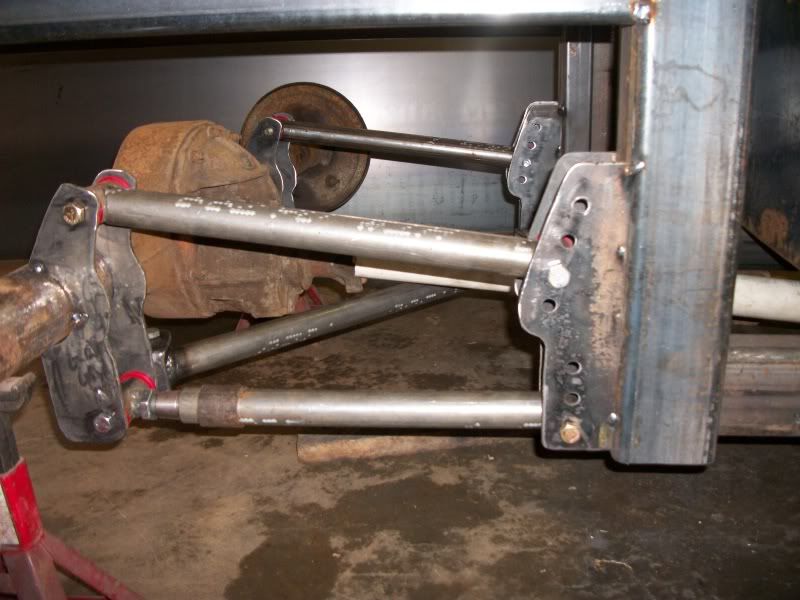
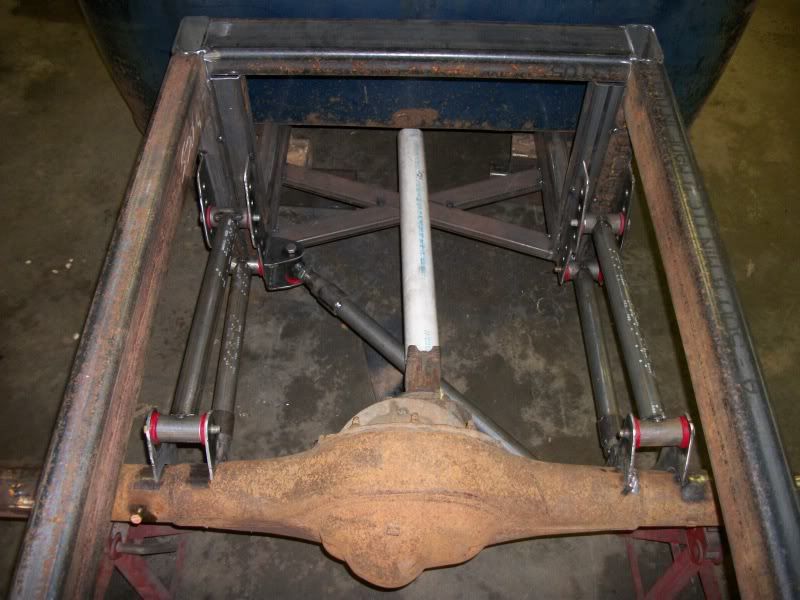
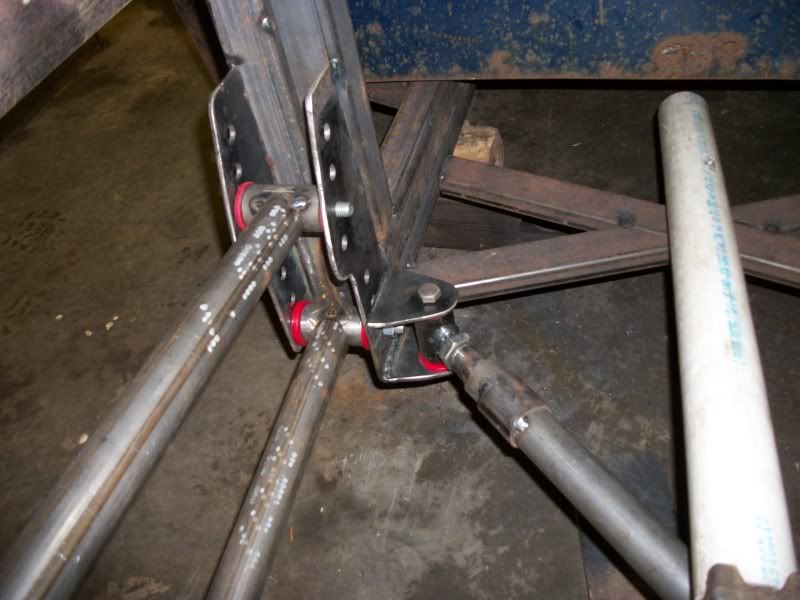
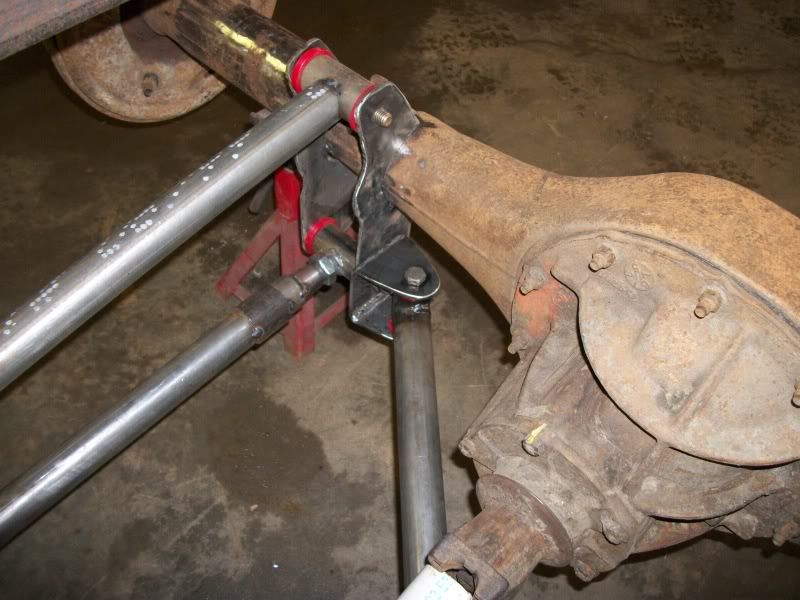
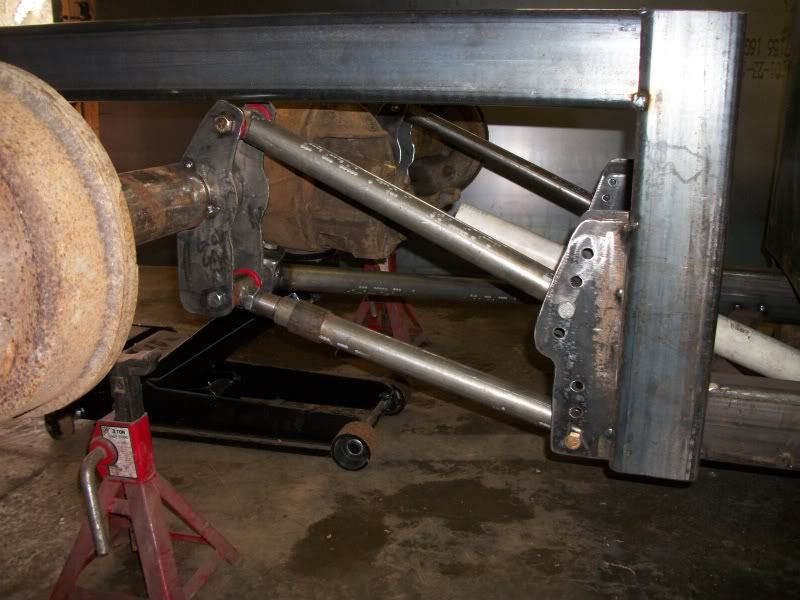
Started working on some rear links. First I was just going to buy a triangulated kit off ebay, but then got to thinkin' bout where to mount a battery and air tank and compressor etc., so I decided to go with straight ahead 4 link design with lower angled locating brace to free up some room at the top inside of the frame (under the floor) for mounting accessories.

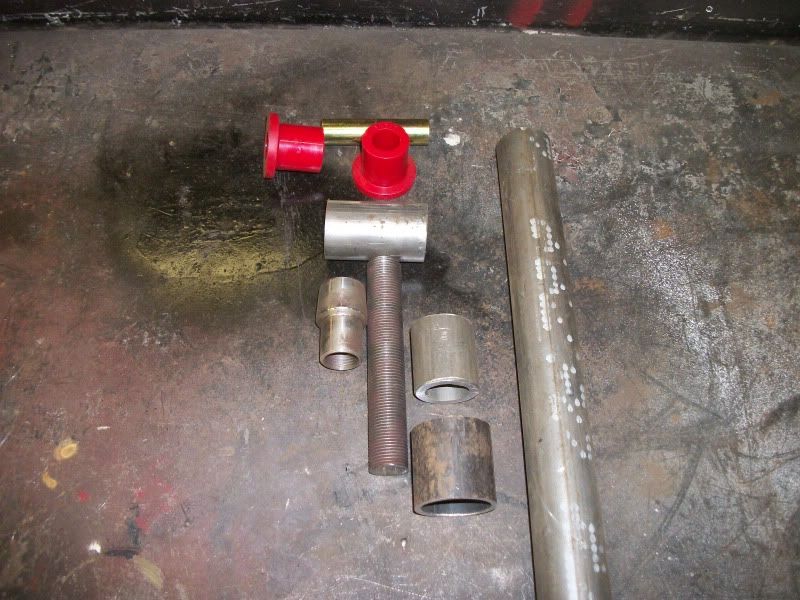
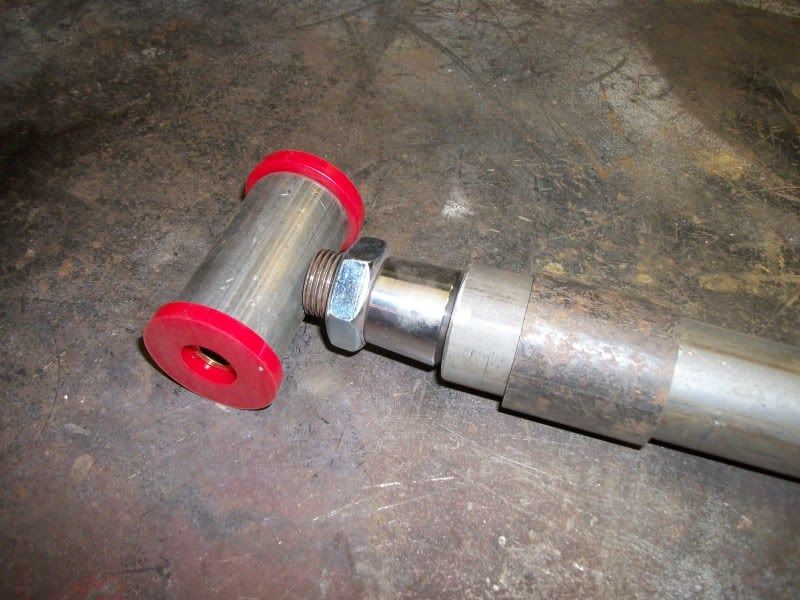
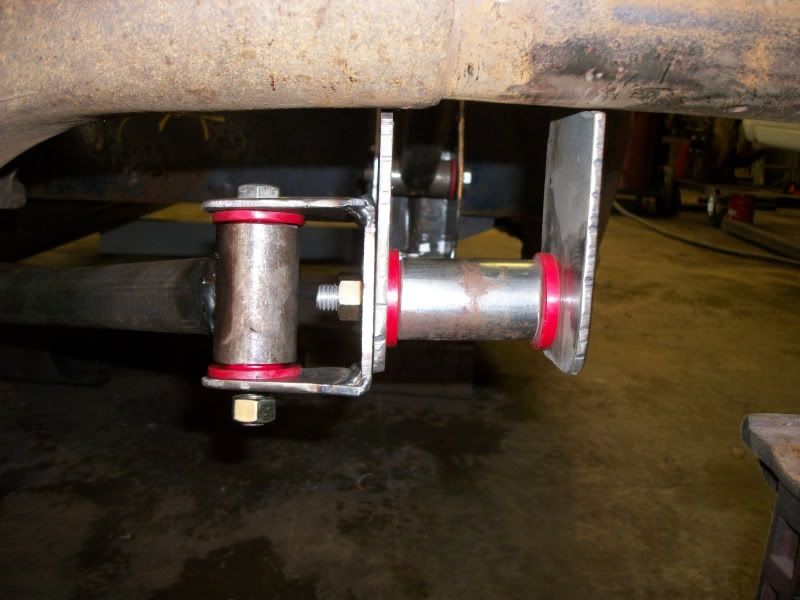
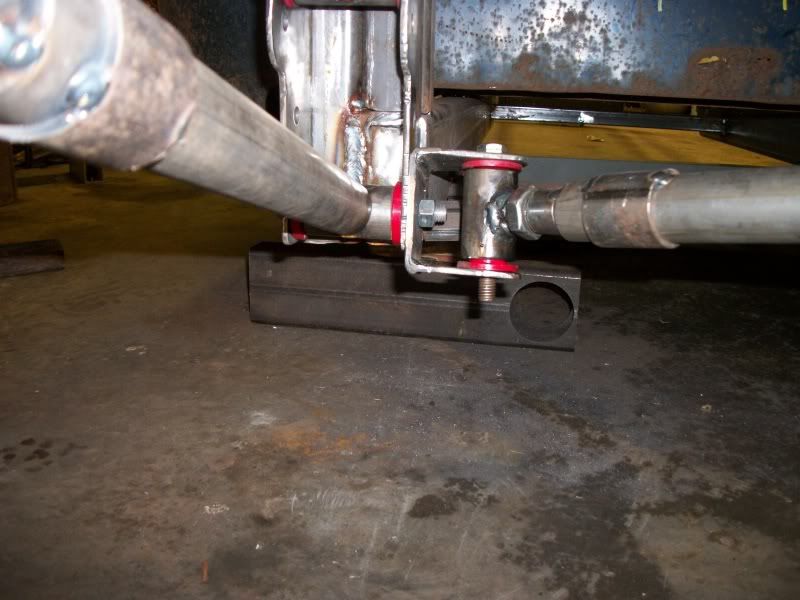
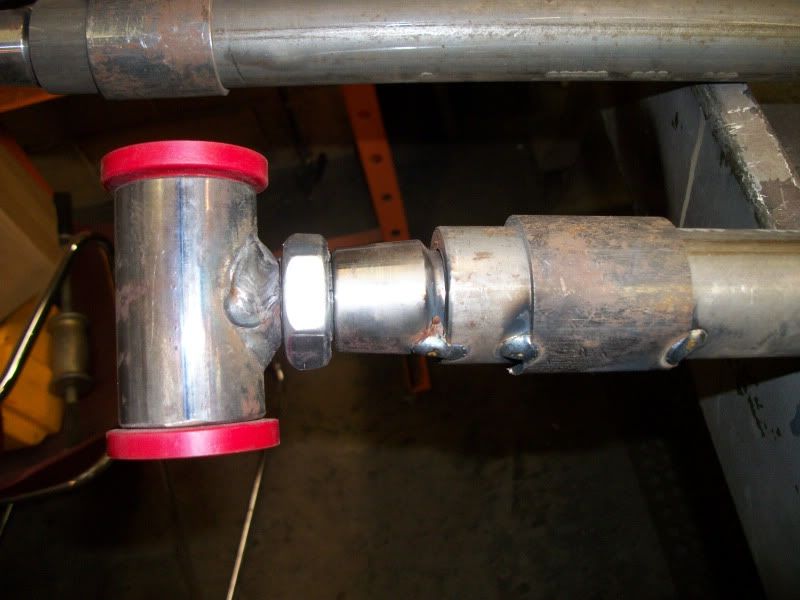
Then instead of buying a different kit, I found tube adaptors, 7/8" all thread, poly bushings, tube and more tube enough to almost make everything. Not trying to be cheap, just want to spend some dough on wheels, tires and tunnel ram etc.

100_0552.jpg


100_0557.jpg

The links are being made out of 1 1/2" DOM 1/8" wall. The tube adaptors are smaller so I had some 1/4" wall 1 1/2" arround. With no lathe etc. I found a larger tube that I sleeved both pieces with or made tube to tube adaptor with what I had.

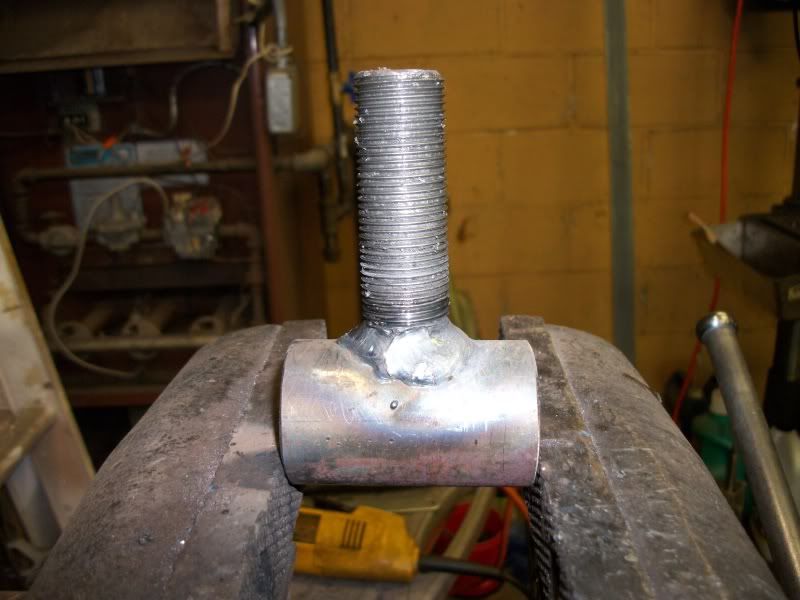
Some may wonder about welding 7/8" all thread to the bushing, but I did it about 7 years ago on my offroad Jeep with 42" tires and haven't broken one yet.
Also, the welded tubes are only going to be the bottom links so it will be a pushing (compression) application.
 
I got the idea from another build thread to cut off the firewall and move it ahead a few inches. The one on here I saw was moved 6". I'm about 6'2" and I was thinking about moving it ahead 4" for a little more leg room. It's hard to tell before a seat is installed, but sure would be a good time to do it while frame is still in mock up.

100_0541.jpg


100_0523.jpg

100_0105.jpg

On my body there is a flat spot about 1 1/2" wide at the front. I figured I could cut it there, move it forward and retain the original firewall without to much work and stretch the frame now to fit it. Any thoughts?
 
that 39 Dodge your talkin about turned out slick with the extended cowl..I think it looked great, if that makes your truck more comfortable for you,go for it!!
 
I got the idea from another build thread to cut off the firewall and move it ahead a few inches. The one on here I saw was moved 6". I'm about 6'2" and I was thinking about moving it ahead 4" for a little more leg room. It's hard to tell before a seat is installed, but sure would be a good time to do it while frame is still in mock up.

Good idea you can't have too much leg room . Just some thoughts here . If you cut the cowl and move it forward you will not be able to keep the shape of the cowl unless you narrow the front pc . You could build a box like thing in front of the firewall , it would give you added foot room on your side and would make a great place to put the battery on the pass side . Might look a little odd on a streetrod but on a rat not so odd . Wish I would have done it on mine .
 
I wouldnt be caught dead in that pile of crap. Bring it to me (signed title) and Ill get rid of it for you....I promise.:D

LOL. Seriously though. I think this is one of the neatest builds so far. I love the wide tires and Id really think hard on using the 401. Those are some brute motors that built right can really haul butt. Little more expensive yes....But way kool!

Keep the pics a comin. Im lovin it! RR:D
 
I got the idea from another build thread to cut off the firewall and move it ahead a few inches. The one on here I saw was moved 6". I'm about 6'2" and I was thinking about moving it ahead 4" for a little more leg room. It's hard to tell before a seat is installed, but sure would be a good time to do it while frame is still in mock up.

On my body there is a flat spot about 1 1/2" wide at the front. I figured I could cut it there, move it forward and retain the original firewall without to much work and stretch the frame now to fit it. Any thoughts?

That truck is AWESOME!
Do IT!!!
-Chaz
 
I know you are toying with the idea of useing that independant front suspension sitting on your trailer , PLEASE don't ! That cab has so much potential to be a cool old rod , Find you a good straight axle and give it the look it deserves . You won't be sorry !!


He is right!! Go with old skool straight axle and jeep it hot rod!! independant is nice but just looks like crap on a rod they make plenty of good upgrades for straight axle stuff hell they even make air ride setups now for them!!!
 
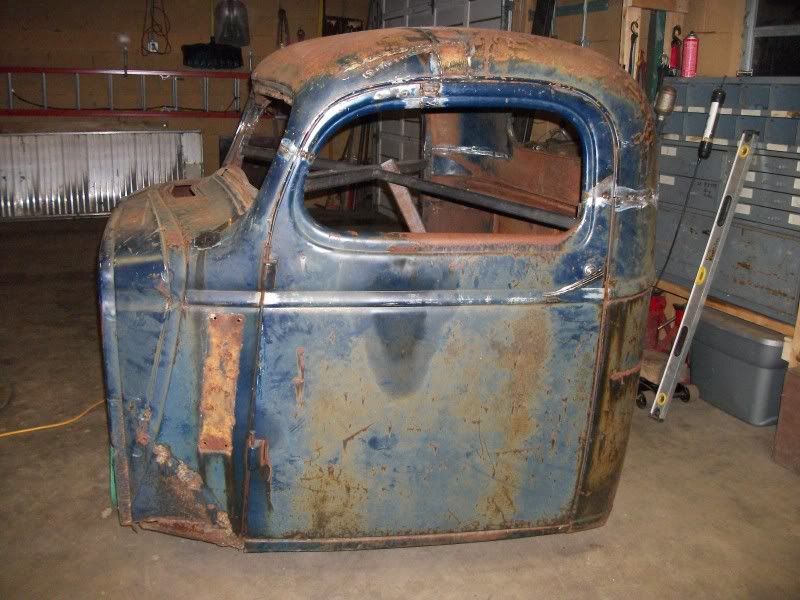
I haven't ever done a chop before. I've done a little body work in my time, but I'm a long way off from being good at it. A Rat Rod Hot Rod Truck Bobber build is perfect for me I figure.

I was a little apprehensive about cutting off the roof before I had my plan gone over by someone else. My buddy Chris didn't see any big hicups in my tapeing job so he helped me get the roof chopped off. From them it was fairly straight forward. The upper roof needed to come in some, so a relief cut or so on each side and it seamed to fit decent. The rear roof fit inside the bottom section so well that I flanged the upper portion and with only one relief cut and a little hammer and dollie both sides there fit good.

The doors weren't so bad either. I did the drivers side first and for some reason the archs didn't line up well. I ground off some of the front and rear radius and rewelded the seams and fixed that problem. I figured it must have been from the tweaking of the winshield area to fit the front roof.
Then went to the passenger side and both radius fit fine. I think I gave up early on the drivers side and could have saved some work. The gap was smaller on the drivers side, but after future bondo etc. you won't be able to tell.

I still have my interior brace welded in place. I had to cut part of it off near each door because the doors would not shut. I plan to leave it there until I weld all the seams up in a week or so. Both door shut very nice right now.
One door I just cut it off with the windo track still in it. The other I bent it out of the way. Both window tracks aren't very good, so not sure what I'm gonna end up doin there. The windows almost fit good enough that I could add some steel to the fronts and never cut the glass down. Doubt if I'll go that way because it may look goofy though.


I am building a '42 chevy and had the same issue with the drivers door not fitting right but the pass door shuts fine...Can you tellme exactly what you did on the drivers door [;)
 
I am building a '42 chevy and had the same issue with the drivers door not fitting right but the pass door shuts fine...Can you tellme exactly what you did on the drivers door [;)

To get them to shut ok just line up the door halves and tack weld in place when the door is hung on the truck. Twist or tweak to get them to line up.
To get the radius better, I just ground off where needed and added to another spot and welded back up.
Take a picture of your problem area and post or send me to your build thread so I can take a look.

Ok cool I will get that up tomarrow [;)
 
A little more progress.

All-Thread welded to bushing end.
100_0559.jpg


Links tacked.
100_0563.jpg


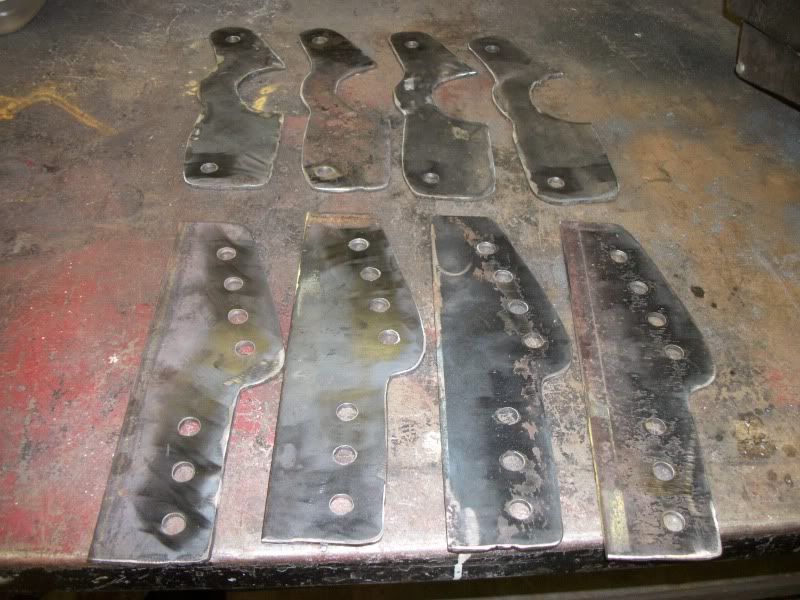
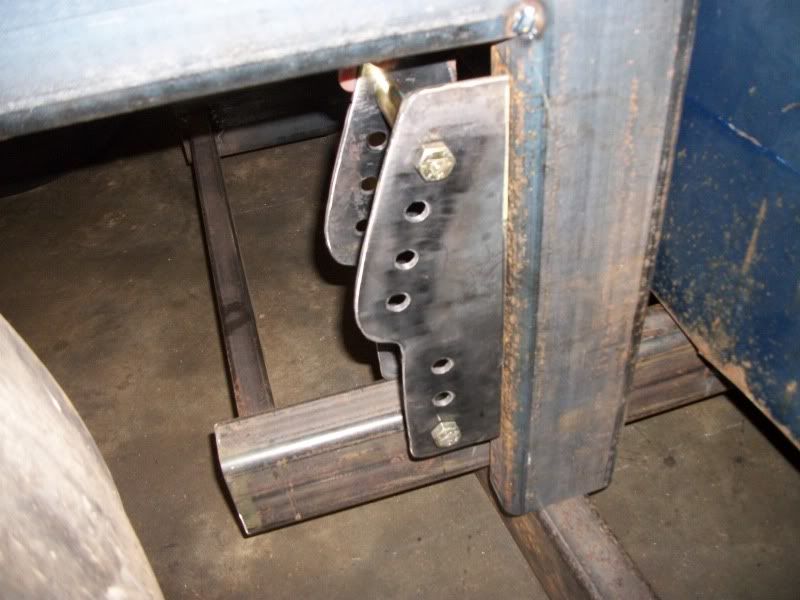
4 link brakets drilled and rough cut.
100_0564.jpg


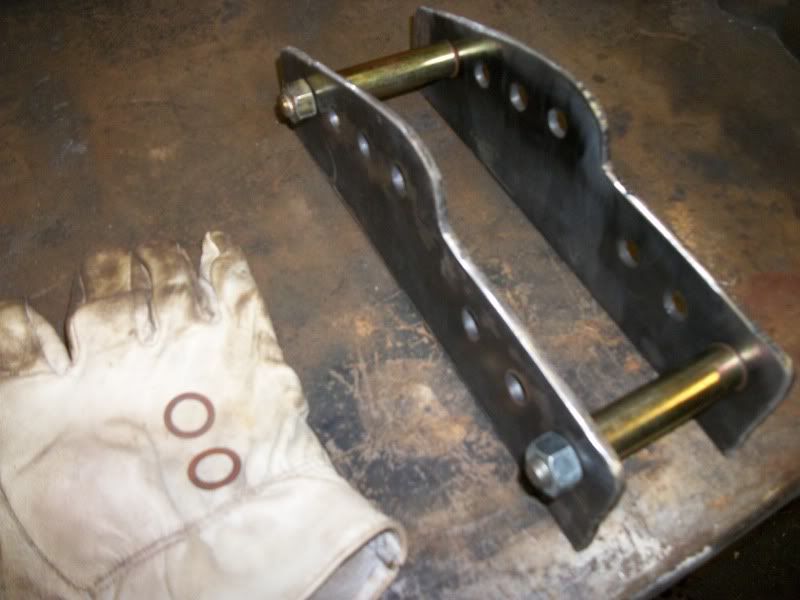
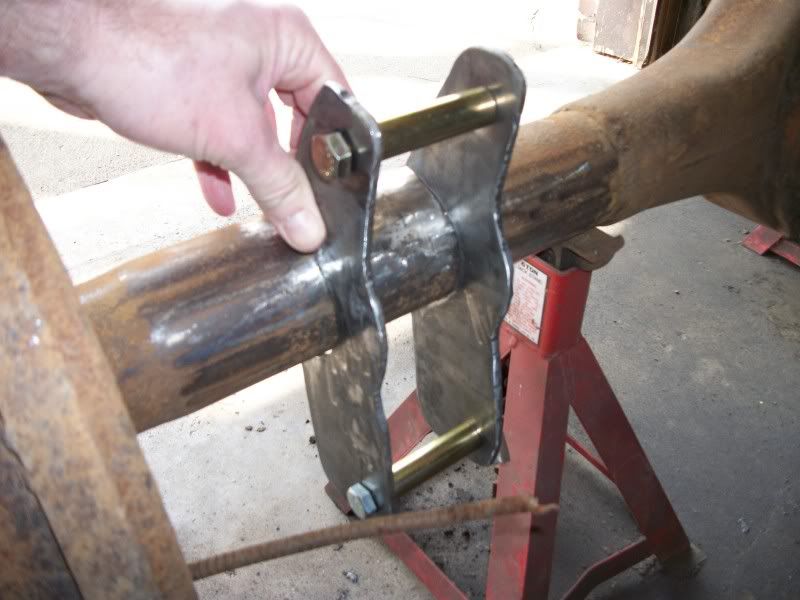
4 link brackets mocked up.
100_0574.jpg


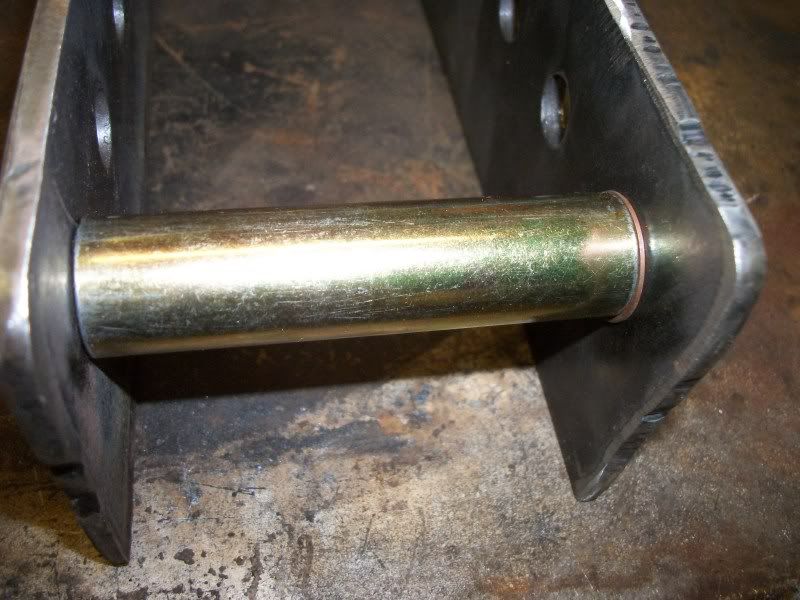
I used some .033" brake line washers to space the mounts apart. I would have liked to find even thinner washers, but that's all I had. If you have ever mounted links or brakets, it's alot easier to leave them wide ahead of time for paint etc. for mounting later than trying to make room afterwards with a BFH.
100_0575.jpg


100_0576.jpg


I ended up lowering this bracket to the bottom of the frame.
100_0578.jpg


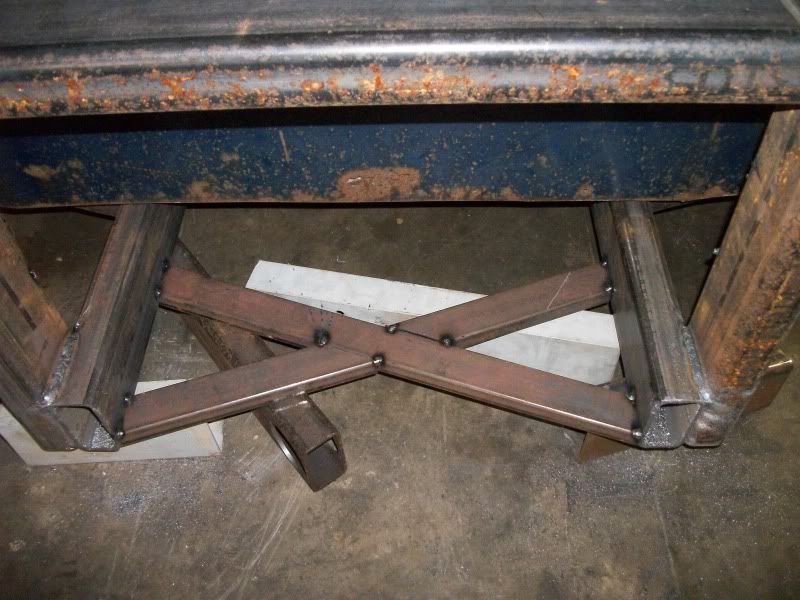
Started the frame 'X" at the rear lower section. Used 1" x 2" rectangle to start. Hopefully this misses the driveshaft after I get that far.
100_0579.jpg
 
This weekends progress:

4 link mock up is almost done in the rear. It a little close to the driveshaft yoke, so either gonna drop it or clearance the tube.

100_0582.jpg


Here you can see the space I plan to use to mount the air comp. and maybe the battery because I went with a 4 link and locator bar.

100_0586.jpg


100_0588.jpg


100_0589.jpg


100_0592.jpg


100_0593.jpg


Looks like all will be ok when air is dropped completely out of it.

100_0590.jpg


The 4 link kits sold on ebay and through catalogs now seem like they are definately worth the money. I only spent $20 on bushings I was short, so I saved a couple hundred dollars to spend on something else because I already had the tube, adaptors and other bushings, but it really was a lot of time spent making everything. No regrets tho as a Rat Rod should be made with as much stuff as you have laying arround your garage.

Now time to order up the air bags and comp. I don't have any of those laying arround...
 
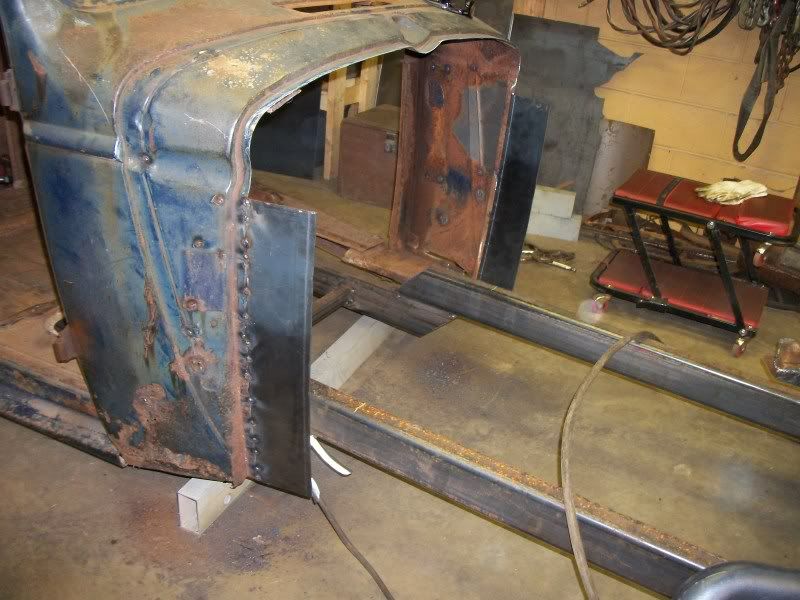
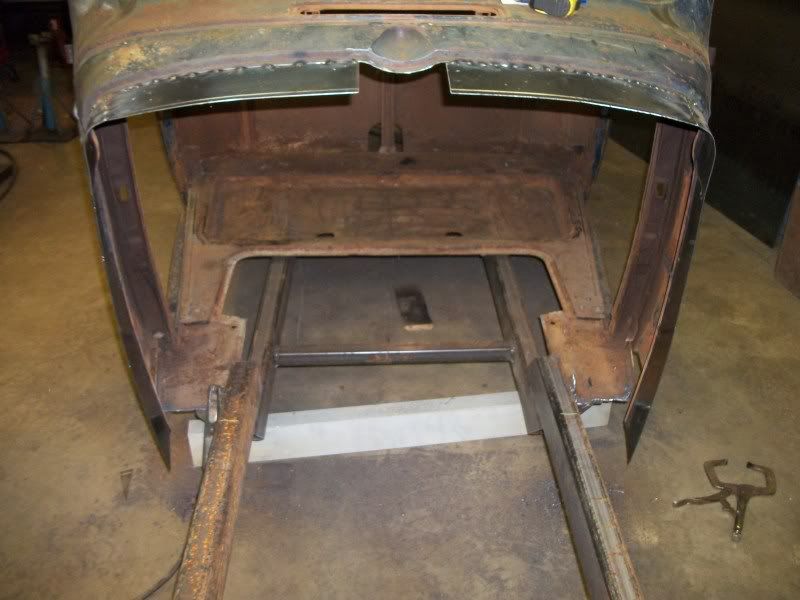
Well I'm committed to extending the firewall.

100_0596.jpg


100_0594.jpg


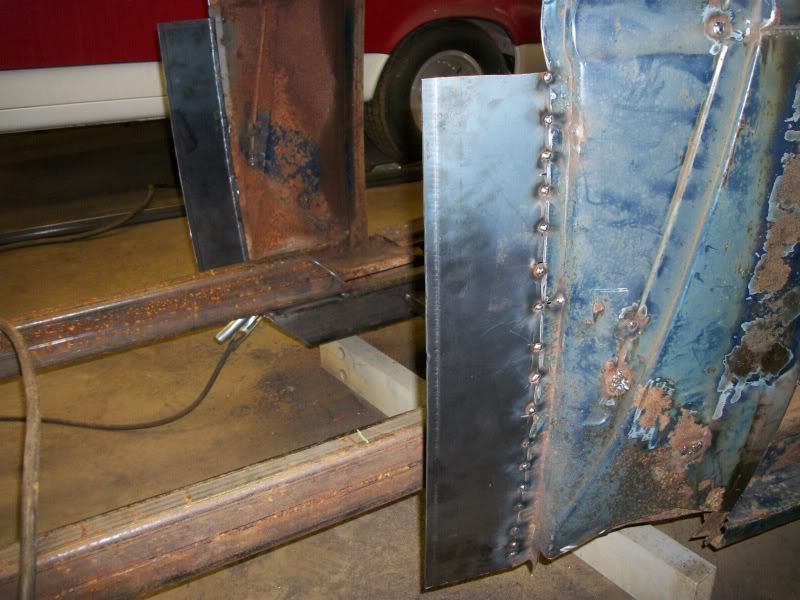
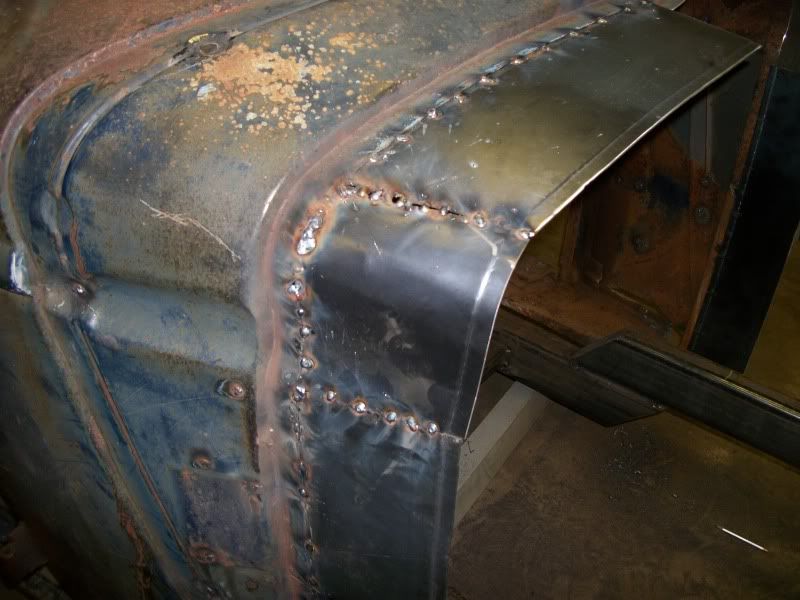
Started by using the plasma to cut a couple 4 3/4" strips then flanging both sides to overlap for easier welding later.

100_0598.jpg


Cut strips to start on the side first.

100_0599.jpg


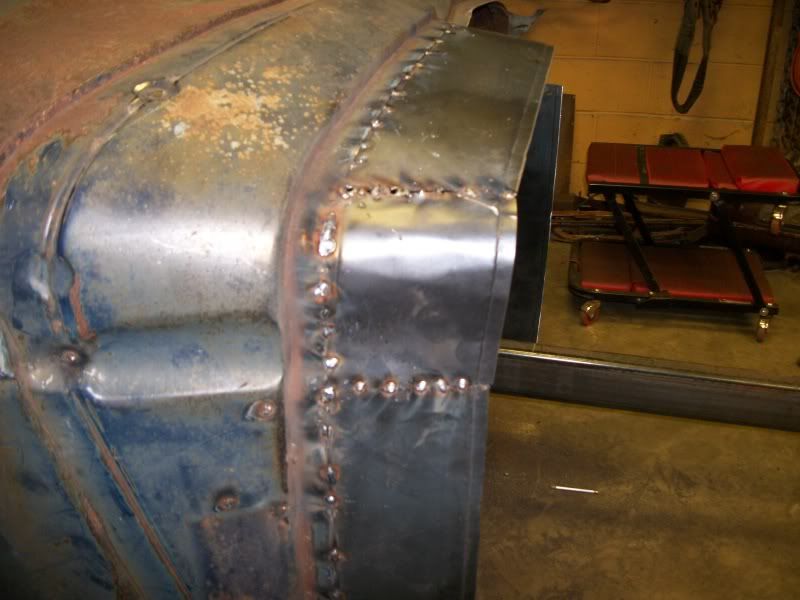
Welded in the corners after I shaped then some.

100_0600.jpg


100_0601.jpg


This is as far I got.

100_0603.jpg


I tapered both sides and the top piece to give it some shape. The idea is to make it look like it belongs there when I'm done. We shall see...
 
I was wondering about that too. I'm gonna have to pay more attention to this build - it's got lots of pictures. [cl

Your 5 link looks very nice. Hope the stretch works for ya.
 
You might want to think about turning one end of this the other way.It seems that this way at both ends will cause a bind.[/QUOTE]


I think you are right about this creating a bind because I want decent travel out of it. Good catch!

After thinking more about it, I need to either replace the vertical bushing with a sperical rod end or go to a track bar to locate the rear end.
I'm leaning toward the track bar because I already have the bushing etc. and would just have to shorten the tube and make a couple rear end frame brackets. Guess I'll take a look tonight when I'm back in the garage.

Anybody have opinion on track bar vs. locator bar and rod end?
 

Latest posts

Back
Top