Sheets & Giggles

Rat Rods Rule

Help Support Rat Rods Rule:

This site may earn a commission from merchant affiliate links, including eBay, Amazon, and others.
If it were mine, I would roll the top edge, over the tube to its centerline...

.

I agree, and that is what I will do, but that is rather hard to do with a piece of cardboard. :D

Do you think I should make the side panels up to the upper frame rail? Or should I make them to the height of the template as shown?

Perhaps I should find the answer to my question by making a higher template so that it can be compared. :eek:
 
Sorry sc, I misunderstood. :eek:

Looking at this photo, I'd leave the panels at your CAD height.

attachment.php


.
 
The car has perfect stance. Looks fast standing still. Will you be using aluminum for the floor and sides?
 
Thanks Bob.

I'm using .040 aluminium for the floors, seat and side panels. I bought 2 sheets so if I don't have to many 'do overs' I should have enough to try make a tonneau cover as well.
 
Well, I've started converting cardboard to aluminium. Having little to no experience in fabricating panels it is proving to be rather time consuming as I try to figure out how to do it. I decided to make the "tall" side panels because if I don't like the look its a lot easier to shorten them than it would be to make them higher. As Dr. Crankenstein suggested I have rolled the top edge around the tube. Not quite finished yet and I still have to roll the beads to stiffen the panels but at least I've started. The lines on the panel are for the bead rolling to come.
 

Attachments

  • IMG_0556.jpg
    IMG_0556.jpg
    72.8 KB
Got a little more done on the car. Made the second side panel and then decided to try my hand at making the seat. Not quite finished and I kind of screwed up on the angles a little bit so it didn't fit quite as I had planned but I think I can add a little bit to it and it will be fine. Surprisingly comfortable to sit in though! :D:D
 

Attachments

  • IMG_0564.jpg
    IMG_0564.jpg
    75.9 KB
  • IMG_0565.jpg
    IMG_0565.jpg
    87.8 KB
  • IMG_0566.jpg
    IMG_0566.jpg
    64.3 KB
Continuing with the tin work ... got the front edge done on the seat and made up the floor and transmission tunnel. Not up to the standards of some I've seen but its the best I can do. At a hundred miles an hour no one will be able to see how bad it is! :D Also got a chance to play with my new bead roller ... gonna need some practice there to but it'll do for now. I ran out of rivets so its not quite finished but the clecos are holding everything in place.
 

Attachments

  • IMG_0567.jpg
    IMG_0567.jpg
    54.5 KB
  • IMG_0570.jpg
    IMG_0570.jpg
    95.9 KB
Looking good sc, yup them bead rollers take some practice. Did you replace the hand crank with an old steering wheel? it helps a lot.
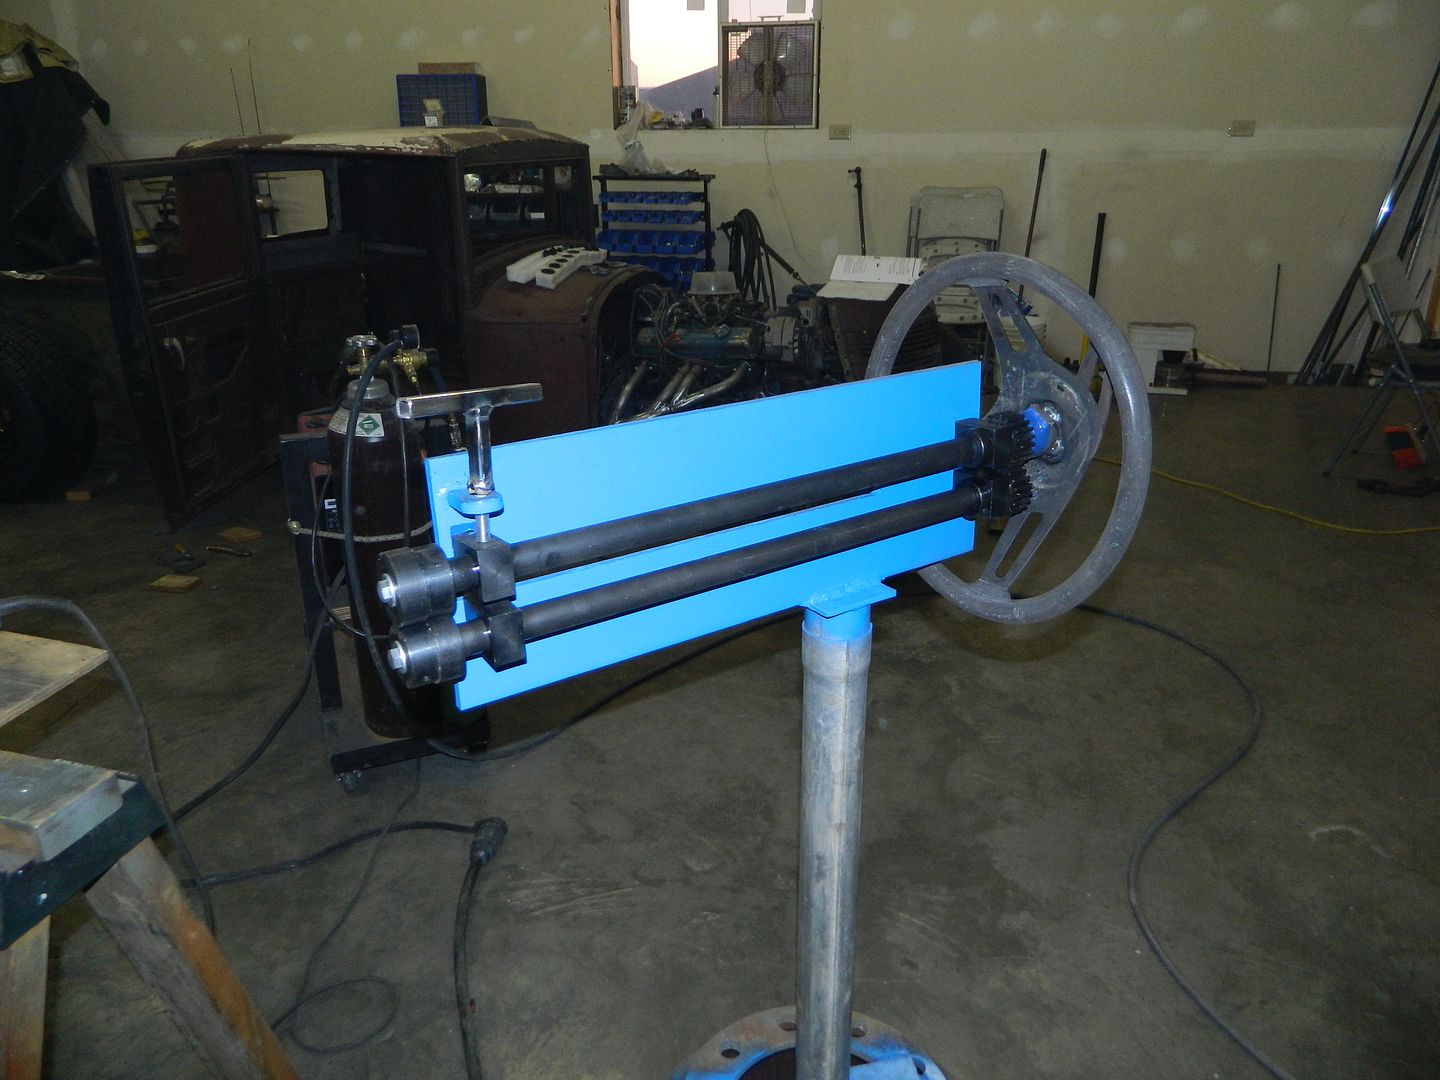
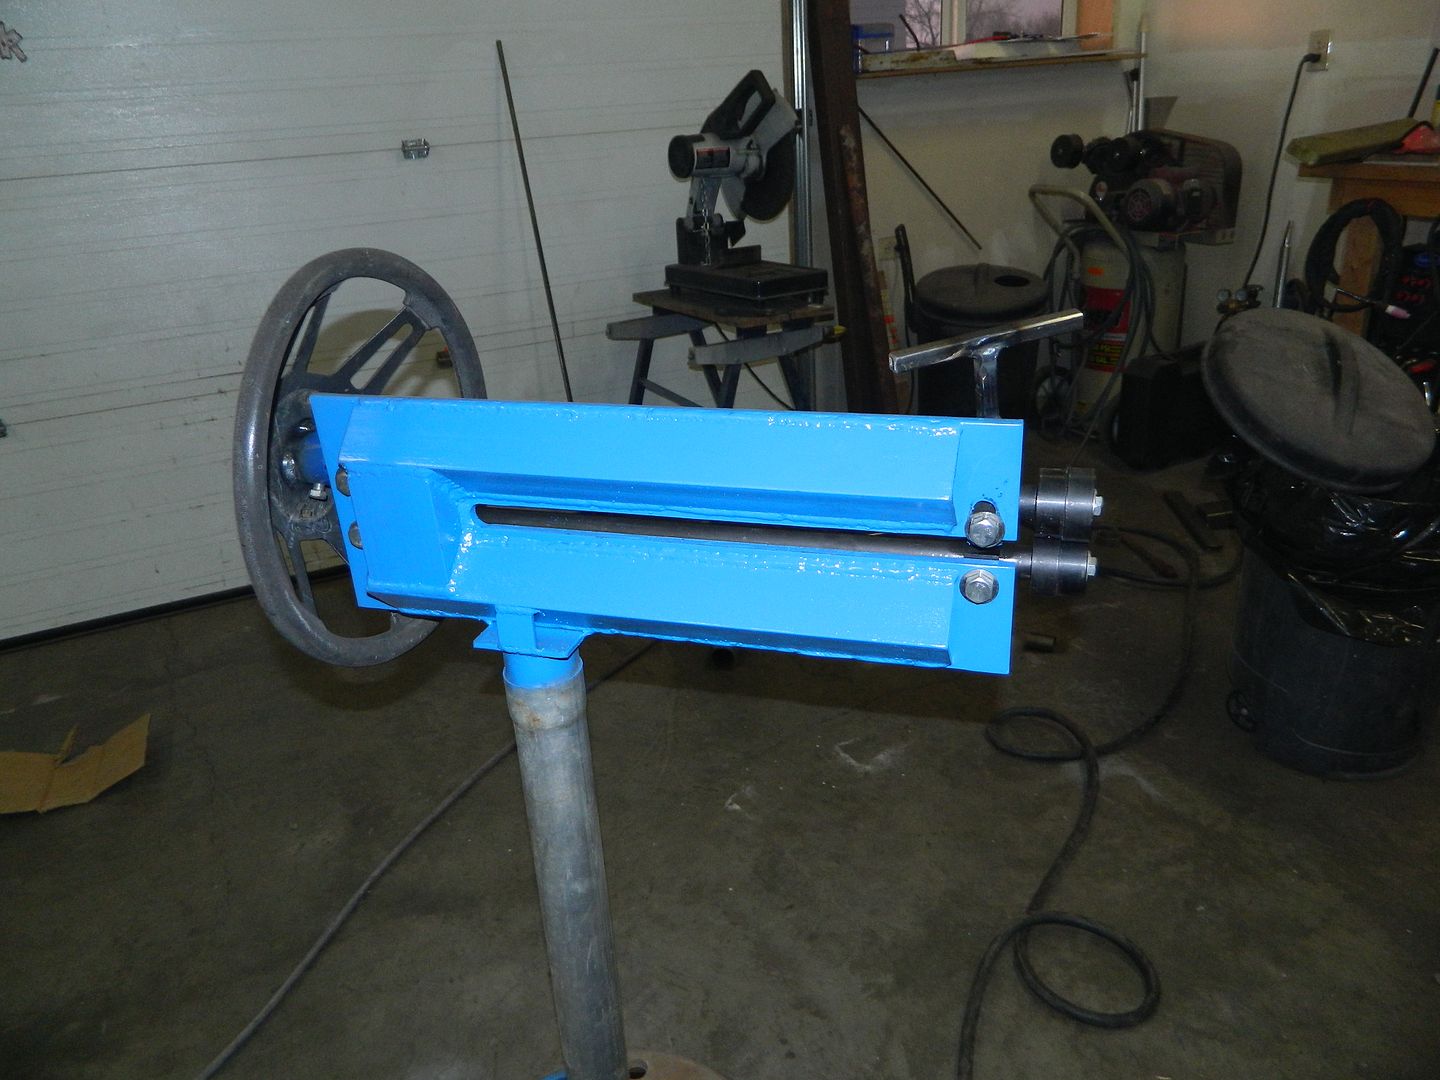
Thanks DozerII. Might have to try that on the bead roller - so far mine is still unmodified factory stock. It does the job ok but I find it hard to guide the piece straight and turn the handle at the same time. Might be easier if I had someone to turn the handle slowly while I guided the piece. Wonder if I could adapt a hydraulic or electric motor and a foot switch? Has anyone done this?
 
There are quite a few videos on Youtube on how to improve and modify them. adding the old steering wheel made a world of difference on mine. If you bought the Princess Auto one like I did you will find it flexes a lot and will need angle welded to the back sides of the arch to stiffen it. here's a couple pictures of mine.


Thanks for the pics DozerII. That's the one I bought when they were on sale recently. Yours certainly looks a lot more robust than the way they come. I think I'll have to copy your "modifications".
 

Latest posts

Back
Top