51 F1 Rat Rod

Rat Rods Rule

Help Support Rat Rods Rule:

This site may earn a commission from merchant affiliate links, including eBay, Amazon, and others.
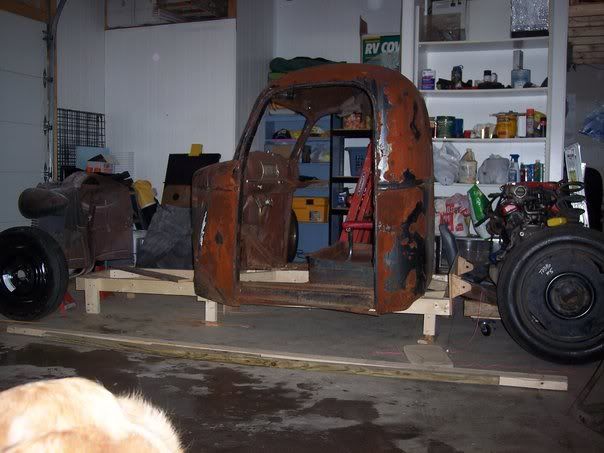
Well it's been a long time since I've posted any updates here. So here it goes. The main thing I've been working on is the box, which as you already know is based around using parts of 58 Buick 1/4's, chrome and tail lights. This is where I started.

I had the fab shop down the road from our shop roll a couple box side panels for me and I picked them up today. I started fitting my 58 Buick fins and tail lights into them . The first thing I had to do was lay the oringinal 1/4 panel over my new box sides.

--------------------------------------------------------------------------------

I laid out all the pertinent points that need to be delt with and then started triming off what I don't need.
 

Attachments

  • 51 Ford 95.jpg
    51 Ford 95.jpg
    74.8 KB · Views: 46
  • 51 Ford 93.jpg
    51 Ford 93.jpg
    78.3 KB · Views: 57
  • 51 Ford 97.jpg
    51 Ford 97.jpg
    88.5 KB · Views: 59
  • 51 Ford 99.jpg
    51 Ford 99.jpg
    84.7 KB · Views: 48
These two pics show what I had left of the original 58 panels once I was happy with the fit. next I will mark out and trim off what I don't need from the new panels that are under the Buick fins and then tac weld them into place. I have some really cool ideas for this box so stay tuned.
 

Attachments

  • 51 Ford 100.jpg
    51 Ford 100.jpg
    82.7 KB · Views: 35
  • 51 Ford 101.jpg
    51 Ford 101.jpg
    72.5 KB · Views: 35
It's really funny, the company I work for has two shops and the one I'm at I work with two other guys. The one German fellow can't wrap his head around this stuff and says it's way to wild. the other says it's way to much work. I think there both missing the point.
So what I've got done so far it to get the fin section tack welded into place on one of the new box sides. Ok now I'm gonna let you in on some of the neat features that I'm putting into this box. On the inner edge of the new box side I have also tacked on the inner fender edge from a 69 Buick Wildcat. This provides a curved edge that will be used to frame the opening in the top of the box. I will then be making a deck cover using a roof section from an old Benz.
 

Attachments

  • 51 Ford 106.jpg
    51 Ford 106.jpg
    71 KB · Views: 36
  • 51 Ford 107.jpg
    51 Ford 107.jpg
    83.1 KB · Views: 29
  • 51 Ford 109.jpg
    51 Ford 109.jpg
    67.7 KB · Views: 42
  • 51 Ford 111.jpg
    51 Ford 111.jpg
    70.9 KB · Views: 30
While I was measuring and designing for the box I made the desicion to shorten the frame by 5" on the truck so I can make the box a bit shorter to. I think the proportions will look better in the end.

Ok, so here is what I've done so far. I started with triming the box floor (from a Dodge truck) and I changed the braces to shorter units so I could gain as much space as posible inside the box. I now have about 11" of usable depth inside the box. Then I mocked up the side panels and built the panels that make up the front of the box. I made them up in three peaces, Lt / Rt wings, and center panels. I will take pix of the individual panels when I break it down again. Right now everything is just screwed together for mock up.
 

Attachments

  • 51 Ford 121.jpg
    51 Ford 121.jpg
    93 KB · Views: 28
  • 51 Ford 124.jpg
    51 Ford 124.jpg
    70.1 KB · Views: 58
  • 51 Ford 120.jpg
    51 Ford 120.jpg
    104.9 KB · Views: 23
  • 51 Ford 119.jpg
    51 Ford 119.jpg
    95.4 KB · Views: 21
  • 51 Ford 114.jpg
    51 Ford 114.jpg
    99.1 KB · Views: 23
Here are a few pics with the front panels in place.
 

Attachments

  • 51 Ford 130.jpg
    51 Ford 130.jpg
    73.8 KB · Views: 45
  • 51 Ford 131.jpg
    51 Ford 131.jpg
    84.9 KB · Views: 40
  • 51 Ford 132.jpg
    51 Ford 132.jpg
    64.3 KB · Views: 28
  • 51 Ford 133.jpg
    51 Ford 133.jpg
    67.5 KB · Views: 36
You can see some 1x2 tubing that has been put in place to stiffen the structure and keep everything square untill all the inner structures are built and in place. Then they will be removed. You can also see in these pics I've been working on adding some of the inner structer. I had originaly planed to use pieces from a cut up 69 Buick bumper to make the tailgate, but the more I looked at it the less I liked it.
 

Attachments

  • 51 Ford 140.jpg
    51 Ford 140.jpg
    62.4 KB · Views: 28
  • 51 Ford 142.jpg
    51 Ford 142.jpg
    65.7 KB · Views: 20
  • 51 Ford 137.jpg
    51 Ford 137.jpg
    83.3 KB · Views: 31
  • 51 Ford 138.jpg
    51 Ford 138.jpg
    76.8 KB · Views: 38
So I've decided to change the way I'm doing the tailgate. I kept thinking about the piece that I started to make and I just never liked it so I made one that follows the natural contour that is already there.

The first thing I started with was to trim up the deck lid panel that I cut from a Mercedes roof. It has the proper curve in it to match the box sides.
 

Attachments

  • 51 Ford 147.jpg
    51 Ford 147.jpg
    58.7 KB · Views: 39
  • 51 Ford 148.jpg
    51 Ford 148.jpg
    65.7 KB · Views: 39
Once I knew the length of the deck lid I could start to make the tailgate frame.
 

Attachments

  • 51 Ford 145.jpg
    51 Ford 145.jpg
    69.8 KB · Views: 26
  • 51 Ford 146.jpg
    51 Ford 146.jpg
    52.5 KB · Views: 31
  • 51 Ford 150.jpg
    51 Ford 150.jpg
    69.6 KB · Views: 28
  • 51 Ford 151.jpg
    51 Ford 151.jpg
    80.7 KB · Views: 21
  • 51 Ford 152.jpg
    51 Ford 152.jpg
    59.8 KB · Views: 17
Then it was time to make the skin for the tailgate.
 

Attachments

  • 51 Ford 156.jpg
    51 Ford 156.jpg
    96.5 KB · Views: 32
  • 51 Ford 157.jpg
    51 Ford 157.jpg
    85.5 KB · Views: 26
  • 51 Ford 154.jpg
    51 Ford 154.jpg
    63.5 KB · Views: 21
  • 51 Ford 153.jpg
    51 Ford 153.jpg
    57.9 KB · Views: 26
Now that the skin was in place it was time to install a set of mini bear claw latches and make a couple of recessed areas in the frame for the GM tail gate hinges. I also intstalled The corresponding hing on the jamb panels
 

Attachments

  • 51 Ford 159.jpg
    51 Ford 159.jpg
    83.8 KB · Views: 18
  • 51 Ford 163.jpg
    51 Ford 163.jpg
    97.6 KB · Views: 23
  • 51 Ford 162.jpg
    51 Ford 162.jpg
    110.3 KB · Views: 31
  • 51 Ford 160.jpg
    51 Ford 160.jpg
    82.8 KB · Views: 26
  • 51 Ford 158.jpg
    51 Ford 158.jpg
    73.8 KB · Views: 25
Time for a test fit now. It looks and fits great. I still have lots to do on the tailgate. I need to install the GM style gate hande on the inside panel that I have yet to make. I also need to figure out some kind of latch system that will hold the deck lid down and will be operated by a remote popper.
 

Attachments

  • 51 Ford 165.jpg
    51 Ford 165.jpg
    85.4 KB · Views: 35
  • 51 Ford 166.jpg
    51 Ford 166.jpg
    97.7 KB · Views: 71
  • 51 Ford 168.jpg
    51 Ford 168.jpg
    90.6 KB · Views: 41
  • 51 Ford 169.jpg
    51 Ford 169.jpg
    112.3 KB · Views: 29
  • 51 Ford 170.jpg
    51 Ford 170.jpg
    86.3 KB · Views: 28
I got a little more done on my box. I added some more bracing in the tailgate to stiffen up the frame and around the latches. I also have one side of the jamb made and taced into place. I'm really liking the way this is turning out now.
 

Attachments

  • 51 Ford 173.jpg
    51 Ford 173.jpg
    101.9 KB · Views: 33
  • 51 Ford 175.jpg
    51 Ford 175.jpg
    75.7 KB · Views: 42
you know what, im really liking the way this is turning out too..great work, i have been to the barrie swap meet and your right, its 3 days of parts, its great walking around there, never know what your going to find. keep up the great work and dont forget the pictures...
 
I bought this truck around 1998 and had sat on it till 2002. At the time I was 39. I decided my path and started in the winter of 2002. The first thing I did was to lay out some tape on the floor just to get and idea of length and wheel base. Then I built a mock up frame from 2x4's. Man did I take a ribbing for that. Some guys in my club actually thought that was going to be my frame. Amatures :D. You may notice in the pics that there is some blue tape on the roof. I had been planing to make it a convertable originally, but later changed my mind to something I think you will find more interesting. More on that later. Here is a few more pics

just reading this thread for the first time-I think- and thought you might like this pic
n5511178_31399285_8028.jpg
 

Latest posts

Back
Top