
You are using an out of date browser. It may not display this or other websites correctly.
You should upgrade or use an alternative browser.
You should upgrade or use an alternative browser.
'48 Olds
- Thread starter Sam_Fear
- Start date
Help Support Rat Rods Rule:
This site may earn a commission from merchant affiliate
links, including eBay, Amazon, and others.
Well, back on page 13 is a pic of my front frame horns that bolts on using the G-body roll bar bolt holes. And on page 41 is a pic of the simple 1/8"x1x1 bar I welded across the frame to mount the original radiator brace to. On page 40 you can kinda see the original rad brace that had to be cut shorter - it also had to be notched to get around the P/S box. I don't recall why I had to shorten the brace?
Basically, with the rad brace bolted in, I got the front sheet metal lined up and straight with the body, then placed the 1x1 and front frame horns. The front clip is also bolted to the frame horn section using the original mount. At some point, I may weld the frame horns solid to the frame.
I still have the front clip off right now, but if there is something I can take a picture of for you, I'd be glad to!
Might as well do a small update. Still been just getting little things back together. Painted my steering column and got that back in. Seat metal is back in. Rear doors and fenders on.
I did have to shorten the front of my rear fenders 1/4" so I took a 1/4" out about 3" up from the bottom to keep the bottom curves the same. The left side was pretty well eaten up with rust under the stone guard so I had a plan to cut all the rust off and weld new metal in. Then I reminded myself I was working on a rat - I welded together what was there and put the guard back on.")

I did have to shorten the front of my rear fenders 1/4" so I took a 1/4" out about 3" up from the bottom to keep the bottom curves the same. The left side was pretty well eaten up with rust under the stone guard so I had a plan to cut all the rust off and weld new metal in. Then I reminded myself I was working on a rat - I welded together what was there and put the guard back on.
Attachments

Paul_J
Well-known member
Then I reminded myself I was working on a rat - I welded together what was there and put the guard back on.
Man do I know what you mean! I always have to remind myself what it is I'm building. I have one project I let go way too far before I had to tell myself to STOP! Now I have to tell myself daily working on my son's truck.
Keep on keeping on! Great car and great project.
How about a few pics?
Worked out an air dam around the frame horns. Just tacked in fer now incase the radiator isn't big enough.

Finished off the tank filler neck. Didn't like the idea of it venting into the trunk with the compressor back there.


My amp gauge was burned out, so I decided to use a cheapy volt gauge to replace it.


Worked out an air dam around the frame horns. Just tacked in fer now incase the radiator isn't big enough.
Finished off the tank filler neck. Didn't like the idea of it venting into the trunk with the compressor back there.
My amp gauge was burned out, so I decided to use a cheapy volt gauge to replace it.
Attachments


bob w
Still crazy after all these years!
Nice work, Sam.
earthman
Fascinated by rolling objects!
Good save on the gauge bud.
A while back I bought a cheap radio and face plate off e-bay, the radio was all corroded inside, but I salvaged the push button part.

Found a quarter in the drivers door. Musta been in there a while to erode it like that.

Found a quarter in the drivers door. Musta been in there a while to erode it like that.
Attachments


I finally finished the string wrap on my steering wheel. I learned a lot for next time.
First I filled the many cracks with putty.

Then I wrapped the wheel with a simple wrap around the rim and a single reversing half hitch for the two spokes. (Then I added a few extra wraps around the T's and some Turksheads knots)
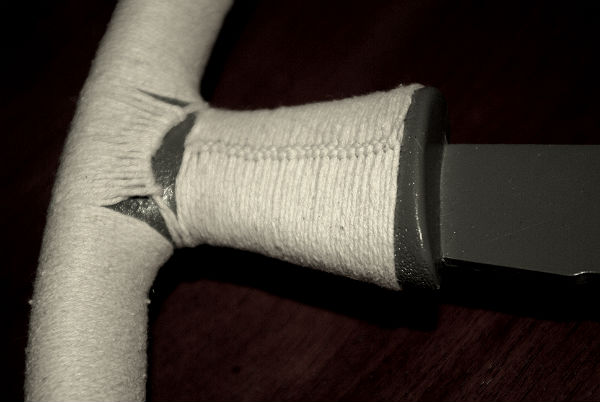
I coated it with 2 coats of Helmsman Spar Urethane.

This is a close up of the extra wrap on the T part and a Turkshead to cover the rest.
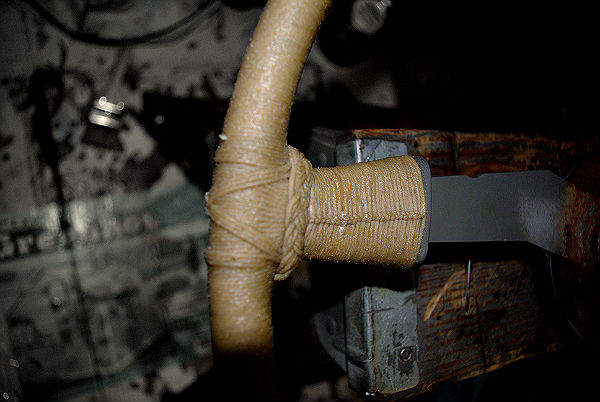
And back together on the painted column.

First I filled the many cracks with putty.
Then I wrapped the wheel with a simple wrap around the rim and a single reversing half hitch for the two spokes. (Then I added a few extra wraps around the T's and some Turksheads knots)
I coated it with 2 coats of Helmsman Spar Urethane.
This is a close up of the extra wrap on the T part and a Turkshead to cover the rest.
And back together on the painted column.
Attachments


Last edited:
Bonehead
Skull Master
Wrap SOUNDS cool, I wonder what it looks like.
Very cool quarter!
Very cool quarter!
Wrap SOUNDS cool, I wonder what it looks like.
Very cool quarter!
Yeah, I got a little trigger happy on the submit button.
Flipper_1938
He recycles the right way
I finally finished the string wrap on my steering wheel. I learned a lot for next time.
First I filled the many cracks with putty.
Then I wrapped the wheel with a simple wrap around the rim and a single reversing half hitch for the two spokes. (Then I added a few extra wraps around the T's and some Turksheads knots)
I coated it with 2 coats of Helmsman Spar Urethane.
This is a close up of the extra wrap on the T part and a Turkshead to cover the rest.
And back together on the painted column.
PLEASE...PLEASE...PLEASE....do a how to tech thread on doing that!
mitchs66
Well-known member
From the pictures here Sam, that is bad a$$[dr
DJ3100
Well-known member
Great solution. I think you might see that on mine.
phillip-r-s
Well-known member
- Joined
- Nov 8, 2010
- Messages
- 199
[cl as always [cl
Looks great
Looks great
bob w
Still crazy after all these years!
Finer than frog's hair!
Did someone just read Street Rodder magazine? Looks good! [P
Nope. If there was a how to about it, I wish I woulda. I had a hard time finding info.
PLEASE...PLEASE...PLEASE....do a how to tech thread on doing that!
I had thought about it, but I really didn't (and still don't) know what I was doing. Guess I could post up what I did, the info I found, and what I learned.
BTW, I worked on this for about a month on and off.
Similar threads
- Replies
- 15
- Views
- 688
- Replies
- 11
- Views
- 11K